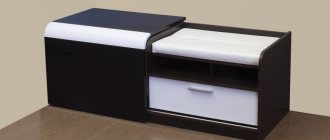
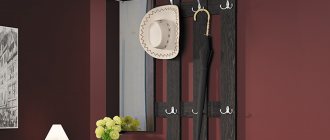
Proper organization of the corridor allows you to unload the main rooms. If space allows, a large cabinet is installed. In conditions of limited space - a hanger with a cabinet. This practical interior detail fits perfectly into the hallway. It doesn’t eat up extra meters, zones well and makes it possible to store outerwear without staining the walls. The design has a wide variety of shapes. If you have the necessary materials and tools, you can make it yourself.
Hanger with cabinet in the hallway
New design element: wall-mounted wooden hanger for the hallway
A wall hanger must meet certain requirements in order for its use to be comfortable and enjoyable. A pleasing design, reliable fasteners, durable hooks - all these are necessary components of a good hanger.
Since all wall hangers have an open design, you need to make sure that the mounting hardware is hidden from view and does not interfere with the appearance of the hanger.
There are several designs of wall hangers. If this is a classic version, the design will be a bar with hooks attached to it.
Planks can be:
- Vertical – visually increase the height of the room, so this is a suitable option for the hallway. The body is usually made of wood or chipboard. The length varies from 30 cm to 2 meters, the shape can be different;
- Horizontal models are very compact and suitable for small spaces. They visually increase the width of the wall and are perfect for installation in a corner. Their basis is a rectangular board, but more complex shapes are also found;
- Designer ones - made from wooden planks. Hooks are usually one composition with the body; the necessary ones are bent to place things. There are also compact options for hallways in a modern or minimalist style.
The most popular types of wood used to make hangers are birch, ash, beech, and pine. To extend the life of a product, manufacturers coat it with a special composition, apply paint and varnish, or artificially age it.
Wall hangers
Hangers are an integral part of the corridor interior. They are presented in a large assortment and many styles. According to the installation method, they are divided into built-in cabinets, wall-mounted and floor-mounted.
Depending on the material of manufacture, the following options are available:
- Metal. Capacious designs, characterized by good stability and large mass. They are made mainly from chromed aluminum.
- Forged. Original models that decorate any hallway. Characterized by a long service life.
- Wooden. They look appropriate within many style concepts. Particularly suitable for loft and country style. The products are durable and go well with metal structures. In budget options, chipboard is used instead of wood.
- Plastic. They are characterized by low cost and low stability.
In addition to those listed, there are hangers made from unusual materials, deer antlers, for example.
Among the existing options, the hanger-cabinet has the best functionality
Types of hangers
Table 1. Common types of structures
| Variety | Description |
Tripod | It is a stand with a large number of hooks. Designed for storing clothes, umbrellas and bags. The lower part is flat or has 3 legs. |
Costume | The most popular model for jackets and trousers. Allows you to store your suit in neat condition. Suitable for both men's and women's clothing. |
Rack | The U-shaped device is convenient for placing things on hangers. |
Chair | The hanger is made in the shape of a chair with a high back. Suitable for shoes and outerwear. Ideal design for older people. Available in both monolithic and folding varieties. |
Tree | Invention of Scandinavian designers. The unusual design came into fashion in the late 70s of the 20th century. It is a tree on whose branches clothes are hung. Contains a distinct artistic element. |
Hanger-stand | A convenient model that allows you to store the main part of your outerwear in one furniture module. There are floor and wall options. |
Advantages and disadvantages of a hanging cabinet
This design has many more advantages than disadvantages. The most significant advantages are the following:
- One 150 cm wide hanger holds a family seasonal set of clothes. This allows you to save on purchasing a cabinet.
- Thanks to the open design, clothes dry quickly.
- The cabinet is a shoe rack, which allows you to avoid cluttering the space.
- If the dimensions of the structure are calculated correctly, clothing will not stain the wallpaper.
- Low cost.
Hanging cabinets are highly stable
- Stability and ability to hang heavy things.
- The optimal storage mode for outerwear, which implies good ventilation.
- Simplicity of care activities.
- Wide variety of design solutions.
This piece of furniture is relevant in small rooms where it is not possible to install a cabinet.
These models have only one small drawback related to wall structures. When updating the interior, there is a need to redecorate the hallway, since hanger mounts spoil the finish of the walls. This does not apply to floor-standing models.
Floor structures are characterized by mobility
Prices for various types of wall hangers with a cabinet in the hallway
Wall hanger with cabinet in the hallway
Wall-mounted wooden clothes hangers for the hallway: a difficult choice
Creating coziness and completing the interior of the hallway are one of the conditions for a good wall hanger. But not only this determines her choice, the most important thing is functionality.
In order not to be disappointed in your purchase, it is worth considering some expert advice:
- The wooden model must be durable;
- Hangers with an unusual design should fit perfectly into the interior of the room;
- Before buying a hanger, you should find out the required number of hooks; there should be at least two for each family member;
- The model should take into account the growth of all family members and be easy to use for everyone.
Wooden wall hangers are suitable for those who often prefer to change the “image” of their home, as they are practical, easy to use and do not require special care. Their price is also extremely attractive.
Manufacturers meet customers halfway, providing them with a huge selection of models of different colors, shapes and materials, but with such a variety, choosing a product to your liking is not always easy.
How to make it yourself?
The shoe rack for the hallway is quite simple to make - be creative! The materials are available at a low price in any hardware store or market, or you can simply order them by mail or via the Internet.
The first step is to find the size of the area that the future shoe rack will occupy.
The parameters should ideally suit your needs. Consult a sales consultant when purchasing materials, family members, or someone you trust with construction issues.
Hanger with mirror
Hanger with shoe rack in the interior of the hallway
You should take into account the texture and properties of the materials you will use. For example, wood tends to lose color in direct sunlight. Plastic is quite difficult to process. Glass (not tempered) is a fragile material. You and other family members can be injured by shrapnel. So, you should be careful.
Decide in advance what type of design you will give preference to, so that the shoe rack is not only comfortable, but also pleasing to the eye.
We have already talked about the types above - the decision is yours! It should be remembered that a closed shoe rack increases the risk of an unpleasant odor, and a slim shoe rack is easy to catch and turn over. These are important points, so you should carefully weigh the pros and cons and then make a decision.
Shelves are best made from easily processed materials. Wood is ideal. We all have experience working with this wonderful material. The wood can be given almost any color or left with a natural look, which is very beautiful.
Hanger with shoe rack in the hallway
Hanger with chest of drawers
Working with plastic requires some skill, but if you are confident that you can handle it or have experience working with this material, you will definitely be pleased with the result!
It is most effective to use standard screws. They can be bought or ordered online. They are easy to work with and reliably connect both the walls to each other and the shelves.
You can use special construction adhesive. It should be remembered that such glue has its own drying time. There is a high probability of glue accidentally getting on the front surface, which will somewhat spoil the appearance of the shoe rack. Additional time will be required to remove the adhesive. It is important that the glue may have an unpleasant (sometimes toxic) odor. Choose products from proven, safe, high-quality manufacturers. You can use combined assembly methods, the shoe rack will only become stronger and last you longer.
Hanger in the next room
Hanger with shoe rack in the interior of a passerby
It is better to carry out assembly in an open, well-ventilated room or directly on the street, and then move the finished piece of furniture into the hallway.
Show your imagination in decor and your shoe rack will become a unique, one-of-a-kind handmade masterpiece!
Hanger with shoe rack in the hallway
Hanger in the hallway
When you don’t need to buy: DIY hallway hanger made of wood
It happens that all the stores have been looked through, but the one and only necessary hanger has not been found. In this case, the solution would be to make this necessary element of the hallway yourself. The good thing about wood is that it is very affordable to purchase and easy to process.
To make the simplest hanger, you will need to arm yourself with:
- Jigsaw or hacksaw;
- Blowtorch;
- Sandpaper;
- Screwdriver;
- Shilom;
- A piece of board of the required size;
- With hooks.
The board must be well processed; a piece of clapboard will also work. You should not take birch, as there is a possibility of it splitting when screwing in the screws due to its fragility. Heavy wood species (oak, ash, etc.) should also not be considered as an option. Next, you need to cut a piece of board of the required size and use a jigsaw to process the edges so that they become round. You can make a wavy, rhombic or trapezoidal shape for the future hanger.
The elegance of the base will be given by a chamfer removed from each edge of the upper part of the future hanger at an angle.
Then the edges are sanded and polished. The smooth surface of the boards is burned with a blowtorch; if you don’t have one, you can use a gas burner.
Fastening to the wall occurs in two ways:
- Mounted. “Ears” are attached to the back of the structure - special rounded metal or tin strips. Holes are drilled in them, and the hanger is attached with screws to the dowels. The reliability of the entire fastener will depend on the length of the dowels and screws;
- Holes in the board, drilled through. Thanks to this, the hanger will be attached to the wall itself. The greater the length and width of the base, the greater the number of holes needed. This is the most reliable fastening method.
Next, hooks are distributed along the surface of the product in one row at a distance of 15 cm from each other. A wide board can accommodate 2 rows. For this option, a staggered arrangement of hooks is suitable.
Installation of a metal hanger
If a metal structure fits better into the design of the hallway, you can build it from copper pipes. The algorithm for creating it is quite simple.
Step 1. Preparing the material
You need 2 copper pipes 2 cm thick and 3 m long. When purchasing in a store, you can ask the seller to cut them into the following parts:
- 2 tubes 1.5 m long (150 cm - height of the structure);
- 2 x 1 m;
- 4 x 20 cm (legs).
Metal pipes
You should first measure the floor area and make sure that the structure fits in the available space - 150 x 100 x 45 cm.
Step 2. Assembling the support legs
The assembly of the structure begins with a support. The first pair of small tubes is fastened with a special T-shaped connector, then the same manipulation is done with the 2nd pair.
Assembling the support
Step 3. Installing protective caps
To prevent dirt and dust from penetrating into the core of the legs, it is necessary to seal the holes. This is done using special caps.
Pipe caps
Step 4. Installation of the hanger
Then 1.5 meter pipes are installed in each of the T-shaped devices. They form the side posts. A corner is attached to each rack and a 1 m long pipe is inserted. To protect the surface from scratches, the legs are wrapped with felt pads.
For good fixation, it is appropriate to use glue. However, after using it, the hanger cannot be disassembled.
Installing side supports
Floor wooden hanger in the hallway
Floor hangers are a good alternative to wall-mounted ones. Their main advantage is that they are very mobile and easy to move around.
Among the floor hangers there are collapsible models. In warm seasons, they can be easily disassembled and the free space can be used for other needs. Such products are designed so that anyone can cope with this task, have convenient packaging and do not take much time in the process of assembly and disassembly.
Floor hangers have several advantages that distinguish them from other models:
- When using them, there is no need to damage the walls;
- They are very mobile;
- Some options can be used immediately after purchase;
- Reasonable cost;
- Clothes have the ability to quickly dry and ventilate.
A floor hanger can be located anywhere in the apartment, organizing the space in the room. The need to look for lost and scattered things will instantly disappear with the acquisition of such a design.
But floor-standing models also have a number of disadvantages:
- It is necessary to hang clothes evenly to prevent the structure from turning over;
- All clothing is in plain sight;
- A floor hanger requires space, but a wall hanger does not take up space.
Collapsible models need to monitor the condition of the thread connections and periodically tighten them, otherwise they will become loose.
Details: wooden wall hangers for the hallway (photo examples)
- Author: admin
Rate this article:
- 5
- 4
- 3
- 2
- 1
(0 votes, average: 0 out of 5)
Share with your friends!
