Windows in the house are covered with curtains or curtains. Their main function is to close openings and decorate the room. Properly executed window decoration can create an atmosphere of comfort in the home.
Curtain rods can highlight the beauty of curtains and effectively complement the interior
How to hang a curtain so that installation does not take much time and effort? You need to know the intricacies of the work and the main elements. You don't have to turn to professionals. You will need tools and a desire to add some zest to the interior. The beauty of a home comes from perfect renovations and small touches that can make a room unique.
Description
Curtains are curtains made of thin and soft fabric. Used to close a window or doorway. In almost all models, the canvas reaches the floor, but there are short curtains. Hang separately or combine models.
Curtains and cornices should be in harmony with each other and match the overall style of the room
Kinds:
- Classic curtain shape. They are called scissor curtains. Go down to the floor with the same length on both sides.
- Narrow, long scarf curtains.
- Thiers, curtains covering several parts of the window.
- Swags are curtains with a complex shape. Decorative variety with two hanging edges.
- A canopy is a decorative, elegant element.
To curtain windows and doors, the first option is often used - classic scissors, and the rest are used as decorative decorations for the interior.
Classic curtains are most often used to decorate door and window openings
The main function is to decorate the room, but there are also significant purposes.
Functions:
- decorative purpose;
- give comfort and tranquility;
- easily allow air to pass through;
- protect from the sun and cold air;
- prevent interior elements from fading;
- protect the room from prying eyes.
Combining destination functions, they become an integral part of the room. They are able to preserve the unique features of a separate room and add the finishing touch to the interior.
Curtains are a great way to give your interior a new lease of life.
Features of installing cornices on a suspended or suspended ceiling
Neither suspended nor suspended ceilings are able to hold at least some mass. Therefore, hanging a curtain rod on a suspended/stretch ceiling “directly” will not work. There are two options:
- When installing the ceiling, install the mortgages (usually wooden blocks) to which the holders are screwed. In this case, the load, through the mortgages, is transferred to the main ceiling (floor). When attaching to wooden blocks, the fasteners are self-tapping screws. The length is less than the height of the beam.
Mortgages under suspended ceilings
Both options are working. Only in the second case is there a hidden cornice that is not visible. There are only curtains and curtains. The cornice (blind, curtain) is not visible.
When installing mortgages, you can fix the block parallel to the wall. In this case, the installation will be similar, but a whole beam under the cornice is wasteful. You can install small sections - 30-50 centimeters long in the places where the cornice is supposed to be attached. Installation will become more difficult - you will have to take into account the position of the mortgages, but this is nothing. If timber is expensive, savings are more important.
If you need to lower it lower
If the ceiling is lowered not by 5-7 cm, but by a greater distance, several bars should not be attached. In this case, metal brackets are screwed to the base (base floor), and a small piece of timber or thick plywood is screwed to them. The lower edge of the block/plywood should be set at the level of the suspended/suspended ceiling.
In the case of a plasterboard ceiling, you can use a profile as a mortgage, which is screwed “backwards” down. In this case, you will need to use metal screws. Most likely, before hanging the curtain rod, you will have to drill holes with a small drill, otherwise the self-tapping screw may not work. It will not be possible to develop a large force, since the suspensions will bend.
The most common arrangement of curtains is two parallel rows of curtains - made of light, usually translucent, fabric and a denser material. This explains the higher demand for double-row cornices - devices for placing such a combination of fabrics.
Examples of cornice devices
Let's look at the assembly and installation of double-row baguettes for curtains using the most common designs as an example.
Installation of curtains. Mounting methods
Universal curtain rods can be attached to any type of surface. Installation is carried out on walls and ceilings. The methods exist in two versions. The choice must be made based on personal preferences. Based on combination with suitable room decoration devices.
Wall mounted
A common type of curtain fastening. They are easy to install. Can be installed by a non-professional. Consolidation does not take much time and effort. The design is reliable and can withstand heavy curtains. But the walls chosen are strong, not made of plasterboard.
Wall cornice is indispensable for suspended or suspended ceilings
A wide range of materials and styles makes the method popular. Allows you to select the appropriate design for a specific design. The planks fit into any interior.
Wall views:
- single row;
- double row;
- three-row.
Single row cornice
Double row cornice
Three-row cornice
It is important to apply depending on the number of curtains. Mix and match tulles with thick fabrics.
Ceiling
Wall-mounted models began to be replaced due to the fact that stretch ceilings began to become popular. Ceiling mounting corresponds to the style of suspended ceilings.
Ceiling models are fixed directly to the ceiling of the room
They have a number of advantages:
- Suitable for small rooms. Visually expand the space and increase the height of the room.
- Hiding defects. Thick, long curtains can cover the opening from ceiling to floor.
- Hide errors on a window or wall.
- Can withstand heavy, voluminous curtain models.
- Installation is carried out on any type of surface.
- Protection from the sun and cold air. Thick ones do not allow the wind to pass through and protect from the bright sun.
- Look ideal in rooms with high window openings.
- You can choose from: types of designs, colors, materials.
Concealed ceiling cornice with heavy straight curtains
Types of designs:
- Rod, round bars. Consist of a round rod. Inserted into a fixed bracket in the wall. There are round stoppers on both sides at the end.
- Profile. A universal option for plastic windows.
- Baguettes. Presented in the form of a design where part is hidden behind a decorative strip.
- Strings. The common type is popular. Consists of two metal parts. Light curtains are hung, and heavy ones begin to sag in the center.
- Telescopic. The model is presented in the form of a narrow tube. Suitable for narrow, small windows.
Plastic profile cornice for ceiling-type curtains
A string cornice has practically no alternative when the wall near the window opening is very narrow and there is simply no room on it to place a rod
Main types of eyelets
Installation diagram of a round cornice.
This connection most often has a round configuration, occasionally it is oval, triangular in shape, and is made of plastic or metal. Can imitate wood, metal, granite and other compositions. The colors of the rings may also vary.
Metal or wood. Which rings are better?
Plastic eyelets are quite easy to install; they are not capable of rusting or staining the fabric. The matte base of the rings will be much more practical, because their appearance remains ideal for a long time. They are not afraid of mechanical damage in the form of abrasions.
Related article: Glass wallpaper: main brands
The optimal diameter for curtains will be 10-50 mm.
The fabrics needed to install the rings would be organza, veil, or mesh. They can be perfectly combined with heavier types of materials. Successfully combined together, they will easily and harmoniously fit into any room decor.
The curtain should look such that the rings are as close to the top of the curtain as possible. This will save the fabric from possible sagging and sagging, as a result of which the appearance noticeably suffers. You can trim the edges of such a lightweight fabric with a denser base.
Choice of curtains. Preference should be given to one curtain or another, taking into account the characteristics of the room. So, for low shelves you need to install a cornice under the ceiling. At the same time, it should not contain flashy colors or bright elements. It is very important to consider the style of the room and the interior design features.
If you install a ceiling relief above the radiator, you should move it forward a little so that the curtain does not come into contact with it. The color of the curtain should go well with the color of the curtains and furniture, but should not be of a similar tone.
Wall Mounting Bracket
It is necessary to select the size according to the width of the wall. It is advisable to leave a gap from the wall to the cornice. It should not rest closely against the wall.
When installing above a window, you will need to measure the width of the window opening and add 0.4 cm to the result. The installation cannot be carried out by a professional. You will need elements and tools for the job.
The installation method depends on the design of the cornice
Elements:
- Cornice. Dimensions are chosen according to the parameters of the room.
- 2 brackets.
- Tips.
The cornice is a decorative and functional element designed to secure curtains above the window
Cornices
They can have different lengths, shapes, and materials of manufacture. The appropriate material is selected in accordance with the interior design.
Kinds:
- Wooden;
- Metal;
- Aluminum;
- Plastic.
Wooden cornice
Metal cornice
Aluminum cornice
Plastic cornice
Shapes:
- Straight;
- Angular;
- Rounded.
Straight cornice
Corner cornice
Rounded cornice
Tools:
- Pencil, marker. Be sure to mark the measured distance. It is not recommended to build in at random. Curtains will not be able to hide errors in installation.
- Ruler, tape measure. It is recommended to measure with a margin of up to 0.5 cm.
- Fastening parts: screws, nails, brackets, self-tapping screws.
- Screwdriver. Helps to firmly fix elements.
- Drill. It is difficult to make a hole in the wall using a screwdriver. The drill remains an unchanged tool in construction work.
- Ladder. Needed when mounting at height.
Roulette
Hammer drill
Plastic dowels
Screwdriver
How to choose
Of course, the choice of a specific model is a purely individual matter, but when choosing wooden curtain rods for your home or apartment, it is better to adhere to the following recommendations:
- They should harmonize well with the rest of the room decor.
- Curtains can be either light or very heavy, therefore, it is worth considering a lot of future curtains when choosing a specific model.
- Wider hanging options that protrude beyond the window opening will help to visually enlarge the window.
- For low rooms, ceiling-mounted options are better, and for rooms with high ceilings, it is better to purchase wall-mounted models.
- Two rows of booms are better than one and, if possible, give preference to two or three row options.
- If the length of the rods is too long, you will need to purchase additional brackets for fixation. This will help avoid sagging and bending of the structure.
Step by step guide for beginners
Attaching to the curtain is carried out in 2 stages.
Stage 1. Marking
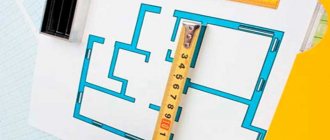
The installation begins with markings. The same distance is measured in the center. A distance of 35 to 40 cm is left from the edge of the wall to the cornice.
Marking diagram for attaching the cornice to the wall
Attention! It is necessary to maintain a distance of 10-15 cm between the ceiling and the wall. Otherwise, the cornices look awkward.
The fastening points must be located on the same horizontal line, so when marking you must use a level
Mark the drilling points with a pencil
Stage 2. Fastening cornices
The plank is assembled not from one crossbar, but from two parts, and then hung on brackets. The joint of the planks is not visible.
The fixation points are measured. A drill is used to drill holes in the wall. The brackets are screwed on and the bar is inserted. It should have rings and hooks. If they are not there, then you need to take care of this first. But, as a rule, they are sold already as a set.
Drilling holes
Installing dowels
We fix the bar
Installing the bracket
Fixing the bracket
Place the cornice
Hang tulle using rings with hooks. How tightly it will hold depends on the strength of the clamp.
Where to begin
Deciding on the mounting location
Even before buying a cornice, you need to think about where it will be fixed: on the wall or on the ceiling. In terms of aesthetics, the ceiling installation option is more attractive. Mounting on the ceiling allows you to cover the entire wall from top to bottom with fabric.
In addition, this option has a hidden system of curtain fasteners. The wall-mounted version is reliable and versatile, since any building has walls into which brackets can be mounted, but not everywhere there is open access to the ceilings. For example, in the case of a suspended ceiling there is no such access, which means installation on the wall is the only possible option in this case.
Marking
For proper installation of any system, it is necessary to first mark the supporting surface. Therefore, the first step is to find the center of the wall that is supposed to be curtained, and from there, using a tape measure, set equal intervals to its edges. The distance between the edge of the wall and the bracket should be about 35-45 cm. If it is smaller, even the assembled curtains will still slightly overlap the window, which is extremely undesirable.
Also, they should not be located close to the window itself, since then they will not allow its windows to be fully opened. The distance to the ceiling, as a rule, is 10-15 cm, but this parameter has little effect, so it can change in each specific case as desired.
When making markings, they are always oriented, first of all, to the wall, and only then to the window opening or level, because the plane of the wall itself is often uneven, which means that even strict adherence to the level cannot protect against the crooked position of the baguette.
Preparation of necessary tools and materials
To install such a system, you will need a standard set of tools, most of which are found in every home, however, if you don’t have any, it’s easy to purchase them or ask your neighbors:
- Hammer or drill.
- Hammer.
- Tape measure and pencil.
- Level and plumb.
- Ladder.
When purchased, parts for fixing it are usually supplied as a kit, however, even despite their presence, it is recommended to stock up separately with additional materials for installation: dowels and screws.
Photo of curtains
Curtains Wall curtain rods: three-row, two-row, designer
Next
CurtainsTypes of components for roller blinds for plastic windows
How to assemble a two-row metal curtain rod? Same as single row
Type of double-row forged curtain rod
A tangible advantage of using forged cornices when placing curtains is the versatility of the assembly process. The layout features do not depend on the number of curtain rods provided. A specific model is designed for one, two or three rows - the sequence of actions remains the same:
Scheme of fastening iron cornices of different types
- unpack the purchased cornice elements: pipes, ends, brackets, rings, fasteners (dowels, screws, hex wrench);
- Mark the places for attaching the brackets. When choosing places for drilling holes (window or ceiling), you need to ensure that the product is evenly positioned relative to the window;
- Using a drill equipped with a concrete drill, drill the required number of holes. Most often it is necessary to hang two brackets. But with a pipe length of 2.5 meters or more, experts recommend using additional supports. Whether it’s a two-row set or another doesn’t matter;
- place dowels in the holes, screw the supporting part of the bracket using self-tapping screws. Then screw on the part of the bracket that will hold the metal rod;
- hang the metal pipe on one of the brackets. From the other edge, curtain rings are put on the pipe;
- attach the ends to the ends of the pipe using a hex wrench;
- tighten the special pins that secure the pipe in the brackets with a hexagon.
How to mount to a wall
The repairman knows that poor fastening leads to the fact that the base falls along with the curtains, and the curtain does not look neatly hung. To avoid this, it is better not to hang heavy fabrics, such as velvet curtains, on drywall or against a loose wall. Hanging a ceiling curtain to a reinforced concrete ceiling would be a solution. You can install string, plastic, and profile curtain rods.
What you need for work
Before carrying out work, prepare everything necessary. In addition to the cornice there should be:
- pencil to mark the location of the holes;
- all measurements are taken with a tape measure and ruler;
- fastenings;
- drill or hammer drill;
- screwdriver, screwdriver.
Fastenings include dowels, brackets, and screws.
Attention! For durable fastening of PVC panels to drywall, use screws or butterfly dowels. Liquid nails are used for ceiling fastenings.
Mounting the mount
Before choosing curtains for a window, you need to take measurements. When buying a cornice, take it 30-40 cm larger than the window opening itself, on both sides. You can hang the curtain on the wall after marking the position and drilling holes for fastening. The distance from the side walls is not less than 5 cm, and from the ceiling - not less than 10 cm.
Choosing a cornice according to the interior style
Manufacturers offer a wide variety of curtain rods. You should choose a design for curtains based on the style in which the interior is decorated.
For rooms decorated in a classic style, you should choose baguettes. A good option is round cornices, preferably wooden ones.
Recently, it has become fashionable to decorate interiors in a minimalist style, and hi-tech is no less popular. A string cornice or metal cornice with a round shape is perfect for this decor.
For Provence style interiors, the best solution is wrought iron cornices. Such curtain designs are also suitable for country style. Interiors in rustic styles, in addition to forged curtain products, look especially impressive. You can purchase a painted wrought-iron cornice or a metal-colored structure.
Pre-assembly of the cornice
Before you begin installing the cornice, you will need to assemble it. The process is simple and consists of the following steps:
- Hanging rings for attaching curtains and holders are placed on the guides, on which the structure will be mounted to the wall.
- Tips and plugs are installed.
The number of rings is taken at the rate of 10 pieces per 1 m of curtain fabric. With three-point fastening, the total quantity is divided in half. First, 1-2 rings are put on, then the bracket and the rest of the rings from the first half. Then put on the central holder, almost all the other rings, the third holder and the last 1-2 rings after it. It is important to place the brackets symmetrically, with the outer ones located at a distance of 3-10 cm from the edge of the structure. After they are placed, all clamps are clamped.
When assembling, make sure that the pipe seam is located towards the holders, that is, inside the window opening. Also, when fixing the brackets, you should be extremely careful, since if you press hard, there is a risk of damaging something.
How to calculate the length of the cornice?
The cornice must be chosen such a length that completely open curtains open the entire window opening. Visually it will be like this: the width of the window opening needs to be increased by one meter, i.e. half a meter on each side for assembled curtains.
Are you wondering how to properly hang a curtain rod over a window? Then imagine that on average the length of the structure reaches two meters, then for installation you can use only two fasteners. If ideally the length is longer, then an additional bracket should be made in the middle.
The length and dimensions of the brackets should also be taken into account. Curtains should not lie on window sills or heating radiators, because they usually protrude far beyond the wall.
The distance of the cornice from the ceiling should take into account the fact that the fasteners are usually mounted in a reinforced concrete lintel above the window. There is a reinforcement cage inside it, which means that a drill should not get into this rod, because it will not be possible to drill the required size of the recess.
We have already found out the distance at which the cornice is attached from the ceiling; now it remains to determine how the cornices should be installed from the walls. Typically, the brackets are located no closer than 15-20 cm from the walls. In order for the cornice to hang evenly, an equal number of centimeters should be measured from the ceiling on both sides of the brackets. This can be done using a special horizontal level. Important: walls are not always level, so be sure to visually ensure that you don’t get into trouble.
The process of attaching the cornice
You can also secure the curtain rod with your own hands. First, you need to drill out the required socket for the bracket using a hammer drill. A dowel is initially inserted into it; it should not protrude beyond the plane of the wall. Next, you need to attach a special fastening element and secure it with screws, wrapping them in a plastic dowel.
After the supporting elements are secured, you should begin installing the cornice, according to the instructions for the cornice.
How long should the cornice be?
When choosing a cornice, you need to pay special attention to its length. The length consists of the size of the crossbar and the tips on one and the other side, which perform a decorative function. Before measuring the length, you need to decide where the cornice will be located and how it will be fastened.
Which curtain rods are best to choose and how to do it correctly? When choosing a cornice for curtains that cover the entire surface of the wall along with the window opening completely, the immediate length of the cornice should be a couple of centimeters shorter than the distance from one section of the wall to another. Please note that with this option the fastenings must be in at least three places.
If the cornice will be placed directly above the window opening, then the fastenings must be located in the area where the window opening ends, otherwise the window cannot be opened completely, and the parted curtains will cover the glazed area.
In this case, the length should be selected 35-40 centimeters greater than the width of the window.
Tips for choosing a cornice
A competent choice of cornices includes several points.
Any cornice can withstand a specific amount of load ; Taking this into account, choose a curtain rod based on the weight of the curtains. This indicator has a great influence on the choice of cornice.
Decide curtain mount The fastenings must be suitable for the selected textile, slide easily along the cornice, do not make noise, and do not cling.
For curtains that are light in weight, you can choose any mounting option . You can give preference to wall or ceiling mounts. If the curtains in the hall or living room are heavy, choose a ceiling type. This type of mount is suitable for heavy loads, so this option is ideal for thick, heavy curtains in the living room or bedroom.
The choice of design for curtains also depends on the location of the radiators, the size of the window sill, as well as the route of the heating system pipes. Curtains should hang freely, for this reason, when installing the curtain rod, you need to take these points into account.
Narrow window openings . If the window openings are small in width, they can be made larger. In such a case, you should give preference to a longer cornice so that the curtains that hang on it cover, in addition to the window opening, also a small section of the wall next to it.
Low height ceilings . The ceiling can be made visually higher by hanging a cornice with a ceiling mounting type. A curtain that hangs from the ceiling to the bottom of the wall will lengthen the distance between the ceiling and the floor.
The window is too wide . To correct the visual perception of the window, hang a cornice whose length is equal to the width of the window.