Types and classification of wooden cornices
The most popular option for cornices are wooden curtains. They, in turn, differ:
- The type of wood used for production. Models made from hardwood are distinguished by their high strength and noble shade. But products consisting of several rows may be too heavy, so additional, reinforced fixation will be required. The advantage of softwood cornices is the ability to apply carved patterns to their surface. And modern technologies allow you to give the product absolutely any shade.
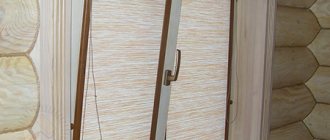
- Type of fastening. They can be attached to the wall or ceiling. When choosing a ceiling mount, you need to pay attention to the weight of the curtain, especially if the surface is suspended. This option is preferable for an apartment with low ceilings or rooms in which there is no space between the window and the ceiling. The wall method is simpler, but is used mainly in rooms with a high ceiling and a significant distance from the window to the horizontal surface.
- Appearance. Today the trend is complex systems with a large bar on the front side. The fastening mechanism is hidden behind it. Models in the form of a rod, which may have additional sections for tulle and curtains, also remain relevant.
- Number of functional rows. If one curtain is enough, for example, in the kitchen, choose single-row models. Double row is more popular. It is suitable for tulle and curtains. Three-row ones are needed when it is necessary to hang a complex structure with a lambrequin.
Cornices differ in the type of wood, fastenings and appearance.
The wood cornice is a decorative element. To attract attention to it, you need to choose one whose length exceeds the width of the window opening by more than 10-12 cm. And in order for the structure to have a finished look, special decorative overlays are used.
A wooden cornice is a decorative element of the interior.
Wood
The following types of wood can be used to produce a wooden cornice:
- deciduous (oak, beech, cherry, walnut, birch);
- needles (pine, larch, juniper);
- exotic (wenge, ebony, zebran).
Deciduous, coniferous and exotic types of wood can be used for production. The cheapest are pine and spruce. At the same time, they have a fairly attractive appearance and fit well into any interior.
Products made from pine and spruce are considered the most budget-friendly. Oak is recognized as valuable and beautiful. It is difficult to work with, but the product can last a very long time.
Oak cornices are very durable. Cherry is light in weight and easy to process, so models made from this wood are often decorated with patterns.
Products made from cherry are very light. Exotic wood species can highlight the status of a room. But such products are very expensive. And it’s almost impossible to find discounts and promotions on them.
Cornices made of exotic woods emphasize the status of the room.
Form
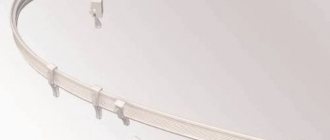
There are 2 forms of wooden curtain rods: round and rectangular. Round ones are more common. Thanks to their shape, they can make the interior softer, and the movement of fasteners along the bar is smoother and more convenient.
Round cornices make rooms more comfortable. Rectangular ones represent a bar.
Rectangular cornices look like planks. Their design allows you to create a romantic atmosphere in the room by adding additional lighting to the cornice.
Lighting allows you to give the room a special romantic atmosphere.
Dimensions
The length of the curtain rod is selected individually for each room and depends on its area, type and material from which the curtains will be made. For a small apartment, not very wide options in light shades without threads are suitable.
Narrow cornices are suitable for small rooms. When decorating a room in a classic or modern style, choose wide cornices with beautiful carvings.
Wide carved cornices are suitable for decorating a room in a classic style.
Color
Today, when producing products from natural wood, it is possible to paint it in a variety of colors. When choosing the colors of the cornice, you need to build on the colors that are used in the interior.
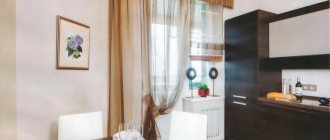
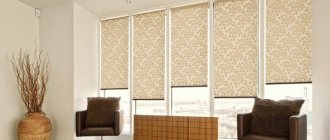
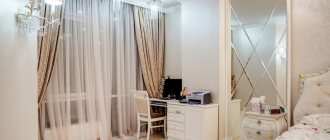
When choosing a cornice, take into account the colors of the overall interior of the room. Light-colored products are suitable for decorating a room in Provence, minimalism or eco styles. They are hung in rooms with a small area and low ceilings.
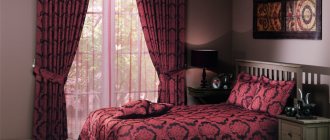
Light cornices fit perfectly into Provence, minimalism, and eco styles. Dark products decorated with carvings are used to accentuate classical, modern, baroque and empire styles.
Such carved products are suitable for Art Nouveau, Baroque and Empire styles.
You cannot buy products in a shade that sharply contrasts with the decoration of the room! But it is allowed to choose tones that are very different from the color of the curtains.
Which cornice is better - metal or wood?
The development of technology has reached such a level today that it is possible to make a suitable cornice from absolutely any material. Of course, there are some rules that style imposes: for example, in a modern high-tech style, metal curtain rods are usually used, and in a classic-style interior with wooden furniture, a wooden cornice is better suited, but there are exceptions to any rule. In addition, today, unlike the recent past, people have the opportunity to create their own style, which designers and artists will help to design. As for quality, our curtain rods, both wooden and metal, are among the best available on the market in terms of quality, reliability and aesthetic properties.
Accessories and decorative elements
Wooden cornices consist of:
- rods (depending on the model, there may be several, for example, in a double-row – two);
- brackets;
- tips for decoration;
- parts intended for fastening curtains (hooks, clips, rings, eyelets).
Some models may have fleurons - decorative tips attached to a baguette or wooden rod. They can be of any shape (round, pointed, quadrangular).
Some models may have fleurons - decorative tips of various shapes.
Optimal size
It is often difficult for non-professional craftsmen to determine what size cornice to make. This is indeed a very important design decision, because if it is too small, then melt or rain water from the slope will fall on the lining of the external walls, on the foundation blind area, leading to destruction and also damage to the appearance of the structure. When choosing the length of the cornice, the following factors are taken into account:
- Climatic conditions. The optimal size of the roof eaves depends on the amount of precipitation falling in winter and summer. In snowier regions, roofs with wide eaves are traditionally used to protect the walls and foundation from snow. For example, alpine chalets located in the mountains usually have eaves overhangs at least 1 meter wide.
- Roof slope. The greater the angle of inclination of the roof slopes, the smaller the cornice can be made. This is explained by the fact that with a flat roof shape, the trajectory of falling snow and water goes far from the outer walls of the house. If the slopes are steep enough, then it is better to make the cornices wider to protect the structure from splashes of water that can reach the wall during intense snowmelt or rainfall.
- Proportions of the house. A wide cornice with a flat roof makes the building visually lower, squat, distorting the optimal proportions. A narrow overhang with a high, steep roof, on the contrary, elongates the silhouette of the house.
Important! The minimum permissible width of cornices is 45-50 cm, but this is clearly not enough for regions with high snow loads. If necessary, the size of this structural element is increased to 1 m.
How to make wooden curtains with your own hands
Making a wooden curtain rod with your own hands is not difficult. To do this you need to prepare the following materials:
- 2 slats;
- 2 metal corners;
- self-tapping screws
To make your own cornice, you will need wooden slats. Additionally, you will need a saw, a hacksaw, a screwdriver, wire for attaching hooks, a ruler and varnish for wood processing.
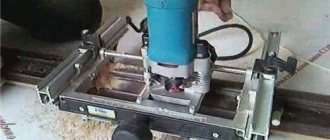
You will need to prepare the necessary tools. The process of making a cornice with your own hands is as follows:
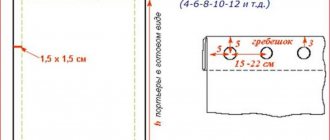
- Length notes are made on the staff.
- The excess is sawed off.
- Corners are attached to the sides. Experts advise attaching two pairs at once, from below and from above.
- Wooden elements are attached to the corners.
- Guides are installed. To secure the wire tightly, its length must be 5 cm greater than the length of the cornice.
- The number of guides depends on personal preference. Self-tapping screws are used to secure the strings.
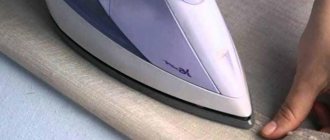
- At the very end, the cornice is treated with a layer of varnish. It is advisable to repeat the procedure 3 times.
At the end, the finished product must be varnished.
Recommendations for choosing wooden cornices
A harmonious and complete image will be possible only if certain recommendations are followed in the process of decorating the room.
- The color of the cornice may not match the shade of the furniture frames; it is much more important to choose a product that will match (but not merge) with the walls and curtains. An almost black cornice against a background of very light curtains will look just as interesting as an ensemble that differs by a couple of tones.
- For a small room with low ceilings, light-colored small cornices without carvings and massive wooden knobs are best suited. It is better to give preference to metal overlays with an openwork pattern.
- The holders for the cornice should not be radically different in color from the wooden frame, otherwise they will have to be well disguised with canvas.
- In the bedroom you can use a special double-row cornice, which has a hidden slightly rounded strip or track. Then the curtain will bend, completely blocking sunlight and drafts.
- The curtain fastener must match the fabric used. Light flying curtains on a massive cornice look out of place; massive and voluminous curtains are more suitable here.
- Single panels are hung on wooden cornices extremely rarely; double or even multi-layer ensembles look much more interesting.
Related article: How to make New Year's curtains: design options
When choosing wood, we must not forget about the price of the material. When making a decision in favor of expensive breeds, you need to understand that the entire environment will have to match the element.
Features of choice
When choosing a cornice, it is important to consider the following nuances:
- Its shade should be harmoniously combined with furniture, wall decoration and curtain color. To emphasize interesting curtains, it is allowed to use a contrasting cornice.
- Light-colored products are appropriate in small rooms. In a large one, you can hang massive cornices, decorated with carvings, forging or decorated with metal parts.
- In order for the curtains to protect the room from the penetration of cold air from the street, it is worth choosing rounded models that have an original appearance.
- Carved cornices and curtains must match each other. Having chosen a massive composition made of dense, heavy fabric, you need to choose a large curtain. And vice versa.
When choosing, keep in mind that the curtains with the cornice should be harmoniously combined.
Application of cornices
Carved wooden cornices give the house elegance and originality. Even a modest cornice (for example, a cornice in the Rostov style 042 kn. 07) will allow a small country house or bathhouse to stand out from many of its kind. Openwork cornices with complex carvings (such as cornices in the Red Hill style 037 kn.06) will add lightness and airiness to a garden gazebo or summer café pavilion. But, of course, carved cornices are most often used to decorate the facades of houses and cottages. In addition to the traditional placement of such carved wooden products under the roof, cornices with original carvings can visually separate the first and second floors (Kalyazin cornice 007 book 01). Carved cornices will give a finished and attractive look to a balcony or balustrade. You can emphasize the romance of an attic or mezzanine thanks to multi-layered combinations of friezes (025 book 03 Myshkin style) and cornices (024 book 03 Myshkin style). Carved cornices are also used in interior design for rooms made in the traditional Russian style (for example, Mamontovsky cornice 011 book 02).
The best manufacturers
To be sure that you are buying not only a beautiful, but also a high-quality cornice, you need to pay attention to the manufacturer. The best models are made:
- Cessot is a French brand that produces products from environmentally friendly, high-quality materials.
- DecorHome is one of the largest manufacturers in Russia. If desired, the buyer can make an individual order (with ornaments, for painting).
- Olexdeco is a manufacturer that works only with high-quality materials. The company offers a wide selection of original cornices at an affordable price.
- Legrand, in addition to curtain rods, has launched the production of sun protection systems for windows. All products are of high quality, attractive design and low prices.
The range of curtain rods from various manufacturers is more than wide.
The process of making a wooden cornice with your own hands
- We saw off two pieces of 10 cm each and two 15 cm pieces from the board. We are left with a 70 cm piece of board. This will be the front part of the cornice. The 10 cm pieces will be the side walls, and the 15 cm pieces will be both the back sides and the mounting supports.
- We assemble the blanks of our homemade product into a single frame. Be sure to coat the ends of short parts with PVA-Stolyar glue. Before screwing in the screws, be sure to drill holes for them so as not to split the wood. The sides must be screwed on as shown in the picture so that the ends are not visible:
- As a result, a few minutes - and you will get this frame:
- Now you need to make the lower part, which will make the lamps invisible. We take a prepared piece of plywood, apply it to the bottom plane of the cornice, outline it with a pencil, and cut off the excess with a hacksaw. This way it will be more accurate, everything will fall into place during assembly.
- Our cornice is blind and may not provide the required amount of light. To solve the problem, we need to make light transmission slits. And they need to be made so that they are also invisible...
- To do this, draw a line along the front edge with an indentation of 2 cm, and stepping back another 1 cm from it, draw a second line in parallel. On the sides of the plywood, stepping back 2 cm from the edges, we draw the same thing. Now we cut out the slots according to the received marks. To ensure greater light transmission, you can cut out a small semicircle on the wall side of the lower plane of the cornice. Don’t forget to sand all the cuts!
- Our piece of plywood has become the finished lower part of the cornice, now let's fit it into place.
- We drill for the screws, coat the joints with glue, and screw the plywood to the cornice. The heads of the screws must be deepened so that they do not protrude above the plane of the plywood.
- Now we need to add intensity to the light flux... We solve this problem by making a reflector. To do this, we simply cover the inner surfaces of the cornice with... ordinary food foil, in which we often bake all sorts of goodies in the oven! In our case, the foil will not only provide an increase in luminous flux, but will also prevent excessive heating of the wood.
- This is what the overall result should look like (the cornice was checked “at the place of work” before finishing):
When our hand-made wooden cornice has passed the tests, we can begin finishing it.
Finishing a homemade cornice
To decorate our cornice we will need:
- remnants of ceiling foam plinth;
- trimming ceiling decorative borders;
- a little putty, white paint, a brush... I also used gold paint to highlight the design - but this is in my specific case; to fit the element into the style.
- First, we go over all the screws, corners, and joints with putty, then we sand it so that not a single crack or hole remains. Then we paste over the planes of the front and side parts of the cornice with a beautiful border. At the corners, both the border and the plinth must be cut with a knife at 45 degrees so that the pattern meets correctly at the junctions of the corners. Joints should be carefully filled with putty.
- We glue the plinth along the upper end of the front and side walls. We also putty the corners.
- We paint all our homemade products with white paint and dry them.
And finally, we install our homemade wooden cornice in its rightful place, and admire the beauty created with our own hands!
How to install correctly
You need to hang the cornice in stages:
- Make markings where it is attached to the wall or ceiling.
- Attach the brackets. If the wall is concrete, use dowels with spacers. Self-tapping screws are suitable for drywall, and plastic bushings are suitable for foam blocks.
- Assemble the cornice and hang it on the prepared brackets.
The cornice must be installed in accordance with specific instructions. Curtain rods made of wood need proper care. To prevent the product from swelling and losing its original appearance, it must be protected from direct exposure to moisture. It is important to wipe them regularly with a soft cloth and soapy water. Protective impregnations are periodically used. Powders and aggressive chemicals are not suitable for caring for cornices.
To maintain the appearance of the product, it requires systematic care. Curtain rods made of natural wood are environmentally friendly and have an attractive appearance. When choosing them, you need to take into account the size of the room, ceiling height and overall interior design. With proper care, such a product can last a very long time.
The main advantage of wood cornices is that they are environmentally friendly.
Carved cornices made of wood composite
The Art Gorodets company offers you carved cornices made of wood composite - a material that is superior to wood in a number of characteristics: it does not rot and does not dry out. In addition, the wood composite does not contain substances that have a negative impact on human health. The carved frames of our company are kept in the original Russian traditions of the Tver, Vologda, and Rostov provinces, which have been famous since ancient times for their house carvings. At your request, our specialists will develop an individual project for decorating the facade of your house with carved cornices, or you can choose cornices from those presented in our catalog.
Photo examples in the interior
Material for filing
Installation of overhangs is carried out at the final stage of work on assembling the rafter frame. When the sheathing is ready, the rafter legs are leveled, and then the frontal (wind) strip is fixed at their ends. To protect the lower surface from moisture penetration or bird colonization of the overhang, the cornice is hemmed. This task can be accomplished using various materials:
- Boards. You can sew up the lower surface of the overhang using a regular edged board or other lumber. The advantage of this method is that wood is a fairly affordable, lightweight, environmentally friendly material. However, wood does not tolerate moisture well and is susceptible to rotting. Therefore, lining cornices with boards does not last long; in addition, it requires regular renewal of the paint layer, which protects the wood from rot.
Remember that ventilation of the under-roof space is an important factor affecting the service life of the rafter frame. Therefore, experienced craftsmen recommend using soffits for filing overhangs. It is better to use models with central perforation, providing an average level of ventilation.