Materials for work
If you want to do it yourself to save money, think carefully before making a shower tray with your own hands. You are unlikely to be able to save money, because you will need:
- Waterproofing - most likely pool waterproofing.
- A mortar with the addition of plasticizers to increase the waterproofing effect.
- Tile or mosaic for finishing.
Important! It’s a good idea to have a heated floor so that you can comfortably stand barefoot on a concrete floor in winter. In a word, the event is quite expensive, even if you do not hire craftsmen.
Lay out a shower with mosaics: pros and cons
Advantages:
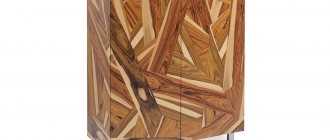
- The color design of plastic booths does not differ in variety. More often they are presented in white or silver. Ceramic elements allow you to decorate the cabin in almost any color scheme.
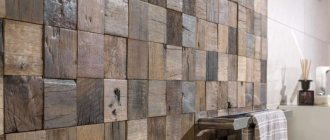
- Mosaic visually increases the volume of the room.
- The mosaic-lined construction (especially ceramic) is stronger than standard plastic box walls.
- Using mosaic elements you can create an original design.
- Ceramic mosaic elements do not conduct electricity and do not emit unpleasant odors .
- Mosaic tiles are easy to care for : the elements do not require detergents and are easily cleaned of limescale.
Related article: How to make a shower tray with your own hands
There are practically no disadvantages to a mosaic shower. Poor sound insulation and uncomfortable sensations from cold elements are noted when decorating the cabin floor with mosaics.
Important! Disadvantages such as poor sound insulation or cold are easily corrected : the first problem is solved by laying an additional layer under the cabin screed or installing a ready-made pallet, the second by installing a “warm floor” system.
How to drain?
Despite the external similarity, there are several options for arranging a shower. Let's look at them in more detail.
Types of pallets
The easiest and fastest option is to purchase a ready-made pallet and install it on a base made of foam blocks or bricks. Acrylic and metal (enamel) products are available for sale:
- Acrylic ones do not slip and are lightweight. In addition, this material is pleasant to the touch. However, they also have a drawback. Over time, they acquire a yellowish tint.
- Enameled ones are quite good to use, but they slip. You have to use a rubber mat.
Important! If these options are not suitable, the pallet is made of concrete or bricks, followed by mosaic or tile cladding.
Let's look at how to make a shower tray from tiles and bricks in more detail. This option is reliable, but labor-intensive. It requires carefully thought out insulation.
Important! If you are installing a shower room in an apartment building, miscalculations with waterproofing are fraught with claims from neighbors below. If in private, then you will have to suffer from your own negligence yourself.
There is another option. It can be called a compromise. Make a bathroom tray with your own hands from metal, treat it with an anti-corrosion compound and install it on a “podium” made of foam concrete or brick.
Dimensions
As for the dimensions of the pallet, there may be the following options:
- 800x800 mm is quite small. Even a person of slight build will not feel entirely comfortable.
- 900x900 mm - a little better, but a bit cramped.
- 1000x1000 mm - quite spacious and comfortable.
Drain arrangement
There are two options - drain and siphon:
- The ladder is more expensive, but its height is smaller and it is more reliable. The safety margin will be enough for a long time.
- Siphon involves lower costs, but it is not as durable. It is not a good idea to monolith it, since when replacing it you will have to get to it with a hammer drill at the ready. Therefore, from the very beginning, provide an inspection hole with a small door or hatch.
Important! So that, if necessary, the sewer can be cleaned with a cable, it is undesirable to make the angle of rotation to the sewer more than 30 degrees (45 is the maximum permissible value).
The drain pipe should be laid with a height difference of 4-5 cm per 1 m of length. The floor is also made with approximately the same slope towards the drain.
Pros of creating a tile shower
When making a shower with your own hands, you can choose the material to create it yourself. If the buyer wants an acrylic pallet, then he can purchase either a more budget-friendly option made in China or a more expensive one made by a manufacturer from Belgium, Poland, Germany, or Italy. Steel pallets have a similar cost; they also depend on the country of manufacture. The most expensive pallets are made of earthenware; their price can fluctuate up to 200 thousand rubles.
You can also choose the design of your future shower cabin yourself:
- The classic is considered unchanged; it is distinguished by the presence of pastel and slightly brownish tints, with light gilding. This style will fit harmoniously if you complement everything with expensive and interesting accessories. To keep everything firmly in place, you need to purchase expensive, high-quality tile adhesive.
- High-tech is distinguished by a large amount of metal, chrome parts and exquisite shapes. This style is often liked by young people who keep up with progress. Such cabins can be complemented with interesting devices and massage brushes, simplifying the quality of showering.
- Fusion - has several combinations of different styles, everything here is thought out to the smallest detail, and the key is not only the attractive appearance of the finished product, but also comfort while taking a shower. But, in order not to make a mistake, it is better to either look at ready-made options created in this style, or consult with a specialist, because this direction is very capricious, and adding one unimportant detail can easily go too far.
How to properly make a shower tray from bricks and tiles?
The first requirement for a brick shower tray is a well-leveled floor. If there are still differences, first level it using a rough screed. Install a drainage device and connect it to the sewer. The further procedure is as follows:
- Waterproofing the base. The simplest option is bitumen, but its smell is not pleasant. Liquid glass, cement hydrophobic impregnation, and pool waterproofing are also suitable. The best option, according to experts, is waterproofing for swimming pools. The composition is pre-calculated for significant water pressure and is therefore reliable. Impregnation based on concrete is somewhat worse in this regard.
Important! Apply 2-3 layers of waterproofing to make sure there are no gaps.
- Taping the border between the wall and the waterproofing with waterproofing tape. The minimum height of entry onto the floor and walls is 100 mm.
Important! By applying tape, you protect the areas that are most vulnerable to water infiltration.
- Laying a brick layer. Solid ceramic bricks should be used. Sand-lime bricks are quickly destroyed by moisture.
- Pouring concrete screed along the beacons. This stage already provides for the arrangement of a slope towards the drain. However, the screed level is still slightly below the drain as tiling is still to be done.
Important! Add compounds that enhance the hydrophobic effect to the screed solution. The best options are liquid glass and PVA construction adhesive.
- After the concrete has hardened, cover it with a layer of waterproofing again. Now it is advisable to use a cement-based hydrophobic layer, since laying the tiles will be much easier.
- Laying tiles.
- Grouting joints with a hydrophobic compound.
If you plan to install a heated floor, there will be 2 more layers:
- After the brick is laid, level the base with a layer of mortar, and lay heating cables on it (with or without mesh).
- Fill the structure on top with a special composition for insulated floors.
- After the mortar has set, you can lay the tiles.
Important! The thickness of the mortar layer on top of the cables should not be less than 30 mm. Be sure to form a slope towards the drain.
What are they?
There are 2 types of waterproof grout:
- cement;
- epoxy.
The first type is cheaper and easier to use (even a non-professional can do it), but has lower resistance to moisture. Cement grout is the most common option. The material is suitable for seams no more than 5 mm.
When using cement grout, special care should be taken so as not to damage the decorative coating of the tile near the seams. Manufacturers achieve moisture-resistant and antifungal properties by adding additional components to the grout.
It is recommended to dilute the cement grout before use with a latex plasticizer, which imparts elasticity and moisture resistance.
For the cement type of grout, you can use moisture-resistant impregnation, which can be matte or glossy. These two types differ in external qualities - glossy impregnation gives greater color saturation.
The second option is grout with 100% moisture protection. Epoxy grout has the highest quality of all representatives of this material for repairs.
READ ALSO: Leveling bathroom walls under tiles: step-by-step instructions
It contains epoxy resin, a pigment that gives the desired shade, and a special hardener.
This type of grout is the most difficult to use due to its increased viscosity. For ease of use, a regular pastry bag is suitable, from which the grout is squeezed into the seam and distributed along the entire length.
Using epoxy tile grout yourself requires some skill. The mixture quickly sticks to the tiles and is difficult to clean. This requires special chemicals. The mixture hardens in a couple of minutes and dries within 5-6 hours.
How to make a pallet from monolithic concrete?
If you plan to form your own concrete shower tray, first assemble the formwork. Materials for the manufacture of formwork - thick board with a thickness of 2.5 cm or cuttings of fiberboard or OSB (thickness from 1.6 cm).
Important! A prerequisite is insulation of the concrete floor. Whether to install a “warm floor” or not is up to you, but you need to insulate it. In a bathhouse in a country house, a wooden grate placed on the floor can help out, but for a city apartment this is hardly acceptable.
The operating algorithm is as follows:
- Coat the base with waterproofing. Apply hydrophobic tape around the perimeter.
- Lay a damper tape around the perimeter or lay a layer of insulation along the walls.
- Lay polystyrene foam with a thickness of 50 mm (density from 35 kg/cubic meter). Tape the joints with reinforced tape.
- Lay a metal mesh.
- Using the beacons as a guide, form a drain.
- Lay the screed in 2 layers. Half the thickness - with a minimum amount of water, the second half with a normal consistency.
- After the screed has set, coat the surface with waterproofing again.
- Only after this can the floor tiles be laid.
What to sit on in the shower
Types of seats
Note. If necessary, you can, of course, use an ordinary wooden stool in the shower, but it will not last long, since the wood will swell and it will become loose (play in the joints). The only wood that reclining chairs are made from that is suitable for constant water treatment is bamboo.
- First of all, it should be noted that a stationary seat of any type in a box, cabin, or simply in a room can be washed under a sprayer only if it is installed on the floor or pallet, and also if there are hard walls or partitions for this purpose . The essence of this requirement comes down to the fact that the base to which such a chair is attached or mounted must not only withstand the weight of a person - there must also be a margin of safety, since when the body moves, the load increases significantly.
- If you do not have the opportunity to install a folding or simply stationary seat on the wall (the base is not rigid enough or you simply do not have the time or the necessary tools for this), then you can purchase a folding plastic stool in the store, which is very easy to use . Let's start with the fact that plastic is not afraid of water, therefore, you do not have to dry it after each wash, the design itself will not take up much space - you can simply lean it or hang it on the wall, it can easily withstand 150 kg of vertical load, and the price is stool is quite democratic.
- Of course, there are many other options for folding chairs that differ from the one shown in the top photo - these are designs with a fabric (canvas) top, ottomans and even armchairs, but all of them are more suitable for a country house or for fishing, but not for constant watering . You can also find wooden sliding structures of this type, but any instruction will recommend that you protect such a product from dampness and moisture, therefore, there is no place for it in the shower.
Note. If you come across a shower stall with a seat and a low tray for sale, it means that this does not mean a stall, which also includes the wall of the room as its enclosure, but a shower box, where the chair is attached to its wall, but not to the tray.
How to attach a seat to the wall
If you want to fix a folding seat or any other seat to the wall, then you will certainly need anchor bolts or dowels that can withstand the load that will be placed on them, especially since it will be “tearing”.
What is the door made of?
An excellent option is tempered glass. It is very durable, and if it breaks, it is into large, non-sharp fragments. The disadvantage of tempered glass is its high cost.
Want to save money? Make a door from ordinary thick glass, covering it with polymer film on both sides. The effect is approximately the same as with tempered glass: when broken, the fragments remain on the film and do not fly apart.
Important! Before gluing the film, the glass must first be washed and then degreased. Glue the film onto wet glass: it is much easier to work with.
Good doors are made from sheet (not cellular!) polycarbonate. You can also purchase a finished product: glass or plastic “accordion”.
Video material
In this article, we examined in detail the materials and work process so that you could make a shower tray with your own hands. Now you just have to decide whether it’s worth doing or not.