Composition of MDF wall panels
MDF panels (fine fraction) are formed from small wood particles under pressure and high temperature. As a result of heating, wood releases lignin, which acts as an adhesive and gives the material the required density and strength . Paraffin can be used as an additional binding component. Sawdust makes up at least 90% of the total mass. The remaining 10% are bonding agents and additives that prevent rotting.
Due to the absence of synthetic resins, MDF is considered safe for human health - its use is permissible in residential premises, as well as institutions with increased sanitary and hygienic requirements. The basis for the manufacture of MDF is wood processing waste: off-grade species, curved areas, trimmings. Despite the complexity of the technological process, wood panels managed to retain a number of positive qualities of natural raw materials.
Chipboards in the interior
In the production of this finishing material, natural wood fiber is also used, which is pressed while simultaneously exposed to high temperatures. The coating is absolutely safe for others, which makes it possible to use the slabs for decorating children's bedrooms.
Fastening to the underlying base can be done using glue, self-tapping screws (on a pre-assembled sheathing). It is imperative to carry out special treatment of the walls with an antiseptic and moisture-resistant composition. It would be a good idea to cover surfaces with antifungal solutions.
Pros and cons of finishing material
MDF wall panels have a number of advantages:
- Safety. Wood derivatives do not emit toxic components , there is no threat to health.
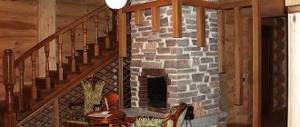
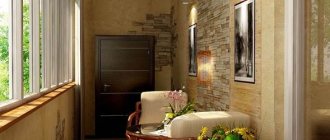
- Decorative. The range of products allows you to choose finishes to suit the interior requirements of the room. The panels differ in shape, color and texture - the choice of decor is unlimited. Finishes with imitation wood, as well as MDF panels with a stone look, are in wide demand.
- Practicality. The coating is strong and durable. This finishing increases the thermal efficiency of the room and improves sound insulation.
- Easy to install. Installation does not require careful preparation of the walls; the entire process can be completed independently. With the help of decorative panels you can hide minor defects and uneven walls.
- Ease of care. Unlike solid wood, MDF does not require periodic treatment with protective compounds. It is enough to periodically wipe the coating from dust.
The disadvantages of the panels include the following:
- mounting on a frame reduces the usable area of the room - for finishing cramped rooms it is better to use a different material;
- the material is sensitive to high humidity - in some cases it is necessary to use moisture-resistant MDF for the bathroom, swimming pool, kitchen;
- installation of wall-mounted shelves and cabinets on a panel is carried out using special fasteners;
- MDF canvas will not withstand a strong impact - a dent or hole will form.
Variety of MDF panels
The whole variety of panels for wall decoration can be classified according to production technology, method of design of the front part and standard sizes.
Classification by manufacturing method
MDF panels are divided into two categories: solidly pressed and laminated . The first type includes ordinary sheets obtained from wood fiber by dry hot pressing. Fully pressed panels are not coated or treated with anything, but their surface is smooth due to the tight pressing of the smallest particles. This material has a non-uniform color. To decorate walls, it is repainted or used in its original form when arranging non-residential premises. Laminated panels are made using a similar technology, but are additionally covered with a polymer film. The coating provides good wear resistance, strength , protection from moisture and a variety of colors.
Useful: Wind protection of a frame house
There are MDF panels for special purposes. They are made from durable types of wood at elevated temperatures and under increased pressure. These include:
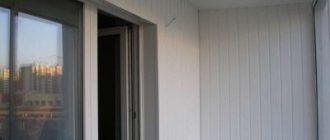
- moisture resistant - not afraid of water, characteristics comparable to plastic ;
- heat-resistant - contains fire retardant additives, product markings - KM1 and KM2;
- flexible - due to improved plasticity, they are suitable for creating arched and bent structures .
If you plan to mount heavy objects on the wall, then it is better to use high-density MDF.
Decorative coating options
Depending on the top layer, the following types of MDF boards are distinguished:
- veneered;
- glossy;
- painted.
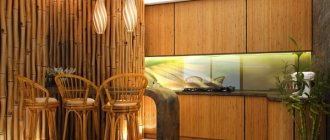
Veneered panels are covered on top with a thin layer of natural wood (3 mm). This finish fully conveys the texture and pattern of natural material. Veneered boards are universal - they are used in classic, modern and ethnic interior styles.
Glossy panels are covered with a polymer film. The plate can be given almost any color. There are options with a holographic effect or 3D pattern .
Painted MDF panels are very popular due to their affordability and unlimited choice of shades. You can choose decorative finishes to suit any room design. A layer of paint smoothes out all the unevenness and roughness of the wood composite. This option is often chosen for finishing the hallway, kitchen, and living room.
The disadvantage of the material is susceptibility to mechanical stress . If handled carelessly, scratches and chips may occur.
Shapes and sizes of wall panels
Based on the location and design idea, the shape of the slabs is selected. There are three options for MDF panels on sale:
- Tiled. These are compact panels of square or rectangular shape. Available sizes are 30*30 cm, 90*90 cm. They require fastening without slats with glue. Tiled canvases can act as an independent decorative element or be combined with other finishing elements. Their installation requires careful preparation of the walls .
- Rack and pinion. Dimensions of MDF slats: length - from 2.5 m, thickness - 8-12 mm, width variable. Slat panels are usually mounted vertically, mounted on a frame. This form is relevant for narrow rooms, as it visually expands the space .
- Leafy. Large sizes of wood panels allow you to quickly finish spacious rooms. The dimensions of the slabs are from 1.2*2.4 m. Frame and adhesive fastening technology .
The thickness of MDF is selected taking into account the purpose of the slab. An indicator of 1.2 cm or more will provide additional heat and sound insulation of the walls.
Decorative plaster
This general term refers to a layer of construction and decorative mixture applied to the surface of the walls. It levels the walls, insulates them, insulates them, and is also, of course, one of the most ancient methods of beautifying a home inside and out.
Plaster mixtures can be divided according to two criteria - according to the composition of the mixture and according to artistic qualities.
Mineral plaster
Mineral plaster is the most economical type of plaster.
This is due to the base of the mixture - cement, which is “seasoned” with chemical additives that provide increased moisture resistance. To this we can add environmental safety, vapor permeability, resistance to fungi and mold, temperature changes, as well as fire safety. Among the disadvantages are the not very diverse color palette and the complexity of application. But the average period of operation of a mineral coating does not exceed 15 years.
In addition to mineral, there is also: silicate, based on liquid glass; silicone, which is based on silicone resins; polymer - with acrylic resin in the composition. Silicone and mineral plasters have the longest service life.
Textured plaster
Textured (structural) decorative plaster is a way of decorating walls that can be called an unfading classic. Due to the fact that the plaster mixture contains various additives (pebbles, fibers, marble chips or ground bricks), this finish can look like rock, valuable wood, cork bark, sand patterns, cracked clay, dug velvet.
Textured types of plaster include the famous “fur coat”, as well as bark beetle plaster, a method of finishing halls and hallways that has been popular for many decades.
Textured plaster is an excellent solution for those who want to get a unique interior. It will definitely provide picturesqueness and sophistication. And at the same time, strength, durability, and fire resistance. Plaster will help hide small defects on the walls, and its price is not bad at all. Textured plaster will not put to shame any of the palace, classical interior styles; it will be a good find for the hall, living room, and dining room.
Judging by the reviews, this design has one drawback - it is difficult to remove when the need for new repairs arises. The time during which textured plaster will not lose its attractiveness is 15-20 years.
Venetian plaster
It's hard to believe that this type of coating is over 500 years old. “Venetian” creates the impression of a noble stone - marble, granite, onyx, jasper, opal, malachite, amber. Such a sophisticated type of decoration literally asks for the walls of spacious living rooms, where there are fireplaces, hanging canvases in lush frames and the spirit of the Renaissance is in the air. Venetian plaster is unique: there are no two identical copies of it in the world! It is precisely this that can be seen inside the palaces of the Venetian doges and the villas of Italian aristocrats. “Venetian” is not only enchantingly beautiful, but also safe, moisture-resistant, durable and capable of pleasing the eye not for years, but for centuries! But the price also matches it.
How to attach MDF panels to the wall
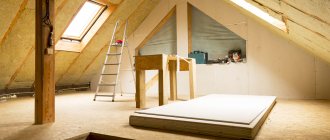
Before fixing the decorative slabs, it is worth deciding on the installation method. The use of lathing will hide the curvature of the walls and allow you to place an additional layer of insulation. The adhesive method is best used in confined spaces, where every centimeter counts.
Frame technology: step-by-step installation
The first step is to select the material for the sheathing. Possible options:
- Cink Steel. Metal slats are best used in damp areas. The material does not corrode and withstands temperature and humidity fluctuations.
- Wooden bars. Planks with a cross-section of 3*3 cm are suitable. If it is necessary to install insulation, you can take beams of greater thickness. The sheathing elements must first be treated with fire retardants and an antiseptic .
Useful: Parok insulation – taking care of energy efficiency
Stages of work:
- Measure the walls.
- Cut the beams - their length should be slightly less than the parameters of the walls. When the slabs are arranged vertically, the frame slats are installed horizontally, and vice versa.
- Fix the slats to the wall using dowels or self-tapping screws.
- Install slab insulation into the frame cells.
- Mount MDF panels. Fixation is carried out with self-tapping screws or special nails. The fasteners are screwed into the grooves of the lamellas.
- Install connecting strips and outer corners.
How to attach slabs to metal sheathing? First, wall guides are installed around the perimeter, then intermediate slats are installed at a distance of 40-50 cm from each other . The frame is fastened with hangers and self-tapping screws, and then they begin to cover it with MDF boards.
Cladding inside the house
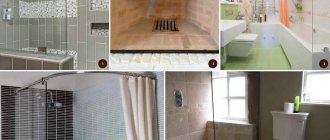
Lining is a leader among finishing materials. It is used both inside and outside the house, only with different treatments (impregnations and paints are used for external or internal work). It comes in different types. It's not just about different types of wood or different board widths. There are also different profiles: smooth, wavy, imitating timber or log house. There are several options in the photo below.
The most popular types of lining for interior decoration of a wooden house inside
The interior decoration of a wooden house can also be made from lining with a non-standard profile
To decorate the inside of the house, use thin lining: 1.5-2 cm is enough. It costs less and will perform its functions. The slats can be placed horizontally, vertically, or at an angle. From combinations of all these directions you can get amazingly beautiful panels, but this is a labor-intensive task.
When nailing the sheathing or planks, you need to remember about the shrinkage of the log house and the ability of the wood to swell and shrink. Near the floor and ceiling, do not nail the trim and sheathing tightly; leave 2-4 cm to compensate for these expansions.
Both the walls and the ceiling are finished with lining. In both cases it looks more than decent, and such finishing is relatively inexpensive. It’s cheaper (and easier to do) to just cover it with plywood and stick wallpaper. This, by the way, is a popular option for decorating a country house inside an economy class home. With a sufficient level of execution, this method can be used to decorate premises not only in the dacha version. The only objection is the glue that is used to make plywood. But if you take it in emission class I (approved for use in children's institutions), then probably nothing terrible will happen.
Mounting methods
Previously, they were not particularly worried and nailed the lining into the face (into the front surface) right through. At best, they used nails without heads or finishing nails (their heads are very small). Sometimes the caps were covered with wood putty and sanded, sometimes the screw holes were covered with pins. This is for the most fastidious and demanding of quality finishes.
Ways to fasten the lining
Today, even this method is considered not the most aesthetic: the traces can still be seen. To make sure nothing is visible, secret methods are used:
- nails or screws are driven at an angle into a tenon or groove;
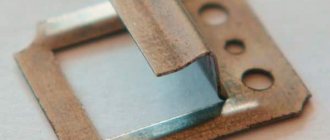
- using clamps (clasps).
Both of these methods require patience and accuracy: thin, small nails are used, and they must be nailed in such a way as not to damage the front surface. To make it easier, you can hit not with nails, but with staples from a construction stapler. Staples are taken with a narrow back and long legs, made of stainless steel with sharpening. Although there are models of staplers that “shoot” nails with a very small head. For fastening the lining - just right. Self-tapping screws are also used. A comparison of the two methods is made in the video.
There is one caveat. If you bought the lining that was not chamber dried (its humidity is 7-8%), it will gradually dry out. Gaps will appear between the planks and you will either have to put up with them or re-nail all the planks. Sometimes two or three times. There is no way to avoid this. You can only choose a profile in which the cracks will be invisible (the “Softline” and “Standard” profiles in the figure in the previous section). In this regard, you need to think carefully about how best to secure the lining for the first time: it will have to be removed. Therefore, it is advisable to make it so that it is not difficult and so that it does not collapse. Here everyone decides for themselves: for some it is more convenient to work with self-tapping screws, for others with nails. Both methods are not ideal (it is difficult to pull out nails, and you need to drill a hole under the head of the screw), but both are acceptable.
Sometimes it becomes necessary to connect the lining to a wall made of logs. Difficulty may arise due to the fact that the wall has a non-linear shape. You can outline it using a small piece of lining, to which a simple pencil is attached. Having placed the plank and moving it along the wall with a piece of clapboard with a pencil, transfer the shape of the log onto the plank. By carefully cutting along the intended line, you can achieve an almost perfect match.
You might be interested in reading about how to lay laminate flooring.