Instructions
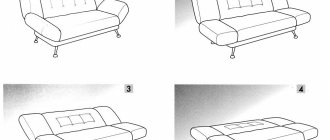
After all the materials for restoration have been purchased and the tools have been prepared, it’s time to move on to the repair itself. This process is not complicated, you just need to be careful and consistently follow all the steps described in the instructions.
Checking and repairing upholstered furniture frames
The first step in restoring a sofa is to check all its components for integrity and functionality. If any boards are rotten or cracked, try to replace them.
Dismantling and inspection
After checking the frame, the process of dismantling individual structural elements begins, such as:
- armrests;
- sofa backs;
- upholstery;
- filler;
- springs
Side armrests
In most models, the fastener is located on the inside, and to get to it you will need:
- hex socket wrench;
- pliers.
If these tools are available, there will be no difficulties with dismantling.
Seats and backrests
The seats and backrests are fixed using special fasteners to the lower frame of the sofa. The tools you prepared before starting the repair of the product will help you cope with the fasteners.
Old upholstery, staples
The old upholstery is attached to the wooden parts of the sofa using special staples. They must be carefully removed, after which removing the upholstery will not be difficult.
Old filler
Once the upholstery is removed, access to the sofa filling will open. It is advisable to immediately replace it with a new one, but if it is in acceptable condition, you can leave the old filling.
Springs, checking their condition
Once the filler is removed, we move on to evaluating the springs. If the inspection result shows a satisfactory condition, it is enough to clean and coat the old parts with lubricant.
Checking the condition of the chipboard
Often it is the chipboard sheets that become unusable first. Replace damaged parts of the structure or leave the old ones if their condition allows reuse.
Repair and replacement of old elements
After all the components of the sofa have been dismantled, you can proceed to repair and replacement of old parts. Subject to inspection:
- base for a spring block;
- spring block;
- mechanisms responsible for disassembling the sofa;
- slats.
Spring block base
The base for the spring block is completely changed if any defects or malfunctions are detected. Fastening to the block is carried out using a stapler. If you couldn’t find a stapler, take:
- thin cloves;
- steel wire.
We make brackets from them and attach the springs.
Spring block
To repair a spring block, you must:
- replace faulty springs;
- cover each side of the block with thick fabric, which is attached to the part using a nylon thread.
Note! The edges of the fabric are folded inward
Case and cover
Fastening the cover and covering the frame with upholstery is carried out using construction glue and a stapler. Don't forget to return the old filler or replace it with a new one.
Mechanism repair
Repairing sofa mechanisms has its own nuances, depending on which operating principle is used:
- folding;
- roll-out
In roll-out ones, the roller most often fails, and in folding ones, the springs fail, which over time lose their shape and burst.
Lamels
Reasons for lamella failure:
- poor quality of material;
- high load on a separate section.
Damaged strips are bent until they completely come out of the fixing grooves, after which a new part is installed in their place.
Restoration of a spring sofa
The task of a modern restorer when restoring a sofa is to strengthen the structure of the old thing in such a way that it remains functional, but retains all the advantages of antiquity.
Reupholstering an antique sofa and upholstering it are two different things. Reupholstery is a major restoration involving reupholstering the sofa springs. So to speak, a major overhaul. Sofa upholstery is the replacement of fabric on working or already restored, reupholstered seats, backrests, and bolsters.
The antique sofa consists of two designs. Wooden - load-bearing structure, and spring, designed to provide softness, elasticity and, ultimately, comfort. There are antique sofas and hard ones, all wooden, with rattan mesh, with down cushions, but since the beginning of the 19th century, sofas with spring seats have been the most popular.
In the old days, the frame was repaired by a carpenter, the springs were reupholstered by an upholsterer, and the draper covered it with a finishing cloth. The modern restorer does everything himself. No educational institution currently trains specialists of this level. We “raised” all our restorers ourselves. From simple to complex. From student to master.
The difficulty of restoration lies in the fact that to restore an antique sofa you need authentic elastic and padding materials, which are practically never found in modern furniture. The seat, back, and sometimes spring armrests of club sofas and armchairs are formed manually from springs using ropes, as well as a heap of sea grass, by laying it and sewing it under burlap. The stiffness is controlled by the degree of compression of the springs. The height of the side is determined by the experience and intuition of the craftsman, the bend of the back is determined by the design.
Restoring an old, antique or cabinet sofa, as well as Stalinist and Soviet sofas from the 50s and 60s, is one of the pinnacles of restoration art.
Here is an approximate list of work required when restoring a sofa.
1. Disassembly. Removing finishing fabric, removing worn out calico fabrics, burlap, belts, old tarpaulins. 2. Removing dusty sea grass. 3. Disassembling the spring block, removing the frayed ropes that tied the springs. 4. Alignment of deformed springs 5. Purchase and replacement of broken springs. 6. Clearing the frame. 7. Removing old nails and filling nail holes. 8. Possibly sealing woodworm holes. 9. Gluing and strengthening the frame. 10. Carpentry work. Repairing cracks, restoring weak joints of parts. 11. Leveling (building up legs) 12. Restoring the finish of visible wooden parts of the sofa. 13. Arrangement of a soft spring seat (tensioning of belts, tying springs with jute ropes). 14. Arrangement of a soft back with sewing of the side and rough upholstery with calico. 15. Arrangement of soft side parts of the armrests with sewing of the side and rough upholstery with calico. 16. Upholstery with finishing cloth. 17. Finishing the joint between fabric and wood with braid or nails.
You can, of course, repair an antique sofa by simply placing new fabric directly on top of the old one, slightly leveling the seat. The appearance will improve, but frame breakdowns, looseness, the dust of centuries and the smell of old furniture will remain.
Mechanism repair
If during operation the back or seat does not fold or this happens with great effort, or they are skewed relative to each other, then repair of the mechanism for transforming the sofa-book is required.
The extent of the problem can only be discovered after disassembling the product. To do this, you first need to remove the armrests (most often they are secured with two bolts); in order to dismantle the moving parts, you need to unscrew the fasteners in the mechanism itself.
The system is now fully visible, but still attached to the sofa frame. If all components are intact, there is no play or other signs of loosening, you can simply lubricate it and lift the fastening bolt. Even the presence of rust does not mean complete failure. You can get rid of it using special chemicals.
If the rivets that connect the moving elements of the sofa-book mechanism break, they can be easily replaced with others. Before this, you should remove the mechanism, clean it, get rid of broken parts and install a replacement.
In extreme cases, especially when the sofa book has been in use for many years, the entire mechanism will have to be replaced. The design is easy to purchase at any furniture store at an affordable price.
A special feature of the Eurobook sofa is the presence of a double transformation mechanism, one part of which allows you to move the seat forward, the second lowers the backrest into the resulting space. Repair or replacement is carried out similarly to the case considered, with one difference: the retractable mechanism is equipped with bearings, which break most often. They will need to be replaced.
The click-klyak model has a base made of a metal frame to which all the moving elements and slats are attached. If there are problems with folding out or 1 rail is broken, you will first have to remove the upholstery, conduct a detailed inspection followed by repair work (replacing fasteners, broken slats, lubricating moving elements).
Repair of a sofa from MULTI-FURNITURE
Greetings to all. We bought a sofa a little over a year ago from MnogoMebel. I was attracted by the modern design, size and price of just over 20 thousand. Everything was fine until recently, when we noticed the seat sagging on one edge of the retractable part. We looked up the contract and found a clause stating that for warranty repairs it needs to be taken all the way to the Saratov region to the address of the manufacturing factory. It's a bit far from the Tula region, it's easier to get a new sofa. This option disappeared by itself. And then my wife and child left for two weeks and I decided to try to repair this miracle myself.
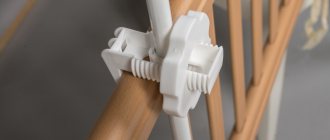
We have such a sofa, only a different color and a different upholstery material:
there was just a spring sticking out from the outside and it was noticeable that the bottom crossbar was broken
after opening it turned out that the cause of the breakdown was not excessive uneven load, but design features. In the working position of the sofa, the plywood plank rests on a plank made of coarse chipboard through four bars and in one of the corners it is extended with a piece of plywood and fastened with staples, and with this piece it rests on the block. Consequently, over time or with a little stronger pressure on the joint, the fasteners fly out and break, and so the fragile bottom bar and the sofa cushion fall through. I understand that this was done on purpose, because... on the other side the same thing was done.
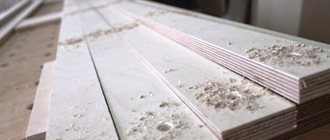
I took a larger photo so that the poor quality of the material could be seen. Plywood would be much stronger in this place.
I found suitable bars and secured the surviving connection
I didn't bother replacing the broken strip, because... was limited in time. I took furniture corners and screwed them on the inside; they won’t be particularly noticeable, because... half will be hidden under the skin.
It all took a total of 6-8 hours and 200-250 rubles for consumables (bars, screws, corners, etc.). My wife is happy)) Well, something like that.
Duplicates found
Have a lot of fun with this sofa!)
YES, stop supporting this crap with rubles, people. Well, don't buy this! Also for 20k+. Kick.
So write alternatives so that you know where this is not sold and by whom it is not manufactured at reasonable prices =)
What saved my situation was that the sofa had no mechanical parts or mechanisms. Much easier to disassemble and assemble.
Uffff. I almost bought the same omno. There is reason to think about it.
Fucked up! The sofa has non-laminated chipboard. Phenolic factory underneath!
literally the other day I went to this store for the first time, I left a minute later, crushing the brochure and business card of the manager that was handed to me at the entrance.
= Plywood would be much stronger in this place. =
Yes, even a couple of transverse bars made from waste wood initially would have saved the situation. But this is the kind of guano they sculpt.
Restoration process step by step instructions
Restoring sofas with your own hands is a labor-intensive and difficult process. To avoid mistakes, it is necessary to determine the specifics of the damage and assess the scale of the work.
Perhaps the restoration will include repairs to the internal structure, replacement of the filler and seal in the main parts, complete or partial reupholstery of the furniture.
Required materials and tools
In order to restore a sofa with your own hands, you will need the following tools:
- pliers;
- screwdriver;
- spanner;
- furniture glue;
- electric drill, screwdriver, drills of different diameters;
- electric jigsaw and saw;
- bolts, nuts, fasteners and metal corners, furniture nails;
- gypsy needle, nylon thread, scissors;
- furniture stapler and anti-stapler for removing old staples.
The set of tools can be supplemented depending on the complexity and specifics of furniture repair.
Materials needed:
- upholstery fabric;
- foam rubber or other type of filler;
- tapes for masking seams;
- various decorative elements.
When repairing an ottoman with pillows or bolsters, it is necessary to take into account that the density of the filler of the decorative elements differs from the material intended for the seat. All these nuances must be foreseen in advance so that problems do not arise later.
Filler selection
The filling is selected depending on the sofa model. The seat and back are equipped with denser and thicker foam. For the side parts and armrests, thinner material is used.
Choice of upholstery material
To restore a sofa, you can use any fabric, including one that differs in texture from the previous upholstery. For example, instead of a tapestry, you can use suede or velor to cover an upholstered sofa; such a covering will create coziness and give the product a sophisticated look.
For practicality, many people prefer to combine fabrics. Some parts of the back and armrests can be covered with leather or its substitute, and velor or jacquard is perfect for the back and seat.
When selecting fabric for the restoration of old furniture, it is necessary to take into account the overall interior, its style and the intended purpose of the soft modules.
Soft and natural fabrics are used in residential premises. For an office or other places with high furniture use, it is better to choose synthetic, wear-resistant, easy-to-clean and dense materials.
Disassembling the sofa and its elements
The sofa is disassembled in the following sequence:
- Carefully remove the side parts. Then unscrew the back and disassemble the seat.
- Remove the covering fabric and foam rubber.
- They carry out an inspection. If necessary, repair the internal mechanism of the furniture. At this stage, the spring block, wooden frame or belts are replaced. All fastening elements are checked. If necessary, they are twisted and glued.
Padding
Old upholstery fabric needs to be ironed and used to create patterns. All upholstery details are cut out of linen. It is recommended to be careful and consistent in your work.
Each element should be numbered and indicated which part it belongs to. All parts must be basted for test fitting. After adjustments, the fabric is stitched on a sewing machine. Restoring a sofa with your own hands requires not only knowledge of carpentry, but also tailoring
Subsequently, the covers are put on each piece of furniture and attached to the frame at each edge. After this, the general assembly of the sofa begins.
The final stage of decoration
Restoring an old sofa is not only hard physical work, but also creative work. Decoration is the final and most important part of the process. The updated upholstery itself can become a bright accent, but decorative contrasting pillows and bolsters will add more originality to the sofa. They can be decorated with ribbons, plaits, and carriage ties.
If the arms and legs of the ottoman have been restored, they are coated with varnish or paint in the same tone.
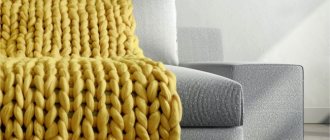
How to disguise a hole
In order to outwardly hide damage to the upholstery, you can use a beautiful blanket or decorative cape. They can not only hide a hole, but also complement the appearance of the room, adding an interesting twist to it.
There are special covers that are sold in furniture stores. You can purchase several different types and change them to suit your mood. Moreover, such covers are very easy to care for.
If there is major damage, you should consider completely reupholstering the sofa. Masking methods in this case will be inappropriate. You can do this at home, or you can seek help from specialists. If you know how to handle tools and have free time and a desire to do something with your own hands, then take up reupholstery yourself. There is a lot of information and videos on the Internet on how to reupholster furniture yourself. Otherwise, professionals will do everything quickly and efficiently, but they will have to spend a certain amount of money.
Cut a piece of material for the inner patch.
For deep rips and cuts that expose the sofa's interior padding, patches should be used to create a solid foundation for future repairs. In a special leather repair kit you will find not only the material for making patches, but also everything else you need. If you do not have such a kit, then you can use any strong elastic fabric or a piece of leather or vinyl for the patch. Cut the patch so that it is slightly larger than the hole or cut. Round the corners of the patch to make it easier to insert it inside.
Place a patch under the hole.
Using tweezers, insert the patch into the hole in the skin, and then straighten it under the hole to remove any wrinkles or folds. Make sure the patch completely covers the hole and lies flat between the sofa's upholstery and the leather surface.
Glue the patch to the skin.
Take a large needle or toothpick and apply flexible textile adhesive or leather adhesive to the underside of the leather upholstery around the hole. Spread a thin layer of glue over the entire surface that will be in contact with the inner patch. Press the leather upholstery of the sofa against the inner patch, aligning the edges of the tear or cut and returning them to their original position. Wipe off excess glue with a paper towel.
Place a weight on the area to be glued while the glue dries.
Place a heavy piece of wood or a book over the gluing area to create even and fairly strong pressure. Wait at least 20 minutes for the glue to dry (check the instructions for the specific time).
- Read the label on the adhesive container to see if using a hair dryer is required to speed up the drying process. If necessary, set the hair dryer to a low heat setting and try not to get it too close to the leather upholstery. Excessive heat can damage the skin.
- Clean the surface of the leather.
Before using leather crack filler, you will need to clean the surface of the leather to ensure better adhesion of the substance. Lightly dampen a clean cloth with leather cleaner or 70% isopropyl alcohol, and then wipe the affected area.
Trim any fibers sticking out along the edges of the tear.
This will allow you to evenly cover the damaged area with crack filler. Carefully cut away any fibers protruding from the edges of the tear.
- Seal the damaged area with crack filler.
If there is a gap between the edges of the tear, take a palette knife and use it to fill it with leather crack filler. Use the flat end of a palette knife to smooth out the aggregate and remove any excess. As a result, the damaged area should become as smooth as the rest of the skin surface. To wipe away excess filler and smooth the transition from crack to intact leather, use a paper towel.
- Crack filler is commonly included in leather repair kits.
Refer to the instructions on the label of the product you use to find out how long it takes to dry. Once the filler has dried, you can gently apply pressure to the repaired area of skin and check that the product used is truly set and does not move anywhere.
- If, after the filler has dried, the surface of the repaired area remains uneven, you can try applying a second layer of this substance on top.
Do-it-yourself sofa repair in a classic style
At home, wear and tear on furniture is inevitable. The solution to the problem may be to restore the sofa yourself. Most often, external elements require replacement, regardless of the type and quality of the material. The fabric fades in the sun, wears out, the foam loses its elasticity and sags.
Do-it-yourself reupholstery and minor repairs to a corner sofa
Advantages of do-it-yourself restoration:
- purchasing material is several times cheaper than new furniture;
- preservation of antiques;
- choice of colors and design to suit personal tastes and the overall interior of the room;
- independent choice of material based on quality, environmental friendliness, cost;
- the ability to take into account the weak points of the old sofa and strengthen them.
Broken sofa folding mechanism
In addition to external wear and tear, internal breakdowns occur over time. Somewhere there is a creak, the folding mechanism does not work, the springs break.
Repair of the interior filling of the sofa - replacement of springs
Lubricate the creaking parts of the folding mechanism
The wooden base may crack or break. In order for the restoration of an old sofa to be of high quality with your own hands, you need to know its approximate structure and repair methods.
Cracked block - part of the base
Bed base in need of replacement
Restoration of a Soviet sofa - new life for old furniture
Conventionally, the sofa can be divided into four parts. This is a wooden base made of solid wood and chipboard, steel springs and a folding mechanism, filling (foam rubber or batting) and upholstery (fabric, leather, leatherette), decorative elements (wooden overlays, buttons).
The process of reupholstering a soft sofa step by step
There are several ways to restore a sofa with your own hands, depending on the complexity:
- minor repairs to upholstery and decor;
- complete replacement of upholstery (reupholstery);
- replacement of upholstery and filling;
- replacement of upholstery, filling, repair of mechanisms;
- complete repair of all parts.
Repair of the spring mechanism, replacement of the filling and upholstery of the sofa-couch
You should not get down to business if we are talking about antiques, or if the old sofa has complex structural elements. It is also better to entrust work with capricious materials, such as leather, to professionals, or change the material to fabric.
Transformation of a leather sofa after restoration by specialists
Basic methods of do-it-yourself restoration
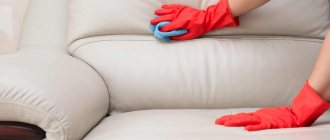
The process of restoring a leather sofa depends on the condition of the upholstery, the presence of certain defects and the requirements for the final result. When planning to restore and repair furniture, you need to take into account the nuances and select the appropriate materials.
How to remove scratches
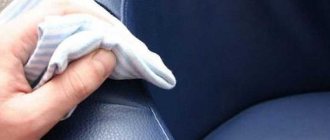
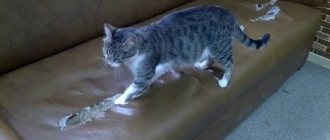
Scratches on leather upholstery are a common problem. Defects arise from the claws of pets and the impact of various objects. To remove scratches, you can use improvised means.
Olive oil
If the surface of the sofa is scratched by a dog or cat, you need to apply olive oil to a cotton pad and wipe the scratches. A minor defect will disappear after the skin dries as a result of the initial treatment. Otherwise, you need to repeat the procedure 2-3 times.
Application of wax
Beeswax helps to effectively remove small and shallow scratches on leather furniture. The beekeeping product is heated until soft and the damaged areas are treated. When the wax hardens, it is carefully removed from the upholstery.
Liquid skin
The use of liquid skin makes it possible to restore significant damage. The material is applied to the scratches and left for several hours until it hardens completely. When the liquid skin hardens, the furniture can continue to be used freely.
Nail polish and marker
Nail polish and a marker are suitable for removing scratches on the sofa. Transparent varnish is applied in a small amount to the scratches and waits until it dries. After restoration, a slightly noticeable transparent crust will remain on the surface of the upholstery.
Rubber based adhesive
The glue is rubbed into the scratches and left to dry. When the damaged areas are covered with an adhesive crust, you need to additionally treat them with special paint, selected taking into account the color of the leather sofa.
Shoe polish
A shoe polish of a suitable shade is rubbed into the scratched areas. The cream does not eliminate defects, but only visually masks them.
Iron
You can treat the upholstery of a leather sofa with a warm iron. Apply a cotton cloth to the surface of the furniture and rub the iron over the damaged areas. The duration of each contact between the iron and furniture should not exceed 10 seconds.
Paint or varnish
Specially developed materials for the restoration of leather sofas are used to eliminate scuffs and restore the original color. It is enough to choose a paint or varnish that matches the color and apply it to the upholstery. After drying, you can use the furniture.
Padding
The reupholstery process involves completely changing the upholstery of the sofa. As a result of reupholstery, it is possible to completely change the appearance of the furniture. You can do the work yourself or contact a specialized workshop.
For self-upholstery, it is important to choose a material of a suitable color and in sufficient quantity.
Replacement of accessories
Leather sofas use parts to connect individual parts, legs, a transformation mechanism and other fittings.
Patches
Sofa patches are pieces of leather material that are fixed to worn parts of furniture. When restoring a sofa without outside help, it is recommended to use self-adhesive stripes, which have a special Velcro on the back side.
Overlays
Sofa covers are most often made of wood and mounted on the armrests. The use of overlays allows you to visually hide holes and abrasions. In this case, there is no need to repair every damaged area, since the overlay covers a large area at once. Moreover, it has the added benefit of creating a place where you can conveniently store various things.
Tape
To seal defects in the leather upholstery of a sofa, you can use specialized products, including liquid leather and adhesive-based compounds. The selected product is applied to areas that require restoration, or the upholstery is completely treated. The second option is more preferable because it avoids changes in shade.
How to repair a hole in a sofa (made of fabric, leather or other materials)
Having finished with the preparation, we proceed directly to the sewing process. In this matter, accuracy and concentration are important.
You need to carefully repair the hole in the sofa.
Ready patch
If you decide to patch the damage on the sofa, you will need an iron, thread and a needle for further work. It is better if the tools are special, designed for furniture repair, but ordinary ones can also be used.
Cut the patch to fit the hole.
When working with fabric or leather, the procedure is as follows:
- We place it inside the hole.
- We make a basting with a thread and a needle.
- We sew it in a circle. Stitches should be small and hidden.
You need to sew up the hole from the inside out.
Helpful advice! You can replace the classic skin patch with a paper napkin. We apply “liquid skin” to it, apply it to the damaged area and cut it into shape. Then we carefully dry the resulting template. We use it like regular fabric.
Liquid cream paint penetrates deeply into the structure of the product.
When working with leather furniture, you should add a layer of “liquid leather” after this. It will hide all the unevenness on the surface. If the hole was not too large to begin with, you can seal it:
- Let's degrease the surface.
- Let's dry it.
- Cover the damage with a product of the desired color.
Important! Avoid any contact with the surface until completely dry.
Sew up the hole
Small holes or loose seams can simply be sewn up. It is safer to put a piece of fabric inside the damage and then sew first one side and then the other. It is better to connect them as closely as possible. This method will prevent further divergence of the tissue in this place.
Next, you need to sew the parts on a machine so that the seams are even.
We work similarly with leather furniture. We put a piece of leather inside and stitch along the depressions.
Gluing fabric to fabric
This method is the simplest and is suitable for both fabric and leather sofas.
First you need to make a pattern and cut out the parts.
In the first case, we use thermal fabric:
- Cut a piece of the required size, extending beyond the edges of the hole.
- Place it on top of the damage.
- We pass by iron.
The result of using “liquid skin”.
If we are talking about leather sofas, then “liquid leather” comes to the rescue.
- We clean the edges of the tear from debris and parts of the coating, and degrease it.
- Apply the mixture.
- Let it dry.
Don’t rush to get rid of your favorite sofa if it shows signs of use. You can always update its appearance yourself using fabric and sewing tools.
Get creative to disguise the hole.
Even restoring torn upholstery can be done creatively. If you don’t just patch up all the scuffs, but add brightness or even shape to the patches, the result can be a real art object.
The photo shows an option for a patch on a sofa.
Leather furniture can also be updated on your own, but additional materials will be required. You need to try and work with your hands, but in the end the sofa will serve you for a long time.
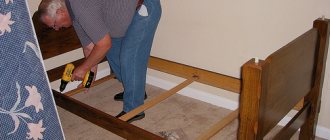
Repair of sofa frame and armrests
Repair of the frame can only be done after removing the upholstery and filling, i.e. almost completely disassemble it. It is much easier if the seat and back are attached to the frame with a transformation mechanism. They can simply be removed by unscrewing a few bolts and screws, without touching the soft upholstery.
After accessing the damage, the defects must be carefully examined and decided whether the old part can be restored or whether it is better to replace it. To do this, self-tapping screws or bolts are unscrewed, the frame elements are measured, their exact copy is created and installed in place.
If you are doing other sofa repairs with your own hands, it is recommended to strengthen the supporting structures in each individual case (place a wooden beam, add a couple of cross boards, install metal corners). In addition, you can tighten the loose fasteners of the sofa, treat the joints with glue to prevent their play in the future.
Sometimes you need to restore armrests from which part of the wood has broken off. To do this, you should collect all the fragments (if there are several of them), determine the location of each and use PVA glue to glue them in place. Then all that remains is to lightly sand the gluing area and cover it with a layer of varnish matched to the color.
If you need to repair armrests with soft upholstery, first remove the fabric and foam rubber, and detach the broken part. The purchased one is installed in its place. The filling and fabric are returned to their place, and the armrest is screwed to the frame.
Step-by-step instructions for repairing a sofa
Almost all repair work requires complete or partial disassembly of the sofa.
- Remove pillows from the sofa and check the upholstery.
- Turn it over so that you can inspect the frame.
- Carefully check the wooden parts for breaks and rot.
- If you need to replace the upholstery, you should purchase fabric for this.
- Replacing the frame will require the purchase of plywood and special screws.
- Before you repair your sofa at home, it is important to check the areas under the cushions. If the platform underneath is broken, a support should be attached. Stores sell ready-made parts made from fiberboard.
- You can use thin plywood, the size of the pillows. This will help them not to sag.
- Check the integrity of the spring. If they are simply bent, you need to put them in place using pliers. If damaged, they should be replaced with new ones.
- Check all the pillows one by one, because they may be the reason why the sofa is sagging. If you find that they are too soft, you need to add a similar filler or install a foam seal in the upper and lower parts.
- Strengthen the back part, as well as the frame, with tape.
After eliminating damage to the upholstery, frame and filling the pillows, the cause of the sagging has not been corrected, before repairing the sofa with your own hands, you should add support to the entire back of the furniture. To do this, take the tape and wrap the fabric so that it looks like a spider's web. This will be a big help in supporting the frame and rear end from sagging.
Transformation mechanism repair
Possible options for transforming sofas
A high-quality mechanism most often determines the cost of a sofa, since moving parts break faster. There are several types related to the operating principle. Each of them requires its own maintenance and troubleshooting.
Repair of a sofa roll-out mechanism
Scheme of the transformation mechanism of the “Roll-out” sofa
The most common mechanism. Popularity is associated with simplicity and low cost of execution. So named because of the principle of rolling out the section for the “bed” position. It also consists of rollers on an additional section, a slide with a fixing bracket on the body. There is also a lifting mechanism or an additional leg. Frequent problems are braking and squeaking when rolling out. Solved by replacing the rollers and slides. There is also a lack of complete fixation in the “bed” position. In this case, repair of the fixing bracket is required.
Repair of the “sofa-book” mechanism
Diagram of the transformation mechanism of the sofa “Book”
Known since Soviet times and is already obsolete. Due to this, it is difficult to find components for the device. The sofa uses the front side of the back as an additional section. Transformation occurs by folding the backrest and seat together, removing the roller from its extreme position, rolling the roller and unfolding the sections. The most common problems are the inability to unfold or fold the sofa. In this case, you should not use force. “It can be treated” by disassembling the sofa, cleaning the guides, relieving the tension of the fixing spring, lubricating the axle and correcting the jamming or replacing the roller. In case of several problems with the mechanism, a complete replacement of the unit is preferable.
New variations use a rocking part with springs. It's more reliable. But in case of malfunction, a complete change is required.
Repair of the click-clack sofa mechanism
Scheme of the mechanism for transforming the sofa “Click-clack”
The most modern type for serial models of upholstered furniture. Has three positions. “Click Klyak” allows you, in addition to sitting, to use the backrest and armrests as a sleeping surface. The interesting name comes from the sound of transformation. Outwardly similar to the mechanism of a book. However, it uses a special folding mechanism without rollers. Since a perfect fit of all the moving parts of the device cannot be done at home, it is better to change the entire unit. To do this, it is necessary to disassemble the casing and filling and fix the damage.
Repair of the accordion sofa mechanism
Diagram of the transformation mechanism of the “Accordion” sofa
Has three positions. Unfolding and fixing occurs due to movable axes and locks. To disassemble, you only need a 10mm wrench. The locks themselves resemble clamps in appearance without a tightening bolt. Frequent problems are similar to the problems of a sofa book. It is necessary to periodically lubricate all elements.
Repairing spring upholstered furniture: the best way
This method of repairing a spring sofa or chair is considered the most reliable of all existing ones, although it is time-consuming. Let's look at its implementation step by step:
- Make sure you remove all trim, staples, and nails from the frame. In this case, the furniture body was already completely ready for installing the seat (cleaned, sanded, washed, painted). The springs were removed and set aside for later use. Before this, the master took several photos so as not to forget how they were located.
- Install straps (slings) to secure the springs on the lower part of the seat. The more strips you install, the stronger the seat will be. Secure them with a stapler, leaving a couple of centimeters of material on each edge. The tension should be moderate so that the sling bends slightly when pressing on it.
- The extra centimeters on each edge should be folded and also attached to the frame with a stapler. Repeat these steps until you have installed all the vertical lines, then move on to the horizontal ones. Don't forget that they should intertwine with the vertical ones, and not just go under them.
- Reinforce the strength of each strap with three small upholstery nails. This is what this whole process of upholstered furniture repair looks like in the photo:
5. Now you can proceed directly to installing the springs. You can use an old photo or just distribute them evenly on the sling support. The end of each spring should "face" in the same direction as all the others.
6. The springs are attached to the straps either using a special tool or with a thick strand of twine and a special button. Each spring must be secured at three points.
7. Drive 2 nails into the end of each vertical and horizontal row of springs.
8. Measure the length of the twine, which will be 2 times the length of the seat plus 40-50 cm. Fold the piece in half and create a loop around the nails, as shown in the photo below. After this, pulling the twine taut, hammer in the nails with the loop to the very end.
9. Now our goal is to intertwine the springs together to form the seat and connect all the springs into a single unit. Start and finish tying knots at each end on the second “ring” from the top, then immediately move on to the top rings. This will allow you to get a dome-shaped seat.
10. Once you have tied all the springs together, wrap the twine around the nail and hammer it in until it stops. Secure the free end of the thread with a stapler.
11. For the second thread from each secured loop, repeat steps 9 and 10, but it should be tied exclusively on the upper rings, without “falling” to the second level from above.
12. Knit all the vertical rows like this, then the horizontal ones, and to be sure, you can also go diagonally. As a result, none of your springs will be able to move separately from the rest. Follow the step-by-step photos to secure the springs in the seat of upholstered furniture:
Finally, all that remains is to reupholster the finished seat. In this case, the craftsman simply sewed on the fabric (which could also be done using a stapler), and masked the seams with ribbon.
How to remake furniture at home?
Just follow the instructions:
Stage I: we begin restoring furniture by disassembling it, which involves unscrewing and removing locks, as well as detaching old staples that were needed to secure the upholstery to the frame. Be sure to keep trash bags on hand to immediately remove dust and previous litter.
Stage II: carrying out repair work and replacing parts that have become unusable. In fact, restoring an old but beloved sofa is possible if you select the right spare parts. If you notice that cracks have appeared on the beams that form the frame, this indicates that their useful life has come to an end. Replacement should be carried out by choosing solid beams. If desired, you can order them from a carpenter or prepare them yourself. In order for the alteration to be carried out efficiently, the joints of the beams should be registered using PVA glue. If you notice broken parts, you also need to repair them or install new ones by cutting them out with a jigsaw.
For their subsequent fixation, the master uses nails or a pneumatic stapler. This tool will be needed if you decide to return the furniture to its original appearance. Springs often break during operation. We repair them by completely replacing the blocks. Sometimes this is the only solution that is suitable for bringing the seats of your favorite folding beds back to normal.
Stage III: replacement of the filler, which is often foam rubber. Over time, it cakes and becomes unsuitable for further use. We restore the seat by removing the old material and covering it with new. How to restore the seat? Only in this way, although it can be done easier by leaving the same filler if it is in good condition.
Stage IV: replacing locks is a mandatory stage when restoring furniture.
At the final stage, a new cover is sewn and fixed to the piece of furniture. Britannica sofas and armchairs are repaired using the same scheme.
If such work seems burdensome to you, a master who repairs leather sofas at home will help. He knows exactly how to restore furniture.
Tips and mistakes
In particularly difficult situations, it is worth consulting with a specialist before starting repairs. You should handle the sofa very carefully when repairing the box spring, otherwise there is a risk of injury.
Be sure to use goggles and gloves for protection during restoration work. If the problem seems too complicated, then you should invite a specialist.
Let's look at the main mistakes when doing DIY repairs.
- Incorrect cutting. It is recommended to cut new fabric over old upholstery. If this is not possible, then you should take accurate measurements from sofa cushions or other elements.
- Use of untreated wood parts. The wood for the frame must be dried and impregnated with an antiseptic. Otherwise, the part will soon begin to rot.
- Neglect of additional fastenings. It is recommended to reinforce new parts on the frame with metal corners. This will make the design more reliable.
- Large distance between furniture stapler staples. The upholstery must be secured using a special method so that it does not come apart. The staples should be placed at a distance of no more than 20 mm from each other.
How to repair a lifting mechanism with your own hands
Sometimes the bed lifting mechanism, which is responsible for transforming the structure, breaks along with the slats. The following signs indicate a breakdown:
- spontaneous lowering of the orthopedic base;
- jamming of the mechanism when lifting or lowering the structure;
- creaking and other extraneous sounds that occur during operation.
If one of the listed symptoms appears, it is necessary to disassemble the lifting mechanism. To do this, the mattress is removed from the bed, after which its base is unscrewed. Then the fasteners are unscrewed, with the help of which the mechanism is screwed to the structure. It is difficult to repair such a product yourself and therefore it is better to take it to a specialist who professionally repairs furniture.