Arches in an apartment made of plasterboard occupy a special place in home decoration. Vaulted and curved structures give the apartment sophistication, spaciousness, comfort and unusualness. In order for the arch to look harmonious in the interior, you need to choose the right type of arch. An interior arch is a modern, stylish solution for every interior, which you can create with your own hands.
Design of a classic arch in the interior of an apartment
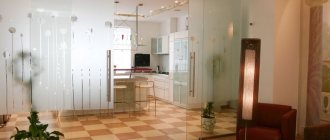
Many apartments with a small area only benefit from the absence of interior doors; for example, you can combine a small kitchen with a room, delimiting the space with a beautiful arch. In addition, you can remove the partitions between rooms, replacing them with arches, creating a visual expansion of the space in which each functional room will be highlighted and left in its place.
Arch design
Absolutely all arches can be built from plasterboard, depending on preferences and design. They are active and passive. Active structures transform the room, through them all rooms in the apartment are visible. These elements are used to decorate an apartment and in most cases they are erected in rooms to divide the space.
Design option for a plasterboard arch in an antique style
Depending on the interior features, these designs can be simple or complex. Passive arches are used in small rooms; they often serve a practical function.
Complex arches
Curly arch made of plasterboard
Not always a partition, a plasterboard arch is made of a simple shape. In some cases, additional niches in the arch are used, which are also made of plasterboard, because not everyone is satisfied with an oval in the arch. If shelves or niches in the arch are used, then the lighting in them combines very effectively.
Initially, when making an arch from plasterboard, you should decide on the size and location of the structure. Marking is carried out according to the conditions in the apartment. Once the arch has been determined, installation of the complex plasterboard structure can begin.
Using a level, you need to make a line on the wall that will serve as part of the plasterboard arch. Next, a profile is installed along the marked line, and the second one is mounted at the top of the arched opening. On the finished profiles, which will have the shape of the letter “L”, you need to screw a sheet of plasterboard, which is pre-cut. You can make any shape or design on drywall using a pencil and a jigsaw or knife.
A couple of identical parts should be cut out of a sheet of drywall, and then screwed to the frame, the thickness of which can be different; each person himself sets the thickness of the arch using a profile. In essence, complex plasterboard structures are created according to the scheme described above, but the complexity can only be in the lines, which require more time to cut. If it is not clear how to make a complex arch from plasterboard, then you should watch the video, a master class on creating complex plasterboard partitions.
Creating arches or partitions from plasterboard allows you to add zest to any apartment. Working with drywall is not difficult; the cost of the material, including drywall, is low, which is why it is profitable to use funds for building arches in the house.
Types of plasterboard arches
- Designs in the classic style - in the shape of a semicircle, look at the photo. This option is the most popular and in demand, and will fit into any interior. This option is ideal for an apartment with a small area, but do not forget that this design will take away the height of the opening;
- The arches are modern, with different segments. It will look harmonious in large rooms where the door opening is located opposite the window. Harmonizes with relief walls and suspended ceilings. You can create a wide arch with wooden trim with your own hands, which will emphasize the beauty of the structure;
Example of an arch with wood trim - Do-it-yourself arches-portals are installed in rooms where doors are irrelevant; simple, but at the same time original designs; thanks to their simple design, it is not difficult to build them with your own hands, and many home craftsmen use these arches in their premises;
- A design in the romantic style, in which only the corners are rounded, easy to manufacture, which can be decorated with delicate lace made of wood or PVC;
- Semi-arches with one rounded corner, but you can come up with and implement other options with your own hands. This type of arched openings is used in cases where the height of the room is not very large and the doorway is no more than two meters. Such designs also look good as a division of space into zones. Interesting! Any option can be used to arrange an arch in an apartment. If you can’t make a decision, look at the photo of the design of rooms with arches;
Original semi-arch design in the interior - The pointed design is in the Gothic style. The two planes of the arch converge at a slight angle at the top point, located in the middle of the opening. This type of arches is sometimes used in a duet with doors of the same type to the hall;
- Openwork designs that look great in the openings between the hallway and the room;
- Multi-level arches with an intricate shape. Only a specialist who has extensive experience working with drywall can carry out such a design. Such designs are used when it is necessary to allocate a niche from plasterboard in an apartment.
Important! If the openings in your apartment are less than two meters, then using an arch is not recommended; they take away the height in the apartment.
Materials and finishing of the arch
The arched opening can be constructed from any material: plasterboard, brick, natural stone, etc. In any case, at the stage of choosing the final finish, the choice of decor options is very wide. It is important to decide whether it is necessary to naturally and imperceptibly fit the opening into the interior, or whether it will become the focal point and the leading element of the design. Also, the choice of finishing is influenced by the characteristics of the room: in areas of high humidity, for example, in the kitchen, materials must provide additional protection and be resistant to any changes in temperature and humidity.
Classic living room with arch
Important: you can make an arch of almost any shape from drywall with your own hands, and place built-in lighting in the space between the sheathing. Remember that installing radial structures is always more difficult than working with rectangular or square shapes.
The arch, like any part of the wall, can be covered with wallpaper, painted or decorated with decorative plaster. These are the fastest and most cost-effective surface finishing options that fit perfectly with modern interior styling. However, you should be prepared that abrasions will appear quickly at the joints, especially near the kitchen, where this finishing option is, in principle, not durable. Plastic corner covers can protect the most vulnerable areas, but they rarely look aesthetically pleasing.
Wardrobe decor with imitation arches
The traditional option for decorating arches and doorways is wooden trim or their high-quality imitations. They are durable, resistant to mechanical damage, respectable and are perfect for classic and rustic interiors, and in a painted version they will fit into Scandinavian aesthetics.
Suitable here
×
Chair with backrest white with wooden legs Eames Small
1890 rub.
1607
rub.
buy
Arched openings in a corner room
Stucco molding is a traditional companion of the classical style. Nowadays, we are not talking about handmade work, but about quite affordable imitations, various moldings made of polyurethane and analogues. This is a simple and affordable option for decorating an arch, but it is important to choose only high-quality samples so as not to visually “cheapen” the interior and take into account that stucco decoration should be moderate and does not suit every interior style.
Finishing with decorative stone will require a lot of work and investment, but it will definitely not start to rub off in the corners. This decor assumes a spacious opening and country style. Open brickwork is ideal for a loft interior, and an oriental-style arch can be faced with tiles or mosaics.
Moroccan style bedroom with arch
Decor options for every taste
Arches in the interior solve different problems. In terms of functionality, they most often appear where it is necessary to visually separate part of the room; there is no space or need for a full-fledged door. An arched opening will perfectly delimit the kitchen and the dining or living room area, help to design a boudoir or work area in the bedroom, and separate the living spaces from the hallway.
Wardrobe with arched niches
Arches are often a necessary measure if the load-bearing wall cannot be demolished, but you want to combine several rooms into one. An arched opening in this case will be an effective solution, but according to the law it will require the construction of additional structures that will take on the load arising from the expansion of the opening. This procedure is not easy to implement and approve; it usually takes more than two months to sign the permit. Without the participation of certified engineers of the management company, doing this on your own is strictly prohibited, so few people decide to take such a step.
An arch is an ideal frame if you need to draw attention to something. The arched opening focuses attention on the fireplace, favorite painting or luxurious chandelier. It will easily combine several disparate pieces of furniture into a single composition, so when designing an arch, it is important to take into account that a beautiful view can be seen through it, and not a disorderly pile of furniture.
Wardrobe in the form of an oriental arch
Do you need to introduce color accents into the room? It is enough to paint the slopes of the arched opening in a contrasting color and now the familiar environment has been transformed. In this case, you can paint not only the internal ends, but also the entire contour, including the floor.
Drapery in an arched opening will create intrigue and a sense of mystery. It is better to choose a minimalist design of the opening and a plain fabric of a deep and rich shade. In this case, you will avoid excessive theatricality and affectation. The interior will seem more feminine, but will remain stylish and modern.
Arched corridor in a private house
Important: perspective is a strong visual device. The visible enfilade of arches can be replaced by fake photo wallpapers. This decor will add a feeling of additional space to the room; you should make sure that guests do not accidentally enter with their foreheads into a non-existent opening.
The most popular designs - photos
There are a lot of arch designs, but there are the most popular ones that are most often found indoors:
- Segmental.
- Rectangular.
- Correct.
- Curvilinear.
- Round.
- Rectangular.
- Oval.
Many designers use non-standard arches that enliven the interior of the room. If the arch is mounted in a studio kitchen, then it can be supplemented with a bar counter or a decorative partition with segments. If the room is non-standard, then the arch can be built in an irregular shape. Arches of the correct shape are often used because they are not suitable for any interior.
Many people, when creating zones in a large apartment, use offset arches; this helps to separate the recreation area, where the sleeping area is hidden behind an improvised partition.
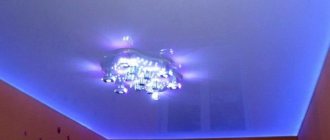
For a more original solution, you can build convex plasterboard elements on the arched structure and equip it with lighting.
Original arch design with lighting
You can decorate arches with stencils and various decorative items, for example, artificial climbing flowers.
Do-it-yourself arch - step-by-step instructions with photos
Photo from the site: dveridoc.ru
It is clear that you can read anything, and even memorize all the information, but still not learn how to do anything. Any instructions that we have at the information level will remain just words until you pick up a tool and start cutting, gluing and bending something. In practice, everything may seem much more complicated, but if there is a great desire, then any person can cope, even one who has never previously had anything to do with repairs, much less construction.
For ease of understanding, instructions will be given for creating the most popular and fairly simple domed arch, that is, the classic arch. Only after completing it, and finally understanding the details, can you move on to more complex tasks and structures. Moreover, the tools and materials that may be required for your work should be collected in advance, so as not to rush to the store and back if suddenly there are not enough screws, the profile does not fit, and so on.
Do-it-yourself interior plasterboard arches with photos
Photo from the site: koffkindom.ru
First of all, as already mentioned, you should acquire absolutely everything you need in your work. Moreover, there is no need for special, professional equipment; most often, the tools are available in the “arsenal” of any “hands-on” man and real owner.
- Purchase several sheets of drywall, six and a half millimeters thick. Experienced craftsmen recommend using a special grade of gypsum plasterboard, which bends best. It is also worth considering that for rooms with high humidity, it is worth using resistant drywall, it is usually green.
- Regular self-tapping screws, it is better to make a reserve, measuring 3.5 mm by 25 mm, as well as 4.2 mm by 13 mm.
- A jigsaw, or a special knife for cutting drywall, as well as good metal scissors.
- Metal rack profile, commercially available. You can work with wooden blocks, but it will be much more difficult, and you will also need carpentry skills.
- Pliers and pliers.
- You will also need a drill, but it is better if you find yourself a special device that immediately combines the functions of a hammer drill and a screwdriver.
- Construction pencil, simple needle roller, quality level, serpyanka tape for final finishing, tape measure for taking measurements.
- Spatula and putty for final finishing.
Features of using arched structures
There are several traditional ways to use arches in a living space:
- the most popular is the connection of a loggia and a room, which will help to qualitatively increase the space. As you know, no one will allow you to remove the upper load-bearing beam; it can only be disguised as an arch;
- the kitchen and living room can turn into a kitchen studio. A coupe arch with a bar counter is often used - this adds beauty and elegance to the room. The highlight of this interior can be a false fireplace made of plasterboard;
- with the help of an arch you can hide the hood in the apartment;
- by arranging an arch in the corridor, you can visually stretch and expand the opening and space; if there is little lighting in the room, then you can arrange a wide arch between the corridor and the room;
Design option for plasterboard arches in the corridor - an arch with a niche is preferable in the interior of a children's room. Can also be used in the living room;
- in any room, if it is large, you can separate the work and relaxation areas with an arch;
- arched partitions can hide flaws in the layout;
- Illuminated designs will help refresh the design of the apartment;
- if the apartment design is made in the style of the East, then an arch is even built in the bathroom.
Important! For an arch in the bathroom you need to take moisture-resistant plasterboard. Green gypsum board sheets can even be used under ceramic tiles, as they are treated with special compounds.
Arch in the apartment
Firstly, arches help save space. They make it possible to view the entire interior. However, for the design to look harmonious, each arch must have its own appearance, which creates a certain atmosphere in the apartment that you need. Like any interior detail, arches have their own tasks.
It is impossible to name absolutely all the functions of an arch in one article, since they are as diverse as the design options for your apartment. An arch can act as a border between two zones, for example, between a living room and a kitchen, however, it should not divide the ensemble, but, on the contrary, should visually unite it. Often owners of small apartments resort to this design solution. After all, an arch makes the room more spacious, uncluttered, and exclusive.
As a rule, interior designers try to get away from the idea of building a holistic space using an arch. In general, we can safely say that for a modern apartment, especially a small one, an arch is the most irreplaceable interior detail.
It will make your home more comfortable, and the interior alive and modern.
There are a huge number of options for arch shapes that help create the necessary atmosphere. But in general, they can be safely divided into two main groups: active and passive.
Arches that are simple in design are considered passive. They are the ones most often found in modern apartments. But unusual, complex arches that offer an excellent overview of several rooms at once are considered active. As a rule, complex arches are also actively decorated with various elements, although in fact the arch itself is already a wonderful, self-sufficient decoration.
Naturally, the decor of the arch as a whole depends on the style in which the room or your room or even the entire apartment is designed. If the apartment is made in the Art Nouveau style, then the arch is best made of wood, since this is the material that will look most organic in such an apartment. In this case, thin painting along the rim of the arch will also look very stylish: it will be able to focus attention on all the main objects located behind it. Well, if you are a fan of high-tech style, then remember that the arch must also meet all the canons of this design direction.
How to mount an arch yourself
The design is simple, but it will require attention and perseverance from you. To get a positive result, you should follow the instructions described below.
Sequence of work
- The first thing to do is decide where the structure will be located and what function it will serve. It will be a simple arch for beauty, for example, dividing a room into zones. Or it will be a special partition with shelves for the living room or hallway. Or maybe you want to build a niche, framed by an arched curved structure. Why do you need to decide on this before starting work? It's simple, so you won't make unwanted mistakes and waste of material.
- Next, the design should be drawn on paper, defining all dimensions. This does not have to be a professional drawing; it is enough to make a schematic sketch that you will use as a reference during installation.
Detailed drawing with dimensions of a plasterboard arch - The next step will be to assemble the partition frame from plasterboard. If the structure is curved, then it is assembled from a metal profile, which can be bent in any direction by making cuts on the side walls.
- As soon as the frame is ready, a gypsum board cut according to the pattern is screwed onto it: first straight strips, then curved ones.
- The last stage will be the finishing of the finished plasterboard structure: plastering, puttying the plasterboard, painting the wall, or finishing with another finishing material.
Finishing
At this stage, you can go into more detail, since there are many options for cladding arched structures, depending on the design of the room. Let's consider several options:
- Classic arched structures are in most cases finished with natural wood. The material is natural, has a beautiful appearance, a natural pattern, and you can also use stains of different colors. If you can’t afford the use of wood, you can use MDF panels with imitation of expensive wood species;
- Natural or artificial stone - often used in rooms decorated in the loft style. Thanks to this decoration, the room has a brutal look, it simply reeks of the Middle Ages;
Several options for finishing plasterboard arches in an apartment - PVC panels will be relevant in a minimalist style. The pattern and color must match the overall interior of the apartment;
- Decorative brick is an excellent solution for any interior. If the apartment has a partition with an arch that zones the room, then by laying decorative bricks on it, you will make the interior unusual and stylish.
In other words, there are no specific rules in the design of arched structures; it all depends on your preferences. In the video you can see photos of apartment interiors with arches, all the variety of room design, design solutions and design styles for plasterboard arches.
Interior and door arches made of plasterboard - how to make them step by step with your own hands?
One way to increase your living space is to remove the doors. But there is not always the opportunity or desire to break down the walls. Then the former doorway is designed in the form of an arch. Another option for using arched openings is to divide a long corridor into zones, breaking up an overly simple geometry. When making repairs on your own, arches are most often made from plasterboard: it’s easiest to make them yourself.
Types of arches
Interior or corridor arches can have different shapes. They differ mainly in the shape of the upper part and sometimes in the way they are connected to the vertical parts. Their main types are presented in the photo.
Types of interior and corridor arches
This group lacks one of the most popular recently - the half-arch. They have a rounded corner only on one side, on the other it remains straight. This is where the name came from - semi-arch. It looks good in modern interiors: minimalism, hi-tech, maybe art deco.
One of the options for a semi-arch in the interior
The classic is distinguished by the correct shape of the top. This is strictly a semicircle, the radius of which is equal to half the width of the doorway. This type looks good with an opening height of at least 2.5 m. It fits well into any interior, but looks best in a long corridor, or instead of the entrance door to the kitchen.
A classic arch requires a height of at least 2.5 m
An arched opening in the Modern style is distinguished by a small radius of curvature and a sharp transition at the junction with the vertical components of the opening. It looks good if the walls and ceiling have a more or less simple design. Looks great in place of the former balcony door, good at the entrance to the office.
Art Nouveau arch on the site of a former balcony door
The “Romantic” style arch is more likely to be simply rounded corners (mostly masters call it that). Looks good with a large width and not the greatest height.
The “romantic” shape is good with large width and small height
The “ellipse” shape is very close to “romance”. It differs only in greater curvature in the middle part. Also suitable for low and wide openings. It just looks a little softer.
Suitable for openings of large width and not very high height
Trapezoid is a non-standard design consisting of broken lines. It is difficult to play out in the interior, therefore it is used infrequently: for some non-standard designs.
One of the design options is trapezoid
It is very similar to an ordinary opening, and that is essentially what it is, only without the door leaf. For greater originality, it is often accompanied by wooden carved elements in the form of columns on the sides. In this form it is good for classical interiors, as well as ethno-style - Greek or Roman, depending on the type of columns.
Portal with wood frame
For decoration in modern styles, they use another example - next to the main arch, smaller portals are located. This technique allows you to “beat” a simple form.
Another version of the “portal” arch
Before you start making an arch, you need to decide on its parameters. select the type, and then the parameters: where it will start, and what the radius of curvature will be. It could be a really sharp bend, or it could just be some rounding of the corners.
Rounded corners in standard doorways look better than steep arched curves
To understand how your chosen shape will look, you can cut out a template from cardboard and attach it to the doorway. Evaluate the effect. If everything suits you, you can make a blank using this template. But only one - for one of the sides of the opening. The second one needs to be done in place, otherwise it will turn out crooked.
Step-by-step instructions with photos: the fastest way
Do-it-yourself plasterboard arches are made in different ways. This takes a minimal amount of time. Having decided on the shape, we proceed to installation. We attach a frame to the prepared opening, cleared of peeling plaster and relatively leveled, according to the dimensions of the future arch. It is made from a drywall profile or a dry wooden block of a suitable size. Sometimes, if the wall is narrow, you can only choose wood.
A profile frame is screwed to the selected dimensions
To begin, we cut out a rectangle from drywall to the size of the future arch, find its middle, mark it, and then temporarily screw it into place. We retreat from the edge 12.5 mm - the thickness of the plasterboard sheet. If the adjacent walls are already plastered, add a couple more millimeters of putty so that the surface can be leveled.
Screwed the drywall into place
Now we take a piece of profile or hard corner and set aside half the width of the opening from one edge. At this point we make a hole in the corner and insert a nail into it. We stick this nail into the middle of the doorway we marked earlier on the sheet. It turns out to be a kind of compass, with which it is easy to draw an ideal line.
Device for outlining an arc
By changing the mounting height you can get a more or less high arch. If you need a flatter curve, increase the length of the “compass”.
Using a corner we draw an arc
Having removed the sheet, we cut out an arc along the outlined contour. This can be done with a special drywall saw, a metal saw with a fine tooth for a smoother edge, or a jigsaw (there will be a lot of dust). If the cut is not very even, smooth it out using sandpaper attached to a grater. With this device we achieve a perfectly even curve of the shape we need. We fasten the cut fragment of the arch - the side wall - back into place.
We fix the cut out fragment
If everything is smooth, there are no distortions or irregularities, on the other side of the opening we attach the same sheet of drywall as a few steps earlier - a rectangle or square, depending on the shape. It must be fixed strictly vertically. Now we transfer the shape of the arch onto it. We take a square, at a right angle and press one side against the drywall, onto which we transfer the arch, and the other side against the arch. Having aligned the square perpendicularly, mark a point with a pencil. We make such points along the entire arc. The more often they are done, the easier it will be to draw the line and the more accurate the match will be - the less you will have to grind down.
Transfer the arch shape to another sheet of drywall
Why is it so difficult and not just to make a copy of the first sheet? Because few openings are symmetrical. As a result, installing the second sheet so that the lines of the arch coincide is very problematic.
Having marked all the points, remove the sheet, draw a line, and cut along it. We install it in its original place. Now we take the smoother again with sandpaper and now we smooth both edges until they match completely. One point - the trowel should be wider than the opening so that both walls of the arch are captured in one pass.
Level both walls at the same time
We measure the length of the arc, cut out a piece of the profile of the same length, make notches on the walls every 3-4 cm. This tape will need to be secured along the arch arch on one side and the other.
How to cut a profile for an arch
We fasten it with self-tapping screws, carefully, pressing the profile and holding it with a block, not with your fingers: it’s easy to get the screw into your fingers. By the way, you need to wear gloves when working with the cut profile. If you don’t, you’ll definitely cut your hands.
We fasten the notched profile, simultaneously giving it the shape of an arch
By the way, the back of the profile can be aligned along the edge - it’s easier to work this way, but the joint will still have to be sealed later. Screw the strip to the other side in the same way.
This is a bottom view - profiles are attached to the sides
There is a second way to attach the profile - attach it to a quick-setting universal glue, such as liquid nails. This method is acceptable if the opening width is small. If the arch is thick, the glue may not be able to withstand the mass of drywall that will be attached from below.
The next step is to attach the jumpers. First, the depth of the arch is lost, 1-1.5 cm is subtracted from it. This will be the length of the lintels. Cut profile pieces of this length.
Jumpers are cut from the same profile
At the places where the jumpers are attached, the “petals” are cut off, and the prepared fragment is installed and secured. It should not rest against the walls, it should be located approximately 5 mm from the back. Jumpers are needed to make the structure more rigid, otherwise it “walks” when pressed.
Fastening jumpers
Next, you need to cut out a rectangle from drywall that will cover the structure from below. Its width is determined simply - from the outer edge of one sheet of plasterboard to the outer edge of the second sheet. The length is measured with a flexible tape (can be a tailor's tape) or a tape measure with an assistant. We attach this sheet with self-tapping screws to the arch frame. The sheet has to be bent, but read how to do this a little lower - closer to the end of the article.
We attach a strip of gypsum board to the arch
Next came the finishing work: a special corner is attached to the corner, everything is puttied using the usual technology: first the starting joints and corners, then the finishing one.
Arched opening made of plasterboard: second method (photo report)
This method is good if the thickness of the partition is small: try attaching the profiles if the gap between them is several centimeters, and then attach the jumpers. It all starts the same way: the first wall of the arch is cut out, attached and transferred to the second sheet.
First we also cut out the sides
Afterwards, wooden crossbars are cut along the width of the gap between the two sheets, which are attached along the edge of the arch with self-tapping screws.
Insert wooden blocks cut along the width of the opening
The cut strip of drywall is fastened starting from one of the sides. To make it more convenient, you can fix it with clamps, since the thickness of the wall is small. When attaching the strip, you can use the self-tapping screws that were used to fasten the bars. This way you will definitely hit the crossbar.
Using clamps, the strip can be fixed
Then all that remains is to secure a special perforated corner in the corner and smooth out the unevenness.
A corner is attached to the arch arch, everything is puttied
Putty allows you to hide all the flaws
It is also more convenient to smooth the dried putty along the arch arch with the entire plane of sandpaper attached to a grater. It’s unpleasant that dust falls into your eyes, making it almost impossible to work without glasses.
DIY plasterboard arch is ready
How to make an arch instead of a door: method three - typesetting technique
Another way to make arches from plasterboard with your own hands is by typesetting. The arch is divided into segments and assembled from pieces that create a curvature close to the required one.
The arch is assembled from plates cut from plasterboard
They are attached to putty diluted with a mixture of PVA and water. This batch dries quickly, so first we cut the plates and try them on. You can fold it on a table, but the vault will turn out upside down, but it will allow you to evaluate how correctly the plates are assembled.
Side view of the arch opening
Then the plates begin to be attached to the opening, periodically strengthening them with self-tapping screws for reliability. Place washers under the heads so as not to push through the cardboard. Remove excess putty immediately. If it gets stuck, it’s impossible to tear it off. The finished surface is treated with a primer to improve adhesion (adhesion), and then puttied, leveling the arch. To make it easier to display, you can use a template attached on both sides.
A putty arch looks like this
Making sharp bends using this technology is not easy, but for rounded corners and semi-arches it is a great way to do without profiles.
How to bend drywall
One important detail: standard wall plasterboard does not bend well. For curved surfaces, they specially came up with thin ones - 6 and 6 mm thick. This bent part is easier to make from it. With a slight curvature, such a thin sheet can bend easily and without tricks. If you don’t want to buy thin GVL, there are two ways to bend the standard one.
The first is to take a needle roller and roll the cut section well on one side. You need to roll with force so that the plaster breaks. Then the leaf is soaked in water and left for two to three hours. After such procedures, it should bend quite well. You take it, fix it on one side, and gradually press it against the arch frame, bend it, gradually screwing it along the edges with self-tapping screws. The method is not bad, but if there is a lack of experience and insufficient processing of the gypsum, the sheet may burst. You will either have to mask the gap later, or start over.
Roll the strip with a roller with needles
The second way to bend drywall: on one side, make notches with a knife approximately every 4-5 cm. The notches should cut the paper. This strip is also gradually fixed, breaking the plaster as necessary. It bursts along the cut lines with light pressure.
Notches on one side make it easy to break the plaster
Video on the topic
Stylish arches
Drywall is a very malleable material, so you can use it to make an arch in an apartment of any design, which will transform the room, making it unusual and original. Its low cost plays a big role in the popularity of this material.
Arches of a classic design can be found in any room, as they are simple in execution and appropriate for any design. Stylish and original designs are used in studios or large rooms. You can often find curved structures in offices where you need to divide the space into zones.
A selection of plasterboard arch designs in various styles
A teardrop-shaped arch that separates the space of a room or kitchen from a loggia looks beautiful. You can install an arched structure in a high-tech style with shelves and lighting. Stylish plasterboard arches in an apartment are often decorated with various elements and decor, for example, you can install polyurethane panels decorated with gold leaf. This design will look luxurious in any interior. In fact, the choice is great, this can be judged by looking at photos of interiors with arches.
Features and variety of interior arches
We are interested in how, with the help of plasterboard structures, you can quickly change the appearance of rooms, their size, “let air” into the room, and remove unnecessary doors and walls. What functions do the structures perform:
- for zoning large rooms;
- decorating the door opening;
- to combine two rooms;
- visually raise the ceilings and add “softness” to the interior;
- Blind options are the background for decorative elements.
“Let” air into the room
If the door interferes with the comfortable placement of furniture or interferes with convenient movement, an arched passage becomes an option for the room.
Basic forms of arches for different directions:
| Form | Style |
| Portal | The straight shape imparts understated elegance. It is enough to frame the doorway with decorative elements and the task of changing the room is completed. |
| Roman | Historically, the classic version requires high ceiling heights. The semicircular shape is complemented by basic elements: columns, semi-columns with capitals, rods. |
| Thai | Features an asymmetrical shape. One side remains straight, the second has any plastic shape: semicircular, elliptical, with various shelves and small openings. |
| English (British) | The laconic, truncated arc of the arch emphasizes the pedantry of this interior. Corresponds to the Art Nouveau style. The corners are decorated with classic volutes. |
| Ellipse | Different shapes of semicircle and oval change the room. Used in low-height rooms. This shape visually raises the ceiling. |
| Russian (Slavic) | The rectangular shape has small rounded corners at the top. The portal is decorated with wide platbands with paintings or carvings. |
| Transom | The optimal way to connect a door (can be double-leaf) and an arched span. The main part is decorated with corrugated glass or stained glass pattern, which should match the style of the interior. |
| Trapezoidal | Quick version of the arch. Decorative elements cover the upper corners of a passage or doorway. |
Thai with asymmetrical shape
Photo examples of designing a plasterboard arch in an apartment interior
Finishing arches from plasterboard sheets
Finishing and getting an answer to the question of how to make a beautiful interior arch with your own hands first begins with drawing up a plan. The material, its type, and finishing are specified in advance.
Finishing putty includes the following steps:
- Preparation of a homogeneous mixture, the consistency of thick sour cream. Prepare the solution using a special drill attachment.
- Treatment of plaster, which is used to seal the seams in advance so that it does not subsequently crack.
- Apply the putty using smooth movements with a spatula. It is better to do 2 layers to prevent the formation of tubercles.
- Sanding after complete drying - so the surface becomes even and smooth.
Now the process can be considered complete. All that remains is to arrange the finishing according to your own taste in accordance with the style of the room.
Painting
One of the simplest, but no less attractive decorative options is painting. To do this, first thoroughly clean the surface. If desired, a relief is created on the paint using special mixtures. To ensure evenness of joints and corners, special corners are used.
painting
But you can not just paint the arch, but create a unique pattern on it, painting it using spray paint and stencils. By choosing the right combination of colors and background, you can achieve a unique arched design.
Stucco molding and PVC decor
The design of the passage with stucco molding and decorative panels is usually realized using MDF. This material perfectly imitates wood, covered with veneer and polyvinyl chloride film on top. The design can be selected to suit any interior. The panels are fastened with nails without heads, and the stucco molding is fastened with liquid nails.
Opening with stucco
Wallpaper
The arched part of the plasterboard wall covered with wallpaper also looks appropriate. This is a common finishing choice. But you will have to tinker to cut and fit the wallpaper efficiently, but this option helps save money and time. There is also the possibility of wallpapering for painting, which after some time can be painted during cosmetic repairs.
Decorative rock
Cladding with stone or artificial stone-like tiles, also with mosaics is an original solution. For naturalness, the elements are arranged in a chaotic order. Gypsum imitation of natural stone is an excellent choice, affordable, and it is also easier to work with, unlike natural materials.
Wood veneer
MDF panels for finishing are an equivalent replacement for natural wood. The decor of doorways with MDF panels can be made interesting and original thanks to the wide range of material appearance.
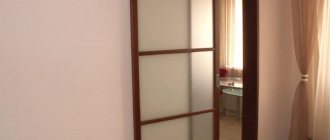
Stained glass, glass, mirrors
Finishing an arch with mosaics is a painstaking job, but once completed, the result is truly mesmerizing. The advantages include:
- wide choice of sizes, shapes, shades;
- water resistance;
- strength;
- long service life;
- wear resistance.
But against the backdrop of the advantages, it is important to say about the disadvantages of this finish:
- long-term work;
- high price.
You can choose a mosaic to suit every taste: metal, ceramic, glass and mirror.
Stained glass decor