Nowadays, the building materials market is so diverse that everyone will find what they need, both in quality and price. One of the most used materials in construction is sealant. With its help, you can protect the joints between materials from moisture, as well as eliminate some defects. The only problem with the sealant is the difficulty in removing it from the tube without a special tool. In this article we will tell you how to use a caulk gun. Using this tool will increase your work speed and make it more enjoyable.
Design and principle of operation
Regardless of what type of pistol, the basic structure is the same for all. It has a body, a rod, with the help of which the sealant is squeezed out, a trigger and a latch that holds the rod. The task of the work is to squeeze the contents out of the package. This process is very simple: you pull the trigger, which, in turn, sets the rod in motion. Next, the rod is pressed onto the bottom of the sealant package, which serves as a piston, and it comes out with ease.
Types and classification of pistols
Sealant guns are divided according to several parameters: appearance, complexity of the body structure, method of supplying the sealant.
| By design features | |
| Semi-hulled - they are not designed for long-term use. Such guns are suitable for small household work, are not very durable in use and are relatively inexpensive. | |
| Skeleton pistols, like half-body pistols, can cope with the same amount of work. They differ from each other in that the skeleton pistol is more convenient to use. It consists of two ribs and a rod, which allows the tube with sealant to be more firmly fixed in it, resulting in better quality of work. The cost of a skeleton pistol is higher than that of a half-body pistol, but it will also last longer. | |
| Case pistols are intended for those who do repair or construction work quite often. They are distinguished by their versatility; they can be used both for sealant in hard tubes and for sealant in soft packaging. Their cost is higher than all others, but due to the fact that the consumption of sealant with a housing gun is minimal, it is considered more profitable. | |
| According to the method of applying sealant | |
| Mechanical is the most affordable option. The supply of sealant in such guns occurs only due to the physical strength of the hands. Mechanical pistols are purchased for small household purposes. | |
| Pneumatic - used for medium-sized work. The principle of its operation is such that the sealant is released due to the pressure of compressed air. This type of gun has a special valve that allows you to discharge excess sealant and minimize its losses. | |
| Electric - allows you to make a more even seam and reduce the time required to complete the work. But to use them, appropriate experience is required. In addition, the cost of such a pistol, compared to mechanical and pneumatic ones, is much higher. | |
When choosing which pistol to buy, you need to consider how often you plan to use it and what your financial capabilities are.
Description of the tool
A pneumatic sealant gun consists of two words. “Gun” is used due to the principle of operation, since the mixture is released by pressing the trigger, and the first part of the word “pneumo” means that the mechanism operates using compressed air. This gun is used to perform small but serious work, so it is perfect for workshops providing commercial services, or for self-repair of an apartment or country house. The tool operates using air supplied under pressure from a compressor. Because of this, it is impossible to move around the room while working; you will have to do it in one place.
The composition of silicone, polyurethane or acrylic is applied after lowering the handle; the pressure force of the piston can be controlled, so that the mixture will be applied accurately and economically. Pneumatic pistols exist only of the closed type. A closed housing is a container that is shaped like a pipe or cylinder. Thanks to this, they are firmly fixed and do not allow substances to penetrate into the device. The piston air gun is used to apply seam, glass or spray sealant.
Directions for use: instructions
Regardless of which type of caulk gun you choose, the instructions for use are similar for all. So, how to properly prepare a pistol for use? Let's look at each stage in turn:
- Using a stationery knife, carefully cut off the spout of the tube at an angle of approximately 45°. The width of the hole should be selected depending on the width of the intended seam.
- Having unscrewed the plastic cap with the cut off spout, pierce the protective valve on the package, and then screw the cap back along the thread.
- In order to insert the sealant package into the gun, you need to free up its internal space. By pressing the latch, push the rod back until it stops.
- The tube with sealant is installed into the gun body until it stops. The piston is pushed in until it comes into contact with the bottom of the package.
- To supply the sealant, pull the trigger of the gun. The speed of the extruded composition depends on the force of pressing.
When using sealant in soft packaging, only case guns are selected. The usage diagram is simple:
- Unscrew the applicator with the spout on the front end of the gun.
- Free up space in the gun in the same way as when using sealants in a tube.
- Using wire cutters, carefully cut off the metal bracket on one side of the package.
- Insert the package so that the cut end is in front.
- Screw the applicator back.
Video: how to insert sealant into a skeleton gun
Video: features of using a frame pistol
There are several rules for using a sealant gun:
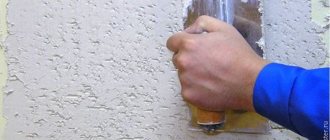
- Before applying the sealant, it is necessary to thoroughly clean the area where it is applied: remove dirt, remove dust and degrease with alcohol.
- You can stick masking tape on both sides of the gap. Its function is such that when applying sealant, all excess will fall on it and you will not have to wipe off the excess. Peel off the tape immediately after finishing work. The seams are clean and even.
- For good and durable adhesion of the sealant, the surface is treated with an acrylic primer.
After finishing the work, the spout of the package is cleaned of any remaining sealant and closed with a special cap. This will protect the sealant from drying out. The sealant can remain closed for about three months without losing its qualities. The gun itself is also wiped. If this is not done, the gun can quickly become unusable. The metal case is cleaned with a special metal solvent. Plastic surfaces are wiped with soapy water.
Do not forget to ventilate the room well where you are carrying out repair work.
Video: How to Optimize a Casing Gun for Sealant
If during the repair you need to seal several cracks or joints, you can carry out these actions yourself using sealant. As everyone knows, sealant is mostly sold in packages with a long spout, but it is impossible to get the mass out of there without a special construction gun.
Seeing such a gun for the first time, not everyone will understand how to use it. But this article will tell you in detail and show that this unit is not so difficult to use, but it simplifies the repair process much.
COX Airflow 3 Sachet 600 ml
| retail 9,000 ₽ | small wholesale 8,500 ₽ | wholesale |
8 000 ₽
- Product description
- Technical documentation
Airflow 3 Sachet 600ml allows for quick and easy application of sealants.
Airflow 3 Sachet is designed for industrial applications. When used in areas with access to compressed air, this gun provides a significant increase in productivity over manual guns.
Peculiarities
- Ergonomic design;
- Lightweight and convenient to use;
- Easy application of sealants;
- Precise control thanks to built-in regulator;
- Built-in silencer for quiet operation;
- Smooth, continuous flow of sealant;
- Made in Great Britain.
The new generation Airflow 3 Sachet is highly ergonomic: it provides exceptional comfort and is the most comfortable and simple air gun in the world.
QUIET AND POWERFUL
Airflow 3 Sachet is ideal for use on production lines and refinishing applications.
To enhance performance and improve user comfort when using the gun indoors, the Airflow 3 features a built-in silencer that reduces noise levels to less than 70 dB.
PRECISION CONTROL
Thanks to the adjuster conveniently located on the front of the handle, the user can control the air flow through the cylinder with one finger. As a result, the Airflow 3 Sachet 600 ml can easily apply a wide range of low and high viscosity materials, available in cartridges, tubes and bags.
Types of sealant guns
A construction gun is a device for effectively squeezing out sealant and has a not particularly complex design. But it would seem that such a simple thing is divided into types in accordance with the type of compartments for sealant, the structural features and supply of the composition.
According to the first criterion, devices are divided into sheet and frame. The second type is more common, as it has better and more reliable retention of the cartridge. Based on the method of supplying sealant, battery-powered, electric and mechanical units can be distinguished. Each type has pros and cons, so we can’t help but say:
Based on their design, devices can be divided into skeletal, tubular and semi-hulled. The first type is designed to work with 310 ml cartridges. Half-body versions of pistols are not very durable and are inconvenient to use. They also use 310 ml cartridges. The tubular type gun is suitable for professional work. It needs to be refilled less often, since absolutely any cartridge options are suitable for it.
Advantages and disadvantages
The reason for the demand for sealant is considered to be the many advantages of an air gun for this composition.
Its main advantages are:
- versatility;
- neatness of the seam;
- accuracy of application of the composition;
- frame strength;
- rust resistance;
- resistance to mechanical damage;
- ease of use;
- low operating costs;
- absence of defects in work;
- durability.
In addition, the advantage of this gun is the fact that the model can have a body for a mixture that is prepared independently at home. It allows you to work with bulk sealants. Despite the external complexity of the system, even a beginner can work with it. At the same time, the quality of work will be quite high.
Since the risk of breakage of this device is low, it lasts for a long service life. Despite its many advantages, this device is not portable. It is inconvenient to transport. However, this is the only drawback that cannot be considered significant against the background of all the advantages.
Working with a pistol
Using a caulking gun is not difficult. Having familiarized yourself with the main nuances, you can safely get to work and be confident in a clear result.
The operating principle of such a device is not at all complicated. The gun works by applying pressure to a tube of sealant. As a result of this effect, a strip of material comes out of the container, which is mechanically aligned and placed in the right place. The pressure comes from a rod that is driven by a trigger. The main problems occur before the sealant is inserted into the gun.
Important! A pneumatic tool uses air instead of a rod.
Algorithm for using the tool
- Remove the restraints. When working with a skeleton or half-body caulking gun, there will be no problems with removing the stops. In addition to removing the limiting elements on the tool itself, you need to remove them on the container itself with the composition, if there are any on it.
- Pull out the rod. To move the rod, you need to press the lever all the way and pull out the rod. This frees up space into which a container with sealant is installed. Afterwards you need to press the trigger a few more times so that the tube is firmly secured.
- Release the sealant. We cut a hole in the cartridge itself that will allow the composition to pass to the nozzle. Usually the nozzles come in one piece, so it is also necessary to cut off the top part to create a hole of the same diameter as the thickness of the seam needed.
If a tubular or syringe type gun is used, the filling algorithm is slightly different. First of all, in this case, a hole is made in the container with the compound and its cut side is laid towards the hole through which the sealant will come out.
Important! Before inserting the container with sealant, the rod is removed. This is done in the same way as in the previous case.
As a rule, a set of tips is included with the gun. If the selected nozzle does not have a hole for the sealant to exit, you can make one by cutting off a small part of the tip. This should be done at an angle of 45 degrees.
Each individual caulk gun can be equipped with additional functions and certain elements that help during operation. That is why it is a good idea to study the instructions that come with the purchased pistol model.
Advantages
The main advantage of the closed type of tool is reliability compared to open and semi-open options, which tend to become deformed after use with 2–4 containers of material. Owners of such products can, in principle, forget about such a phenomenon as piston misalignment, which is often the problem with skeletal models. Another important advantage of such a gun is its independence from the size of purchased containers of sealing material, since sealant can be filled into a closed case from any package. At the same time, a wide range of closed instruments of different sizes are currently produced. Simple mechanical options are available with a capacity of 310 ml (for example, T4P in an aluminum case), 400 ml (Kaem 2050-180400), 420 ml (Steel 31105) and 600 ml (Steel 31104).
Sealant gun operating instructions
First, a little advice. If at the right time the gun is suddenly not at hand, then in order to knock the sealant out of the cartridge, you can use any available tool. For example, a hammer.
To use the gun successfully, follow these steps, which we have illustrated with pictures.
Step 1. First, take care of personal protection - at a minimum, wear gloves.
Step 2. Next, prepare the surface to apply sealant. In this case, we cannot advise anything specific, since everything depends on the instructions of the cartridge manufacturer. Everything should be written on the back of the latter. To remove the previous coating, use a sharp knife or triangular scraper. Remove remaining crumbs with a brush or use a vacuum cleaner.
In addition, the working surface must be degreased.
Step 3: Next, remove the limiters. If we are talking about a half-body or skeleton pistol, then this procedure will happen quickly. First, make sure that the tube does not have a special bottom-limiter. And if it is still present, then remove it.
Step 4. Let's figure out further how to use a sealant gun. Then pull out the rod in the device. To do this, press the lever and remove the part. Place the cartridge in the place that was vacated by the rod and apply a few gentle pressures on the hook to finally strengthen the container.
Installing a cartridge in a skeleton sealant gun (photo)
Note! In most cases, such cones come sealed. And if you also have it sealed, you will have to cut off the end of the cone to form the required seam diameter. It is important that the cut dimensions are smaller than required for the job.
But if you decide to use a tubular or syringe tool for work, then you should use it slightly differently.
Installing a cartridge into a tubular (syringe) gun for sealant
Photo - diagram of a tubular gun
Step 1: First, make a hole in the sealant tube. If you are using packaged material or a “sausage”, then cut off one corner/end with extreme care so that the mixture can easily come out of the bag.
Step 2. Next, place the prepared container with the material into the tool itself, but so that it is the cut end of the container that goes to the tip, through which, in fact, the strip of material will be squeezed out.
Step 3. Of course, before this you need to remove the rod - do this in the same way as with a skeletal-type device.
Step 4. Guns are often equipped with several nozzles with such tips. Choose one of them and screw it onto the cylinder. If you notice that there is no hole on it (the tip), then take a utility knife and cut the tip, but strictly at an angle of 45 degrees. Of course, you also have to guess the size of the future hole in order to get a seam of the required diameter.
Be that as it may, if you have a sealant gun on your hands, then you must also have the manufacturer’s instructions. Take the time to familiarize yourself with it, since manufacturers often equip tools with some improvements and developments that are not provided in standard models.
Video - Sealant application technology
As we have already found out, if the tool is properly equipped, then there should be no difficulties with its operation. And if you installed the cartridge as described in the instructions above, then you have already done half the work. Therefore, all that remains is to slowly press the trigger and apply the mixture to the desired seam. If you have a semi-body or skeletal type tool, it may take a couple of initial clicks for the required amount of material to fill the void in the tip. After this, make only smooth movements.
And if the model is battery-powered or electric, then by pressing the trigger you will regulate the intensity of the material supply. Therefore, if you are picking up a tool for the first time, then first practice in inconspicuous places - for example, seal a seam in the far corner of the room. After a little practice, you can move on to more visible places.
If you need to trim something or insert material into a gap, wet your fingers a little and run them along the surface. Use soapy water for this so that the mixture does not stick to your fingers. By the way, it is with this water that it is most convenient to remove the formed drips.
Note! The sealant does not require additional drying - in the fresh air it will acquire the required strength in just two to three hours.
And one more good tip: after you finish sealing, be sure to rinse the instrument with warm water.
Go ahead. To make the seam beautiful, use masking tape - stick it on both sides of the gap and remove it immediately after applying the sealant. To make a beautiful and, more importantly, high-quality corner seam, do the following. First, gently wet the side surfaces with soapy water. First prepare a small stick made of plastic or wood; Cut one side of the stick so that you can use it to set the shape for the seam. Accordingly, the final shape of the upper part of the seam will no longer be formed by the tip of the gun, but by the stick mentioned above.
Note! If you accidentally squeeze out too much sealant, don't worry - there's nothing wrong with it. Simply dry the seam with a hairdryer and remove the remaining material from the side surface using the same stick dipped in soapy water.
Method of application and operating rules
Sealing agents are produced only in specialized plastic and metal cylinders, since when they come into contact with air, they soon dry out and become unsuitable for further use. It is difficult to get the mixture, because it only yields with constant pressure on the lower piston. Therefore, a handicraft homemade tool will not bring much benefit and you will have to purchase specialized equipment, for example, a pneumatic gun. Before performing work, it is necessary to prepare the surface using the instructions on the material packaging. Remove the old coating and thoroughly clean everything from its crumbs.
Then you need to degrease the surface and treat it with a primer. It is necessary to use the pistol strictly following safety rules. All types of caulk guns have a standard method of use.
Refueling and using the tool is as follows:
- First you need to remove the stopper cover from the back;
- remove the plug from the front or pierce it with a sharp object;
- remove the piston; to do this, hold the handle and press the trigger;
- then you need to insert the cylinder into the container, press the piston all the way and fix the mechanism;
- install a pre-cut conical nozzle;
- perform the work by squeezing the mixture by pressing the trigger and filling the seams with it;
- after finishing use, unscrew the piston and remove the container, after which it can be closed with a tip so that it can be used again;
- Clean the gun with solvent.
To make perfect seams, use the following tips:
- the cylinder cap should be cut with a stationery knife at an angle of 45°, in which case the diameter of the hole made will coincide with the size of the seam;
- to apply the mixture evenly, you need to keep the tool at the same distance from the surface;
- do not rush so that there are no unfilled areas;
- You can pre-glue the surface on both sides of the seam with masking tape;
- for a corner seam, it is better to moisten the sides of the surface with a soap solution;
- to smooth out the applied sealant if necessary and prevent the mixture from sticking to your hands, you can also wet it with soapy water; This method can remove smudges of material.
Basic classifications
Based on the type of compartments for cartridges (that is, containers with the mixture), the tool is divided into two categories:
- leafy;
- framed
The latter are more popular because they fix the cartridge more securely. Depending on the method of squeezing out the mixture, guns are divided into four more categories.
Finally, according to the design features, pistols can be:
- skeletal (designed for cartridges with a volume of 310 milliliters);
- half-body (the volume is the same, but the mechanism is simpler; designed for several cartridges, but extremely inconvenient to use);
- tubular, working with any cartridges.
Note! The best option is a skeleton pistol. It costs a little more, but is more durable.
But how to choose the right option? Let's get a look.
How to choose?
The construction market offers a wide variety of similar equipment, including excellent branded devices. However, choosing this pistol is not as difficult as it might seem.
It is worth taking into account the main selection criteria; this will allow you to choose a high-quality product with good performance indicators.
- The choice of design depends on the type of task at hand. A professional device that can handle a variety of jobs. However, if you need one-time sealing of seams, there is no point in buying a professional tool.
- If the product is not purchased for a one-time job, when purchasing it you need to hold it in your hands to evaluate the body: it should be light, because excess weight can affect the quality of the seam.
- The device must be convenient. Also evaluate the reliability of the device, because you will have to work with the gun more than once.
Please note that good tools are usually not sold at large discounts
Such products are distinguished by a price adequate to their quality and durability. The purchase should be made in a trusted store that has a positive customer rating. It is necessary to evaluate the operation of the piston and the ability to adjust the force of its pressure, and also pay attention to the quality of the connections of the product body. Don’t forget, a pneumatic gun for sealants allows you to regulate the amount of air, which allows you to distinguish it from other analogues. When purchasing, you should ask for a certificate of product quality and compliance with safety standards. Trademarks that value their reputation always provide their products with such documentation.
It is important to take into account one nuance: the type of pistol in question has a closed appearance. This is a cylindrical model with a handle.
The cylinder follows the shape of a tube or cylinder, due to which the sealant inside it is securely held. If you see that the structure is open, this device is not pneumatic.
Also pay attention to the cost. High-quality models from well-known brands are not cheap
This is due to the fact that they belong to professional equipment for construction work. The price of such products sometimes reaches 20,000 - 35,000 rubles. However, this pays off in reliability and convenience. Budget options cost about 9,000 – 10,000 rubles.
Features of choosing a sealant gun
The most important criterion is the amount of future work. If you only need to process a couple of joints, you can safely purchase a skeletal tool. And if you have a more complex task ahead (such as, for example, repairing an entire home), then buy a tubular-type pneumatic tool.
When only accuracy and speed of work are important, the best option is a battery-powered or mains-powered tool. Directly at the time of purchase, see how convenient the gun is for you personally, and whether the elements will interfere with operation.
And pay special attention to the hook itself: see if it is fixed tightly enough, what it was made of, etc. Finally, if we talk about specific brands, then, of course, give preference only to trusted manufacturers who have already earned trust.
As you can see, there is nothing complicated about how to use a sealant gun. All you need is the right tool, a quality mixture, a little practice and, of course, good step-by-step instructions. You have already found the last one - here - so all that remains is to go to the store to buy it.
And finally, another useful video. Good luck with your work!
Video - Using acrylic sealant
Reading time ≈ 3 minutes
Surprising as it may seem, the question: how to use a sealant gun sometimes still arises; this question especially concerns novice craftsmen. And although this instrument is not particularly complex in design, some people who pick it up for the first time may even be stunned by it.
How to choose?
Selecting equipment is not difficult; you need to first study its structure. A pneumatic gun for hermetic mixtures is a professional and almost autonomous tool. When choosing it, you first need to look at the comfort at the time of use, lightness and reliability. And also inspect all the buttons, pistons and housing connections. Next, you should check the thread of the nozzles, the return of the buttons and the ability to regulate the force of the piston pressure. You also need to look at the operation of the trigger, since tension should not be felt when pressing.
It is best to choose models from famous and trusted brands. Of course, they are more expensive, but the quality pays off, especially if large volumes of work are planned.
Among the popular companies producing air pistols, it is worth highlighting several.
- Ani produces excellent piston air guns from good materials, which ensures durable and high-quality results. The models of this company provide pressure regulation up to 8 bar, which allows for the smoothest possible flow of the mixture. They produce models for spraying and joint sealants.
- Wilton also creates tools that last and are built to last. They are made of lightweight aluminum and high quality plastic, using materials that are resistant to popular solvents for cleaning tools.
- Workman Company. Feeding in the tools of this company is carried out smoothly and continuously, resulting in an even seam. The adjustment mechanism operates simply and safely. The models are made of lightweight aluminum and plastic, and there is also the possibility of purchasing additional attachments.
Sealant gun - what is it?
If you look at the photos provided on how to use a sealant gun, you can generally understand what kind of tool it is and how the sealant should be inserted into it. But the very principle of its operation can present a certain complexity. After all, even its name causes confusion among a non-specialist. In fact, if you watch the video instructions on using a caulk gun, you can understand why this tool is called that. It also has another name - a syringe.
It got this name because of its structure and operating principle. The sealant composition is released from the plastic tube by pressing a kind of trigger, so this association arose with one of the types of firearms. There are several types of such tools and they can be divided into the following categories:
- by the type of compartments where the cartridge is inserted;
- according to the features of the device;
- using the silicone supply method.
If you look at the pictures, you will notice that such a tool can be of several types:
- battery;
- pneumatic;
- electric;
- mechanical.
Each gun is designed to be able to seal hard-to-reach gaps. The most common are mechanical tools, as they are a budget option.
Advantages and disadvantages
An air pistol has many advantages. It has low mixture consumption due to high seam precision. It does not require electricity or expensive batteries to operate. Lightness, speed of material application and pressure adjustment - all this allows you to do a lot of work in a short period of time. The instrument does not create impact or whistling sounds and operates silently.
The power of this type of equipment is higher than that of others. It works with different types of consumables produced in tubes and processes seams with better quality. It is an excellent choice for sealing double-glazed windows. However, this type of tool also has disadvantages. The main problem of the equipment is the lack of portability - you will have to carry out work without leaving the place. Another disadvantage is its relatively high price compared to other types of pistols.
How to use a syringe to squeeze out silicone?
It’s worth watching a video on how to use a sealant gun, and everything will become clear:
- Before inserting the cartridge from the syringe, you must pull out the metal pin. To do this, you will need to use two hands, since the pin itself will not extend, because it is held in place by a special clamp. When you pull the trigger with one hand, the lock releases the piston and it can be pulled out. But you need to pull it out to the very end.
- Now you can insert the cartridge into the gun and lock it with a few pulls of the trigger. But do not clamp it too hard, because first you need to prepare the tip of the cartridge.
- When the cartridge is fixed, the tip is cut off and a cone is screwed on, through which the silicone will be squeezed out. Cones come with ready-made holes (one for threads, and a second smaller one for sealant outlet) and without one hole. If there is no smaller hole, you need to carefully make a cut on the cone with a knife.
- In order to see how the sealant gun works, you should pull the trigger several times until the piston fully stops in the cartridge. The tool is ready and you can start working.
The cartridge cone must be placed at the place that needs sealing. After this, you can pull the trigger, activating the pusher, which will evenly squeeze out a sausage of sealant of the required thickness. When the pusher moves, the latch will also be activated at the same time so that the piston does not weaken its pressure on the bottom of the cartridge. To remove a used cartridge, pull the trigger to loosen the latch, pull out the pusher with the other hand and the cartridge will be released.
Safety regulations
The use of pneumatic equipment requires compliance with safety regulations. When using the tool and applying the sealing agent, you must wear protective equipment such as glasses, gloves and overalls. Before removing the applicator, be sure to disconnect the air line. When using a pneumatic gun, you need to ensure that the cap is installed, it must fit snugly. After work, it is imperative to clean the equipment using special cleaners recommended by the sealant manufacturer. However, do not completely immerse the gun in the cleaning agent.
Preparing surfaces for sealant
Preparing surfaces before applying sealant is an important step in the work. The level of adhesion and type of coating will depend on its quality. Preparation process:
- To remove dirt and dust residues with a brush or vacuum cleaner, you can use a damp sponge, but then you must wait until the surface being treated is completely dry.
- Degreasing the surface with alcohol and acetone, paying special attention to the internal areas.
- A paint strip is glued on both sides, allowing you to limit the area where the product is applied.
- Drying the work area: wiping with a dry cloth or a hair dryer.
We suggest you read: How to remove silicone sealant from tiles, how to clean tiles