→ Fittings
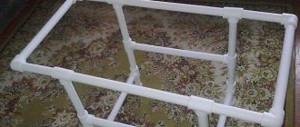
Hi all! Alas, the situation in our kindergartens is not the best, so a lot of responsibility falls on the parents. You have to buy, make, collect something. But for some dads this is even a joy. A clear example of what you can do for your child is a screen made of plastic pipes for a kindergarten.
From a financial point of view, this is a low-cost event, since many may still have pipes after repairs. And they are quite cheap. There shouldn’t be any problems finding fabrics for upholstery either.
But buying ready-made screens, which will differ little from homemade ones, is not a cheap pleasure. Therefore, it is often natural to decide to do everything yourself. Dads will be able to make the design, and moms will be able to sew the necessary fabrics. The result is a wonderful children's screen for many tasks and activities.
What it is
A screen can be called a structure containing various hidden elements. With its help, you can organize skits, performances, use it for a puppet theater, conduct a master class in a kindergarten, and much more.
In addition to its entertainment function, a screen or decorative fence is actively used for the development, education and upbringing of children. Believe me, any teacher in the kindergarten will only be glad if something similar appears at her disposal. These are truly multifunctional products that, with imagination and experience, can be used for a huge and varied range of applications. Using medical-themed covers, you can organize a lesson on taking care of your health. By stretching thematic canvases, it is easy to stage different performances or stage a whole performance.
Officially, such screens are called nothing less than a developing subject-spatial environment. There is even a state educational standard that it must meet.
Don’t worry, if you have ordinary polypropylene, verified dimensions and the right tools, it will be difficult to violate these standards.
But it is still important to remember that we are talking about a product for children, not adults. Leaving the kids alone near the screen, the teacher or parents should have no reason or reason to worry about their safety.
All this is spelled out in the requirements and standards. In relation to the screen they are:
- Safety. We are talking about the stability of the structure and its strength;
- Transformability. The ability of the screen to change its appearance through simple movements;
- Availability. This is not about price, but about the ability of each child to carry out certain actions;
- Variability. That is, the ability to change covers and contents;
- Content and richness. Here, I think, everything is clear;
- Multifunctionality. In fact, a combination of all the previous points.
Such a decorative partition has excellent developmental functions; it allows you to concentrate and hold the attention of children, develop their intelligence, thinking, show ingenuity, learn something new, develop creatively, etc.
A screen also becomes an excellent way to zone a room during quizzes, skits, and various events so that children are not distracted by other matters.
Where to begin
Polypropylene is a fairly versatile, durable and multifunctional material. It’s not for nothing that some people even make it out of it, without worrying at all about its strength and stability.
As with the manufacture of any other furniture from, before creating a decorative screen, you should determine the design and dimensions of the future structure.
To make your own screen based on polypropylene, you will need a little of your time and a certain amount of materials. You can highlight the idea in the photo, copy the options you like, and assemble them step by step with your own hands. Please note that the main task is to create a strong, stable and safe structure, since it will constantly be exposed to certain influences. That is, you need to make a partition conscientiously, with an eye to active use. Also exclude any heavy or sharp elements.
Usually a screen is made of 3 elements. This is one central part and two sidewalls, which, due to their mobility, can be transformed into different shapes. But you can add as many sections as you need.
Consider the possibility of changing covers in advance. The easiest way is to attach Velcro around the perimeter of the pipes themselves, with the help of which the replaceable fabric will be held.
The covers will need to be sewn on the opposite side to ensure a strong adhesion to the Velcro. Or vice versa.
Polypropylene is excellent for such tasks. This is an easy-to-process and affordable material. It makes a strong and stable frame. There are also no complaints about durability. Therefore, there are several good reasons to choose polypropylene pipes. The connection will be made using plastic fittings, so do not forget to buy the required number of connecting elements. The formation of a strong connection is carried out with a special soldering iron. You can use another heating option, but using a soldering iron is preferable.
Now all that remains is to tell you how the structure is assembled and what the home craftsman needs to take into account.
Types of screens and their purpose
The design of the future partition completely depends on the functions that it will perform and on the time available for the implementation of ideas.
Read also How to get a garden plot
Depending on the purpose, screens can perform the following functions:
- decorative - a partition is used to decorate the interior of a room, being an artistically designed object;
- division of space - a screen visually divides the room into zones, which is often used by designers in large rooms;
- implementation of creative ideas - a small screen made of pipes acts as theatrical equipment when performances are staged at home.
The size of the future product is also important for the project, so you should immediately decide on its function. Most often, partitions are made from plastic for a kindergarten group, for playing tabletop puppet theater, for fulfilling household needs, for zoning a one-room apartment, trying to separate an office from a bedroom or living room.
And also, this is a favorite craft of creative and creative craftswomen who prefer to make an unusual and completely unique thing with their own hands.
In principle, it is not at all difficult to buy a screen for every taste and size - manufacturers offer a huge range of different purposes from a wide variety of materials.
Ready-made solutions offered by art studios are not very expensive. Therefore, it is much more interesting to build a partition yourself. Moreover, there are always improvised materials at hand that will work, you just need to show your imagination.
You should immediately think about the design - mobile (on wheels), portable or stationary partition. It is also important whether it folds or not.
All these points need to be carefully considered, because the project of the future homemade screen depends on them.
Step by step assembly
To complete the task, you will need to assemble a set of tools and materials.
It will consist of:
- pipes;
- soldering iron;
- roulette;
- marker;
- saws;
- fittings;
- scissors;
- fabrics;
- fastenings.
If everything is ready, you can start working.
- Make a drawing of the future screen for the show and development of children, or use a ready-made diagram indicating all sizes;
- Cut the required number of pieces of polypropylene pipes;
- Assemble the frame;
- Using a soldering iron, heat the ends of the pipes and fittings, and then connect them with a little physical force;
- Using plastic connectors, combine the sections, ensuring their mobility relative to each other;
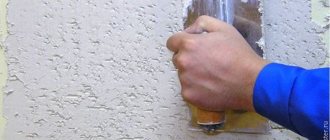
- Perform decorative work by painting the frame;
- Sew a cover, or entrust this to moms. It's definitely no more difficult than doing ;
- A Velcro strip or response elements for buttons are fixed on the frame;
- The frame can be supplemented with applications, stickers and other decorative elements.
There are countless options for assembling and finishing screens based on polypropylene pipes. Therefore, here you can completely rely on your own imagination, imagination or banal needs presented by the kindergarten or the teacher directly.
A screen made of pipes is an original device for zoning a room. At the same time, screens made from scraps of plastic pipes are affordable, easy to make - just a godsend for home craftsmen. The function of screens - dividing a room and a light, adjustable partition of the desired degree of transparency - can also be realized using white plastic water pipes, which can be painted in different colors if desired. Despite the simplicity of work and pronounced handicraft, screens made of pipes look unusually stylish, and at first glance it is difficult to determine what kind of creative material was used to make this stylish decor. The purpose of all screens and their additional capabilities - a stand for a mirror, an open storage system, an additional vertical plane for placing photo collages and paintings - all these types of tasks can be performed by a screen made of pipes. Bright white rings of different diameters, connected in a flat design, attract the eye and can become an effective decorative addition to the interior. The designer and inventor of screens made from scraps of white plastic pipes also foresaw powerful prospects: the possibility of making curvilinear and fancy shapes - it all depends on the purpose and location of the screen.
Choosing design and sizes
Depending on the purpose of use and the age of the children, various designs can be made.
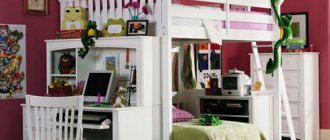
This could be a large full-length theatrical screen.
Or a small tabletop version of the screen to independently show scenes with puppet characters.
An important factor is the lightness and versatility of the design: children really appreciate the rare opportunity to independently change the arrangement of interior items, using them not as a mandatory established order, but as a resource for realizing ideas.
This develops management skills and also gives more space for play and creativity.
As a rule, the standard model of a screen made of PVC pipes is made with three sections.
It is enough to collect 3 frames, connect them together and cover them with beautifully decorated curtains.
However, this is not a mandatory rule, and if you wish and have the material, you can make a larger number of frame components. The design of the fabric stretched over the frame depends only on personal preferences - you can choose it together with your children from several options by making removable covers with Velcro fastenings.
When choosing covers, you can show your imagination and creativity.
Different colors of covers can be associated with seasons or themed holidays. For example, a green background in the spring, yellow and orange - with the onset of autumn, blue or dark blue - in the winter season.
There is a lot of room for imagination here for the teacher.
DIY pipe screen
To make exclusive decor from polyvinyl chloride pipes, you will need pipes themselves - as many different diameters as possible, but no less than three types. The more rings of different sizes, the more interesting the screen design will be.
You will need a tool for cutting PVC; a metal file will do. The rings are connected with glue that is suitable in composition for gluing polymers; it is very desirable - the adhesive composition should be completely safe and suitable for residential premises. Cutting pipes on special machines will give an even and smooth end of the pipe, and if possible, the pipes are cut upon purchase. The width of the screen made of glued rings should not be less than 50 mm; this contact area of the rings will be sufficient for strong fastening. The width of the screen can be greater. Moreover, craftsmen use PVC pipes to make not only screens, but also shelves for storing shoes, wine bottles and kitchen utensils. Designs made from thin rings are only suitable for panels and small decorative frames.
An interesting decor made from thin rings of plastic pipes, painted in various shades, can decorate the walls and become an elegant accessory. From PVC pipe you can make frames for watches and mirrors, make a photo collage into a complete piece, or create a convenient creative shelf for things and toys. The assembly principle is always the same - cutting pipes to size, selecting diameters and gluing. This is not the first year that a Christmas tree made from pipe scraps has been surprising with its thoughtful design and minimalist laconicism of forms.
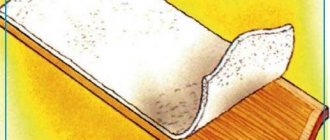
To make screens, shelves and any equipment and decor, you need to cut pipes. If you have to cut it by hand, you will have to prepare for a long process - you will need a lot of rings. The pipes are marked according to the width of the future rings - from five centimeters, fixed using a carpenter's vice and cut with a metal file. After cutting, the edges of the pipes will not be nice and smooth enough, but PVC is easy to shape into any shape using heat. You can use a household iron - heating it to the highest temperature and ironing the cut of each ring through the parchment. If the product is double-sided - like a screen - then you will have to smooth out each cut. The confectionery parchment must be peeled off from the cut immediately, without waiting for the polymer to cool.
Having prepared the required number of smooth rings, or better yet with a reserve, we begin assembling and gluing. It is convenient to lay out the rings on a flat surface, on a table or on the floor, and the final plane of the finished screen will depend on the evenness of the base. It is also possible to manufacture curved structures, but for this it will be necessary to make a base jig. The edge of the screen can be made smooth by selecting rings, but a fantasy edge with a pattern of rings looks especially decorative. Large diameter pipe segments can also be used (white water pipes can have diameters up to 315 mm; there are other options for plastic pipes). A screen made from rings cut from pipes of one or two diameters can look quite original.
When using rings of different diameters, lay out the largest ones first, and then fill the free areas with smaller rings. Random patterns or thoughtful symmetry - all this is planned in advance or invented during the process. All options are interesting. The edges of the screen can be curved or straight. After selecting the rings according to the planned design of the screen, they begin gluing the rings. Polymer-based adhesives and liquid nails are suitable. The glue is carefully applied to the contact lines of the ring parts; excess glue should be immediately removed with a piece of cloth. After connecting all the elements, you need to wait for the glue to dry completely.
You can paint the finished product with a brush, but aerosol cans with paints of various shades, including metallic - silver, bronze, and so on - will help add decorativeness, and much more accurately. You can paint the ring parts before assembly, and any color combinations are possible.
Ready-made screens can be attached to the wall or made in a fully mobile version, for example, on wheels. Large screen rings can serve as convenient shelves for storing magazines and newspapers. You can make a screen shelf specifically for things and store them conveniently rolled into rolls - towels, daily items of clothing will be at hand, and the interior will become more interesting. A decor made from thin rings cut from small-diameter tubes can enliven the design of a room or kitchen. Lamps made from PVC pipes are also a good opportunity to decorate the interior with a hand-made product.
5921 0 0
Do you want to know how to make a screen with your own hands? To do this, just read the corresponding detailed instructions. It also contains many visual photographic illustrations.
Crafts from plastic pipes for all occasions
With skill and a rich imagination, interesting and useful things can be made from any available materials, including plastic pipes.
Plastic pipes of different diameters are sold in any hardware store at quite affordable prices. They are used in the installation of water supply, sewerage, heating, irrigation systems, and after construction or repair, unnecessary trimmings often clog the site, while they can serve as an excellent material for creative crafts.
Don’t rush to take construction waste to a landfill - we’ll tell you what can be done from a plastic pipe to turn excess waste into beautiful and functional interior items.
We will not talk about the direct purpose of the product, but about the convenience of using varieties of plastic pipes specifically as a material for crafts. Plastic pipes are light weight, strong and quite durable. They are dirt-resistant, do not collect dust and are easy to clean. Products made from plastic pipes are safe to use even by small children (they do not break, are not heavy, and do not emit toxins).
For creative work, PVC pipes are often used, which are quite rigid and can be easily connected with special nozzles and “adapters,” allowing the creation of collapsible structures. Polypropylene pipes can also be used, but to connect them you will need a special welding machine or compression fittings, and the finished products cannot be disassembled.
Plastic pipes can be used to make not only convenient household items, but also pieces of furniture. In order for such a homemade product to last a long time and be reliable in operation, care must be taken to properly connect the individual sections. Since the connection of polypropylene pipes has already been said, we will consider the connection of only PVC pipes.
PVC plastic pipes can be connected in the following ways:
- into a socket with a rubber seal;
- using an adhesive composition;
- bolts, drilling holes.
The first connection method is characterized by simplicity, but lack of rigidity. Before connecting, it is recommended to clean the internal and external surfaces of the pipes at the junction from dust particles and treat the inserted part of the pipe with silicone grease. First, the pipe is inserted into the socket until it stops, after which it is carefully pulled back by 0.7 - 1 cm. Structures assembled in this way can later be dismantled, which is convenient for seasonal products.
The second method of assembling pipes is characterized by reliable fixation and greater labor intensity. Work on connecting parts begins with sanding the mating surfaces of the socket and pipe for better adhesion. Then they must be degreased with methylene chloride. The adhesive composition is applied along the entire length of the prepared outer surface of the pipe and 2/3 of the length of the inner surface of the socket. Finally, the pipe is inserted into the socket until it stops and turned a quarter turn. For gluing, you need to press the parts for 1 minute. For good fixation, all operations to connect two segments must be carried out quickly enough. The connected elements are left for several hours until the adhesive composition has completely dried.
The third method is more labor-intensive, as it requires marking and preparing holes, but allows you to obtain collapsible structures with a reliable connection.
For corner joints and connecting several sections at once in one unit, it is convenient to use a variety of fittings. Plastic pipe structures can be of any complexity using numerous tees and fittings. Let's look at useful homemade products in order of increasing complexity.
From the choice of design and materials to decoration
The screen manufacturing instructions include the following steps:
- Drawing up a drawing
; - Selection of materials
; - Creating a wireframe
; - Decoration
.
Stage No. 1: drawing up a drawing
At this stage, it is enough to decide on a couple of criteria:
- Number of doors
. The best option is three. This design is quite multifunctional and can be used:
- For the room
. Separate a corner or bed from the rest of the room to create a separate cozy corner in it;
- For puppet theater.
It is enough just to leave a hole on the central flap for the appearance of dolls;
- For garden
.
Three sections are quite enough to create a place protected from prying eyes and sunlight on your suburban area ;
- Dimensions
: The room should be selected in accordance with its dimensions; large structures will be used more effectively on the site, but, for example, in a kindergarten, on the contrary, a low partition will be sufficient.
After you decide on the specified parameters, you don’t even have to draw the diagram from scratch, but find a suitable template on the Internet and insert your own size values:
Stage No. 2: selection of materials
The screen can be made literally from scrap materials. Here are examples of some interesting solutions:
- Plastic pipes
. If you have a pipe soldering iron, then there is nothing easier and faster than soldering a frame made of polypropylene pipes. They will make a practical and moisture-resistant design, perfect for use outdoors, near a river, in a bathroom or next to a pool;
- Cardboard
. The price of this option is the lowest, it is well suited for a children's room;
- Polycarbonate
. Another not very expensive and practical option that can look stylish indoors and withstand all weather conditions outdoors;
- Tree
. Despite the abundance of different materials, wooden frames covered with fabric and paper are an immortal classic for making screens, which we will also turn to.
If children or allergy sufferers live in the house, but you should not experiment with artificial materials that often contain allergens, it is better to opt for natural wood and natural fabric.
Stage No. 3: creating a frame
A master class on making frames looks like this:
| Photo | Description |
| Let's prepare :
| |
| We apply markings on all planks, departing 60 mm from the edges. | |
| We make cuts according to the markings. | |
| We do the cuts with our own hands using a hammer and chisel. | |
| |
| We fasten the corners with screws to strengthen the structure. |
Stage No. 4: decoration
All that remains is to assemble the frames together and decorate them.
Decorative partitions (screens) have been used since ancient times. But to enjoy such a product, you don’t have to buy it ready-made. You just need to know how to do everything correctly and quickly.
Types of structures
It’s appropriate to start a conversation with a traditional Japanese screen
. This style is suitable for any home designed in the appropriate spirit. Byobu (this is what they call their classic partition in Japan) is often decorated with paintings on both sides. The image is designed in such a way that it is comfortable to study while sitting on the floor. This design is great for limiting a secluded space.
It is more difficult to imitate Indian screens.
They use precious teak wood and other elite tree species.
Later in Europe, partitions were changed according to the dominant style. This is how performances in the spirit appeared:
- classicism;
- baroque;
- modern;
- Provence;
- hi-tech.
People often use folding (or rather, sliding folding) screens. They are formed by several connected frames, usually 3-8 of them. Sometimes there are more frames. This design folds like an accordion and is removed as needed. Single-screen screens (which have only one wide flap) are also quite widely used.
The material inside the sash is selected at your discretion.
Most often, the product is equipped with wheels, making it easier to roll to the right place. A “book” type structure is formed by a pair of identically sized sashes. But some modifications may be slightly asymmetrical.
The “book” is useful for changing clothes and for formal or home photo shoots.
Flexible screens deserve attention.
For them, a lot of long, but differing in small thickness, sections are made. Such sections are created from slats, pipes, and plates. It will be possible to deliver the finished product in the manner of a spiral or even a roll. This, of course, also makes storage and transportation easier.
A blind screen is made from a different number of sashes.
But in any case they are completely opaque. This is very convenient for all sorts of delicate matters, for example, changing clothes. However, as a partition in a room, a blank screen turns out to be very good.
There are also transparent versions
– they are used mainly for decoration and in amateur (and professional too) photography.
What materials can it be made from?
A real classic is the wooden screen. Now it is no longer possible to establish what the very first structure of this kind in history was made of. But there is no doubt that wood is traditional and has been used since ancient times. Along with monolithic boards, partitions in the past were also made from slats.
In the second case, fabric of various types was pulled over them - whatever was at hand and whatever they liked.
Today, wooden screens are still in demand, and their main types are still the same. But, along with simple slats, timber is used quite often. Plywood structures have also gained considerable popularity because they:
- allows you to save money;
- weighs relatively little;
- processed without any problems.
Design developments do not stand still. And recently, screens made from louvered doors have become increasingly common
(and just from unnecessary wooden doors). They usually still contain fairly good quality wood, but the structure itself becomes morally or technically obsolete.
Screens with a wooden base are installed both in houses and on the street. In addition to the frames themselves, various types of decorative panels are used that significantly improve the appearance.
But some home craftsmen try to use metal (usually stainless steel or aluminum). In this case, you will need a frame of a certain shape. Any experienced welder can make it, although sometimes it is better to contact a metalworking company. The following is inserted inside the frame:
- wooden panels;
- sheet glass;
- plastic.
Important: you should avoid using sheet iron, which looks bulky and deprives the room of comfort. It is much better to use a complex ornament made of forged rods.
Instead, small pipes (up to 5 cm in diameter) are also suitable. Tubular screens are widely used in gardens and courtyards.
Regardless of the shape of the frame, it should be covered with elegant fabric or paper with an original image.
Important: paper is used only when the screen is placed indoors or at least under a canopy. In any open place the first rain will destroy it.
If you choose a high-tech style, then it is logical to use a steel screen for blinds to frame it with your own hands.
But those who want to simplify their work as much as possible should abandon metal and focus on PVC. Pipes made of this material are quite light and, in addition, practical.
You can also use it in your work:
- cardboard;
- polymer panels;
- cane;
- willow or bamboo branches;
- CDs or vinyl records.
Manufacturing instructions
Let's consider options for making screens from various materials.
Made of wood
Making a wooden screen for your dacha yourself is quite simple. The classic version of this product is assembled from fabric and a wooden base. The material is simply pulled onto the frame. By varying the specific design and color of the canvas, it is easy to adapt a “homemade” product for any room. To work with timber, along with the tools listed above, you will need another dozen door hinges, 96 screws, durable and beautiful material, universal glue, and decor of your choice.
You can make a full-size screen using 24 bars, 6 cm wide and 2 cm thick.
Half of the bars should have a length of 1.7 m, and the other half should have a length of 0.6 m. Lines are drawn on the planks 6 cm from the edge and the excess is sawed off exactly along the marks.
Important: the cuts should reach exactly half the width of the planks - no less and no more.
The next step in making a homemade room screen is to make notches along the edges of the slats using a chisel. The wood is removed layer by layer, right down to the cuts. The inside of the grooves is covered with glue. After assembling them into a single frame, the entire workpiece is pressed tightly. Only after the glue has completely set can you continue working.
When sanding wood with emery, pay special attention to all joints.
Next, use varnish. Please note: regardless of the number of leaves, ordinary steel corners can be used instead of door hinges. The fasteners are fixed with a screwdriver. After this, all that remains is to decorate the screen with fabric, choosing it at your discretion.
Be sure to make a pattern; in addition to the dimensions of the frames, they also take into account kinks and difficult places. The use of multi-colored and heterogeneous fabrics is allowed. To avoid sewing it with your own hands and a needle, it is better to use a sewing machine. It will also help stitch the edges. Attaching the material to the frames is done with a construction stapler from top to bottom; At the same time, they carefully ensure that everything is tensioned perfectly.
The sidewalls are worked on after attaching the fabric at the top and bottom. When this is ready, two loops or corners for each connection are connected to the parts of the screen. This is the amount of fasteners that is considered optimal for the convenience of folding the partition.
Attention: when choosing fabric, take into account the style of the room. The wood should be selected as carefully as possible so that there are no even small defects.
From cardboard
But if you need to make a screen for the bedroom yourself, then it is better to use cardboard. A mobile modular partition will not externally overload the space. It is enough to cut out any parts you like according to the diagram and fasten them into a single fabric. If necessary, such a screen can be easily remade at your discretion.
Parts can be fastened not only straight or at an angle, but also in a wave-like manner. The only negative: they are completely unsuitable for the street; they can deteriorate from moisture, wind and sun.
For a serious screen over a large area (in the office or in all rooms of the house at once), binder cardboard and corrugated cardboard are used. The color of the source material does not matter. High-density cardboard is used for the supporting part.
Another option is to use a box from a TV, refrigerator or washing machine.
Then the sides are cut off and the place where the first and fourth edges meet is removed. The second of the three seams of the rectangle is bent in the opposite direction to ensure the rigidity of the screen when unfolded.
From plastic pipes
Creating a screen from PVC and polypropylene pipes does not have any significant differences. These can be any pipes - heating, water supply, sewer - as long as they are durable. Such products are suitable for mobile and fixed, transparent and opaque partitions. The transparent option involves fastening the pipes together and stretching a light material over them. Sometimes they even use starched gauze.
Pipes can be connected using flanges, that is, fittings.
Before starting work, the edges must be cleaned. Having placed the fittings on the cuts, put on a gasket with a rubber layer inside, and the flanges are already pulled onto this gasket. Sometimes counter bolts and counter flanges are used.
Important: All fasteners must be tightened uniformly, otherwise the fittings will not line up. If necessary, the structure can be easily disassembled. But when assembled, it is extremely stable.
An alternative is to glue the pipes together.
All connected elements are freed from chamfers and then covered with special marks. From the markings it is easy to understand to what depth to screw the flange. Of course, 100% of the parts are degreased. Glue is applied to a clean surface from the inside of the socket, to the chamfers and pipes. Then the pipes are inserted into sockets or fittings, turned ¼ turn and clamped for 60 seconds.
Attention: all these manipulations must be performed as quickly and carefully as possible; any excess glue is removed immediately. The glue will dry in a few hours. Despite the labor intensity, this method of creating a frame is slightly more reliable than the previous method.
There is another option - using a rubber seal. It is available at the end of any socket. The rubber seal allows you to connect pipes quickly, easily and completely airtight.
Surfaces need to be cleaned as best as possible. On a smooth area, get rid of the chamfer. Then they make a mark showing how deep the pipe will go into the socket. All smooth areas are coated with silicone. Next, the structure is assembled. Despite the simplicity and ease of dismantling, such a product will not be particularly durable.
If the screen is made with wheels, they are attached to self-tapping screws.
It is advisable to use a weighting agent that is placed at the bottom of the base. It must be secured with screws and holders. Flanges for inserting pipes are placed on top. Above the horizontal pipe there are several more vertical elements; Once assembly is complete, the structure is often painted.
An interesting option is plastic screens made from pipes cut into rings.
Important: whenever possible, it is better to cut pipes to size using special machines. The width of the plastic screens is approximately 5 cm. If it should be smaller for some reason, you will need to work with a handy tool. It is recommended to mark the surface every 5 cm. The workpieces are clamped in a vice and cut with a handsaw.
Important: the paper is removed immediately, otherwise it will be impossible to remove it. The rings are connected with glue; Before this, the blanks are laid out on the floor so that you can clearly see what is connected to what and in what order.
The rings must be placed from larger to smaller; the pattern is selected to your liking. The edges are usually straightened, but they can also be curved. Of course, all this is thought out in advance. In addition to their structural role, rings are suitable for storing small items.
The screen itself is made both mobile and fixed to the wall.
An alternative version of the plastic screen consists of the following parts:
- set of wheels for furniture;
- steel pipe as a weighting material;
- pipes to the frame;
- paints and brushes;
- fasteners;
- flanges;
- board.
The frame is assembled in the same way as in other options. Attention must be paid to choosing a good paint. Before applying it, all surfaces are degreased and cleaned. All metal parts are coated with anti-corrosion protection. The finished structure is easy to repaint.
You can make a variety of crafts and many useful things from the simplest and most affordable material, for example, plastic pipes. They can be purchased in specialized stores. Many owners have them left after repairs and lie idle in the barn. Therefore, you can safely take them out and start creating. And from our article you will learn original ideas for crafts made from pipes.
Plastic pipes for crafts: advantages
Plastic pipes allow you to create excellent prefabricated and dismountable structures. They can be used in an apartment or in a country house. Crafts for children will also look great.
The advantages of this material are as follows:
- possibility of use without preliminary painting or with additional surface decoration;
- compactness of the created collapsible structures;
- non-toxic when heated;
- high strength and rigidity of parts;
- the ability to create a variety of designs using connecting elements - couplings and fittings.
Using simple material, you can create original products and delight your friends and loved ones with a gift.
Methods for fastening workpieces
If you are interested in the question of how to make an interesting craft with your own hands, then to give plastic products the desired shape, you should stock up on a certain set of tools. You will need a gas torch, metal saw or jigsaw. Homemade products can be solid, connected using adhesive and bolts, or dismountable.
Can be used to connect sockets with a seal. However, this requires a lot of time and effort, but the connection is unlikely to be sufficiently rigid.
If you still decide to use this method, the pipes must be cleaned of contamination at the future connection points. The edge of the pipe that will be inserted should be coated with lubricant. When the pipe enters completely into the socket, it must be pushed back a little. This will allow the structure to be disassembled in the future.
Using glue helps make the structure more durable. The parts are first sanded at the connection points, followed by thorough degreasing. Glue must be applied to both sides of the fastening - both internal and external. When joining, the pipe is inserted tightly until it stops, and then a quarter turn is made. After this, reliable bonding should be ensured by tightly fitting the parts.
The option with fastening with bolts will be very labor-intensive, as can be seen in the photo of crafts made from plastic pipes. The craftsman will need to mark the locations for drilling holes and use a drill in the work. There is no need to glue, and the connections will be very strong.
Screen manufacturing process
Creating an original screen of the required size is quite a feasible task not only for the home craftsman, but also for the creative housewife.
Moreover, you can use improvised materials to make a homemade partition if it is not possible to rent a specialized tool for working with plastic pipes.
Step #1 – creating a homemade screen project
If you have to make a partition structure for use by children, then its dimensions should be selected taking into account the height of future users.
And for use as a decorative element in a room, it is important to determine the required dimensions - if you build a partition that is too small, it will not bring the desired result.
In addition, you need to decide on the shape of the screen, the number and dimensions of the sashes, as well as the type of homemade product - folding, mobile, stationary, etc.
The easiest way for beginners is to make a simple version of the partition with a combination of plastic pipe + textiles. Or a very original option - just pipes.
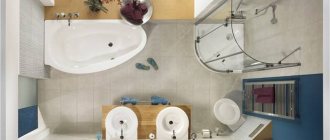
The advantage of using only plastic is moisture resistance. Such a product can be safely placed in a combined bathroom without fear that splashes will spoil the appearance of your masterpiece.
Step #2 – preparing the necessary materials
Specialized tools are useful for working with metal-plastic pipes. If you don’t have them, you can rent or use improvised tools.
So, first of all, you will need plastic pipes. Their diameter and length depend on the draft of the future screen - the shape, height, length and width of the sashes.
A tool for soldering and cutting pipes – a special iron and a pipe cutter – will also be useful.
If you don’t have a soldering iron or pipe scissors, a lighter and a regular sharp knife or metal saw will do. Moreover, if the edges heat up, then they do not need to be processed additionally.
Read also Recipe for grilled vegetables on skewers
Step #3 - assembling the homemade product according to the project
In principle, the set of tools and materials depends on the design of the planned screen.
Depending on their purpose, products can be not only functional, but also decorative.
By the way, the latest version of the screen can be made in a large size to stage performances with the participation of live actors, rather than puppets.
Below we will consider two options for partitions made of plastic pipes, the manufacturing principles of which are radically different.
Option #1 – screen on wheels
If you decide to make a designer version for wet rooms, then you have to decide on the depth of the partition and its functionality.
The minimum depth should be about 5 cm - narrower material is inconvenient to work with. If you plan to put magazines and other useful little things in the cells of the partition, then you can add another 10-15 cm.
Plastic pipes serve faithfully as elements of heating systems, sewerage systems, water supply systems, and so on. However, their scope of application does not end there. Lightweight, easy to process, hygienic and versatile, the material is widely used as a source for a wide variety of crafts.
A screen for a puppet theater made of plastic pipes is one of these unusual solutions.
Products for home and apartment
To make wonderful accessories for your apartment, you don’t need detailed instructions for crafts from plastic pipes. All you need is the ability to work with tools and imagination.
If you make many cuts of wide plastic pipes and then fasten them together, you can create convenient sections for shoes. The length of the blanks should correspond to the size of the shoes of your household members. Of course, you can make shelves with short bars so that the heel of the shoe hangs down.
But designs that match the dimensions of shoes and boots look more convenient. The cells can be secured with couplings with glue, self-tapping screws or bolts. Cells for storing wine bottles in a cellar are made using a similar principle.
By connecting plastic pipes vertically, you can create a good hanger. Pipes inserted into the tee will be used as clothing holders. And for rigidity of fastening, it is advisable to insert a wooden holder or a metal rod inside the vertical structure.
Wide-diameter pipes can be used in arranging colored flowerpots, and medium-sized pieces are suitable for vases. By pasting colorful pictures or photographs on such products, you can decorate them perfectly. Original lamps for the desktop or floor lamps are constructed from short scraps.
If you fasten the parts with the end cut at an angle of 45 degrees to a wooden base attached to the wall, you will get stands for pens and pencils. By placing the cylinders vertically, you will create an excellent base for your tools. And, of course, a laptop stand secured with special fittings will look great.
In the bathroom, a piece of pipe with three outlets is suitable for use as a holder for a hair dryer. If you fix the cylinders on the cabinet door, you can insert other devices into them, for example, combs and curling irons.
There is also a place for these homemade samples in the kitchen, which you can learn about by studying the master class on crafts made from plastic pipes. Firstly, these are original containers for storing forks, spoons and knives. And secondly, the cylindrical part can be used as a holder for glasses. You just need to take a pipe with a length of 0.5 m and make a longitudinal cut through one side. You can insert the stems of glasses into it. And the pipe itself can be attached to the ceiling or hanging cabinet.
Required materials and tools
Before starting the main work, it is necessary to prepare all the parts used. It will be very unpleasant if at the most crucial moment one of the pipe parts or finishing material is missing.
In order to create a simple screen from plastic pipes, you will need:
- PVC pipes. Their number depends on the calculated dimensions of the screen. The amount of materials for each section is selected from calculations - 2 pipes defining the height, and 2 pipes determining the width of the section. We multiply them by the number of screen sections and get the total number of materials needed.
- Fitting. You will need 4 connecting corners for each section. If you plan to use intermediate strips, you will also need to purchase several triple connectors.
- Textile. To calculate the required dimensions, we will use mathematical knowledge and calculate the area. To do this, multiply the height of the screen section by its width, and then by the number of similar sections. The result will show how much fabric will be needed for finishing.
- Hacksaw for shortening pipes.
- Soldering iron for PVC pipes or special glue.
- Materials for additional decoration - appliqués, pockets, compositions for dyeing fabric.
Products for children
There are also a variety of crafts made from plastic pipes for children. What can you offer to little family members:
- Spacious playpen.
- Children's swing in the yard.
- Lightweight and mobile sled.
- Goal for playing football.
- Frame for a spacious house.
- Summer shower at the dacha.
- Screen for theatrical productions.
- A fence for the baby's crib and a fence that restricts the baby's exit from the room.
Children will also be delighted to have an impromptu closet for storing toys. A compact table and chairs and plastic pipes will fit perfectly into the interior of a children's room. Children will be able to eat their own food or organize gatherings for the dolls.
Master classes on creating screens
- A successful master class on making a screen from plastic pipes with your own hands embodies the idea of creating an entire children's house on its basis - for this purpose the door and windows are decorated on covers.
- Another master class gives advice on using screens for children's creativity - appliqués and children's crafts are attached to the covers.
- If paper wallpaper sheets are attached instead of fabric covers, the screen can be used for collective drawing by children, creating large posters - for example, for the holidays.
- The design can serve as a basis for activities with children; counting material, letters, and materials for the development of logic and imagination can be attached to it.