Tables
A homemade table looks no worse than one purchased for a round sum. It is very easy to assemble and even beginners can do the process.
You can implement interesting ideas yourself with a little effort.
What should be done:
- a drawing and diagram of future furniture is applied to paper;
- the legs and tabletop are cut out, and if you plan to make an original design with different shelves, all the details are prepared;
- the canvas - the base is thoroughly sanded and cleaned;
- the surface is treated with antiseptics and other liquids;
- cracks in wood are treated with wood putty;
- markings are applied to the base;
- the product is sawed out;
- cuts are made on previously prepared legs, and the structure is assembled with bolts, screws and other parts.
A table is the piece of furniture with which any novice furniture maker can begin their thorny path of knowledge.
Important! In order not to spoil the material and understand the intricacies of drinking and assembly, it is recommended to watch training videos - lessons.
You can strengthen elements that dangle after assembly with glue or special construction belts. The tabletop is smoothed, varnished or painted, and decorated.
Surface restoration
The most common damage is surface defects. This is not surprising, because cabinet furniture is often used in not the best conditions and the surface is often subjected to heavy loads. You can fix minor damage yourself. To do this you will need your skill and some tools depending on the damage.
Minor scratches
The appearance of small scratches is a natural process during the use of furniture. The cause of such a defect can be pets or careless handling of furniture. Usually scratches appear as if by themselves, the owners simply notice them and begin to choose a repair method:
- Walnut. With its help you can make small scratches on the surface less noticeable. The material covers up scratches. To carry out repairs, it is necessary to divide the whole nut into two halves and lightly rub the damaged area with the inside;
- To correct damage, you can use a pencil of a suitable color. With its help, you just need to paint over the scratch;
- MDF and chipboard panels can be repaired using furniture wax. To do this, the wax pencil is melted using a thin knife heated over an open flame, and the mixture is applied to the scratch. After drying, the remaining wax should be removed with a blade and wiped with a cloth. Under no circumstances should wax be melted over an open fire; the beeswax contained in it is highly flammable.
After completing the work to eliminate scratches, the surface can be varnished; this will not only improve the appearance, but will also help protect the furniture from further damage for a while.
Anti-scratch pencil
Scratches are removed with walnut
Major damage
Major damage cannot always be repaired with your own hands; they often require the involvement of specialists. Many companies carry out repairs of cabinet furniture at home, this saves the energy and nerves of the owners. In this case, the technician will professionally assess the amount of damage and carry out repairs. If the damage is unusual or non-specific parts need to be replaced, you will have to wait until the specialist returns with a set of everything necessary.
Some major damage can be repaired on your own. A common defect in furniture is cracking of legs or other parts due to use in unfavorable conditions, with constantly changing humidity. To repair this defect you will need the following tools:
- PVA glue;
- Syringe with needle;
- Rag;
- Clamp.
The work is carried out in several stages, at which time the operation of the furniture becomes impossible
. To ensure that all work is carried out efficiently, the objects being repaired are advised to be freed from cargo.
- First you need to remove dust and other contaminants from the crack. Do not allow moisture to get on the surface; all work must be carried out with dry parts;
- Carefully draw glue into a syringe without a needle. At this stage, air bubbles should not be allowed to get inside;
- To work, put a needle on the syringe. Through it, the crack is carefully filled with glue. It should protrude somewhat above the surface of the furniture;
- The part is compressed with a clamp and excess glue protruding from the crack is removed;
- After 24 hours, the clamp is removed, the surface is sanded and coated with varnish to protect it from scratches and other damage.
After performing these simple steps, the furniture completely restores its functions. Crack repairs should be carried out as early as possible, immediately after damage appears. This is due to the ability of cracks to expand as time passes.
Cleaning the surface
Filling the crack with glue
Sanding the coating
Chips
Cabinet furniture is made from chipboard or MDF - these are sheets of tightly glued sawdust, wrapped in a decorative coating. They are often varnished or laminated. The top layer of furniture parts is susceptible to chipping. This unpleasant incident can result in the appearance of noticeable defects, because the unprotected surface is subject to significant damage.
Chips in the paint layer can be easily repaired using furniture repair wax. It is simply applied to the surface, wait until it dries completely and cover with an additional layer of varnish.
The situation is somewhat more complicated with chipped edges of structures. These are noticeable light indentations on the edges and corners of chipboard panels. Such damage causes further destruction, so they must be “treated” immediately. To complete the work you will need:
- A felt-tip pen for giving the repaired area an inconspicuous color. The most difficult thing in repairing chips is choosing the required shade;
- Repair wax of a suitable tone;
- Thin knife and lighter;
- Putty knife;
- Felt;
- Fixing varnish spray.
The repair process includes several stages:
- The edges of the chip are given a straight shape. The damage is treated with a knife and sandpaper;
- The chip is sealed with wax. The pencil should not be melted over an open fire, so it is applied using a hot thin knife. It is necessary to leave some wax reserve;
- After the wax has completely cooled and hardened, it needs to be processed with a chisel and the frozen mixture must be given the required shape;
- When the shape of the part is restored, the wax is lightly polished with a felt cloth;
- A pencil is used to repair surfaces with a clear structure. It helps restore texture;
- If the chipped area looks invisible, it means the work was done well and you can coat the repaired part with varnish.
If you cannot find wax of a suitable color in the store, then this problem can be solved by mixing different shades. Purchase two tones that are close to the color of the furniture being repaired. The shavings of these wax crayons are placed in a waste tablespoon and melted. You should get a substance of the required shade. By adding shavings from one of the two pencils you can achieve the perfect color.
Making straight edges at the chip
Cover the surface with wax
Processing with a chisel
Closet
Even a novice craftsman can assemble the cabinet on his own. First of all, decide on the material and boards - these can be chipboard - slabs no thicker than 18 mm.
The cabinet can be made according to your own sketch from various materials
Step by step the work looks like this:
- decide on the door closing system: they can be sliding or hinged. The first ones can be purchased ready-made or made on your own;
- prepare all materials, tools, parts, sketch a sketch, cut out the parts;
- assemble the frame - side and rear walls;
- mount on top and bottom using self-tapping screws or base confirmations;
- take into account the dimensions of the already assembled cabinet and make shelves and drawers;
- secure the facades;
- attach fittings: handles and locks.
With a creative approach and the availability of tools and materials, you can make a pretty decent cabinet.
You can decorate a finished piece of furniture in any way, to your taste. If you wish, you can arrange lighting.
Today it is impossible to do without cabinets designed to store things.
Nightstand
Making your own bedside table will not take much time. You just need to sketch out a drawing of a product that suits your design, prepare the material and tools.
There are a large number of ideas for DIY bedside tables, the main thing is that it matches the design of your interior.
The list of further actions is as follows:
- drank all the elements;
- assembling the frame of wooden furniture: connecting the board and side panel with screws;
- cutting holes for future drawers;
- screwing the second side panel, forming a furniture support;
- installation of the panel from above, both with and without a canopy;
- installation of drawer guides;
- connecting all the parts of the boxes;
- installation of facade panels.
A bedside table is an indispensable bedroom furniture.
The drawers are put into place last. All fastenings are made with self-tapping screws or self-tapping screws. Decoration can be done upon request. Not only wood can be used to make furniture.
A bedside table can not only be a wonderful element that will complement the interior of the room, but also a good option for emphasizing the overall atmosphere.
Do-it-yourself repair of chipboard furniture and chipped cabinet furniture: materials, tips, recommendations
Chip on laminated chipboard
Chips usually appear at the corners and are small, light-colored indentations (chipboard color).
The elimination process consists of several stages:
- Preparatory treatment of the chip . In this case, it is necessary to process the chip with a chisel so that its edges become straight.
- Repairing the chip . To do this, hard wax of a suitable color is melted with a wax melter or lighter and applied to the chip with a small margin.
- Leveling the surface . After the wax has dried, using a chisel, having worked through each plane, carefully cut off the excess wax, forming a clear right angle to the surface, and lightly sand it with a felt cloth.
- Texture restoration . Using a thin retouching felt-tip pen, apply lines along the chip in accordance with the overall texture, wiping each time with a paper napkin to easily blur the clear boundaries of the lines and make them more believable.
- Opening with varnish . To fix the seal and to give the restored surface a characteristic shine, it is treated with a spray varnish.
Such damage is especially often found during the renovation of children's rooms.
To remove scratches, you will need the same tools for repairing furniture as for repairing chips, only instead of hard wax it will be more convenient to use soft wax.
How to remove scratches: sequence of work
- Using a spatula, apply wax transversely to the scratch, simultaneously compacting and leveling it.
- Use a thin retouching felt-tip pen to fill in the missing texture.
- To fix the place of sealing and level the surface gloss, apply a fixing varnish.
Scratches on chipboard
Advice! To seal cracks when wax is unavailable, you can use a special furniture touch.
Restoring a worn surface
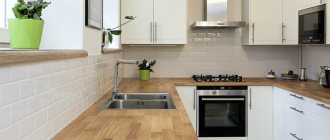
Scuffs, like scratches, often occur on laminated chipboard due to constant contact with the surface of foreign objects. For example, you can find them during renovations in the hallway or kitchen .
As a result, the top protective layer and partially or completely the paint layer are worn away.
In order to eliminate the abrasion that has already appeared, you need to do a few simple manipulations:
- Stretch a microfiber cloth over your finger and dampen it with a matching colored marker.
- Use a napkin to touch up the abrasion, rubbing along the surface structure.
- Apply several thin layers of fixing varnish.
Repairing cracks
Cracks in chipboard furniture often appear under the influence of moisture, heat or improper use at the attachment point of the cabinet doors.
To repair cabinet furniture with your own hands you will need:
- clamps (adjustable clamps);
- syringe with needle;
- PVA glue.
Repair process:
- PVA glue is filled into a syringe without a needle (for easier and faster penetration) and the needle is put on.
- Using a syringe, fill the entire internal volume of the crack with glue.
- Place a clamp on the slab on either side of the crack and tighten it.
- Remove excess glue with a napkin and leave in this position for at least a day.
After the glue has dried, the element will be ready for use again.
Briefly about materials
Edge gluing
The most commonly used are hard and soft wax, special retouching and shading felt-tip pens or markers, furniture touches, PVA glue, laminating edge.
Soft wax differs from hard wax in that in its original form it is immediately ready for use (it does not need to be melted), but it is applicable only on those surfaces that are not subject to mechanical stress.
Soft wax is more convenient to use, while hard wax is more reliable.
The stroke is used to cover minor damage (scratches, small chips, abrasions). It must be applied to the surface, allowed to dry slightly, and then sanded with a felt cloth.
Laminating edges are glued to the worn end surface of the board, having previously removed and sanded the old edge.
The edge is placed on the end and a heated iron is passed over it, causing it to stick.
Summing up
We hope our article was useful to you.
In order to more accurately understand the technological and practical issue, our website provides detailed photo and video instructions in which you will find useful information on this issue.
density of construction sand
Source: https://www.ristroy.ru/info/remont-mebeli-iz-dsp-i-skolov-korpusnoj-mebeli.html
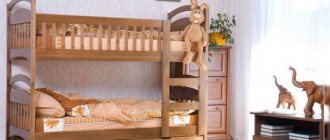
Bed
A DIY bed is a master class that is popular. For manufacturing, it is better to select wood with a high moisture content.
The bed can be made by both a novice craftsman and an experienced furniture maker who has special woodworking equipment.
The process looks like this:
- a diagram is drawn, materials and accessories are purchased, the necessary tools are selected;
- the frame is assembled: the bars are fastened together with self-tapping screws;
- the edges are filed down and smoothed with a sanding machine;
- the frame is painted with a composition for wood;
- supports for the slatted bottom are made;
- holes are drilled in the frame, bars are mounted;
- wooden slats are attached to the supports, the distance between them should be the same;
- The legs are made from wooden blocks, their cross-section and length should be within 10 cm.
Having decided on the dimensions, you should think about the design of the bed and its design style, and draw up a drawing or sketch.
Important! The number of blocks should not be less than 6 pieces;
- the legs are mounted to the frame;
- The furniture is sanded and top coated with varnish.
The bed can be decorated with various types of decor, which will greatly decorate the bedroom where it will be installed.
Decoration can be different: painting, carving, original painting. To ensure that the furniture is level and not skewed, a building level is used at all stages.
How can you restore furniture made from laminated chipboard?
Furniture made from laminated chipboard is found in every home and office. This is the most budget-friendly and quite decent-looking furnishing option. In more expensive versions of furniture, only the body is made from chipboard, while the facade part is made from MDF with various types of cladding (PVC film, veneer, enamel) and solid wood. MDF and solid surfaces may also require restoration, but we will not talk about them. This article provides information on how to restore chipboard with a laminated surface with your own hands.
.
Do-it-yourself chipboard restoration can be of several types:
- Restoring the color of a worn (worn) surface.
- Masking chips and scratches on the surface.
- Restoration of chipped ends of chipboard furniture.
- Restoration of places with torn fasteners and hinges.
Each of the defects requires its own approach to restoration and a different set of available tools.
Master classes for beginners on furniture making
Every beginner can make high-quality furniture at home with their own hands. The main condition is to decide on the material and arm yourself with all the necessary tools. To implement a home master class, experts recommend watching an example video on the Internet.
Creating a new, unusual object does not necessarily require the purchase of expensive materials.
Depending on the future loads on the piece of furniture, you can use the following types of wood:
- hard: apple, beech, elm - suitable for making solid frame furniture;
- soft: fir, pine - they have an attractive appearance and ease of processing.
After choosing wood, you need to stock up on the necessary tools:
- jigsaw with tilting shoe;
- grinding machine;
- milling cutter for wood processing;
- rotary miter box;
- glue, screws and other fasteners.
To complete the work you will need a set of tools.
When everything is ready, you can begin the work process: sketching drawings, cutting out parts and assembling.
So, the stages of creating interior items:
- choosing the specific type of furniture to be made;
- drawing diagrams and drawings - it is better to draw a non-standard type of project in detail, with examples and all elements;
- purchasing the necessary materials;
- drawing markings for further cutting out details;
- treatment with special antiseptics and protective compounds for wood;
- cutting holes for fasteners according to previously drawn diagrams;
- surface painting;
- assembly of the structure.
Ideas for making furniture with your own hands can be taken from the Internet or using your own imagination.
Note! It is necessary to process the material to prevent rotting and drying out of the wood.
The last, final stage: decoration. You can make furniture decoupage from appliqués or original wood carvings. For wooden surfaces, hot stamping looks beautiful: three-dimensional designs that are made using high temperatures. The wood is softened, different forms of press are used and a creative design is obtained. Unique furniture can be created using applied decor: overlays, rosettes, bas-reliefs, corners.
Making furniture with your own hands is a fascinating, creative process that brings stunning results.
You should start with the simplest designs: a bedside table or a table. A good option is to watch an online master class and ask an exciting question in the comments or personally to a specialist.
DIY stool made from leftover chipboard and MDF
In this article we will talk about how to make a stool from MDF at home. To do this, we only need trimmings of MDF or chipboard panels that could remain from old furniture. The result will be an original and practical piece of furniture that can carry both functional and decorative loads.
Return to content
Step 1: Create a Project
The first thing you need to understand is what kind of stool you want to get later. That is, it is important to decide on the dimensions, shape and color scheme. After finding out all these details, it is necessary to draw a drawing of a stool made of chipboard or MDF, which can be used to lean on during the process of making the stool. Now we need to prepare the material, which in our case is represented by scraps of panels that would hardly be suitable for making something larger.
Create a project
Return to content
Step 2: select the material
After writing the project, you need to pay attention to the material itself. It should be immediately noted that not all trimmings are suitable for these purposes. You need to choose a material that is suitable in shape, size and decor for one or another part of the stool. Roughly speaking, you need to visualize the written project.
Selecting the material
Return to content
Step 3: applying graphic markings
Now you need to make a template that resembles the letter “P”, after which you need to attach it to the previously selected panels and trace the outline with a pencil - these will be blanks for the legs of the future stool.
Kitchen stool made of chipboard
Apply markings
Return to content
Step 4: cut out the stool elements
Now, according to the drawn markings, you need to cut out the elements of the stool. We chose a circular saw for this operation, but you can use any tools. The main condition is even and smooth edges of the legs.
Cutting out fragments
Return to content
Step 5: Glue the fragments together
At this stage it is necessary to glue all the cut out fragments. To do this, you will need an adhesive composition made on a natural basis. This is the kind of glue you need, because it hardens quickly and holds the component parts together very well. With its help, a DIY chipboard stool will be more durable.
By following the link https://vse-postroim-sami.ru/home/mebel-i-elementy-interera/1290_kak-sdelat-taburetku-svoimi-rukami/, you will learn how to make a stool with your own hands. This article talks about how to make a shoe rack with your own hands. We also recommend reading the article on how to make an original lamp from wood.
The fact is that no additional fastening elements are provided in this design, so all mechanical loads will fall on the joints of the panels that have been treated with adhesive.
Gluing the parts
Return to content
Step 6: Fixing the glued parts
At this stage we will need a clamp with which we will fasten the parts we have just glued together. After this, you need to let the glue harden; the drying time is indicated on the glue packaging. It is also very important to read the instructions before use to avoid any unpleasant surprises.
Fixing the glued fragments
After gluing the three main fragments, it is necessary to continue work and supplement the structure with decorative elements.
Return to content
Step 7: sand the product
After installing all the fragments, you need to start sanding the finished product. You can do this by hand with a supply of sandpaper, but it will take a very long time, so it is much more advisable to use a sander. You can make the corners of the product rounded or leave it straight - here you are your own designer.
Grinding
Return to content
Step 8: finishing work
This stage is considered the most difficult and responsible. The fact is that the material you choose to finish your stool is the most important design element. Neither the main material nor the dimensions of a chipboard stool affect the appearance, practicality and service life of the product as much as the finishing material.
Finish 1
In our case, vegetable oil was used as a finishing material. It reliably preserves the original appearance of the product, and is also able to protect the stool from external factors, for example, from moisture.
Finish 2
In principle, you can use varnish, which will also protect the product, but we decided to make a 100% environmentally friendly product, so we abandoned synthetic finishing materials.
Return to content
Step 9: finished stool
We talked about how to make a stool from chipboard, and if you strictly followed the instructions, then most likely you have already finished making this piece of furniture. Finally, you can equip the stool with a soft cushion, which can be secured with fasteners or left removable.
Photo of the finished chipboard stool
Healthy? Save it to your wall! Thank you for like!
vse-postroim-sami.ru