A child's birthday is a special holiday that should take place in an atmosphere of joy and fun.
Balloons, garlands and various inscriptions hung in the room will charge the birthday person with positivity and happiness from the very morning.
Buying jewelry is not difficult, but not everyone can afford it. It is much more profitable and interesting to create beauty with your own hands.
A number corresponding to the age of the birthday person is an original way to transform a room and delight the little creature.
Making numbers
Most often, small balls are used to create such decorations. But not everyone can make an air number for their birthday on their own.
There are other, no less beautiful options:
Flat digit
It is much faster and easier to make a figure yourself in a flat version. If you use your imagination, the craft will look no less impressive than a voluminous one.
The design options are varied: paint it, cover it with colored paper or foil, cover it with fabric, and if you also cover it with flowers, they will add some volume.
From cardboard
You will need a large (or not so large) unnecessary box. On it you should draw a beautiful number corresponding to the child’s age, and then cut it out.
Next, the cardboard base needs to be decorated: painted with paints, covered with bright scraps of fabric or wrapped with floral film.
Soft figure
There is another way to add volume to the product. The cardboard base is wrapped in fabric or inserted into a sewn cover, and padding material - centipon, foam rubber or cotton wool - is added under the fabric.
We recommend reading:
A paper crown is a simple instruction for creating original jewelry with your own hands. Templates, diagrams, master class, exclusive design (110 photos)Weaving from newspaper tubes for beginners: the best free master class, with step-by-step instructions. Photos, diagrams, unusual ideas, videos
Paper rose - how to make it yourself? Step-by-step instructions, original ideas, photos, videos, master class
The figurine will become round and soft to the touch; your baby will surely like this figure.
From photographs
A kind of collage made on a cardboard figure.
Photo cards should be selected in advance and arranged according to the desired pattern.
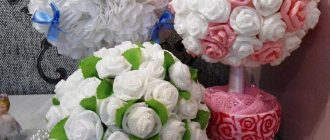
From flowers
The cardboard blank must be pasted over with many flowers made from colored or corrugated paper.
The decorations should be laid out closer to each other, and in this way fill the entire base with them.
From buttons
If you have a large number of buttons, you can paste them over a cardboard base.
Volumetric figures
If there is still time before the name day, then you can make a three-dimensional birthday figure with your own hands, which the baby can play with and move around the room.
The same cardboard is used as the basis, only this time you will need two identical parts. In addition to them, you need to prepare several cardboard strips of the desired width - these are the sides of future beauty.
You can assemble the number using masking tape or tape: to do this, glue the parts to each other one by one.
Where and how to place the number
A large, thick craft can be placed directly on the floor or you can allocate a stool for it. During manufacturing, the lower part of the product must be weighted to give stability by gluing, for example, wooden blocks inside.
If the figurine is flat and cannot stand on its own, you need to provide a loop on the back side to hang the figure on the wall or ensure a vertical position in another way, for example, when making it, provide it with a stick and place it in a vase.
After the holiday, a beautiful craft can be placed in the interior for a whole year - on the wall or on the desktop.
From napkins
To create a “fluffy” figure, in addition to napkins, you will need a lot of patience. But this is nothing compared to how happy the little birthday boy will be.
The process of creating a decoration is quite simple: a napkin (single-layer) must be folded in four and cut - you should get four squares. They should be stacked on top of each other and secured in the center. Wire, stapler or thread can help with this.
The sharp parts of the resulting part need to be cut off so that the final result is a circle. Then cut through the edges without touching the central part. All that remains is to lift and straighten the petals.
Note!
Crafts for the home made of fabric: we sew toys and decorations with our own hands (98 photos + video)- What crafts can you make from boxes with your own hands? 79 photos of great solutions for children
- Crafts from newspaper tubes: step-by-step instructions for the weaving process. 105 photos of newspaper crafts!
This creates one flower. To cover the figure completely, you will need quite a lot of them. Having prepared the required amount, you need to glue the flowers to the base, filling the entire space with them.
Photos of birthday gifts
Read here - DIY bird feeder: ideas on how and what to make a beautiful bird feeder from (135 photos and videos)
Help the site, repost 
0
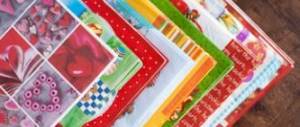
Corrugated paper
A large birthday number decorated in this way will turn out simply incomparable.
In order to create beauty you will need a large amount of corrugated paper. It would be better if it were multi-colored. You should cut the paper into strips of half a meter.
The optimal width is 3.5 cm. At this stage, you need to monitor the veins on the paper: they should be directed along the future flower.
Then you should stretch the strip on one side. Hold the workpiece in waves upward and, grabbing the base, wrap it around its axis. Secure the bottom of the flower with thread or wire. Spread the petals of the resulting rose.
Note!
- Crafts for beginners: tips and ideas from a guru on creating beautiful things with your own hands (96 photos)
- Children's crafts: inspiring ideas for hobbies and hobbies for all ages + 56 photos
- How to make beautiful simple crafts with your own hands - step-by-step instructions for beginners + 62 photos
Cover the cardboard frame with flowers. For convenience, you can use a glue gun.