How to make the environment in a children's room truly cozy and inspiring? The question is not an easy one. A child is a sloppy creature, so his room is always a mess. Especially if you buy him a lot of toys. It’s not difficult to teach your baby to be tidy. Toy cabinet – perfect option
for these purposes. Aesthetic and stylish furniture successfully performs two tasks: it decorates the interior and solves the problem of toys scattered throughout the room.
A toy cabinet is indispensable during games, or rather, after them. Play is not the only direction in which a child intensively develops. If you have a little artist growing up, then he needs the appropriate tools : brushes, pencils, albums, felt-tip pens. All this is usually stored in special compartments of cabinets. An alternative option is separate plastic containers.
.
How to choose good furniture for a children's room?
The ideal toy cabinet meets the following requirements:
- The height of the cabinet is optimal for the baby. If the child wants to remove the toys on his own, then there should be no difficulties;
- Inside the structure there are several ergonomic shelves where you can put toys;
- An important aspect is the design. A toy cabinet should have a bright, memorable design; Colorful and interesting furniture design is the key to your baby’s good mood. The child should “make friends” with the furniture as quickly as possible.
- It is desirable that the design has a compartment with a door, drawers and a special compartment for small toys.
It is better not to buy toy cabinets with mirrors for a children's room. A hooligan child can quickly break a mirror and cut himself on the shards. For the same reason, it is recommended to avoid purchasing designs with glass doors and shelves.
Pay attention to ready-made modular systems
for a children's room. They will allow you to decorate the room in the same style. If you buy a separate cabinet for toys, you will have to rely on your own aesthetic taste and sense of beauty. Everyone can create a harmonious composition. The main thing is to listen to our advice and recommendations.
It is advisable that the toy closet also have a convenient shelf for notebooks and books. The baby is growing, which means we must not forget about his intellectual development. Textbooks can be placed on one shelf, and entertaining literature on another. Another strict requirement is that the toy cabinet must be made of environmentally friendly wood.
– Children’s health must be taken care of first.
DIY toy boxes
Looking at the not childish prices for cute wicker or plastic baskets in stores, you think that the idea of making colored toy boxes with your own hands is not so bad. You will need cardboard boxes made of thick (not corrugated) cardboard, most likely from household appliances. You can try your luck with your friends: many manufacturers provide warranty repairs only if the packaging is present. So people keep the boxes. The warranty period has long passed, and they forgot to throw away the packaging. These boxes are the best option for children.
Related article: How to connect a shower stall to the water supply with your own hands?
Another option is to ask in department stores. They also often receive goods in hard packaging. For example, diapers, wipes, etc. come in these.
Cover with paper
Cut off the lid from the found boxes. We cut holes-handles in the side walls (narrow). We seal all joints from the inside with tape.
Cut off the lid of the box and make holes in the sides for handles
Take colorful paper. The wrapping paper used to wrap gifts is perfect. It is dense, there are a large number of different patterns. You can also use scrapbooking paper. If the trim is made of paper of different colors, we cut it into strips of equal width; if we paste it with one pattern, we measure the strip along the height of the box.
Glue the paper
We take glue (PVA), brush the surface of the box and start gluing it from the corner. We try to glue without bubbles, smoothing the paper gradually, from edge to edge. We place the next sheet with a slight overhang, not the previous one. Continue this way until we have covered all the surfaces.
We design handles
After looking at the light, we cut out the handles with scissors. To make the edge more neat, glue the sections of the handle with a thin strip of paper. We also decorate the top cut with a stripe.
Ready-made homemade toy box
We cover it with fabric
In this case, all corners of the box can be taped on both sides - it will last longer. Next, take the fabric and cut out two sets of blanks to fit the box. One is strictly in size, plus a seam allowance, the second is 1 cm smaller and also with an allowance. Add 0.5-1 cm to the seams on each side. You can cut the workpiece immediately in the form of a cross, but this way the fabric consumption is greater - it is more economical in separate pieces))
We cut out a double set of blanks from the fabric and sew them together
We first sew the parts together in the form of a cross, then make a bag from the blank. Let's try it on the box. We stretch one (the larger one) from the outside, and straighten the second one from the inside.
Fitting
Now we take universal glue and glue the fabric around the perimeter of the bottom, inside and out. Then we glue it in the corners. This way the fabric will not move.
Glue the fabric along the edges of the box
We fold the edges of both bags inward and trim the box around the perimeter by hand.
We trim the top of the toy box, cut out the handles
Using scissors, cut through the handles. Just don't cut out large pieces. You need to leave about 1 cm of “extra” fabric. We wrap it inside, hemming the handle.
Hemmed handle
Having decorated the handles, we get a ready-made box for storing toys.
The box is ready
Decorated with self-adhesive film
Unusual cabinets
- Treasure boxes
. The design is an open shelving unit with large sliding drawers. The dimensions are one of the key elements of the product - the entire “royal army” will fit here. The boxes are made of transparent plastic; - House for dolls. A special cabinet for collectible toys is one of the innovative trends
in recent years. The universal design allows you to build in a railway, a Lego town; - Wardrobe with compartments for clothes and toys. The child will be able to play right... on the shelf. Toys scattered around the room will become a rarity;
- “Car” with toys. Furniture storage structures can take on unusual shapes. Little car lovers will appreciate the car-shaped design. Things are stored in the trunk. Girls have their own option - a colorful kitchen stove with spacious drawers.
Where else can you store children's toys?
- An alternative to wardrobes is spacious and ergonomic chests of drawers. This is a great option for storing board games and art kits. When purchasing, try to focus on the presence of retractable plastic drawers
; - Another alternative to cabinets is textile sections with pockets. They can be hung throughout the room;
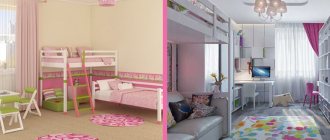
- Children's bed with drawers. An excellent solution for storing toys that the child no longer plays with;
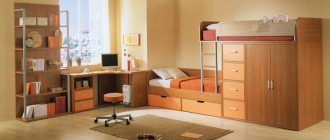
- Loft bed. A multifunctional ergonomic complex that combines a wardrobe, a sleeping area and a work area. The versatility of the design makes it popular;
- Desk with shelves for toys. An excellent option for younger students. Combines business with pleasure - an ergonomic desk and shelves for storing books and toys;
- Soft ottoman with reclining seat. Good design for storing coloring books, construction sets and children's books;
- Closet. Multifunctional furniture for storing both toys and other things. You can put household items on the upper shelves, and dolls, cars and soft toys on the lower shelves;
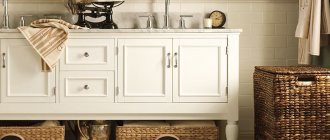
- Wardrobe rack for toys. Structures with shelves. Many parents do not use this option precisely because of the “openness”. The reason is simple: things will be on public display. And they buy a closet precisely to hide toys inside. But if you decide to go with shelving, then take a closer look at wicker baskets with handles in which you can put all your items. Alternatively, you can use a simple cardboard box
covered with colored paper. Boxes and containers can be arranged in any order. On the remaining sections you can place the most presentable toys - cars, dolls and books. This composition makes the interior truly inspired and aesthetic; - Racks with a step are an original design in which the bottom shelf is moved forward. The child can climb on it and take the necessary thing. The main thing is that the fastening is reliable. Otherwise, the baby may slip and fall;
- Plastic buckets in the shape of a honeycomb are a smart solution for storing toys in a large nursery;
- Cabinet for soft toys with pipes. An aesthetic and at the same time practical design, thanks to which the child can be sure that his toys will not fall.
WESTWING is a unique shopping club, thanks to which you can plunge headlong into the wonderful world of interiors. We bring you informative and entertaining articles. Once you start getting acquainted with the material, you will learn everything about the world of design! Join us!
Design features.
The design of the rack varies. Here everything depends only on the designer’s imagination, the availability of space to place the shelving and its main purpose. The simplest version of the rack is a simple structure consisting of several shelves and without a back wall. Due to the fact that there are no walls or doors, such a rack does not clutter up the room and looks quite attractive.
A rack with a more complex design may have doors made of chipboard, plastic or even glass. More often, only some compartments are equipped with doors. In some cases, the lower shelves of the racks are equipped as drawers. Here you can store linen, hygiene products, small accessories, including those that should not fall into the hands of the baby. The cabinet door, like the drawer, can be easily locked with a key, which prevents the child from using the contents independently.
Depending on the configuration, various partitions may be present:
- straight;
- carved;
- patterned;
- grooved;
- transparent;
- shelves for books and compartments for CDs;
- drawers and boxes;
- pallets, etc.
The rack can be designed as:
- a cabinet without a back wall, with open shelves;
- a corner equipped with built-in shelves and cabinets;
- add-ons over a crib, table or sold as a set with a furniture cabinet. Such models create additional convenience and save space in the nursery.
