Features and types
A bed (lounger) is a pet’s personal place to sleep and relax. Can be made in a variety of shapes and from a variety of materials. Usually the sleeping place is located where the animal is already accustomed to resting - near the radiator, scratching post or near the sofa. It is important that the chosen place is warm, dry, and cozy.
The modern market for cat products offers various options for beds:
- Baskets with cushion. Provide excellent air exchange. But practice shows that most animals begin to chew on the rods, so the product quickly loses its appearance.
- Plastic container with cushion. The advantage of the products is that they are hygienic and easy to clean.
- Hammock. Since cats naturally love to climb to high places, they feel great in hammocks and really love such “beds”. But keep in mind that this option is not suitable for kittens or old animals.
- Closed models. They are made in the form of a hut/hut. Also loved by pets, as they love the feeling of security. A similar lounger can be made even from a box.
- Soft beds with sides. Often made in the shape of donuts, soft materials are used for sewing.
- Tubes. They are made in the form of a cylinder, the inside of which is lined with soft, pleasant material. Can be installed at height.
However, many types of sun loungers can be sewn yourself using available materials.
Tip: when choosing fabric for a crib, pay attention to what the cat likes to sleep on - soft/hard, fluffy/smooth surface.
To make a sleeping place with your own hands, you can use the following types of fabrics or old things:
- jeans;
- sweaters;
- warm clothes with thick fabric (skirts, dresses, etc.);
- fur coats;
- unnecessary home textiles (blankets, bedspreads, rugs, etc.).
In any case, when choosing fabric, focus on the following criteria:
- Practical, easy to clean and wash. To avoid accumulation of wool and saw, the product will have to be washed and drained regularly.
- Strength. The pet will not mind sharpening its claws on the bed, so the fabric must withstand such loads.
- Comfort and convenience. In order for your pet to rest happily in a bed, it must correspond to his preferences. Keep track of what the cat usually sleeps on - the crib should have the same surface.
Also, when choosing a color/print of fabric, focus on the interior of the room, the shade of the walls or furniture, so that the crib does not stand out from the overall design of the room. However, this requirement is not mandatory.
How to sew a comfortable cat bed with your own hands
Before you start making a bed with your own hands, you need to decide on the model, size, and also choose a suitable material that can be easily washed and cleaned, removing dead hairs and accumulated dust. There are the following options for “beds” for cats found in stores:
- Basket with pillow. It is safe and ventilated due to the many holes, but not very durable, since animals like to chew on rods.
- The lounger is made of plastic and a soft base. Durable, easy to clean if necessary, but the material has a specific odor and increased electrolysis.
- Donut shaped bed. It resembles a pillow with sides, is made of soft fabric with padding, and is comfortable for your pet. It has only one drawback - it is recommended to remove the filling when washing.
- Hammock. A simple design that is installed at a low height from the floor, most often between the legs of a chair. Not very suitable for small kittens and older pets.
- House. This is a closed version of the bed in which the cat can feel safe.
- A lounger that resembles a pipe. Warm version. Can be installed as a suspension to the battery.
- Combined varieties. These include, for example, a hammock with a canopy, a donut with a folding roof, etc.
It is more economical and reliable to make a cat bed yourself, focusing on the preferences of the pet, its dimensions and the interior of the room in which it is planned to install the structure . It is recommended to use non-toxic and natural materials that your pet will like. For a soft base, it is best to take the following types of fabrics:
- cotton;
- linen;
- knitted;
- fleece;
- corduroy;
- plush;
- material from old jeans, faux fur coats, jumpers, sweaters, etc.
Foam rubber, padding polyester, holofiber and similar synthetic fabrics that dry quickly when washed are suitable for padding. But you should not use natural bird down and feathers, because they can harbor parasites.
Rectangular lounger with ties
To make such a bed, you need to use a pattern, adjusting the size to the dimensions of your pet.
From a sweater
Instead of a sweater, you can use a jacket, turtleneck or any other similar item of clothing. As a result, you should get such a nice lounger, as in the photo:
Sweater lounger.
For production you will also need foam filling, thread and needle, scissors, a sheet of thick cardboard (optional).
There is no pattern like this for this lounger, the sweater just needs to be cut in certain places, filled with foam rubber and sewn.
Schematic illustration.
Manufacturing process:
- Cut off the neckline and stitch the cut area.
- Make a seam in the middle of the product, in the chest area, as shown in the photo.
- Fill the product with foam rubber.
- After this, sew up the sleeves and place a seam along the bottom of the product.
- Finally, the sleeves need to be stitched to the sides of the product - this way they will look like sides.
Making a bed from a sweater.
If you are using cardboard (plywood), before filling the sleeves with foam rubber, insert sheets of cardboard, slightly less wide than the width of the sleeve.
Idea: to form the bottom of the lounger, you can use a small pillow, commensurate with the width of the sweater. This solution will save a lot of time, and the sunbed will turn out to be of better quality.
Long sleeve T-shirt lounger.
T-shirt cat house
An interesting option for a cat house is a house made from a T-shirt. There are several options to consider.
Tools:
- 2 wires, 50cm long,
- t-shirt,
- cardboard,
- scotch.
We take 2 wires and cross them together. We cover the joints with tape and insulate the ends so that the cat does not get hurt.
You should get two connected arcs that will adjust the height of the house.
Now let's work on the base for the house. Take a box, you can use cardboard. We make four holes in the corners where we will insert the arcs.
Carefully bend the ends of the wire at the bottom of the box and seal with tape so that the sharp edges do not show through.
T-shirt house base
It's time for the T-shirt. For aesthetics, you can rip off the sleeves and sew an armhole. We stretch the T-shirt onto the frame so that the neck of the product is the entrance.
T-shirt cat house
The larger the frame, the wider the T-shirt is needed.
If the length of the T-shirt is inconvenient, then you can cut it off and make a pillow inside the house.
Second way. We take a cardboard box and put a pillow inside according to size.
We cover the box with a T-shirt so that the cutout serves as the entrance to the cat’s house.
Carefully fold the bottom of the T-shirt and fasten it with a stapler.
We push the sleeves inside the armhole. The simplest cat house is ready!
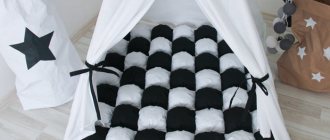
Classic bed with sides
Such models of sun loungers are considered traditional. They are made in the shape of an oval with high or low sides. Inside the product there is a removable pet pillow.
Cat bed with sides.
Necessary materials:
- piece of fabric;
- filler (foam rubber, padding polyester or others);
- thick cardboard;
- some tools: scissors, needle, thread, chalk, ruler.
You can sew a similar cat bed with your own hands using this pattern:
Pattern.
Manufacturing technology step by step:
- You need to cut out parts A and B from a sheet of cardboard. Please note that the length of part A is equal to the circumference of oval B (add 2 cm allowance). The width of part A is the desired height of the side.
- You need to cut out two parts A and B from the fabric. For the bottom you need to choose a denser and more practical fabric.
- Sew part A along the long sides and turn right side out.
- Insert a piece of cardboard inside, having previously cut it in the center (otherwise the piece will not fit through the narrow area).
- From the foam rubber, cut out a suitable piece according to the pattern (part A), cut in half and insert - the side is ready. Its ends must be stitched manually with a hidden seam.
- We take the cut out parts B, between them you need to insert the cut out cardboard part. We baste with thread and sew the bottom to the sides.
- You can put a ready-made pillow inside or sew a pillowcase yourself and fill it with padding polyester.
Advice: for short-haired breeds, which freeze more often than others, it is better to have higher sides. If the pet is fluffy and does not need additional insulation, low sides are suitable.
This model of lounger can be modernized and remade at your discretion: make it in the shape of a heart or a square, combine two types of fabric for interior and exterior decoration, stitch the sides for more texture. Examples are shown in the photo:
Sunbed options.
DIY scratching post and bed for a cat
Table of contents:
Want to create a site? Find Free WordPress Themes and plugins.
A scratching post and a cat bed are an integral part of the everyday life of pet lovers. A new post, or rather a series of posts, will be dedicated to our favorite animals. Having got a beloved pet, we certainly want to create coziness, comfort and warmth in our home. We buy toys, a flea and tick collar, combs, shampoos, and treats. And, of course, we make a separate bed for the new “family member,” or maybe a whole house.
When creating all the benefits for your cat or dog, do not forget about such an important device for them as a scratching post. All of these accessories for pets are sold in pet stores, but not everyone can afford them. In this post I will tell you how you can make a scratching post and a cat bed with your own hands. You can read separately about how to make a dog bed.
So, first we need to decide what our cat (or cat) bed will be like. Perhaps it will be one of these:
Or this:
Or perhaps this will be a house for a pet:
Once you have decided on the type of bed, you can proceed to selecting a pattern and choosing material. There are a lot of original ideas here. Having chosen the appropriate option for yourself, you can make a cat bed with your own hands.
Patterns and sketches of cat beds
1.Pillow bed made of a sweater. An old sweater can be used to make an excellent “bed” for your pet. Below is not a pattern, but a guide to making such a bed.
2. Slipper bed. Choose the dimensions of the cat bed yourself. Using the pattern below, it will be very easy to sew a cat bed with your own hands.
3.Sofa for a cat. The next idea is also very simple, but very interesting. The pattern is not complicated, it’s easy to sew a cat bed with your own hands:
4. DIY cat house . When your pet appreciates his favorite house, he will certainly be happy, because not just people, but even animals dream of a house.
Step-by-step guide to creating a house:
- Create a pattern for a domestic cat with your own hands. In order to understand what you want: look at the photo, go shopping, study the range of ready-made houses there.
- Use a hacksaw to prepare the plywood walls and make one or two holes for hatches.
- Similarly, from the resulting observation platforms - their role is played by smooth plywood squares
- It is advisable to make the roof removable.
- For the wall, cut polyester strips, pieces of fabric to decorate the home.
- All items are glued first with insulation, then with decorative elements.
- We are preparing the foundation.
- The transition to the wall and roof is made using nails or glue.
- The outside of the house is decorated with fabric, which makes it more attractive.
- In a couple of days (while there is enough glue, etc.) the room is ready to accept residents!
Step by step in the form of photo instructions it looks like this:
The house can be supplemented with a scratching post. You can take a simple sketch for it. Then the pet’s house will be transformed and may look like this:
The cat's house should be soft so that the animal does not get injured, the cat will be warm and comfortable in its homes. For these purposes, it is better to choose the following materials:
- soft fabric for decorating the interior of the house (flock, fleece, faux fur, plush, velor or velvet, etc.);
- durable material for external walls and roofs, on which a home scratching post can stand, and on which they are not inhaled (this can be carpet, dense synthetic fabrics);
- soft filling for the lounger (filling made of polyester, foam rubber);
- twine for scratches;
- various decorations, toys for cats, pompoms or buboes.
As you can see, there are quite a lot of options. Making a scratching post is a little more difficult; it requires not only ingenuity, but also skill.
DIY claw point
To make a scratching post, you need to first develop a design project, prepare the necessary tools and purchase the necessary building materials.
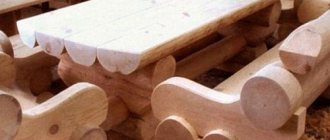
From the point of view of practicality and safety, the scratching post option can be: placed on three support posts, five platforms for crawling and jumping, a rectangular house, a hammock and a small platform on top of a long post.
That is, on one base there will be three thick pillars connected to each other by the first platform. The second platform connects the longest and shortest pillars, and the third will be located under the rectangular box (house) and connect the main pillar with the middle one. Next will be the house itself, above which on the main (longest) pillar there will be two platforms of different sizes.
Preparation of tools and building materials
To create a house with a scratching post, you should prepare the following tools: a screwdriver, a jigsaw, a drill, an electric stapler, and an electric hacksaw.
You should also purchase the following materials:
- plywood about 12 mm thick – 2.25 m2;
- timber 50x70 – 4.2 m;
- carpet on jute base – 1 m2;
- jute rope;
- corners (for assembling the house - 15x20 mm, for fastening load-bearing structures - 40x45 mm, 5x20 mm, safety - 35x40 mm, 2 large triangular corners with a stiffener);
- self-tapping screws
Any material can be used as a covering for the house and platforms. Carpet is soft, durable and wear-resistant, so we will give preference to it. As for the rope for wrapping the post, you can use hemp rope, but jute rope looks better and is more durable.
Attention! It is better not to use cardboard for such a design, since the resulting scratching post will not meet the safety and stability requirements. After all, cats are active creatures, and they need strong support.
How to make a scratching post with a house: step-by-step instructions with photos
It is important to consider a number of points. First, determine the height of the future product. The maximum height of a stable structure is 2.2 m, so we make the tallest support column of this length. To do this, we cut off a 2.2 m long piece from the block. This will be the support pillar.
And also keep in mind that the structure must be stable. We cut a sheet of plywood into 6 equal pieces (approximate size - 750x500 mm) and take one of them as a base. The remaining pieces of plywood will be needed to make platforms. The preparatory stage is completed, we proceed directly to the manufacturing process.
Making the basic frame
- First of all, in the platforms that will be attached below the house, we cut holes for the support pillars. We will leave the platforms that will be attached to one pole and placed above the house for last.
- On each platform that will be located below the house, using a pencil we make marks where the pillars will presumably be located.
- To simplify your task, you can make a stencil from a sheet of whatman paper with the locations of the pillars relative to each other marked on it.
- By marking the platforms using a stencil, you can be sure that the platforms will fit regardless of their geometric shape.
- The first connecting shelf will be the largest. It can be made rectangular (a cat can easily jump to such a height from the ground), or you can cut a semicircular groove in it. The more various holes and cracks there are in the structure, the more interesting it will be for cats to climb on it, so we make the first platform with a large corner round hole. From the cut piece we will later make a wall with an entrance for the house. We make the remaining three platforms according to the same principle: we either leave them rectangular, or use a power tool to give them a shaped shape.
- We make holes for supports in the prepared platforms. In the opposite corners of the rectangles drawn using a stencil, we drill holes using a drill with a diameter of about 12 mm, then using a jigsaw we cut out grooves for the supports. It is better to make the grooves a little larger than required. Otherwise, even a small millimeter deviation may interfere with the assembly of the structure.
- We assemble the finished platforms into one structure to make sure that the supports fit into the grooves.
Before proceeding with further assembly, the platforms should be upholstered with carpet, since upholstering platforms already attached to the posts is problematic. We do this using an electric stapler, it is much easier and faster than doing it manually.
Next, we attach the platforms to the pillars. To do this, we make marks on the pillars that will help place the platforms parallel to each other. To be sure, we make marks on all sides, so it will be more convenient to screw the corners in the future. We attach the corners that will hold the first shelf directly to the pillars, and we attach the corners that will hold the remaining shelves directly to these shelves. After this, we assemble the structure, that is, we screw the platforms to the pillars. You don’t even have to screw the supports to a single base just yet; the platforms already reliably hold the structure together .
Making a house for a cat.
We take pre-cut pieces of plywood as the building blocks of the house. From one piece of 75x50 we make the floor and ceiling, from another - the side walls and end. The wall with the entrance to the house is already ready - it was left over when cutting out the first lower platform.
We screw the corners to the side walls and bottom and assemble all the elements together. Even if the box doesn’t turn out very smooth, don’t be upset, the carpet will hide everything.
Let's start upholstering the house with carpet. We do the upholstery both outside and inside the house, and secure the carpet using an electric stapler.
We attach the house to a structure consisting of pillars and lower platforms. To do this we use a screwdriver. You can simply screw the house to a pole, but in this case the stability of the structure is unreliable. To ensure better stability, it is better to pass the support inside the house along the corner.
After this, we proceed to wrapping the pillars with rope. To do this, carefully wind the rope in a circle around the pole, pressing it to the base after each turn. We fasten the rope to the post using an electric stapler.
Making a hammock where it will be comfortable for both the cat and the kitten to lie
We cut out a frame from a piece of plywood using a jigsaw, tighten it with material and carefully attach it to the post. You can use carpet to make a hammock, but it is better for this purpose to purchase a special material that is just as durable, but not so dense. To attach the hammock to the pole, we use large corners with a stiffener. The fact is that this structural element is attached to only one support, and it must withstand the weight of one cat lying in the src=»https://i0.wp.com/legkovmeste.ru/wp-content/uploads/2014/ 07/gamak-dlya-kota-svoimi-rukami-2-600×339.jpg?resize=600,339″ class=”aligncenter” width=”600″ height=”339″[/img]
It is quite possible that the cat will not sleep in the hammock, but will use it as a kind of springboard or will simply play with the threads sticking out of the scratched fabric. In any case, the hammock will be used.
At the final stage, we mount the roof of the house and attach the entire structure to the base. The structure is quite heavy and relatively stable, so you can attach the pillars to the base using self-tapping screws. To ensure greater stability, you can additionally attach the main support of the structure to the wall using a large bracket.
Source: legkovmeste.ru/stroitelstvo-i-remont/delaem-kogtetochku-dlya-koshki-svoimi-rukami.html
You can see other options for dog beds in the article We sew a dog bed with our own hands. Even though the beds are designed for dogs, they can also be suitable for cats.
Conclusion.
Beds require regular care; pillows need to be knocked out at least once every six months. Wash covers periodically.
If you liked the ideas for beds, share on social networks:
Did you find apk for android? You can find new Free Android Games and apps.
Battery bed (hanging)
The purr will be especially happy with this option for a sleeping place, because in cold times you just want to be closer to the warmth! To make a couch you will need a piece of large diameter PVC pipe. The length of the segment is equal to the desired length of the lounger.
Important! If the lounger is too large, it will prevent the heat from the radiator from penetrating into the room. Therefore, the design should cover no more than 1/5 of the surface of the heating device.
A bed attached to the battery.
Also prepare a piece of soft fabric, scissors and threads in color, needles, and a pencil.
Step-by-step master class on production:
- Measure the circumference of the pipe.
- Using the length and circumference of the pipe, cut two pieces of fabric: one with a width equal to the circumference of the pipe, and the second 20 cm larger than the circumference.
- Sew the smaller section along the length and insert it inside the pipe. For greater softness, you can put a piece of foam rubber on the bottom.
- Sew the larger piece along the length and place it on top of the pipe.
- Next, sew the ends of the “sleeves”.
- To attach the dog bed to the battery, use reliable fasteners.
The following version of the lounger is also possible - made from a piece of wood or plywood, secured with a chain. The main nuance is to attach any rubberized material to the surface of the plywood so that the mattress or blanket does not move when your pet jumps up or down from its place.
A type of battery bed.
Hammock
The advantage of such a lounger is that it will take up virtually no space - after all, it can be attached to a regular chair with four legs.
For production you will need the following materials:
- a piece of felt to fit the size of the animal;
- tape (braid);
- clothing Velcro (4 pcs.).
Caring for domestic cats gives many owners genuine pleasure. Therefore, when it comes to arranging a cozy corner for relaxation, the decision to sew an original house with your own hands naturally suggests itself. There are many simple and interesting ideas for decorating a cat house, some of which we will describe in detail.
Studying the assortment of specialized stores for animals sometimes causes delight and surprise, the models of houses are so different. However, spending money on purchasing an expensive product is not always wise. After reading the design recommendations, most will be able to sew an interesting design with their own hands. Before starting work, pay attention to the following nuances:
- It is extremely important to choose the right shape of the house, taking into account the character and habits of the cat. Some pets prefer to be visible. From this position, it is correct to choose an open bed for making. A cat whose priority is peace and privacy will appreciate a closed, kennel-type house.
- The next stage is sizing. The animal should fit freely in the house that you plan to sew with your own hands. And if you are the owner of an expectant mother, then you should also worry about the place for the upcoming offspring.
- Finishing material. Depending on the conditions in the apartment and the breed of cat (smooth-haired or fluffy), fabrics with or without a warming effect are used. Although most cats still prefer soft material.
Important ! The main condition is that the material is selected natural so as not to accumulate an electrostatic charge.
The second important factor when choosing is durability; the finish should not suffer after the cat’s first attempt to use the house as a scratching post.
A well-equipped house has the following characteristics:
- does not accumulate dust;
- easy to wash;
- meets safety requirements (does not contain sharp corners or material with a strong odor);
- The cat feels comfortable in it.
It is optimal to sew a house in accordance with the surrounding interior so that it fits harmoniously into the design of the room.
Instructions for making a home for two cats
Making a house for two pets is easy if you follow the instructions:
- Build two closed shelters in which furry fidgets could retire. As a rule, they are located at different levels.
- Cover hard surfaces with carpet and wrap posts with rope.
- Connect closed houses and auxiliary elements.
- Secure the gaming complex to a solid foundation.
Make structures for playing purposes (pillars, platforms, hammocks, etc.).
We recommend reading about how to catch a cat. From the article you will learn about how to make a trap for a stray and domestic cat, installing a trap and safety precautions, options for placing a caught cat.
And here is more information about how to find new owners for a cat.
Making a cat house yourself is not only a useful process, but also a creative one. A budget option could be cardboard shelters or a tent house. A play complex created on your own is the best fit for your beloved pet and will fit into the interior of the room. Fluffy fidgets will appreciate the efforts of the owner, and a house made independently will become an interior decoration, emphasizing the taste and style of its owner.
Master class on sewing a classic house
The desire to sew a resting place for a cat with your own hands allows you to fully unleash your own creative potential. An ordinary house can be played up in different ways: create a simple quadrangular structure or a model that imitates a cap, or maybe you want to sew a kind of tent. The choice is yours.
To sew a classic house model with your own hands, you do not need to have a high level of skill in using a sewing machine. Prepare for work:
- foam rubber, which will help keep the shape of the side walls, approximate thickness - 1.5 cm;
- It is better to lay foam rubber 2.5 cm thick on the bottom;
- dense material for decorative finishing; the interior and exterior of a cat house can be sewn from different fabrics.
The entire process of creating a masterpiece for a cat includes the following steps:
Pattern of details. Having prepared a template for one side from the newspaper, transfer it to the fabric and cut out 8 identical blanks. The base of the cat house is 40 cm, the height of the wall is per cm, and 25 cm is allocated for the roof. If different finishes are used, 4 pieces of each type of fabric will be required accordingly. For the bottom you need two blanks measuring 40x40 cm.
Note! The pattern elements are cut out with a margin of 2 cm for future seams. If you mark the four templates on the front side of the fabric, it will be easier to subsequently sew the parts of the house along the visible lines.
Similar actions are carried out with foam rubber: using material 15 mm thick, cut out 4 elements measuring 40x30x25 cm and 1 blank 40x40 cm with a thickness of 25 mm. No allowances are needed here. Before sewing fabric blanks for a cat's house, their edges should be finished with a zigzag stitch. Next, each wall of the cat's house is formed separately according to the sandwich principle: foam rubber is placed between two fabric parts, basted around the perimeter or fixed with safety pins, after which the blank can be sewn. Draw a circle on the fourth part of the wall of the cat house. Any plate of suitable size will help mark a neat entrance.
The entrance circumference, after pinning, is machine stitched. The edges of the cat house entrance need to be processed. It is enough to sew them on a machine using a zigzag stitch. Without touching the processed circle, the middle is cut out, the entire workpiece is turned outward. By analogy, you need to sew the bottom of the structure for the cat. To prevent the parts from delaminating, it is better to secure all the elements with your own hands with buttons.
All blanks are connected to each other from the inside out, starting from the entrance of the cat house, ending with the back wall.
The final step is to sew the bottom and turn the cat house through the entrance. You can invite your pet to your housewarming party!
Look at the following photos to see what interesting models of houses you can sew with your own hands if you show a little imagination:
Interesting ideas for creating beds
Not all cats like to be in a closed house. Most people prefer to combine relaxation with observational activities, so a couch is the optimal solution for them. There are many interesting design ideas for such structures, which are not difficult to sew with your own hands.
Option 1
To sew a cat bed with sides you will need: a small flat pillow with synthetic filling and fabric for decoration. The creation procedure includes the following steps:
The pillow is cut into three pieces to create two long narrow pieces for the side and one rectangular piece with rounded edges for the bottom. Each of the blanks must be carefully sewn. On the sides it is better to place an additional seam in the middle.
The material for decoration is laid out out of the blue, the future sides of the cat bed are placed along the edges, after which they are covered with fabric.
A bed is formed from the resulting blank, the sides at the edges must be sewn, and there is room in the middle for a pillow. Inside the structure you can put a soft blanket for the cat or sew a pillow of the appropriate size, which is easy to get and wash if necessary.
Option 2
It’s very easy to sew a kind of nest-shaped house for your cat with your own hands. Prepare for work:
- fur fabric or thick fabric for decorative finishing;
- foam circle;
- strong rope to give the house the shape of a nest.
Using the proposed pattern, you need:
- Cut 2 circles with a diameter of 80 cm from the finishing material.
- Prepare a foam circle with a diameter of 40 cm.
- Sew two blanks of decorative material with your own hands from the wrong side.
- Turn the resulting cover right side out and insert the foam cushion.
- A seam is sewn at a distance of 1 cm from the edge of the circle. A rope is inserted into the resulting compartment and pulled to the required size.
Advice ! By decorating the cord with interesting pom-poms, you will create an additional object for your cat to play with.
Option 3
Another simple and quick option for a house in the form of a bed is sure to please your cat. Required material:
- Sew the cover preferably from fleece.
- Foam rubber will give the pillow softness; its thickness can vary from 1.5 to 2.5 cm. If there is thin material, the bottom is formed from two layers of foam rubber. If you are using a product with a thickness of 2.5 cm, one circle will be enough.
Main stages:
- A circle or two is cut out of foam rubber (depending on thickness). The diameter corresponds to the planned size of the cat bed.
- Prepare two round blanks from the fabric to be decorated. The first is 0.5 cm larger than the diameter of the foam circle (seam allowance), the second with an allowance of 3.5 cm (taking into account the thickness of the foam cushion and seam).
- The foam cushion is placed between the finishing material and carefully sewn together.
Note! First, you can sew the cover, leaving a little space for inserting foam rubber, after which all that remains is to carefully decorate a small area of the bottom of the cat bed.
- A strip of foam rubber is prepared for the side, the length of which is equal to the circumference of the bottom.
- The part is lined with fleece, the edges are joined. Naturally, they also need to be sewn.
- The bottom of the cat bed is installed inside the hoop, the seam should be located at the bottom.
- Then you need to sew the two main elements together and turn the bed inside out.
- if the sides are slightly bent at the edges, you will get a model resembling an armchair.
Plywood cat house
Take a sheet of plywood. And we make three sides and a floor out of it, it is better to choose a square shape.
For the roof you need two squares, which are connected at an angle by furniture corners.
Connecting the roof
We use self-tapping screws to connect the walls and roof.
Connecting the floor and walls
We cut out the entrance and front sides of the roof from foam plastic.
In order to cut out the entrance, we outline the plate.
You also need to make small holes in the roof parts for ventilation.
You can line the inside with fleece or put a pillow.
DIY plywood house for a cat
Dimensions and shapes of the home
The variety of cat house designs is amazing. However, the most optimal designs are in the form of beds and houses equipped with a scratching post. It's better if everything is connected together.
The size of a cat’s future apartments is influenced by two factors:
- animal size,
- free area for installation of the structure.
If there are several furry ones in the family, then the play complex is simply necessary. Photos of a cat house show that the variety of modern finishing materials allows you to create designs that can harmoniously fit into interior compositions of any style.
Construction materials
The following materials are most often used to build a cat’s home:
- for the manufacture of the frame, chipboard, MDF and plywood sheets, boards made of natural wood are suitable;
- it is possible to sew a soft house for your beloved cat in the form of a comfortable bed from fabric and foam filling;
- simply create cat houses from ordinary boxes;
- To decorate a scratching post for a furry one, you should stock up on jute or sisal rope. Just do not need to secure them with staples or nails, since the animal can damage its limbs;
- PVC pipes or metal and wood products are suitable for the base of the scratching post;
- synthetic winterizer and foam pieces are chosen as filler for pillows and mattresses;
- the interior is decorated with fur, plush or fleece;
- to cover the external facade, the material is selected based on the animal’s habit of tearing its claws: carpet would be a good option;
- adhesive compositions for work should be purchased without a pungent odor, which can scare away the cat.
Bed from an old suitcase
If you still have an unnecessary suitcase or a hard bag of a similar shape, you can make a beautiful and cozy bed out of it in literally 15 minutes. Remove or trim the top, place a pillow inside, and you're ready for a luxurious pet bed. Even a large cat can easily fit into a suitcase, you just need a thinner pillow.
The design is easy to modernize: screw the legs to it or glue them with construction glue. You can make an upper tier from the lid by assembling a support for it from old boards. Even a pillow or mattress can be easily sewn from any natural fabric and a piece of foam rubber.
Design process
The instructions on how to make a cat house with your own hands are quite simple.
First of all, rectangular parts are cut out from chipboard and chipboard panels according to size. Circles with a diameter of 27 cm are drawn on two parts.
The rear wall plane remains blank, and several holes are marked on the front: one with a diameter of 22 cm is the entrance, and several small ones in the form of windows. Next, holes are cut out using a jigsaw or drill according to the indicated marks.
After this, the two resulting elements are combined in order to mark the places where the vertical slats will be installed. It's better to take 7 pieces. The marks will be through drilled holes on both walls.
The slats for the cat's home must be pre-processed: planed, leveled and sanded. The front and the same rear elements of the house are connected with slats using self-tapping screws.
Note!
On a chipboard base in the place where the house will be attached, foam rubber should be placed and a circle should be drawn where the scratching post will be installed. The entire surface of the base is covered with decorative material, which is convenient to attach to a stapler.
DIY paper cat step by step
Cut the black cardboard into two even pieces. One half will be the head, and the other half will be the torso.
Let's make the torso first. Fold half of the cardboard in half. Draw a semicircle on one side.
Cut a semicircle on two pieces of folded cardboard at once. This is already part of the cat. It has a torso and 4 legs. Try not to make them too thin, that is, do not make the semicircle very large. My paws are 3 cm wide and my body height is 4.5 cm.
Make slits on the top near the fold of the paper. These are the places where the body is attached to the head and tail. Also fold the legs at the bottom. But this step is not just for the paper cat's completion, or beauty. In the original, the cat is glued to green paper on these folds. It seems that the cat is standing on a green lawn.
Now let's move on to creating the head of the black cat. To do this, take the second half of the cardboard and cut a strip on its narrow side, slightly less than 4 cm.
This stripe will be a chic tail. The ends of the strip need to be slightly narrowed. But later I cut off one narrow tip, making it straight, since the tail did not fit well in the slot of the body. I suspect that my cardboard is not hard enough. Perhaps you can do it.
Let's continue with our heads. Fold the remaining cardboard, the one from which we cut the strip for the tail, in half. Round off the ends of the forked part of the paper.
Open the paper and make side cuts on only one part of it, up to the fold area.
Then return the paper to its folded position to create protruding ears.
Cut out long, narrow eyes from yellow paper and draw vertical pupils with a felt-tip pen. Cut out a mustache from black cardboard - 6 stripes, approximately 5 mm wide and 9 cm long. You also need a nose.
Straighten the cat's face, round off sharp corners. Glue on the eyes, mustache, and nose on top.
Place the head into the slots on the back, placing its back half and tail into the slot. Kotofey is ready. You can glue it to green paper for stability or leave it like that. Now you know how to make a paper cat for Halloween and more. The cat turns out to be quite large, of course, if you need smaller sizes, you need to take half as much paper.
Black cat with a witch, see how to make it here.
The dark trinity together. Step by step the bat is here.
Roof of the house
To do this, the upper part is pasted over, and the slats that are located in the lower part inside the structure are closed. Afterwards, the finished house is attached to the base, selecting the screws of the required size.
To ensure that the pipe placed inside is stable, it is fixed on both sides with wooden blocks. They are attached with screws or glue.
To arrange the bed, semicircular parts are cut out of chipboard and strung onto a pipe. Once the location for the scratching post has been determined in a vertical position, the pipe can be connected to the base of the house.
At the end of construction, a string with a favorite cat toy is attached under the bed.
Note!
The bed itself is covered with foam elements and the selected fabric. The pipe is wrapped with jute or sisal rope, which is attached with glue.
The edges of the cat scratching post are upholstered with fabric, and it is better to wrap the middle with rope. Next, the board is attached at the top to the frame of the house, and at the bottom to the base of the building.
Cat play area
At the beginning of construction, a box of suitable dimensions is made. The entrance to the interior can have any shape and form. The assembled box is attached to the base of the complex. The pipes are attached to the house using angles and screws.
The next level of the gaming complex is represented by a couch. To make it interesting for the animal to move around its home, you can install a ladder on the side or inside the building, securing it with corners.
The upper level is designed in the form of a gable roof installed on 4 pipes.
Note!
After collecting the entire complex, you can begin decorating.
All pipes should be wrapped with suitable ropes; beds and other floors can be covered with carpet sheets. All cuts and walls of openings must be covered with furniture slats to ensure safe movement for the animal inside the complex.