Articles
All photos from the article
Let's try to assemble a wooden table with our own hands, without using modern materials.
We will only have at our disposal timber, planed boards, screws and... let’s not get used to the Middle Ages too much - a drill and a screwdriver.
Our goal is to assemble a simple garden table exclusively from traditional materials
How to choose wood
The choice of wood will determine the appearance of the table, its strength and the level of complexity of manufacturing.
The tree classification can be structured as follows:
- Soft type: pine, spruce, fir, cedar and other woods.
- Hard type: oak, birch, beech, ash, maple, walnut, fruit tree wood.
- Very hard type: boxwood, yew, dogwood, birch wood
Once the choice of material has been made, we begin processing it.
According to the needs of different people, as well as in the case of individual distinctive situations, different characteristics of wood or its features are important:
- Rot resistant.
- Texture of the material.
- Price of raw materials.
To make a table, we need high-quality dried wood.
If your goal is to make furniture for a living space (and not just practice a skill), then you need to take into account the quality of materials without neglecting them. Dry lumber must be used. How it will be dried is up to you. Evaluate in advance whether you can properly dry the wood at home; if this is not possible, it will be more profitable and reasonable to order ready-made material. During drying, the wood will be deformed, this must be taken into account, but purchasing already dry wood is much more expensive. For high-quality drying at home you will need:
- constantly stable temperature conditions, otherwise the material will dry in waves;
- good ventilation in the room, no draft;
- It should be remembered that this process is very long; the material must be dried without being shifted from place to place for about six months.
Then think about the design of the product.
- Tabletop.
The shape of the tabletop can be round, square, rectangular, oval.
Here, strength plays an important role, as does the absence or low absorption of moisture by wood. Optimal material: pine, oak. For a pine tabletop, choose cheap but high-quality material - without rotten areas, cracks, protruding knots and other unnecessary defects.
- Table legs.
The legs can be made of a different material than the tabletop, and can be of the most bizarre shape.
Optimal material: birch, it is strong enough for constant load; boxwood and acacia are also suitable.
To make a table from wood, the material must first be treated with sandpaper. If you are just starting your carpentry career, you should use birch, pine, oak, acacia and boxwood in your work.
Unlike other materials, wood has a number of advantages.
There are several advantages when using wood in construction:
- easily subject to various processing;
- sufficiently resistant to changes in temperature and humidity;
- good shock absorption: practically no chips or scratches;
- simply undergoing restoration;
- environmentally friendly material;
- the cost varies depending on the type of wood and processing methods;
- the material is easy to saw, cut, and chip with special tools;
- does not require careful and constant care
- external aesthetics.
However, there are also a number of disadvantages.
That being said, there are some significant disadvantages to keep in mind:
- the cost is significantly higher compared to other materials;
- wood can become deformed under the influence of weight;
- without the use of special coatings it is not resistant to mold and mildew, corrosion;
- wood cannot be called a moisture-resistant material;
- Over time, the above aesthetic appearance may be significantly lost.
If you make a table and benches in the same style, you will get a very nice furniture composition for your home, cottage or garden.
What types of wood exist
In fact, the world knows more than 40 types of wood, but they are all divided between two types:
Hardwood
These are maple, oak, elm, beech, rowan, walnut, ash, apple, elm and sycamore. But there are trees with even harder wood. These are white acacia, boxwood, yew, dogwood, pistachio tree.
Furniture frames and load-bearing structures need to be made from solid wood. In short, everything that will be seriously loaded when you use the furniture.
Softwood
Such wood is found in pine, cherry, willow, alder, cedar, spruce, juniper, poplar, aspen, chestnut and fir.
Decorative elements, facades or other parts of furniture that will not be subjected to serious loads are made from such types of wood.
If you use, for example, pine to make the legs of a children's two-story crib, then you can be sure that they will break even before you stop enjoying the fact that you made furniture from solid wood with your own hands.
And then we will list the most popular types of wood that are used to make furniture. We will tell you what properties they have and what products can be made from them.
Wooden tables: range of shapes and sizes
Elegant benches will ideally complement a homemade table.
It is important to decide in advance what shape and configuration the table requires. Professionals advise paying attention to several points:
- the table should fit well into the room where it is planned to be installed;
- think about how many people will constantly be at this table and what it will be used for; from this parameter, calculate the size of the product;
- choose a folding table option if from time to time you need it for more people;
- take into account the age and capabilities of people (for example, the table for children will be different).
By choosing different positions of the table legs and the distance between the boards, you create your own unique design.
The table can be of different shapes. In addition to different shapes, the table can also have different support under the tabletop itself, in other words, a different number of legs.
- table with one leg - this type of installation is suitable only for a small product; it can be used, for example, to make a children's table;
- table with two stable legs - this type of table is good for a rectangular or oval tabletop, but is quite inconvenient and unstable for constant use in everyday life;
- a table with four legs is the most common type, has the greatest stability (compared to the others), is suitable for both a dining table and a coffee table - it is the most versatile type of this type of furniture.
The table can be decorated with openwork wood carvings.
In order to guess the most suitable table size for any room, you should take into account and constantly keep in mind the area of the room itself and that part of it that is the maximum allowable for placing this piece of furniture; you should also, of course, take into account the wishes of the owners.
Material
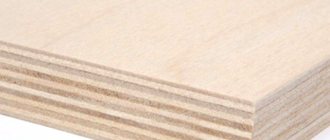
If you intend to assemble a table yourself, the first thing you should pay attention to is the material of manufacture. Very rarely, a whole piece of wood is used as a material at hand; much more often, wooden boards are used. The advantages of this material: they can be cut to the required sizes on any construction site; It’s also easy to transport them to the assembly site if you have a personal car.
The only downsides that can be mentioned are possible difficulties that may arise during installation, and also the fact that you should pay attention to the correct processing of the material - otherwise the boards may come apart and will not last long.
Features of assembling wooden tables
If you follow the correct drawings, there is nothing difficult in assembling the table.
There are several types of hand-assembled wooden tables.
- o on dowels (attached with glue);
- o on the drawers (necessary on tables that are subject to periodic disassembly);
- o bolted (such connections are used mainly for garden furniture).
One of the simplest designs
Table length 140-150 cm, width up to 70 (32 mm board, from which, after leveling, a classic tabletop 28 mm thick is obtained). You will need: boards 1400x100x32, 1400x100x50, sanding belt/discs, paints and varnishes, furniture tension screws, a plane, a hacksaw, sanders, a screwdriver and good lighting.
Rice. 3. It was - it became
After leveling (getting rid of “helicopters”, “bridges” and slabs), the best board is selected for the tabletop. The flatter material will be used for connections and supports.
Rice. 4. We begin to put the board in order
When making a table with your own hands, be sure to check the perpendicularity along 3 planes. If difficulties arise, saw off with a margin and use a belt sander to bring it to a right angle.
Rice. 5. Semi-assembled table support
We screw the tabletop boards onto the supports and level them all together. We work with a belt sander, first grit 60, then 120. The direction of movement of the machine is in the direction of the fibers. Then we use an eccentric sander, grit 120, 240, 320. The better the grinding is done, the more beautiful the finished product looks.
Rice. 6. Sanding
Before painting, the table is completely disassembled, the room is covered with film, and a forced exhaust is installed. The floor is protected with cardboard secured with tape. For safety, it is best to work with a gas mask.
After the stain has dried, apply primer (follow the official instructions of the manufacturers), 2 layers are laid at intervals of 20 minutes. After it dries, sand it with 400 sandpaper until matte, then apply varnish.
Rice. 7. Placing the workpieces in a heated steam room will speed up drying
How to make a table perfect? Just don’t rush to assemble it, the varnish takes several days to dry. Be careful and patient.
Rice. 8. Ready table
Every woodworker quickly begins to distinguish between types of wood and to navigate the properties of wood. I use more than 30 species, mostly trees from central Russia. In carpentry, one of the most widely used species are conifers.
. This is mainly due to their availability and ease of processing. The most common conifers: pine and spruce.
Pine
has white-yellow wood with orange-red resinous veins. Knots provide an interesting and expressive texture. The wood is soft, easy to process, but easily damaged and chipped, requiring sharp tools. Widely used in the manufacture of joinery. Used as a base for veneering. Not suitable for carving.
Spruce
has light whitish wood with barely noticeable annual rings. The spruce branches are scattered chaotically. Its properties are similar to pine, but softer.
Larch
The wood is light brown in color with a reddish tint. The tree contains a lot of resin, as a result of which it is difficult to process, clogging the sandpaper. A very durable, almost eternal, rot-resistant tree.
Juniper
- common in the Caucasus and Crimea. It has dense wood with a very beautiful texture, which is why end cuts are often used for inlay. Juniper is well processed and polished. True, the thickness of the trunk does not exceed 10 cm. The smell of juniper is unusually pleasant and durable (it is often used to make coasters for hot dishes).
Cypress
similar in properties to juniper, but the wood is darker and gray.
It has an unusually pleasant smell that lasts for decades. Cypress cracks little and does not warp, which is why it was previously used to make icons. types of wood
among craftsmen . Of course, preference is given to oak.
Oak
-very decorative dark and hard wood from the middle zone. It has a porous structure with radially arranged rays. Oak is very durable, difficult to process and dulls cutters, so it requires a well-hardened tool. Oak is well suited for large carvings.
Ash
has a light, oak-like wood texture. Unlike oak, it does not have radials. The wood is strong, but bends well when steamed. Ash does not like staining; it spoils its appearance.
Elm
has wood with clearly visible annual rings and a dark center. The elm in the butt part is especially beautiful. Its properties are similar to oak. Handles for woodworking tools are often made from elm.
Russian maple, black maple
It has light wood of a creamy-brown hue, dense and fairly uniform without pronounced fibers. Due to this, maple is widely used in products with fine carvings, in the manufacture of wooden dishes and utensils. Maple polishes well and can be treated with stains and varnishes.
Beech
has a grayish-pinkish wood texture with dark lines. Beech is very durable, has a uniform structure, making it good for carving. Beech cracks little and is often used to make carpentry tools. Good for staining.
Birch
- the most common type of wood in Russia. It has a white-grayish wood color and a solid structure. Birch is easy to process, good for carving, staining, and pyrography. Bends well when steamed. It is used to make dishes, tool cuttings, and furniture. Birch boards warp greatly when drying, so it is better to dry them under a load. Birch burl is extremely decorative.
Walnut
has grayish-brown wood with reddish veins. Dense, easy to polish. Very decorative, suitable for inlay.
Hornbeam
grows in the south of Russia. It has very hard wood of a grayish-white color. It is easy to process. Often used in the manufacture of carpentry tools.
White acacia
has a very beautiful greenish texture with pronounced annual layers. Acacia wood is very durable, polishes well, but cracks a lot. Acacia is widely used in inlay.
Fruit species - apple, cherry, pear, apricot, plum
This is an excellent craft material. The texture is very rich in shades, decorative and dense. It is well processed, polished and stainable. Suitable for carving and inlay. Wood from fruit trees, especially apricot, cracks greatly when dried.
Rowan
-wood with a strong structure, has a beautiful uneven pattern. It glides well when polished and is used for making plane soles.
Buckthorn
- “mahogany” of central Russia. It has very dense wood like bone. Prone to cracking.
An oak table is a prestigious decoration of any living room. Such furniture emphasizes the status of the owner and his refined taste. In addition, a table made of wood of this species can last for decades, and at the same time retain its properties and luster.
Prices for oak products have always been quite high, which is why we will teach you how to make an oak table with your own hands and save a significant amount.
Woodworking workshop and tools
Be sure to make the table in a pre-prepared room; wood dust is very difficult to remove from an ordinary room.
- Room
There are several characteristics that are necessary when organizing your own workshop:
- the work should be carried out under some kind of canopy, ideally: a garage or barn (otherwise there will be too much dependence on the weather);
- You need to make a high-quality hood, otherwise dust will constantly settle on the finished product and you will not achieve straight lines or high-quality finishing of the material. In addition to dust, the hood allows you to eliminate the toxic smell of varnishes and wood paints.
And in the end we wanted to advise you something
Do not make solid wood furniture throughout your apartment. Why?
Because the material is expensive, but very capricious. Once again, the temperature and humidity should not fall or rise, otherwise it will swell from resentment. Naturally, you shouldn’t let it get wet, etc. And taking into account the fact that air conditioners and heated floors are increasingly used in apartments, it will be difficult to please the furniture.
But we must pay tribute to the fact that, for all its capriciousness, it will turn your apartment into a home similar to royal rooms. And to make it less capricious, as we said above, treat it with special compounds before you start using it.
Tools
Even a moderately complex table will not require many tools.
The set of tools and their price category depend on the intentions of the master. The higher the level required, the more extensive the shopping list becomes.
- an electric jigsaw gives greater accuracy in cutting wood than a saw;
- rotating miter box facilitates corner cutting;
- The sanding machine is universal in use and will obviously be required for the manufacture of wooden furniture;
- a manual router is required when processing holes;
- impregnating and other compositions.
Consumables for working with wood: varnishes, paints, impregnation, glue
After making the product, the table should be varnished.
How to impregnate wood to prevent it from rotting?
- used motor oil is an excellent option for impregnation, but, unfortunately, is not suitable for the dinner table;
- it would be optimal to impregnate with a water-polymer emulsion twice, with a break of three to five days;
- water-based acrylic varnishes are superior to old furniture nitrocellulose varnishes;
- PVA has been proven to be superior to bone wood glue.
Options for wooden tables
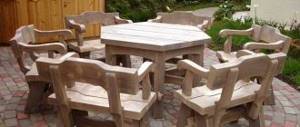
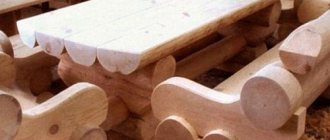
A table with homemade benches is the best option for a summer house.
- Wooden table with benches.
- You need to assemble the table top: the boards are attached to the crossbars with self-tapping screws (it is important to use self-tapping screws as opposed to nails, since the latter contribute to the destruction of the surface of the wood).
- After this, the legs are attached to the crossbars, which must be strong and durable in order to withstand the weight of the table itself and the people sitting at it, thus the minimum thickness will be 4 centimeters).
- Then you need to attach the side crossbars to the legs, on the basis of which benches should be built, fastening them with bolts rather than screws for greater strength.
- Next, we secure the benches and proceed to the subsequent processing of the furniture.
There are several disadvantages to this invention that must be kept in mind:
- If a person on one side suddenly stands up, then all the food will literally fly towards the other.
- It is also not very comfortable to sit at this type of table.
You can improve this design so that its quality becomes unsurpassed, but we invite you to evaluate the idea and project!
Table boards do not have to be the same size and color.
- Table made from pallet boards.
If you have boards of different sizes, colors and, perhaps, even tree species, you can make an interesting structure out of them by organizing the elements in a special way: alternating, grading, creating your own logic for constructing the boards. Among other things, also use discarded dry boards. The side parts of the pallet can act as a good frame, and the rest can be used as a tabletop. We recommend carrying out this work in the yard or garage with an exhaust hood due to the large amount of dust settling everywhere.
- For the legs, use timber more than five centimeters thick. Pre-prepare all the tools and parts needed for the work: you need to sand the wood along the grain with sandpaper, starting with coarse, and then moving to finer grains, carefully removing dust. Next, you need to paint the boards with acrylic or oil paint, apply the desired stencils, symbols or paintings. After this, carefully coat with varnish, repeating this procedure several times and dry.
- An attractive table in a rustic style should be assembled from pallets (also called wooden pallets). In the event that a non-aqueous varnish is used, applying two or three layers is enough, in other cases it is necessary to apply more times, approximately up to ten. After completing the varnishing of the elements, it is worth moving on to installation, which consists of several steps.
- We secure the tabletop with planks, firmly connect the boards together and secure them with self-tapping screws. It is mandatory to use a drill to ensure that the wood is not damaged when using self-tapping screws. Then we coat the joints with glue, and treat the entire tabletop with special products that protect the wood from rotting.
- Last of all, we install the legs: we need to screw them with self-tapping screws in order to learn the structure, we install jumpers at the bottom.
The original design of this model consists of special “rough” wood processing.
- Wooden table with glued top.
For a glued tabletop, you need to take boards of the same width. For this experiment you will need grooves (and therefore a milling machine). Old floorboards already have grooves; if the appearance of the table is unimportant and its purpose is not for a home, it is worth using them.
- The boards need to be laid out on a completely flat surface; this is important for further assembly of the tabletop.
- Carefully coat the sides with glue, join, avoiding gaps between the boards, then pull the resulting invention together with special tools. Leave the product to dry for one to three days. If the gluing operation of the new tabletop was carried out correctly, then gaps will not appear. If cracks appear, then the tabletop will spread even more.
- The ends need to be processed - first trim them with a jigsaw and then sand them. If there is no belt sanding machine, replace it with manual sanding - first use coarse, then medium-grit sandpaper. Then carefully varnish the resulting furniture in several layers (about ten layers of varnish, after every third layer you need to treat the surface with sandpaper and remove dust with a damp cloth), in no case rush at this final stage, then installation of the product is required.
- It is required to make massive L-shaped legs. Take boards at least two and a half centimeters thick so that their thickness matches. Connect them at a ninety-degree angle.
- Make a sample on the boards to be joined, coat the joint with wood glue, and then install self-tapping screws. After the glue has dried, coat the parts with varnish and bring them together into the final composition.
Get creative and create a functional, practical and great-looking table in your own home! Such a standard piece of furniture can create a certain mood in the premises and ennoble your home with special comfort! Choose your material and begin a new adventure - inventing your own table, which may become an ambassador for generations to come! If you still doubt that you can create your own table, you can imagine the new furniture in your head, and then give it to professionals for execution, and then, of course, also enjoy the resulting work of art!
Furniture making
Making home accessories yourself is not difficult. So, for example, to make a table from oak, you will need boards 7-10 cm thick. Before you begin construction, you need to think through the design, configuration and dimensions of the elements. The shape can be simple or made with patterns. For the first time, it is recommended to choose the standard design option.
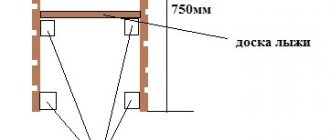
Oak cabinet diagram.
The table top can be assembled from boards that must be cut to the required size. The parts are secured to each other using small bars and self-tapping screws. Some craftsmen make the product from a solid sheet. Thus, the tabletop has a finished and solid look. It is recommended to plan the sides so that they have a good edging. The solid fabric is easy to use. Dirt and dust do not accumulate at the joints.
The legs must be cut from a piece of wood of the required size. Their location should be considered. The table can be placed on one massive leg or on elements parallel to each other. For fastening you need to use metal corners, screws or clusters. Fastening materials must be selected so that their length does not extend beyond the tree. Regular PVA glue will help fix the individual elements.
In order for the table to last for a long time, it can be treated with clear varnish, special wax or oil. The surface must first be cleaned of dust and sawdust. The edges of the tabletop can be fixed using metal or plastic profiles. Thus, this piece of furniture will be strong, functional and durable.
