To decorate the walls, it is not enough to choose high-quality wallpaper and good glue. If the room is covered with crooked paper strips, the renovation will look sloppy. The same applies to joints or thickenings that clearly appear under the light if the trellises are attached with an overlap. Where to start gluing wallpaper? There are several ways to start, all of which take into account the levelness and placement of doors, windows and other elements.
Why do you need to choose a starting point?
The first strip of wallpaper should be glued as evenly as possible. All other pieces of the roll will be mounted on the wall relative to the first, in a circle. If it was installed unevenly, then at the end the joints will not meet, and everything will have to be redone. This is why it is so important to find the perfect vertical line as a guide.
In the Soviet Union, wallpaper was applied only from the window, and this is explained by several reasons. Firstly, there was not such a diverse selection of materials and textures. The wallpaper was paper, thin, and easily overlapped. This made it possible to hide unsightly thickenings. Secondly, the window line in Soviet apartments was often smoother than the door, and especially the corner.
Now the structure of the wallpaper allows them to be glued more accurately - end-to-end. Therefore, it is permissible to start from almost anywhere. The main thing is that the vertical reference line is level, then the first and last sheets will converge. The coincidence of verticals will be especially noticeable on wallpaper with a geometric pattern.
Where to start: all options
It all depends on the characteristics of the room. Somewhere the window line is straighter, somewhere the door line is straighter. In some rooms, it’s even worth pushing off from the center of the wall or from the corner.
Where to start gluing wallpaper in a room, all possible options.
Let's start from the window
The most popular way. But he is chosen not only because of long-standing stereotypes. It's really convenient to move from the window. How to decide whether to hang wallpaper from the window or towards the window? If the canvas is wide, then there is a high probability that if you start from the door when approaching the window, the entire layer will not fit. You will have to cut the roll lengthwise.
Sometimes they glue wallpaper on both sides of the window. In this case, the joint is located under the window and covered with curtains. You can do the same from the door, placing the joint above the opening.
When gluing from a window, it is easier to avoid the problem when you need to match the sheets according to the drawing. This is especially difficult to do under the windowsill and above the window. There's a lot of cutting and matching to do. Heating radiators, which are often located under the window, complicate the work.
Door as a landmark
Modern doors are installed as straight as possible, so it is more than acceptable to start installing wallpaper from them. The main convenience of the method is that the first and last panels do not have to be compared, since there will be a doorway between them. This is a good method for wallpaper with a bright print, because the pattern may not match at the end of installation.
In what cases will an angle help?
Gluing wallpaper from the corner is not the most popular method. In order for the installation to be successful, the corners must be as even as possible, but this is a rare occurrence. At the same time, this method is allowed if there is no window in the room, or the doorway is too crooked.
It will be correct to start from the corner if the room design includes several types of wallpaper. For example, opposite walls are covered in the same way. In this case, to avoid the accumulation of joints at the corner, you should start directly from it.
The evenness of the landmark can be checked with special construction tools. Even if the vertical line looks straight, do not neglect additional checking. Carelessness will cost you nerves, time and additional materials. A building level is the simplest tool; the longer it is, the more convenient it is to measure walls. Vertical lines are also drawn using a plumb line. The most expensive device is a laser level, but it gives the most accurate results.
Where to start wallpapering the walls?
In this case there are also several possible ways. The choice of one or another of them depends on the specific situation, while the type of wallpaper used must be taken into account. Almost all modern wallpaper needs to be glued end-to-end using one of the following methods:
- from the corner;
- from the door;
- from the window;
- from the center of the wall.
There are several options for wallpapering walls: from the middle of the wall, window, door, corner
First you need to make marks perpendicular to the floor surface, using a plumb line or level. Wallpaper can also be glued diagonally - in this case, a thread is stretched from the bottom corner to the diagonally opposite one, and a line is drawn along it. Wallpaper strips are glued obliquely, moving along the drawn line. It is better not to use this method for beginners - it is designed more for experienced craftsmen.
DIY wallpaper sticker on the wall
When using wallpaper with a pattern, difficulties may arise in any variant of perpendicular gluing. The most inconspicuous place is selected (for example, above the door) and gluing begins from there if there are difficulties in joining the patterns.
Gluing wallpaper from a window is quite simple. The height of the room is measured, another 10 cm of margin (for allowances) is added to the resulting figure, then the canvases are cut to match the pattern. The first strip is glued in accordance with the perpendicular guideline, and the rest - sequentially (in most cases - counterclockwise).
The method of finishing wallpaper from a window involves gluing counterclockwise
A few more important points
It is better to glue combined type wallpaper from the middle of the wall, the same applies to wall panels, when creating which you need to maintain a clear symmetry of the picture.
It is recommended to glue combined wallpaper from the middle of the wall
Chic wallpaper pattern
Note! You need to remove the covers from the sockets in advance, and then glue the wallpaper on top. The holes for them are cut out after the glue has dried. It is also better to trim off the excess after the glue has dried.
When gluing wallpaper from the corner, you should consider a few more important points. So, the corners are almost never perfectly straight. To check the evenness, use a building level or plumb line. You can draw a straight line perpendicular in the corner, and then start pasting from there.
In addition, you should not glue a whole strip in a corner, because when the glue dries, folds or distortions may appear on the material, which will cause the pattern to mismatch in the future. To correctly design a corner, follow the recommendations below.
- Choose the most inconspicuous corner and start gluing from there.
- Coat the corners thoroughly, as this is where the wallpaper comes off most often.
- Also treat the corners with a fungicide, because mold “loves” to grow in them.
It should be noted that there is no single algorithm for decorating walls with wallpaper in different rooms.
Other guidelines and tips
These tips will help you decide where to start:
- If there are a large number of large objects in the room - arches, windows, openings, then you need to start from the largest of them.
- If the wallpaper has a very pronounced print, then to avoid an uneven joint it is hidden in an inconspicuous place. That is, you need to start from where the discrepancy will not be visible. It's good if there is a tall piece of furniture, but consider whether rearrangement is planned.
- To make the joints invisible to the eye, they are made above windows or doorways, under radiators, behind the kitchen unit.
- Measure the walls, determine their maximum and minimum height: in some cases this helps to find a starting point. You should not immediately cut the roll into identical pieces, so that you do not have to correct the work by gluing the missing centimeters on top and bottom.
- Pay attention to the lighting of the room where the window is located, how the wall lamps shine. It is good if the joints are not placed in the most visible place.
- It is better to start from the far corner, then when entering the room the gaze will fall on a flat canvas, and not on the joint.
- Vinyl, non-woven and glass wallpaper cannot be glued overlapping, this must be taken into account. As a last resort, it is better to cut off a few centimeters than to make a convex joint that will spoil the appearance.
- If the distance between the exit to the balcony and the nearest corner is very small, then it is better to start from there.
- If the wallpaper is glued overlapping, then professionals recommend moving from left to right. Only thin paper wallpapers are glued this way.
- Tapestries in the corridor begin to be glued from the far inner corner.
- In the kitchen, you need to remember to leave room for a kitchen apron.
Basic rules for wallpapering
When installing wallpaper, certain rules must be followed.
Preparing the walls
Preparing the walls is a mandatory and necessary stage. It is unacceptable to glue wallpaper onto an old coating or an uneven base. It will not be possible to create an aesthetic surface and the result will most likely disappoint you. Of course, if such an effect was not planned.
Necessary actions when preparing the base:
- remove the furniture or cover it with protective film;
- turn off the electricity and unscrew the covers of sockets and switches;
- remove all decor from the walls - paintings, clocks, candlesticks, hanging shelves;
- cover the floor if you plan to leave the same covering;
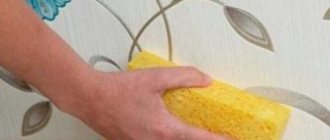
- remove old coating. We tear off the wallpaper; if it does not give in, soak it in hot water and remove it with a spatula. In particularly difficult cases, you can resort to a needle roller. If the wall is painted, remove the top layer of paint using a drill with an emery attachment or special chemicals;
- smooth out uneven areas using putty. If the spot method is not enough, apply the material to the entire surface. After drying, sand the mixture layer and remove any resulting dust.
What materials and tools will be required
To avoid distractions while working, prepare everything you need right away. You will need:
- laser level - to control the vertical. You can use a plumb line - tie the load to a long thread and secure it at the top point of the wall. To avoid errors, take a thread of sufficient length - it should reach the floor;
- pencil – necessary for marking. You can take a marker;
- roller for applying adhesive to walls;
- brush - for coating corners and hard-to-reach areas - behind the batteries;
- container for diluting glue - its size must correspond to the size of the roller;
- soft rags and sponges - for smoothing wallpaper and removing protruding glue. You can also roll the wallpaper using a dry roller;
- plastic spatula - for working in hard-to-reach places;
- a wide metal spatula for trimming the wallpaper edge at the junction of the wall with the floor and ceiling;
- A stationery or construction knife for cutting fabric.
How to mark vertical on uneven walls
If the wall is uneven, you can mark the vertical using a weight. To do this, hang a load on a rope, and make a loop at the other end of the cord. Sparing no chalk, we rub the rope and hang it on a nail driven right under the ceiling. Lightly pull the rope from below, holding it by the attached weight and release it. As a result, an even strip of chalk remains on the wall.
Applying glue
During the era of the reign of paper wallpaper, glue was applied directly to the strips of material. The wallpaper should have been lightly saturated with adhesive. This process was quite inconvenient and time-consuming. It was necessary to provide enough space on the floor to lay out the material. When smearing, the floor around the strip got dirty, and the remaining glue had to be wiped off each time so as not to spoil the next cuts.
Modern non-woven and vinyl wallpapers do not require applying glue directly to the canvas. It is enough to coat the walls well, and the material will easily fix. If the joints are not glued, you can additionally apply the compound to them already on the wall.
How to glue corners
For high-quality pasting of a corner, the following conditions must be met:
- prepare the corners - level them as much as possible using building mixtures. You can use plastic or metal corners with fiberglass reinforcing mesh. They need to be secured with putty. This technology allows you to align the corners as much as possible;
- it is necessary to glue the strips overlapping, slightly bending one of them and covering the first cut with the adjacent one;
- if there is a pronounced pattern on the wallpaper, its lines should be carefully aligned;
- you need to carefully level the wallpaper to hide existing defects and avoid creases and tears. For this work you need to use a special roller, plastic or rubber spatula.
What to do if the corners are uneven
Uneven corners are a real puzzle for those who hang new wallpaper. It is especially problematic to make a finish with a print, since the pattern will not converge due to unevenness and verticality will be lost. Popular wisdom has found a way out of this situation:
- For each new wall, a new reference point is selected.
- At the junction, each canvas should overlap the adjacent wall by about 10 cm.
- A vertical line is drawn on the approach strip. It should be level, not parallel to the corner.
- The next wall is covered with the drawn strip. The method works, but only for thin wallpaper that can be glued overlapping. This option is not suitable for heavy non-woven and vinyl samples. In this case, you will have to work with a sharp stationery knife to join the pattern.
In such a matter as wallpapering walls, the saying is appropriate: measure twice, cut once. In case of an error, all joints will be evident. It is necessary to take into account all the details, the location of key interior items, the evenness of corners and much more so that the renovation is completed successfully.
In many apartments and houses, the walls are decorated with wallpaper, which is understandable. The reason for their prevalence is the wide range of textures and colors and the ease of doing the work yourself. Those who invite professionals to do the wallpapering do not need to find out the intricacies of such work. Those who choose to carry out repairs themselves must take into account some rules. In this article we will look at where to start gluing wallpaper.
Content:
Rules for gluing wallpaper: progress of work
1. Work begins with preparing the premises. It is advisable to remove the furniture or move it away from the walls and cover it with dust film.
2. Clean the walls from old wallpaper using a spatula. If it is difficult for paper scraps to come away from the wall surface, they are moistened with water. After a few minutes, the soaked paper can be easily scraped off the wall with a spatula. Painted walls are sanded with an emery float. Using putty, cracks, dowel holes and other damage to the walls are sealed. If possible, align the corners.
3. The ceiling is painted or whitewashed, after which you can move on to finishing the walls.
4. Measure the height of the wall and cut the canvas from the roll according to this measurement, adding a small margin. Some people apply the wallpaper to the wall and measure it on the spot, making a mark with a pencil. In this case, you need an assistant, because holding the wallpaper and measuring is beyond the power of one person. At the same time, beginners, as a rule, do not know where to start gluing wallpaper. If the wallpaper is glued overlapping, then always start from the window. This helps to visually hide the seams that form. If the wallpaper is glued end to end, then you can start anywhere.
5. The cut canvas is smeared with wallpaper glue, which is diluted immediately before work, taking into account the time of its preparation. All modern adhesive mixtures are usually prepared within 15-30 minutes. When applying glue, pay great attention to the edges so that they do not remain dry.
6. Next, leave the canvas for a few minutes to soak, and at this time quickly coat the wall with glue to the width of the wallpaper strip. You can’t hesitate, since getting the wallpaper wet for too long can lead to its complete disintegration. It will no longer be possible to glue such a sheet.
7. The lower edge of the smeared canvas is folded to make it easier to work with, otherwise the edge will drag along the floor.
8. The canvas is applied from above to the wall using a chair or stepladder, while the side edge is aligned with a plumb line. You can draw a vertical line along the wall in advance and stick the first panel along it.
Using a plumb line to draw a vertical line
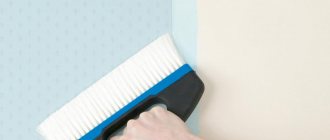
9. Using a wide brush or rubber roller, smooth the canvas from top to bottom using diagonal movements. This will allow you to press the wallpaper tightly over the entire surface of the wall, removing air bubbles and excess glue. The glue is removed with a damp cloth or sponge.
Smoothing the wallpaper with a brush will ensure a strong fixation and eliminate excess glue and air bubbles
10. Excess wallpaper is cut off along the floor plinth and along the perimeter of the ceiling. The remaining sheets are glued in the same way; alignment is carried out along the previously glued sheet.
How to glue wallpaper: video instructions
Features of gluing wallpaper with a pattern
When choosing wallpaper with a pattern that needs to be selected, you need to pay close attention to the correct cutting of the panels.
The selection operation can be carried out in two ways:
- After gluing the first sheet, align the pattern while measuring the second sheet directly on the wall, making marks on the wallpaper above and below. The wallpaper is folded and cut according to these marks. This method requires an assistant.
- You can cut several pieces of wallpaper according to the wall measurements, matching the pattern on the floor. The canvas is cut off and laid out on the floor face up. A roll is being rolled out nearby. The canvas is shifted to the required distance until all elements of the pattern are combined. After that, cuts are made along which cutting is carried out.
How to glue wallpaper with a pattern
In order not to disturb the pattern, the wallpaper is glued end-to-end according to the algorithm described above.
How to hang wallpaper in corners correctly
Angles, especially if they are not perfectly straight, can be a hassle for beginners. Professionals have learned to cope with any angles. What is their secret? Everything ingenious, as always, is simple. There is no need to glue a whole sheet of wallpaper into the corner. Experienced craftsmen make a joint of two canvases in the corner, and to make it perfectly even, the following technique is used. Two canvases are glued with an overlap of five centimeters. Then a sharp stationery knife is used to cut two sheets at once. The cut off parts are removed, the wall is once again coated with glue, and the panels that had to be folded back are re-glued. The joint obtained using this technology is completely invisible. This is how wallpaper is glued in the inner corners. What to do with the external corners that you have to deal with when finishing window and door slopes?
Wallpapering external corners
When we glue wallpaper with our own hands on the outer smooth corners, we simply try to cut out the canvas in such a way as to wrap it around them. But this method is not always applicable. Therefore, you have to glue two canvases that are located on the sides of the corner, while the edge remains visible. Sometimes it is pre-painted in the color of the wallpaper or simply covered with a plastic finishing corner, which is glued with mounting adhesive.
Selection of tools and materials
Before you start gluing wallpaper, you need to study some preparation points.
First, you should choose the type of wallpaper, determine the required quantity, and also choose the right glue. This is possible right in the construction supermarket or at the market. When calculating the volume of glue and the number of rolls, it is necessary to round each result up. This is especially true when choosing wallpaper decorated with patterns (then their consumption increases by about 20 percent).
For gluing we will need:
- container in which glue is diluted;
- brush;
- pencil;
- scissors;
- putty knife;
- roulette;
- plumb line;
- rubber roller.
Tips for novice builders
Soviet-style wallpaper was glued overlapping. To do this, on one side of the material there was a strip without a printed pattern. It was intended for gluing the next canvas. The wallpaper was glued exclusively from the window so that the seam was not so noticeable.
Today this problem does not exist. There is only one answer to the question of where to start gluing wallpaper - they can be glued from any point.
But no one canceled the beauty of the finish and the accuracy of the work. That's why:
- It is advisable to start installing the wall covering from a strictly vertical line. This could be the edge of a door or window opening, or a corner.
- You can break this tradition by drawing a line strictly perpendicular to the floor. The correctness of the line is checked using a building level.
Which side is wallpaper glued on?
Before gluing, you need to determine the side from which to start gluing the wallpaper correctly. When choosing a method, take into account the lighting features. Several decades ago, wallpapering was done exclusively with an overlap; on one side of the canvas there was a strip for gluing the next canvas onto it. The gluing began from the side of the window to hide the transition.
Nowadays, various gluing methods are used, as a result of which the question of choosing the side on which to start gluing is not so relevant. When using high-density wallpaper, overlapping wallpaper is generally undesirable, so it is unacceptable to glue such wallpaper from the window side.
Methods for wallpapering
- From the door. In the case when the walls are pasted vertically, strict geometry must be observed; for this reason, you can start gluing near any vertical landmark. The first canvas is pasted vertically, this is ensured by special devices (plumb), then the pasting continues in any direction.
- From the corner. This method is suitable only when the corners of the room are perfectly even. However, this condition is met extremely rarely, so it is preferable to glue noticeable strips of canvas near ordinary landmarks.
- From the largest landmark. If the room has many passages and windows, it is better to stick from the largest landmark.
- From two or more lines. This is the correct answer to the question of where to start gluing wallpaper in a situation where there is a large window in the room. The gluing is carried out in 2 directions from this window.
In the TAM.BY catalog you will find contacts of craftsmen for any type of finishing work, including wallpapering, as well as addresses of stores where you can buy everything for construction and repair.
If you notice an error in the text of the news, please highlight it and press Ctrl+Enter
It is necessary to wallpaper walls correctly and competently. In most cases, wallpaper is chosen for wall decoration as the most compromise finishing material. Today, when in two minutes you can find a lot of offers with help in gluing, many refuse the idea of a completely independent repair. But often the fear of doing something with your own hands “from start to finish” is simply far-fetched. Have you ever hung wallpaper yourself? Maybe it's time to start? Just arm yourself with information, prepare from the theoretical side, and then in practice everything will go like clockwork.
How to glue wallpaper - measure seven times, cut once
To prevent folds, bubbles and other unpleasant surprises from forming in the corner, non-woven wallpaper should be glued as follows: the canvas should extend 2-3 cm onto the second wall.
It’s not difficult to learn how to properly glue wallpaper; you just need to purchase high-quality materials, tools and listen to the advice of professionals. After the first updated room, you will begin to see difficult places and will know how to handle them. Gluing wallpaper is easy if you have an attentive assistant nearby and you are determined for an excellent result.
The first and main tip: how to start gluing wallpaper correctly
Let’s say you know perfectly well how to carry out the preparatory work, and you don’t need to waste time explaining this stage. Do you know right away where you will be gluing from - from the door, from the window, or maybe from the corner? Meanwhile, this moment is very important. With this choice, the type of lighting in the room is important.
When, back in Soviet times, almost all wallpaper was glued overlapping, there was such a strip on the wallpaper itself, onto which the new canvas was glued. And so that the transition would not be visible, it was necessary to glue it away from the window.
Today this problem is not so acute. If you are using thick wallpaper, then it is not at all possible, or rather, it is not recommended, to glue it overlapping.
There are several options for where you can start gluing wallpaper indoors.
Where to glue from, options:
- From the door. The main thing is to maintain strict verticality, so you can start work from any vertical landmark convenient for you. This could also be a door frame. Glue the very first canvas strictly vertically, so it would be a good idea to use an additional device such as a plumb line. Then gluing continues in the chosen direction.
- From the corner. The method will only be good if the room has perfectly even corners. But this doesn’t always work out that way, so it’s more common to glue from the door or window.
- From a major landmark. If there is more than one passage and more than one window in the room, the pasting process begins from the largest landmark.
- From several equal lines at once. This method is good for a room with a large window, then pasting is carried out in different directions from this same window. And to make the joints less noticeable, they are made above the window or above the door.
Review of adhesive solutions
Before you figure out where to start gluing wallpaper in a room, you should consider the types of adhesive compositions. The table describes the advantages and technical characteristics of some of them:
| Manufacturer | Advantage/disadvantage | Usage |
| KMC | Non-toxic, transparent color, good adhesion, dissolves well. GOST does not apply to the production of glue; it is regulated by TU 2231-034-07507908-2001 and TU 6-55-40-90 Ready-made 4% glue can be stored for at least a week. | Several varieties are available that are suitable for paper wallpaper, fabric-based wallpaper, and lightweight fabrics that can be washed. Basis of use: concrete, wood, plastered chipboard, OSB, MDF, non-metal surfaces |
| Kleo | For light and heavy wallpapers, becomes transparent after drying. Antiseptic additives are used in production. The mixture for dilution is dry, without lumps. The finished composition can be stored for up to 10 days. | Buying glue is not a problem; most hardware stores sell it freely. There are types for simple paper-based canvases, vinyl, non-woven, glass wallpaper, and even for children's rooms, where quality requirements are significantly higher. If you need to glue joints, baseboards or air bubbles under wallpaper, use the Cleo Strong mixture. They do this with a syringe and a needle. |
| Axton | Sets quickly, sold in a tube, economical, moisture resistant, does not smear | Suitable for joints and peeling edges of any wallpaper after completion of repair work, including duplex and photo wallpaper |
| quality | Certified, environmentally friendly starch-based product. A good option for priming substrates with antiseptic properties | Affordable price, excellent combination of characteristics, wide range for different types of wallpaper. Colored Quality, pink in color, makes it possible to control the application of the adhesive solution to the canvas. |
| Methylane | Economical, with a consumption indicator per m2, with a pink tint, which makes it possible to control the application of the mixture | For different types of trellises, suitable for different sizes. For heavy fabrics it is produced in liquid form |
Important! The photos and videos show master classes on wallpapering rooms step by step, starting with preparing the glue and ending with methods of butt and overlap gluing.
Which is better: to glue wallpaper from the window or to the window
It doesn’t matter whether you start gluing wallpaper from the window or from the door. Maybe you even wallpaper a room with perfectly straight corners (which is extremely rare). The main thing is to glue the wallpaper from a perfectly level vertical. If the first canvas is placed evenly along a vertical line, then all subsequent canvases will go smoothly.
You should start gluing wallpaper from a perfectly flat vertical line.
Therefore, most often paper, vinyl and non-woven wallpaper are glued away from the window. It’s more common this way, and they also hope for the evenness of the window opening. Therefore, the window is used as an ideal vertical from which the walls are finished in order to achieve even lines. But the door can also be such a starting point; this is by no means a mistake.
Let's start gluing
There is an opinion that it is correct to start gluing wallpaper from the window. This recommendation arose in the days of the same type of paper wallpaper and rooms characterized by a surprising lack of right angles. Starting work from the window made it possible to mask wall defects as much as possible; in addition, the strip of paper wallpaper intended for layering canvases was practically invisible behind a beautiful curtain. Today, these recommendations can be taken into account, but they should not be followed blindly. The fact is that modern non-woven wallpaper is glued end-to-end, there is no functional strip on it.
Tools for wallpapering.
You need to glue non-woven wallpaper, as well as vinyl and mixed-type wallpaper according to the same pattern. The starting point is a perfect vertical line. If the first canvas is glued as evenly as possible, then all subsequent ones will be much easier to orient. How to determine this vertical, what landmark to choose?
- You can glue non-woven wallpaper from the window, since in typical apartments the window opening can be considered almost the only vertical line. This approach will at least visually make the arrangement of the paintings ideal. But before choosing this particular landmark, the verticality of the window opening should be checked using a building level.
- A doorway can also act as a landmark. Usually, by the time wallpapering begins, the doors have already been replaced or restored. And in the process of this work, the verticality of the lines is mandatory. If you have replaced doors and know that the work was done well, feel free to choose them as a guide and start gluing non-woven wallpaper (Fig. 1).
- In addition, you can make a landmark yourself. To do this, you need to arm yourself with a building level and draw a strictly vertical line at a distance from the corner equal to the width of the wallpaper. From this conditional mark you will move in an arbitrary direction. Correct calculation of the distance to the corner will allow you to qualitatively design this zone (Fig. 2).
Figure 2. Rules for wallpapering.
Whatever landmark you choose, be sure to control the vertical position of the canvases. You can continue gluing the wallpaper in any direction, the main thing is that there is no distortion, displacement, as well as gaps and overlaps.
What to put first and where to start gluing wallpaper in the room
If the renovation is in full swing, and you still don’t know what to do first – lay the floor or glue the wallpaper? Professionals advise doing the things that leave the most waste first. Laying linoleum is unlikely, but laying laminate might be better first.
In the room where renovations are being carried out, all work is completed first, after which more garbage remains
If you first glue wallpaper and then lay laminate:
- Some types of laminate are very sensitive to wallpaper glue, so the coating can deteriorate, which means everything is correct, stick it first;
- Construction debris can also theoretically damage the laminate;
- If the laminate is already laid, protect it with a special film from the work being carried out.
In the case of linoleum, wallpaper is usually glued, and then the linoleum is directly laid. But still, do everything with an eye on the individual characteristics of the repair. And what is more pleasant and habitual for you to do. Adapt to yourself, there are no strict rules.
How to glue wallpaper in a room with a suspended ceiling
Before you start gluing wallpaper in a room with a suspended ceiling, you need to carry out preparatory work - remove the furniture, protect the edges of the ceiling covering with masking tape. This will prevent any adhesive or primer from getting on the film or fabric. If the ceiling profile is attached to old wallpaper, you need to make a neat cut along the edge of the finishing material. We protect the ceiling with a wide roller and draw a line with a stationery knife. The cut should be smooth and clear. After this, we wet the old wallpaper and remove it from the wall.
We clean the walls from dirt to improve the quality of adhesion of the wallpaper to the surface, and prime the base. This will avoid unnecessary consumption of glue and will prevent the wallpaper from getting dirty. We prime the area near the ceiling as carefully as possible, since dried drops will be difficult to remove.
If the ceiling is framed with a baguette, you can cut off the old wallpaper along its line and stick new ones overlapping. After this, the excess material is trimmed with a stationery knife. Be sure to use a wide spatula at this point. Any careless movement can lead to cuts in the tension sheet and its complete damage.
How long does it take for wallpaper to dry?
Non-woven vinyl wallpaper, so popular today, takes a day or two to dry. The drying speed depends on the microclimate in the room, on the type of walls and wall coverings, on the density and thickness of the wallpaper. And also, of course, on the quantity, quality and thickness of the glue.
Wallpaper dries depending on the type, as well as on the amount and thickness of glue
The higher the temperature in the room, the faster the wallpaper will dry. If the room is below plus ten or seven, it is not recommended to glue wallpaper at all. Likewise, temperatures above +25 are also not recommended for repairs.
Features of choice
Before you start gluing trellises and deciding how to glue wallpaper - from the window or to the window, you need to know their features and installation rules. The determining factors when choosing are:
- Purpose of the premises.
- Condition of the walls.
Consider these tips here:
- For rooms with a normal level of humidity and well-leveled walls, you can choose any type of finishing materials.
- For wet rooms, washable types of wallpaper are a more suitable option.
Regarding specific types of materials:
- The non-woven coating covers minor unevenness well. Working with them is a pleasure, since there is no need to coat the panels with glue. The glue must be applied directly to the surface to be finished.
Important! The only difficulty may arise with gluing the corners. When gluing a whole panel, folds may form, so it is necessary to mount the panels with a slight overlap.
- Embossed vinyl covering also hides uneven walls well. The best option is trellises with a dense or coarse-mesh pattern. Fiberglass materials are also a good option.
- For lovers of Japanese and eco-friendly styles, expensive coatings made from natural materials (most often bamboo) are suitable.
- Acrylic wallpaper looks like vinyl wallpaper. They are best suited for rooms with high humidity. They can be washed and are resistant to mechanical damage.
When can you open windows after wallpapering?
The time you need to wait before opening the window after the gluing process is no less than 12 hours. Sometimes you shouldn’t open the windows for a whole 48 hours. Wallpaper dries at a constant temperature, it should not be lower than +15. And the so-called wandering drafts can ruin all the work.
After the wallpapering process, windows can be opened no earlier than 12 hours later
Also, for the first days after gluing, try not to drill, install or turn on the air conditioner. Stretch ceilings are also not installed the first five days after gluing. However, the installation of ceilings involves strong heating, which is unacceptable at the moment.