Painting technique: existing options
When using a roller, you should pay attention to the quality of painting: a lack of paint on the tool can lead to the formation of unpainted areas that are difficult to notice during the work process.
Such “bald spots” will have to be duplicated with an additional layer of paint, since dotted strokes will stand out from the overall uniformity of the coating. A common method of working with a roller is the “W” technique: vertical stripes slightly overlap each other at the junction, allowing you to quickly paint a large area. The speed of painting using this method does not allow the paint to dry before the end of the work, which makes the resulting layer even and visually consistent.
Painting with a “W” requires plenty of room to manipulate, so it’s best to do it in an empty room. The long handle of the roller makes it especially convenient.
Another way to avoid gaps and stripes is the “squares” technique. It consists of conditionally dividing the wall into squares at the corners, which are painted alternately, and then connected into a single covering with horizontal stripes. This method depends on the illumination of the room and takes into account the direction of light from the window.
Painting in “squares” requires speed to avoid premature drying, so it is more often used by professionals. Hobbyists need to monitor the degree of drying of the paint in order to prevent the coating from being applied to an area that has already dried.
Roller selection
The whole variety of rollers is based on the difference in their purposes (use for different paints and varnishes, surfaces, areas of the surface to be painted).
Size
The rollers are divided into three types based on size.
- Mini - designed for local work in small areas, in corners, for stencils. Also, mini rollers with a rubberized base are used to strengthen seams, increasing the adhesion of the coating to the wall.
- Midi - medium-sized rollers, convenient for most painting tasks. They are used when painting walls, floors, ceilings, and the correct selection of a coat allows you to work with all types of paint.
- Maxi are large rollers, when using which it is difficult to monitor the uniformity of application and the absence of gaps. Maxi-rollers are used in priming work on large areas, as well as in creating a primary coating layer that will be covered by subsequent finishing.
A variety of roller sizes is also observed in the range of highly specialized rollers for uneven surfaces, aggressive paint compositions, structural paint or bitumen.
Foam rubber
It is highly absorbent and suitable for painting most surfaces. The foam nozzle is chosen for water-based or adhesive-based paints and varnishes.
You cannot use a foam roller with water-based or oil-based compositions, as during operation they will destroy the structure of the material, which will lead to the formation of lumps on the paint.
Velours
Gives a smooth surface, used for ceilings or as a finishing layer on walls. Velor is suitable for using water-based and oil-based paints, but it does not absorb solutions well, which is why you have to often draw paint from a tray.
Polyamide
Synthetic coats for rollers are universal: they are suitable for all types of paint and varnish compositions, are not afraid of aggressive solvents, and absorb and release paint. In addition, polyamide rollers are easy to clean after painting, so they last a long time.
Fur
Fur rollers vary in degree of fluffiness and give excellent results even on uneven walls due to the length of the pile. Fur coats (artificial or natural) are used for water-dispersion, oil, alkyd compounds, and are distinguished by the application of coatings without splashing. Fur rollers help create an even layer of paint even on surfaces with cracks, differences, or chips. Suitable for painting large areas.
How to paint walls correctly
The selection of roller also depends on the type of paint and varnish applied. Each paint has features, timely consideration of which will make the work with a roller high-quality and effective.
Water-based paint
The optimal choice for water-based emulsion will be rollers coated with velor or pile.
Velor coats have weak absorbent power, so they are better suited for small surfaces to be painted.
Pile rollers are an expensive option (especially those made from natural materials), but they have a number of advantages:
- the ability to select the length of the pile to create layers of a certain thickness (for thin - short pile, for thick - long);
- used for uniform painting of walls and for decorative finishing;
- long-term operation;
- the presence of a special elongated pile for porous, rough surfaces.
Enamel
Enamel paint is used to obtain a glossy surface, so the requirements are for the initial smoothness of the wall and for the roller material, which should not leave particles or air bubbles. Creating a glossy coating requires a large-sized natural wool roller - this will allow you to have time to apply the enamel without drying out streaks.
Silicate paint
The peculiarity of applying silicate paint with a roller is that the coat material must pick up and release the same amount of solution from strip to strip, otherwise the difference in the thickness of the layers will be noticeable visually. For silicate compositions, synthetic rollers and special trays with a place for rolling out in the form of a mesh are selected, which removes unnecessary excess.
Other types of paints
The modern variety of types of paint and varnish materials can create difficulties when choosing a roller. In this case, it is better to contact a consultant in the store, who will select a tool taking into account the characteristics of the paint. In addition, it is worth paying attention to the instructions for use, which should list the compositions suitable for the roller. So, for painting walls with latex paint, a roller with minimal synthetic bristles is better suited, and when applying alkyd mixtures, you cannot do without a brush, which should also match the markings.
Materials for making decorative rollers
Modern instruments differ in the type of material they use. Today the following types of decorative rollers are available on the market:
- Rubber cover. On the base of the tool there are protrusions with depressions of various shapes and sizes, thanks to which a pattern or texture is created on the surface. For example, imitation of a relief plane with patterns, brickwork, etc. But such a tool is suitable only for experienced craftsmen, because it requires certain skills in operation.
- Wooden base. Such texture tools are best used for painting walls in children's rooms, since wood is considered an environmentally friendly material, and therefore does not emit harmful substances when used. It can also be used to create original convex patterns and ornaments on a painted surface. But there is one significant drawback - a wooden roller, unlike its rubber counterpart, can swell during operation. To avoid this, the instrument must be thoroughly cleaned and dried after each use.
- Leather base. With it you can give the surface a marble effect. An excellent choice would be a tool with a base made of genuine leather. If we are talking about applying Venetian plaster, then it will become an indispensable assistant.
- Plastic base. Not the best option. The thing is that with prolonged use, the plastic base can crack, thereby ruining the pattern on the surface of the walls. If you decide to use it, you must remember that textured plaster can only be applied on a perfectly smooth surface.
- Pile base. The roller cover is made of synthetic or natural fur with fibers of various lengths. When choosing this type of tool, you must remember that the longer the fibers, the rougher the surface will be and the more patterned the inclusions on the wall will be. It is recommended to give preference only to high-quality tools with reliable fastening of the fibers.
There are also analogues with a base made of foam rubber, polystyrene foam and fabric. Foam rubber options are used for priming the first layer for subsequent application of decor. They are also great for creating bubbles on the surface. Fabric analogues, for the manufacture of which plush soft fabric is used, form relief marks (patterns) on the wall. Devices with a foam base resemble a rubber counterpart. But you need to remember that polystyrene foam is short-lived.
Why streaks and streaks appear: expert advice
To avoid defective areas on the surface to be painted, you must follow a number of mandatory instructions for working with the roller.
- The fur coat should be checked for the quality of the pile in the store (a quality tool is when, when held with the palm of your hand, the structure returns to its original form; with a slight twitch, the hairs of the fur coat do not separate from the roller).
- The metal frame of the roller should not have any extraneous stains of old paint or rust; the rotation mechanism must be smooth and free.
- Despite the fact that a roller allows you to quickly paint a surface, when working with a specific paint composition it is necessary to calculate the exact drying time. Stains and stripes most often form at the junctions of different layers, so following the technologies for paints, varnishes, and liquid wallpaper will help avoid poor-quality results.
Thus, using a paint roller is the best option for combining price and quality: the tool does not require large financial costs, is suitable for all surfaces and is easy to use.
How to choose a roller for the type of paint
The choice of a paint roller is based not only on ease of use, but also on the compatibility of the material of manufacture with the type of paint and varnish material. Efficiency when working with compositions based on water, drying oil, and polymers depends on this.
Water-based paints and varnishes
There are many painting products on the market for working with water-based compounds. Tools with terry, foam, or polyacrylic coats are used for painting. The recommended device for applying these compositions is polyamide rollers. This is due to the following qualities of polyamide fibers:
- economical consumption;
- effective absorption, which prevents splashing and smudges;
- lack of lint on the painted surface;
- Washable, so the roller can be reused many times.
Rollers with polyamide fiber coats are often used by professionals.
At the same time, the tool is easy to use, thanks to which even inexperienced craftsmen can produce effective coloring.
Solvent based paints
To apply paints and varnishes based on organic solvents, it is recommended to use rollers made of natural fur, since synthetic materials are not always resistant to the chemicals contained in paints.
For two-component compositions, tools made of velor, nylon, and microfiber are used. The disadvantage of such rollers is their high price. In addition, they need to be thoroughly washed with a large amount of solvent after painting is completed, otherwise the device will be unsuitable for the next painting. There are many options for paint rollers on the market. In order for the coloring result to be ideal, you need to take a responsible approach to choosing a tool, study consumer reviews and technical parameters. With a properly selected device, you can even carry out high-quality and beautiful painting of any surface with your own hands.
Painting walls: 10 mistakes you should know about
Tips If you have to paint walls during renovation, take into account all the pitfalls of doing it yourself - so that in the end it doesn’t turn out that the surface is painted unevenly, and the paint turns into a lump
If you think that painting takes a maximum of half an hour and the walls become like new, we will have to disappoint you. Painting a surface is a job that is not without its nuances: the process can be delayed due to the wrong paint, roller, or layer applied at the wrong time. The time of day at which you pick up the instrument also matters. Training, of course, is the best way to achieve success, but we recommend avoiding the mistakes of others - we’ll tell you how.
What is decorative wall paint and methods of applying it
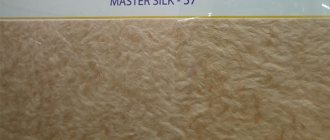
Decorative paint is a paint that creates some visual effects. This group does not include ordinary opaque monochromatic compositions. Only those that are at least somewhat different from them. These compositions reproduce various natural materials. Silk, velvet, plush, sand, natural stone, leather, velor, etc. They are sometimes called decorative paints, since they are not just a background, but an independent decorative element.
Decorative wall paint with a silk effect is a decorative element in itself
Most often, decorative paint is applied as usual - with a brush, roller or spray gun. If the texture itself is “rich”, this is quite enough. The walls already look unusual. In this case, they are just background. Beautiful, unusual, stylish, but background.
Rollers with embossed relief - easy and simple way to get unusual wall decor
To obtain more interesting surfaces, special application techniques are used. The simplest ones are relief rollers. They break up the monotony of paint by adding relief. There are other methods too.
- The applied paint is rubbed off. So you can get wet silk or plush from “silk” paint.
- Partially wipe off the paint with crumpled paper, a sponge, a piece of fur, plastic or metal notched spatulas, metal wool, etc.
- They go over the top with a semi-dry roller or a hard brush with darker or lighter paint.
- Place plastic film on the painted piece, crumple it a little and remove it.
Some ways to get creative
In general, there are a lot of options. This process is completely creative and there are a lot of variations. And the result can be very different, even if you use the same paint.
Mistake #1: Painting unprepared walls
Minor defects, dust, grains of sand, and brush fluff from a previous painting may appear under the paint and negatively affect the result. All the imperfections will be visible under the layer of paint - all you have to do is either accept it or clean the wall and paint it again. And possible greasy stains will appear, no matter how many layers you cover the surface. Defects will be especially noticeable if you use glossy paint.
What to do: To avoid double work and unpleasant surprises, prepare the wall in advance. Take sandpaper or a special plaster sanding tool and go over the uneven areas and defects. Afterwards, brush off the dust with a brush or broom. Stains can be removed by wiping the wall with a damp cloth and soap.
Mistake #2: Ignoring Primer
Don't use primer before painting walls? Don't be surprised if you end up with an unevenly painted wall or overused paint. The fact is that the primer provides a lower hygroscopicity of the surface, which allows you to save paint. The base also gives the surface “adhesion” to the paint, which improves the painting of walls.
What to do: Choose the appropriate primer for the walls. Apply it with a brush vertically in small stripes, and then horizontally - perpendicular to the first layer. After the base has dried, you can cover the surface with the first layer of paint.
Mistake #3: Incorrectly thinned paint
The paint can be too thick in consistency or becomes so during the work process. Then it needs to be diluted - this is an intuitive action. But what to dilute with is a question that can ruin both the material and the whole work. For example, if water-dispersion paint is diluted with white spirit, it will cause the polymers to stick together. If you paint a wall with this composition, the result will be of poor quality - disappointment is inevitable: the paint will lie unevenly, maybe even in lumps. If, on the contrary, you dilute oil paint with water, it simply will not mix with the main mass.
What to do: read the composition on the paint can and select the product you will use to dilute the product accordingly. Do not add too much water or solvent - it is better to add a little at a time, thoroughly mixing the paint.
Preparatory work
Paint is a thin decorative layer. It not only paints the walls, but also protects them from external influences. However, paint must be applied to perfectly smooth and clean walls. The film will not hide unevenness, cracks and defects, as drywall can do. This means that before painting the walls, they need to be prepared.
Removing the old decorative layer
If there is old wallpaper on the walls, peeling paint, whitewash or putty that is about to fall off, they are removed from the surface right down to the base. This is the only way to ensure high-quality adhesion of the composition.
The wallpaper is removed with a spatula or a special compound, the paint is washed off and scraped off with a spatula. The whitewash is washed off, and the putty is knocked off. After all the manipulations, all that remains is to wash the wall and dry it.
Removing rust stains from walls
If rust stains are found during the work, they must also be removed. Preparing walls for painting:
- Stains and smudges are moistened with hot water.
- Using a 10% solution of copper sulfate (copper sulfate), rusty stains are removed from the surface.
- If they do not come off, then they are painted over with a special primer.
Priming the walls
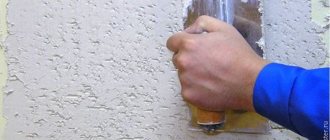
This is a crucial stage. The primer forms a structure on the surface, thanks to which the paint will not penetrate the walls too much, and therefore consumption is reduced. At the same time, adhesion to the surface improves. A roller is used for the job. The composition is applied without skipping, hard-to-reach places are coated with a brush.
The technology for painting walls says that after the first layer of primer has dried, you need to apply another one. This is the last step in surface preparation. All you have to do is wait for the last layer to dry and start painting the walls. But before that you need to decide on the color and choose the type of paint.
Mistake #4: painting without testing
Choosing a color is a rather complicated process, especially if the shade has to be combined with another tone or pattern. The unfortunate masterpiece will have to be repainted, and so the process can be repeated ad infinitum. The same applies to the shade, which you have to “extract” with your own hands using a color scheme.
What to do: add coloring concentrate to the paint a little at a time, mixing the contents thoroughly. To begin, pour a small amount of paint into a small container and add a couple of drops of color – see what color you get. Achieve the desired tone, and then do the same in a larger jar if you like the result. To make sure the color is compatible with the overall decor of the room, try painting it - apply the paint in an inconspicuous corner and wait until it dries. If the result suits you, let's get going.
Mistake #5: choosing the wrong tool
Using the right brush or roller is just as important as choosing your paint. And this is not a matter of taste. In order to paint the wall evenly, you need to purchase a couple of rollers and a brush. You will be the first to “roll” the surface, and use a brush to paint corners and hard-to-reach places.
What to do: for the first layer of paint, it is better to choose a roller with a long pile - 1–1.5 cm. It will pick up more paint, which will make it faster and easier to obtain uniform coloring. For re-painting, a roller with a short pile of 6–7 mm is more suitable: it will help you use the paint more economically and will definitely not leave “drips”. Choose a brush with natural bristles - it will not leave lint on the surface.
Types, design features and purpose
Rollers are used not only for applying paints, but also for adhesives, plasters, and primers. They are intended for painters and are actively used by furniture makers, for processing workpieces or parts in industry. Many people compare rollers with a regular brush and try to find the advantages or disadvantages of the tool.
A professional does not have such questions, since tools with different attachments and brushes of various types have their own purpose and narrow specialization.
Advantages over a brush:
- Even a medium roller covers a large area in one pass. It takes tens of times longer to process the same surface with a brush.
- The roller clasp (handle) is designed in such a way that the painter can quickly replace the coat on it and, with one tool, solve various problems and work with any type of finishing materials.
- It distributes the paint evenly over the surface and does not leave strokes or visible streaks, as happens with a brush. Using a hand roller, wool or nylon, you evenly distribute the material over the surface. Using a brush, the material is simply smeared, without penetrating into pores or cracks, and is simply laid on the surface. The result is an absolutely flat, smooth and uniform surface.
- The efficiency when applying paint is much higher than when using any brushes. In addition, you can use extension cords and handles to work with the ceiling, walls, floors, and finishing work on facades.
- A high-quality velor roller does not leave lint or marks from the fur coat, but the brush begins to crumble over time, and if the master did not notice the appearance of bristles on the working surface in time, correcting errors can lead to additional costs.
A high-quality velor roller will not leave any lint or marks from a fur coat.
Flaws:
- When using a paint roller to paint corners and joints, you will need a specially designed tool, usually a narrow roller.
- The work is carried out using a tray for paint and evenly distributing it over the fur coat. In some cases this is inconvenient.
- The width of the roller does not allow it to be used in hard-to-reach places. Painting uneven surfaces is very problematic; you have to use a brush anyway.
It is also worth mentioning that roller coats help create decorative effects of various types that cannot be achieved with a brush. For example, a long-nap roller creates a textured surface, giving it extra depth. Even simply passing a tool over a dried surface creates an orange peel effect if you do not have a suitable decorative coat on hand for the roller. The relief pattern is enhanced by light sources and shadows.
Mistake #6: applying paint “in different directions”
If you apply paint vertically, then horizontally, and then all at once, in the hope that the wall will look decent when dry, you are making a serious mistake. All strokes can show up, especially if you use a brush.
What to do: choose one painting option - vertical or horizontal - the paint will apply evenly, and the painting will not look awkward due to chaotic strokes. When painting in several layers, you can alternate methods, for example, paint the first layer vertically, the second horizontally.
Mistake #7: Applying paint in one layer
When applying paint in one layer, the coloring may turn out to be uneven, and if you want to change the color of the surface radically, you will definitely not be able to finish the job quickly. Even if you change a light shade to a darker one, the first color will show through.
What to do: to get an intense shade, apply two, or preferably three, layers. The first will allow you to distribute the paint over the surface; the second and third - it is better to shade it, even out the color and fill in small irregularities.
Mistake #8: Painting over wet paint
Of course, I want to finish painting faster and enjoy the result. That’s why we often don’t think about the consequences of painting on a “raw” wall. As a result, the undried layer begins to come off and stick to the brush or roller. Oil paint, in turn, may bubble and you will have to start all over again. True, after waiting for the paint to dry, and sanding the areas with defects.
What to do: Be patient. While the paint dries, do anything else. Pay attention to the instructions on the can, which indicate how long the paint needs to dry completely. If it's a single-base emulsion, it won't take long before you can get to work again.
How to use the tool?
To avoid the appearance of defective areas on the surfaces you are processing, you must follow some recommendations when working with this tool:
- Use only a clean mini roller, container for glue, paint or varnish.
- Before applying paint, you should check the condition of the fur or foam coat - it should not leave stains, and the lint should not remain on the surface.
- Pay attention to the metal elements, there should be no rust on them, the roller should rotate freely and evenly.
- Before starting work, immediately prepare all fur and foam coats, a mini roller for working in hard-to-reach places, plastic film to prevent the spread of splashes, and an extension cord (if you plan to work with high walls or ceilings).
- Using a paint container, spread the paint or glue evenly over the surface of the roller. To do this, just swipe back and forth several times, the fur coat will absorb a sufficient amount of material.
- When working with textured tools, it is important to follow the technology, since the surface characteristics will be different depending on the degree of drying. Even using the highest quality fur coats, you will not get a guarantee of achieving results. It is important to work under certain conditions, carefully monitor the drying time of paint, varnish, structural paints, liquid wallpaper, bitumen.
Regardless of the type of tool or its design, it will take a little time to hone the skill of painting and plastering. When used correctly, the work will be effective, fast and easy.
Mistake #9: Not enough paint
This can be a serious problem. Firstly, because during a trip to the store the already applied layer may dry out (after drying, the joint between the fresh and already applied paint will be noticeable). Secondly, it is difficult to choose the right shade if you added the color to the paint yourself.
What to do: the easiest option is to take more. As a last resort, you can return the unopened can to the store or leave it “just in case” - touch up the places where the paint will peel off over time. On paint cans they always write what area the volume is designed for - pay attention to the numbers. Keep in mind that if you paint the surface in two layers, the area will double.
Stone effect paint
Another decorative paint, in appearance very similar to decorative plaster. This is a stone effect paint. It is safe as it is made on the basis of acrylic emulsion. Decorative elements are added to it, which create the required appearance and relief. For example, Rust Oleum Multispec Stone Accents, Siberia Rock`n`Wall. This paint has 10 shades - from very light to quite bright. Can even be used in kitchens on work aprons.
Both natural stone effect paints look about the same
A very good specimen in terms of performance properties. Has very good adhesion. Very smooth surfaces - such as plastic - require a primer. The rest can be painted immediately. It is applied from a spray gun or using a special roller (from the same company). Appearance depends on the method of application. After the roller, a surface with clearly defined flakes of “stone” remains. After the spray gun the surface is smoother.
This stone-imitating paint is easy to use and durable. It can even be washed with a brush. For Rust Oleum, application of additional protection (in the form of varnish) is not required, but in areas of heavy pollution it is better to coat Siberia with varnish. The paint is repairable. If you get a bald spot or a chip somewhere, you need to moisten a piece of sponge with water, squeeze it out and dip it in the paint, apply it to the desired place and wait until it dries.
There are also stone paints in cans. But you are unlikely to use them to paint walls. Perhaps for a panel or some kind of decoration. It's too expensive.
This is what the stone paint “Alatyr stone” looks like
Another type of surface is provided by paint with the effect of burnt stone Alatyr-stone. It is also called “liquid granite”. Apply by spraying through a spray gun. There are single-color and multi-color options. Less shiny than the ones described above. Positioned as resistant to cracks and ultraviolet radiation. After drying it must be varnished.
Mistake #10: Wrong timing for painting
Applying paint in bright sunlight can cause the paint to dry too quickly, even before you can spread it evenly. The paint may also begin to foam or peel. And if you paint under the light of an electric light bulb, all errors will be barely visible.
What to do: the best option for painting the surface is during the day, without direct sunlight falling through the window. It is better to paint the south side in the morning or evening, when the sun does not shine so brightly.
The procedure for painting walls with a roller
Any more or less significant repair is not complete without plastering and painting work.
One of the most popular tools used for painting walls is a roller. Without it, it is simply impossible to paint large areas, such as walls or ceilings, with high quality.
However, not everyone knows how to apply paint using this, at first glance, very simple tool. So how to paint walls with a roller correctly, so as not to spoil the wall at the very last stage of finishing work?
How to paint walls with a roller?
If you have decided to do home renovations with your own hands, the question will be relevant to you: “How to paint walls with a roller”? The most interesting task in renovation is painting the walls. You can use standard colors, or you can show your imagination: mix paints, make drawings or textured designs. In any case, it must be painted correctly, following the technology.
Painting walls has been the most popular type of decoration in any room for many years.
To paint walls with a roller you will need the following tools:
- roller corresponding to the type of paint;
- wide paint brush;
- eye protection glasses;
- headdress (most often a cap with a visor is used);
- protective clothing;
- paint for walls;
- adhesive tape and other devices that will protect unpainted objects.
Tools for painting walls.
Before you start repairing, you should decide which roller to paint the walls with. If you plan to paint a large area, it is better to go with a wide one (from 25 cm). For wooden surfaces, a narrow roller (from 3 cm) is suitable. The main condition for choice is ease of use.
Foam-based rollers are used for water-dispersion paints, primers, and also for varnish. This type is not recommended for water-based emulsion, as small bubbles will remain on the surface when painting.
Velor rollers with short bristles are chosen for painting walls with emulsion and oil paints. In this case, the paint lies evenly on the wall, creating the feeling of a film. The main disadvantage of velor is its low absorbency, so the roller must be frequently dipped in paint.
Rollers made from natural materials (sheepskin and fur) are much more expensive, but last longer than foam rubber or velor. They are suitable for oil and emulsion paints. If the wall has uneven surfaces, it is best to choose a tool with long hairs. The main disadvantage of fur rollers is their strong adhesion to the paint layer itself, which is why they are not used for painting with acrylic paint.
Thread rollers are popular; their brush surface resembles a towel. They are quite soft and comfortable to use. When working with them, the lint does not fall out and does not leave any marks on the wall. This is their main advantage.
Before painting the walls, you should lay the floor and prepare the surface in advance. Knowing the parameters of the room, it is quite easy to determine the required amount of paint. If the package is small, pour it into a plastic bucket: this will prevent the formation of marks and drips. When pouring, make sure that all jars are from the same batch. When all the paint has been poured, mix it using a construction mixer.
Methods of painting walls.
Pour a small amount of paint into a prepared container (this can be a construction tray). It is important that the main axis of the roller is not covered. To ensure that the tool absorbs the required amount of paint, rotate it back and forth. Movements should be uniform for better absorption.
The main secret in painting with a roller is the correct calculation of the absorbed paint for the selected area of the wall. To do this, you can draw a small square on the wall and paint it over. It is necessary to work with the roller until it stops painting. After this, divide the square into strips whose width will correspond to the width of the fur coat itself. After simple calculations, you can distribute the amount of paint you have in stock.
Any painting of walls with a roller should start from the top corner, right or left - it doesn't matter. Skip the first strip and roll over the next one. Skip the third strip in the same way and only start painting on the fifth strip. Starting from the reverse side, that is, from the fourth stripe, paint towards the first remaining stripe. By following this method, you can evenly distribute the paint over the area of the drawn square. The number of stripes should remain unchanged in the future.
Then start painting the wall horizontally in the same manner. When the roller reaches the end of the strip, sharply tear it off the surface. Repainting the square begins from the opposite side.
To distribute the paint evenly, it is enough to paint the selected square twice.
If the paint container begins to empty, add leftover paint from the same batch.
Since the paint dries quite quickly, after a few minutes you can begin to paint the lower corner using the same pattern.
Rinse the roller with plain water when finished.
This simple procedure will allow you to use it repeatedly.
How to make drawings on walls using a stencil?
Prepare a stencil for painting walls, glue for it, a roller or brush. Spray or acrylic paint will work.
Prepare the surface for painting. Clean it from dust, dirt, wash it if necessary. Apply markings to the cleaned surface. If possible, use a level: this way there is less danger of distorting the design or applying it incorrectly. Mark the outermost points for the stencil with a pencil, so that you can then fix it evenly on the surface.
Paint can be applied to the stencil using a piece of foam.
Practice a little before you start. To do this, you can use a piece of wallpaper or find an inconspicuous section of the wall. Preliminary work helps to practice a little in terms of application technique and choose the desired color of the ornament. Experienced craftsmen try to create several designs in different shades to see what best reflects the idea on the wall surface.
To fix the stencil on the wall, it is better to use a special aerosol glue. There will be no sloppy marks left after the stencil is removed. Neither wallpaper nor paint will come off the wall. The glue is sprayed in an even layer onto the made stencil, and then pressed to the surface. To be on the safe side, you can additionally use tape. It must be kept in mind that glue will not prevent paint from getting under the stencil.
When painting through a stencil, remember that high-quality wall painting does not tolerate fussiness. To do this, it is better to choose acrylic-based paint: it will dry faster and is suitable for any surface. You can apply paint using a sponge, brush or roller. When working, add the coloring matter little by little (this eliminates the risk of smudges).
When working with small stencils, it is recommended to use a brush to apply paint.
When working with a brush, you need to hold it perpendicular to the surface of the wall. Apply the paint using the padding method, so that neither lint nor the coloring matter gets beyond the edge of the product. When painting with a sponge, the first impressions must be made on a separate sheet of wallpaper. This will remove excess paint. When using a roller, make sure that the paint distribution is as even as possible. Particular care must be taken when handling corners and small details of the stencil. The roller is best used for products with large patterns.
To paint using an aerosol paint mixture, try to hold the can at a distance of 30 cm from the wall. Sometimes the wall needs to be protected from paint smearing over the edges of the stencil.
The drawing is saturated with color in several stages. If you get not very distinct boundaries, you need to draw them with a thin brush.
To create a three-dimensional pattern on the wall, acrylic putty is suitable. It must be applied using a spatula. This is done layer by layer until the required thickness is achieved. To create a three-dimensional pattern it is 1-3 mm. The putty sets 2-3 minutes after application, but does not completely harden yet. At this time, the stencil must be carefully removed so that the ornament is not damaged. A not entirely even layer, after the putty has dried, can be leveled using fine-grained sandpaper. The resulting pattern can be painted or tinted.
After finishing the work, the stencil must be washed and dried. In most cases, it can be reused several times.
When working with a stencil, mistakes are sometimes made that need not be made. For example, this is a displacement of the product or smudges of dye. To avoid this, you must first securely fasten the stencil. Use only a small amount of paint and use gentle movements when painting.
Useful tips for painting
When painting walls, you can use several shades. One of them will be the main color (usually white or beige). It should be applied using a standard roller. The second color (yellow, orange, green) is applied using a fabric roller. A roller passing along the surface of the wall will not paint a section of the wall in some places. As a result, the wall will have a rich color with a light tint. This unusual design solution for walls will become a real decoration of the room.
Popular posts
- Chair for dressing table Chairs for dressing tables in Moscow - 189 Products Company from Moscow, delivery 29643 a In…
- Silicone sanitary sealant Silicone sanitary sealant white in Moscow - 1491 products Company from Moscow, delivery (tomorrow) 140...
- Shelf in the hallway Currently, there are a huge number of different options for shelves in the hallway, and this is directly ...
- Insulation of the floor in a wooden Insulation of the floor in a wooden house from below: materials and installation technology SHARE ON SOCIAL NETWORKS One of the common…