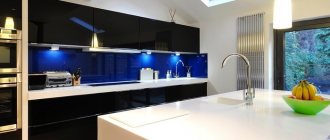
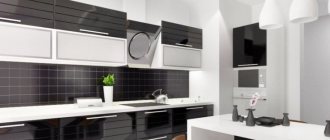
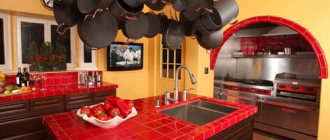
A modern kitchen is not only the heart of the home, a place for gatherings and a food preparation area, but also a technically equipped room that requires powerful electrical wiring. A kitchen from 40 years ago is radically different from a modern one. If previously one outlet for a refrigerator was enough in the room, now you need at least six of them.
How to properly place sockets on the kitchen apron so that they are completely safe and easily accessible?
What to consider when locating outlets
The kitchen is one of the most energy-consuming rooms in the house. A large number of electrical appliances require powerful wiring and, accordingly, many contact connections. The layout of sockets and switches in the kitchen before starting renovation is a must . Drawing up a diagram begins with calculating the total power of all equipment planned for installation.
An approximate list of electrical appliances and their power consumption:
- lamps – 150-200 W;
- refrigerator – 100-500 W;
- Microwave oven – 500-3000 W;
- electric kettle – 2000 W;
- TV – 50 W;
- oven – 2000-4000 W;
- induction hob – 7000-9000 W;
- electric hob – 5000-7000 W;
- hood – 100-300 W;
- multicooker – 1450-1500 W;
- coffee maker – 900-1500 W;
- mixer – 100-500 W;
- toaster – 700-900 W;
- washing machine – 2000-2500 W;
- dishwasher – 1800-2500 W;
- instantaneous water heater – 3000-8000 W;
- coffee grinder – 200-900 W.
Attention! Keep in mind that not all devices will be turned on at the same time, but the total power must be calculated.
The maximum power consumption of several simultaneously switched on electrical appliances in a typical apartment, as a rule, does not exceed 7000 W, but there are exceptions. If your figure is higher, seriously think about distributing the load across phases or introducing 380 V.
The choice of cable for powerful electrical wiring begins with calculating the cross-section of the common supply wire and the wiring going to the pantographs:
| Total load of all electrical appliances | Cable cross-section | Material |
| Up to 3500 W | VVGng-Ls 3x2.5 sq. mm | copper |
| Up to 5500 W | VVGng-Ls 3x4 sq. mm | copper |
| Up to 10000 W | VVGng-Ls 3x6 sq. mm | copper |
| Up to 15000 W | VVGng-Ls 3x10 sq. mm | copper |
Advice. Even if your house has an old type of grounding, in rooms where major repairs are being carried out, do the wiring with a three-core cable. When it comes to replacing all the electrical wiring, you won't have to remodel your entire home.
Installation process
Before installing sockets on the apron, that is, above the kitchen work area, you need to make sure that you have everything for this. You will need: hammer drill, grooving chisel and bit, internal boxes, screws, distributor box, dowels, three-wire cable and double 16 Amp sockets. At the same time, you need to remember that they need to be installed at a level where small children cannot reach them. Overhead fastenings must be done so that other communications in the house are not damaged.
After the layout of the sockets has been drawn up, we begin their installation in the wall:
- Using a hammer drill you need to increase the size of the recess. If in place of the new outlet there was an old one, you should turn off the electricity supply and dismantle it.
- Install the distribution box.
- Use a hammer drill to drill holes for electrical boxes.
- Grooves are made in the concrete structure.
- The wiring needs to be placed in grooves and secured. The wire sheath will help with this.
- Wiring is placed in special boxes.
- Single-color wires need to be connected only to one side of the future outlet; on the other side they are connected with three express terminals. As a result, each terminal should have 5 identical wires coming from the sockets and one wire of a certain color that needs to be routed to the junction box.
- A sand-cement mixture is made, which is used to cover the grooves for wiring.
- Check the correct connection and, if everything is correct, the sockets need to be secured.
Today, very often, so-called retractable sockets are used. They are located inside an MDF apron. Therefore, there are no wires on the surface. This product can be rotated in any direction. But this is most likely just beautiful than practical. When installing, remember:
- the cable must connect uninterruptedly to the network;
- constant access to socket fittings so that when they break, they can be replaced;
- there should be a lot of space under the surface, and this excludes the presence of cabinets and bedside tables.
You should also take into account that if you have a decorative kitchen apron, you should not place a rosette on the design or ornament, so as not to spoil its appearance.
Consider all these criteria, and then your renovation will not bring you much trouble.
Looking for a glass splashback? We recommend reading our detailed guide on this topic. There you will find recommendations on which glass to choose, what kinds of glass splashbacks there are, a price overview and much, much more. And in this post we will tell you what the most common mistakes are made by people who decide to order a glass apron for themselves. We hope this will help you save money and get the results you dream of.
Rules for the location of sockets in the kitchen
Taking into account the total power of electrical appliances and the cable cross-section, we draw up a diagram of the location of contact connections. This is influenced by the installation location of kitchen electrical appliances and compliance with safety requirements.
Rules for the location of kitchen sockets on the apron:
- Behind the lower modules for built-in appliances, sockets are located at a height of at least 10 mm from the baseboard level.
- The selected location for the contact connection must be dry.
- Switches for power supplies, if necessary, are located at a height of at least 0.5 m from the floor.
- The socket must be located no further than 1 m from the pantograph connected to it.
- Often, contact connections are installed on the inside of the lower kitchen modules.
- Power sources for appliances built into the upper modules of the kitchen (hood, microwave, coffee maker, etc.) must be located at a distance of 6 cm from the top edge of the kitchen cabinets.
- The height of sockets for small electrical appliances for temporary use (coffee grinder, mixer, kettle, etc.) is no more than 1-1.5 m from the floor level.
It is allowed to connect several low-power current collectors to one socket, if the total energy consumption does not exceed the capabilities of the electrical wiring and contact connection.
The maximum power consumption for sockets of a Russian manufacturer is 1300 W, for imported ones - 3500 W. Experts recommend purchasing sockets with an automatic power shutoff function. In the event of a current leak, the relay is activated and the socket is turned off.
High-power electrical appliances must be connected to their own power sources.
Attention! Installing sockets in the kitchen on the apron near the sink or stove is prohibited.
The arrangement of sockets on the apron in three lines is considered the most convenient. Thus, the upper line of power supplies is used to connect lighting fixtures, hoods and other equipment installed in the upper modules of the kitchen unit.
The middle line is free-use sockets for connecting small electrical appliances that are not constantly in use.
The bottom row is used to connect equipment built into the lower modules and retractable sockets on the worktop (if available).
Types of glass aprons and their characteristics
Many characteristics of the panels, including resistance to humidity, temperature changes and detergents, depend on the type of apron. In this section you will learn more about them.
Tempered glass splashback
Stalinite (tempered glass) is made from ordinary silicate glass, first subjecting it to high-temperature treatment and then greatly cooling it.
Stalinite has increased strength and immunity to high temperatures
Advantages: In addition to the advantages listed in the previous section, stalinite has increased strength. It can be easily installed close to the stove, and is also not susceptible to minor scratches, moisture or fading. Its service life is about 10 years.
Disadvantages: The cost of stalinite is higher than that of ordinary glass or plexiglass. All cutouts for sockets and communications cannot be made independently; only the manufacturer can do this.
Varieties: There are several varieties of stalinite, among which are:
- Satinate . Frosted glass, the cost of which is slightly higher than the price of transparent glass. It looks impressive, but requires special care.
- Stemalit . Pre-enameled glass, which has then been tempered so that the surface and paint become inseparable from each other.
- They threw it off . Glass for a kitchen apron with a decorative backing.
- Optiwhite . Tempered bleached glass, the cost of unbleached materials is approximately 2 times higher.
- Backlit panels . LED lighting is inserted into the profiles, which turns the apron into an independent lighting device.
The presence of backlight will enhance the effect of the glass surface
The service life of tempered glass is about 10 years
Laminated glass (triplex)
It is organic, tempered or silicate glass, consisting of two or more layers. The thickness of such an apron is most often 8 mm.
Triplex consists of at least two layers
Advantages: Triplex is characterized by increased strength and heat resistance. It is easy to maintain and safe, and the range of designs suits a variety of interiors.
Disadvantages: Triplex is more expensive than regular tempered glass, and it weighs much more. The material is not as transparent as hot iron and more time is spent on its production (from two weeks to a month).
Varieties: This glass apron for the kitchen can be with photo printing, with a mirror, or decorated with a glass layer. Can create an imitation of fabric or leather covering.
Triplex can be installed not only behind the sink, but also near the gas stove
Production times for laminated glass can be up to a month
Plexiglas
Plexiglas is often called acrylic. It is also known as plexiglass, carbonglass, acrylite or limacryl.
You don’t have to worry about accidentally breaking the plexiglass – it’s incredibly durable
Advantages: A plexiglass apron for the kitchen is highly durable and cannot be broken. In addition, it is characterized by its affordable cost, light weight and undemanding quality of the wall on which it is mounted. It is moisture-resistant, environmentally friendly and heat-resistant, and cleaning plexiglass with your own hands is no problem.
Disadvantages: The material scratches easily and fades over time. Plexiglas is susceptible to the influence of abrasive detergents, alcohol and acetone, and is afraid of overheating, which can cause it to become deformed. In terms of decorative qualities, it is inferior to options made of tempered glass.
Varieties: Available in several colors on the market. There are also models decorated with photo printing.
Over time, micro-scratches appear on the plexiglass
A facade with photo printing will dilute the monotony of facades.
Polycarbonate
Glass for a kitchen apron made of polycarbonate is very similar to ordinary plexiglass, only it has characteristics more suitable for the role of a kitchen apron.
Polycarbonate is resistant to high temperatures
Advantages: Low cost, resistant to high temperatures. Among other things, polycarbonate is a lightweight and flexible material that is easy to install with your own hands.
Disadvantages: Easily susceptible to small scratches, inferior in decorative qualities to ordinary glass.
Varieties: Differs in color.
You can install polycarbonate panels even without any special skills
Polycarbonate looks impressive, but still loses to plexiglass in terms of decorative qualities
Preparing for installation
According to the drawn up plan, we mark the walls. We measure and mark with a construction pencil the places where the power supplies are attached. When applying markings, pay attention to the drawing of the future apron. Sockets should not spoil it.
Advice. If you order skinals, do not forget to warn the manufacturer about the holes for sockets in the installed locations.
Tools for installing sockets will include:
- perforator;
- level;
- wall chaser or grinder;
- core drill;
- pliers;
- roulette;
- indicator screwdriver;
- multimeter;
- pencil.
Necessary materials:
- three-core cable of the required cross-section;
- socket boxes;
- junction box;
- express terminals;
- alabaster;
- cambrics;
- required number of 16 A sockets;
- dowel-nails;
- self-tapping screws
Common mistakes and how to avoid them
When arranging sockets on a glass apron, the following errors occur:
Socket boxes are not fixed to the wall => securely fasten with alabaster or glue
Rosette cups are not installed level => disassemble and install level
The holes are offset relative to the socket boxes => drill new holes in the wall, if not possible, make a new panel with the correct cutouts
After assembly, the machine knocks out or there is no current => check the connection is correct, to avoid mistakes, it is recommended to photograph the wires in the socket
Electrical points are too low => carry, if this is not possible, use an extension cord
How to make a rosette on a kitchen apron
After de-energizing the room, using the finished markings, we make holes in the wall for the internal boxes and grooves for the cable. We make the holes for the boxes using a core drill of the required diameter, and the grooves with a grinder or wall chaser.
Immediately, as we go along, we try on the inner boxes. If they do not fit neatly into the prepared sockets, we expand the latter with a hammer drill. Inside the grooves, we drive plastic dowels into the wall in half-meter increments. They will be needed to secure the electrical wiring. We fix the boxes in place, lay the cable, fixing it with self-tapping screws and clamps in the groove.
Advice . Instead of dowels with clamps, simple alabaster will help to grab the wiring inside the groove for further work. The material sets quickly and is easy to apply.
We cut the wires so that a margin of about 5 cm comes out of the box and socket boxes. We connect the cables to the sockets and test all contact connections with a multimeter. If everything is in order, we move on to the next stage of repair - plastering work.
We install a kitchen apron made of tiles, glass, mosaics, MDF or other materials on the prepared walls. The holes on the panels must completely coincide with the installed socket boxes. Upon completion of all work, we connect the sockets to the wires protruding from the socket boxes.
Sheet selection
The modern building materials market offers a huge selection for creating a glass kitchen apron. Today you can purchase panels made of transparent, frosted, textured and colored glass. Glass panels with photo printing, which many know as “skinali,” are especially popular among our compatriots.
When making a glass apron yourself, you should give preference to tempered glass with a thickness of at least 6 mm. The difficulty is that drilling a hole for sockets and a fastening system in this material is an almost impossible task without a special tool. If you decide to make such a glass panel with your own hands, cut and make all the holes before tempering the glass. You need to know that ordinary window glass has a pronounced greenish tint, which intensifies with increasing thickness. For kitchen aprons, special bleached glass should be used, which subsequently will not distort the design.
Step-by-step algorithm for connecting sockets
Among the wires removed from the boxes, we find the same colors, connect them on one side to the socket, and on the other to the distribution box using terminal blocks.
Important! To avoid the risk of short circuiting, properly strip wires before connecting to terminals. The wire should be stripped exactly as far as it will go into the terminal. If you have removed an excess fragment, it is better to cut it off with wire cutters.
We insert the wire into the terminal and tighten the clamping screw well. It is important that no bare area protrudes from the terminal, and that the cable itself is held firmly in the terminal. We fix the case in the socket box, installing it evenly. We hide the body behind a decorative protective cover.
DIY glass apron installation
Do-it-yourself installation of a glass apron is our topic today. The kitchen apron is that part of the wall that is especially susceptible to contamination; the apron itself is located between the kitchen countertop and wall cabinets. It must have the following characteristics:
1. Resistance to temperature changes, since the very location of the apron implies a significant temperature difference and not every material will withstand such a test with dignity.
2. The practicality of the material from which the apron is made; it should be easy to clean and resistant to detergents.
3. Durability and reliability of the material, which ensures a long service life without deterioration in appearance.
4. Material safety in terms of fire.
There are various materials from which kitchen splashbacks are made, such as tempered glass, plastic and MDF panels, tiles, as well as artificial stone and mosaics. But according to the characteristics of a kitchen apron listed above, we can confidently recommend using a glass apron for the kitchen; it is made of tempered glass https://glassfuturspb.ru/products/259/, which is the most popular at this time.
In general, the safest glass used for the production of aprons is considered to be glass with a thickness of at least 9 mm, as well as tempered glass with a thickness of 6 to 10 mm, which is five times stronger than ordinary glass. Also, to ensure additional safety, all corners and edges of the glass are ground and polished before installation.
DIY glass apron installation
- Preparing to install a glass apron.
At the stage of preparatory work, you need to draw up a project, when creating which you need to decide on the shape and size of the apron, the type and color of glass, as well as decoration options. All this is necessary so that the apron fits perfectly, not only in its size, but also in the overall interior design of your kitchen, and also combines with the kitchen set, ultimately forming one whole with it.
In addition to this, it is necessary to determine where the various holes will be on the glass, for example, for a socket, this is very important, because after tempering the glass, it will be impossible to change anything.
As for the preparation of the surface on which the glass apron will be attached, it consists of leveling it, this is necessary to ensure reliable fastening and, as a result, long service life.
- Installation of a glass apron.
Fastening a glass apron occurs, in most cases, in two ways:
— Installing a glass apron with your own hands using glue and all kinds of liquid nails, this method is simpler, but to implement it you need a perfectly flat surface on which you will attach the apron, otherwise no one will give you a guarantee of durability. Therefore, the following method is most often used.
— Do-it-yourself installation of a glass apron using special pass-through fasteners that securely fixes the glass apron and is almost invisible. There are no restrictions on the use of such fasteners, which ensures its popularity.
The most important thing to remember is that if you doubt the feasibility of installing an apron yourself, seek help from professionals.
Not everyone can install a glass apron correctly with their own hands, so be careful! Did you like the article? Share with friends on social networks:
Common mistakes
Most often, people make mistakes in installing sockets due to ignorance of the basic rules for their installation.
The most common mistakes:
- Start of work without drawing up drawings and markings. If you do not calculate what furniture and equipment will be located where, after completing the long-awaited renovation, there is a high probability of encountering problems such as sockets hidden behind cabinets and the need to use carriers.
- Connecting sockets for powering “wet” electrical appliances through a regular automatic machine. Equipment such as an instantaneous water heater, dishwasher or washing machine must be powered through a residual current device or differential circuit breaker.
- Installing regular sockets near the faucet , under the sink, near the gas pipe or hob. This arrangement is prohibited by safety regulations. The distance from potentially hazardous areas should be at least 0.5 m. If the wiring is already installed and there is no possibility to change the location of the outlets, the best option would be to install waterproof power supplies.
- Connecting the refrigerator through an extension cord that does not meet safety requirements. Connecting powerful electrical appliances through non-factory-assembled electrical extension cords or old carriers can cause a fire.
Note! Some refrigerator models have an additional power cord for connecting the freezer. When planning the layout, be sure to take into account the model of the future refrigeration appliance and its features.
If there are hidden pipelines in the apartment, be careful when chiselling the walls to install the bottom line of outlets. Water supply and sewerage pipes can be installed at a distance between 10 and 25 cm from the floor.
Errors
When installing this type of device, inexperienced technicians can make a number of mistakes:
- There is no need to place the outlet for the hood in the area where it is located.
- There is no need to take into account the size of the plinth behind the work surface.
- If the kitchen apron is made of plastic material, then installation should be done after it is installed.
- The wall must be grooved on the apron.
- Place the sockets as far as possible from the sink to prevent water from entering it - this can lead to a short circuit.
- Installation should be carried out before installing the kitchen unit.
- The wiring must be of an acceptable cross-section.
- From the above we can conclude that when installing sockets you should be very careful, taking into account even the most insignificant nuances and details. The price of a mistake is very high!
- Once you have drawn up a plan for the placement of devices, you can begin to implement it.
