Basic Rules
In order for such a floor covering to serve for a long time and not lose its properties, you need to follow simple rules when caring for it:
- remove dirt, food debris and debris immediately;
- wash the floor with detergents more often;
- After cleaning or spilling liquid, wipe dry;
- Glossy tiles cannot be cleaned with powder or a stiff brush.
Advice! The correct selection of cleaning products and methods for cleaning floor tiles is very important. Some harsh chemicals can damage it.
How to remove floor tiles?
It would seem that dismantling old floor tiles is simple and easy. As they say, breaking is not building. Experience shows that this is not always the case. Sometimes you even have to call in specialists to properly remove old tiles without destroying the floor.
It would seem that it is worth removing this old unnecessary tile? Removing floor tiles is not an easy task, but the process can be made much easier if you know the proper techniques for the job. This article contains some valuable tips that will help you remove tiles from your floor quickly and efficiently.
One of the biggest benefits of tiles is that you can replace them as needed. You can remove old tiles from the floor if they appear cracked, chipped, or you decide that the tiles do not suit the interior of the room. Removing tiles from floors is an excellent skill because it can save you a lot of money, which is necessary if you hire specialized firms or craftsmen to do the job.
Tools and protective equipment
Before starting the process, you need to make sure that you have all the necessary equipment that can help make the job easier. You may need: • drill • chisel • crowbar • spatula • hand scraper • reinforced scraper • hammer
You can purchase these tools at any hardware store. It is also important to protect yourself from flying dust and pieces of tiles using personal protective equipment: knee pads, gloves and goggles.
How to remove a single floor tile
When removing one broken tile from a floor, you must be very careful to ensure that nearby tiles do not get damaged. First of all, you need to use a crowbar and a hammer to remove the grout around the perimeter of the desired tile.
Then place a towel on the tile to prevent shards of tile from scattering and hitting you when struck. Then the damaged tile is removed with a chisel and hammer, breaking it into small pieces. When hitting a tile, make sure you don't hit it too hard to prevent other tiles from breaking. After this, you need to collect the broken tiles and remove any remaining adhesive using a hand scraper.
Check that the floor is level. If not, you can smooth out the unevenness with a hand scraper. Then clean the floor first with a broom and then use a vacuum cleaner. In case of large potholes on the floor, it is necessary to level the floor using putty or cement mortar.
Removing tiles on a large surface
If the old tiles were attached to cement, then you can say goodbye to your dream; remove the tiles quickly, without dust and noise. It is worth considering that if the ceramics were placed on concrete using cement, then it is unlikely that it will be possible to remove at least one tile intact. At one time, you had a good professional who worked for you and did everything conscientiously. This coating can only be removed with a jackhammer or chisel. The larger the area of the tile being removed, the more effort will be required. You should always start removing tiles from one corner or edge of the tile and work towards the center. The first tile is the hardest to remove, but once that's done, the rest of the tile can be removed fairly easily.
First, remove the mortar or grout in the tile joints using a chisel placed at an angle and a hammer. This way, the tile will be freed from the mortar and adhesive layer. Next, place a spatula under the tile and pry it off. The rest of the tiles are separated from the floor in the same way. Next, they begin to work with the next row of tiles. Once all the tiles on the floor have been removed, you can clean up the work area. Collect all removed tiles in a cardboard box or large plastic box. Scrape any remaining mortar and adhesive from the floor using a hand scraper. To cover a large area, using a reinforced scraper will be more appropriate. Thoroughly clean the floor of dust and debris. It is now ready to be finished with new flooring.
If the tiled floor area is small, then you can do this work yourself, but if you have a large area to clean, then it is advisable to hire specialists. Moreover, if you are planning to remove asbestos tiles, then you should hire licensed professionals as they know how to remove and dispose of this type of tile safely.
It is much easier to remove the tiles if the old coating was stuck on with glue. In this case, it will be easier to remove it than with cement. In this case, some tiles may be intact and can be reused. When dismantling old ceramic tiles, you must also stock up on the necessary tools, since you won’t be able to remove anything simply by hand.
In any case, before you start tiling the floors with new tiles, you need to tidy up the flooring. The floor should be smooth, level and, importantly, without slopes.
How to clean floor tiles
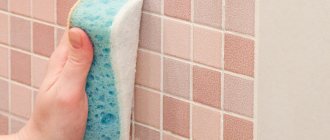
If you wash the floor frequently and use detergents for this, the tiles will always be clean. But sometimes hard-to-remove stains appear on it. Do not rub them with brushes or powders - scratches may appear on the surface. Any product must be rinsed off with clean water and then wipe the tiles dry.
- Method: pour 4 liters of water into a basin, add 100 g of vinegar. Use for cleaning the floor.
- Method: dilute citric acid in half with water. Rub the contaminated area with the solution.
- Method: dilute ammonia with water 1:1. Apply to dirt and clean with a soft brush.
- Method: For white tiles, you can use “Whiteness” or another chlorine bleach. You need to pour it into a spray bottle and spray the floor. After 5 minutes, clean with a brush.
- Method: Mix laundry detergent with water to form a paste. Apply it to the stain. After 10-15 minutes, rinse with water.
Advice! To add shine to the surface after cleaning, spray it with glass cleaner and wipe it with a dry cloth.
The nuances of the tile cleaning process
Cleaning tiles from dirt and removing traces of grout are done in similar ways. Similar tools are used for both processes. But it is worth considering a number of features. Acids have a negative effect on marble. If tiles made from this material are used, they should be cleaned using household products typically used for washing dishes. Tilers with extensive experience always remove excess grout from surfaces. They do this even before the material begins to dry out. This usually occurs within 15 minutes from the moment of application to the seam. A special device was developed to remove the fugue. Its designs include a hydrosponge and containers with rollers. The sponge passed over the rollers is saturated with water. The required volume of liquid is stored in the sponge, and the residue is removed with rollers.
You need to move the sponge along the tile parallel to the seam at an angle of 450 to the surface. Thus, in addition to removing excess fugue, seams of the same depth are formed.
How to clean seams
While the tile itself is fairly easy to clean, dirt gradually accumulates in the seams. They absorb liquid and can darken or become a breeding ground for mold. To clean seams, you need to use other means: acids and aggressive powders can damage them. There are several effective and safe methods.
- Small stains can be cleaned with a regular eraser.
- Make a paste of baking soda and water, diluted in equal parts. Apply to the seam and scrub with a soft brush.
- For light-colored seams, you can use bleach. It needs to be diluted with water 3:1 and applied to the seam, and then cleaned with a brush.
- Mix equal parts hydrogen peroxide, baking soda and dishwashing liquid. Apply to seams and wash off after 2 hours.
- To remove mold, you need to dilute a glass of borax in 3 liters of water. Apply to seams and rub. Do not rinse, just wipe with a dry cloth.
- Dilute 100 ml of vinegar with the same amount of water, add 500 g of soda. Apply to the seams and after 15 minutes brush over them.
Advice! To prevent the seams from becoming dirty, you need to treat them with a special protective compound. It will prevent liquid absorption and make cleaning easier.
Anti-fungus and mold products
Various methods are used to destroy these pathogenic microorganisms.
Chlorine agents have proven themselves to be effective, actively suppressing pathogenic microflora.
Borax (sodium boric acid) may help. A good antiseptic, especially against fungi. It is sold in pharmacies in the form of boric acid, and in powder form in hardware stores. A glass of borax is dissolved in a three-liter jar of water. A sponge is dipped into the solution and the areas affected by microorganisms are treated.
Another way to “treat” seams is a combination of soda and vinegar. Powder or soda diluted to a paste is applied to the seams in the evening. The next morning, vinegar is sprayed onto the baking soda. After the chemical reaction, you need to wait about ten minutes, then you can wash the treated areas with a wet hoe or sponge.
Antiseptics produced by the chemical industry can be used against microorganisms. In this case, you should carefully read the instructions before use.
If all the means used do not give the desired result, you will have to replace the affected area. The seam section is removed with a scraper. Then you need to apply antiseptic impregnation. After it dries, the grout is prepared and the damaged area is repaired.
Paint thinner
How to clean floor tiles after renovation?
The most difficult thing to deal with is the dirt left after the renovation. If the tile is not protected during this time, stains of putty, primer, and glue will remain. There are effective means to remove them:
- the dried primer must be soaked with water and washed with a vinegar solution;
- tile adhesive is soaked in a 1:1 mixture of ammonia and water;
- construction dust can be easily removed with water and vinegar;
- Acetone is effective for cleaning paint.
Read more: how to clean the floor after renovation
To keep the tiles always clean, you need to immediately remove dirt, liquid, and crumbs from it. And simple remedies will help you clean it without damaging it.
How to prevent problems from occurring?
If you don’t want to rack your brain every time about how to wash the tiles in the bathroom to restore their shine, follow these simple recommendations:
- Wipe the tiles regularly with a damp cloth, as fresh plaque can be easily removed without any means. Clean more often those areas that come into contact with water, then problems with limescale will not exist for a very long time.
- Be sure to install a fan in the bathroom so that it forcefully draws out moist air. If there is high-quality ventilation in the bathroom, then there will be no dampness in the room, which, together with high temperature, is an excellent environment for the development of fungus and mold.
- Thoroughly clean the facing surface once a week using specialized preparations or folk remedies, which we described above.
Video material
Clean the tiles periodically using high-quality and effective products, and then problems with plaque, and even more so with fungus, will never appear. We hope that our tips and recommendations helped you get rid of unsightly whitish stains on tiles, and now your bathroom shines with shine and cleanliness.
