Coverage options
Today, there are two main factors on which the choice of flooring depends. The first factor is the characteristics of the soil at the construction site, and the second is the climatic conditions.
Naturally, the first and simplest floor in the garage is earthen. The site is leveled and compacted. Naturally, in this case the garage will not be protected from dampness, cold, etc. The only thing that can be added to somehow increase resistance to frost is to apply another layer on top of the ground. Clay mortar is used as the raw material for this layer. It is also carefully compacted and leveled.
Another budget option for garage flooring is a gravel pad. Instead of clay mortar, I pour medium-fraction gravel onto the ground, which is moistened and compacted. The method is inexpensive, not very practical and not durable. However, it can solve the problem of high humidity in the garage, which is not bad.
The third way to install a garage floor is to pour a concrete screed. This option is the most common when constructing a permanent garage. This method will allow you to equip an inspection hole indoors, and if the foundation is deep, then equip a good basement. The option is quite reliable and has a long service life, but, naturally, more expensive than the previous two.
Another method of installing a garage floor is to lay wood over joists. The base is quite simple to make and quite convenient to use. However, the risk of fire increases significantly here. If the wood is additionally treated with protective compounds, the service life of such a coating can exceed ten years.
The last option is laying tiles or stone. This method of floor preparation is the most expensive and difficult to implement.
What to put on garage floors?
Hi all! I raised this topic on another construction forum, but it seems that no one there has encountered anything similar. I hope you can help me decide what to put as flooring in my personal garage!
Just the other day I did a general cleaning in the garage and realized that the floor had taken on a completely miserable look. I came to the conclusion that it was time to change it. But what to change to is the question.
For about a week I was reading information about different coatings on the Internet and went to visit my neighbors in the garage cooperative. And here’s what I came up with: most often people order a concrete floor (this is exactly what I had), self-leveling (epoxy or polyurethane), modular plastic or modular PVC.
I have already been the happy owner of a concrete floor and I don’t want to repeat this experience at all. Now I will explain why. About ten years ago, when I just bought a garage, there was minimal money available, so I decided not to bother too much and just made a classic concrete floor. The fact that it was cheap at that moment was the main advantage for me. Of course, this coating is very durable, so there were two advantages.
But then the downsides came for me. The filling turned out to be quite labor-intensive and time-consuming. By the end of the first year, I was unlucky and a crack appeared in the floor. It's not particularly big and doesn't interfere with work, but it's still unpleasant. In addition, concrete is not as resistant to damage as is commonly believed. Once I dropped a sledgehammer and a noticeable hole appeared, which I had to trip over more than once. Gradually the surface became dirty and the oil stains could no longer be washed out. The smell appeared unpleasant. In general, I “enjoy” all the consequences of saving.
As a second option, I considered self-leveling floors (I won’t provide links - many companies in Russia are engaged in pouring floors), one of my friends has just such. I always liked the look of them, so this option was my favorite. Looks beautiful, washes great. What else is needed? But it turned out that everything was not so rosy. Firstly, pouring is quite labor-intensive, because you first need to perfectly level the base, be it concrete, slab, wood or other covering.
Then you need to choose a quality mixture. It turned out that there are about a dozen varieties, but the most popular among them are polyurethane and epoxy. When dry, a perfectly smooth, beautiful and durable surface is formed. But a friend and information on the Internet confirm that with active use of the garage, the attractive appearance is quickly lost. The pleasure of laying such a floor is not cheap. And as it turned out, repairing the damage is quite expensive and complicated. So I ultimately abandoned this option.
Further research took me away from concrete and self-leveling floors to modern tiles. The first information I came across was about modular PVC flooring (for example), that is, about PVC tiles. It looks interesting (although it seems cheap), you can make a pattern on the floor. It installs quite quickly, the material seems strong and durable. But, they say, this option is more suitable for exhibition garages, and not for ordinary ones. Despite its resistance to various chemical compounds, PVC is still easy to damage with acetone, and I use it in the garage. And the appearance quickly wears out. Plus, in our climate, there is nothing provided for the removal of water and the passage of air so that the floor covering can be ventilated.
I was already depressed by the fact that all coatings have hidden flaws, until I came across information about a modular floor covering made of plastic - polypropylene (). The same advantages as the previous option, but the material is resistant to any thermal and chemical damage, is easy to clean and even with intensive work retains its appearance. There are even some patented technologies that allow it to be used in our climate. In general, everything was beautifully described on the website and the pictures are attractive. I watched videos of how such tiles do not burst even when heavy objects fall. This may not be the case in life, but the main thing is that even if this happens, replacing a couple of modules is very simple.
So in the end, for now I'm leaning towards plastic polypropylene flooring. What do you think? Who uses what in their garage? They also suggested to me that you can just lay ceramic tiles and not worry, but if I’m not mistaken, one of the disadvantages is the possibility of splitting and it will be slippery if water drains from the car...
Any ideas?
Arrangement of the simplest foundation
It is best to start working on the base of the floor in the garage with its simplest options, that is, by arranging an earthen and/or gravel layer.
- The first thing to do in any case is to remove the top fertile soil layer by 15-60 cm, depending on the type of soil on the site.
- After this, the earth is watered and thoroughly compacted.
- If nothing is done, there will be high humidity in the garage, which will arise due to the flow of high groundwater. To reduce this percentage, you can coat the floor with a liquid layer of clay. You need to apply two or three layers of clay. However, before applying the next one, you need to let the previous one dry completely.
- It is important to add here that if the walls in the garage are wet, then the option of laying clay is excluded. In this case, sifted sand, which does not contain clay particles, can be laid on the floor in the garage. After this, a layer of red burnt brick or waste slag is poured on top and also compacted.
- Another option that can help reduce moisture when you have a regular dirt floor is ventilation. To do this, small holes are made in the corners of the building.
- Another budget idea is to lay old linoleum on the ground. The room will become much drier and warmer, but it will slide a lot. In addition, the linoleum itself should be laid with a slight overlap if the material is laid in pieces. To make it more convenient to drive in, you can lay several boards under the linoleum at the entrance to the garage.
It is worth noting that tiles can be laid on a gravel bed, which will be quite good. Such material cannot be laid on an earthen floor, as a good waterproofing layer is needed.
Cleaning garage floor screed
The cost of subsequent finishing depends on the quality of the finishing screed. The smoother the surface, the better. The easiest way to achieve the perfect base is to screed along beacons.
If you add a little alabaster to ordinary cement mortar, the mixture will harden much faster. In this way, you can quickly mark “beacons” - small areas of solution, at a distance of 1.7-1.8 m from each other. When the beacons harden, it will be easy to lay and tighten the cement mortar between them, or lay even metal pipes.
The next day after making the screed, the beacons should be removed and the holes should be filled with solution.
The hardened solution already allows you to walk, but all irregularities can still be removed with a rule.
This is perhaps one of the most critical operations in the manufacture of high-quality screed.
In cases where finishing is not planned in the near future, it is better to iron the screed. This is a relatively simple process and consists of grouting a slightly damp surface with cement slurry. This can significantly increase the strength of the floor and reduce its dust generation.
Working with tiles
In order to successfully lay tiles on the garage floor, you will need more effort and time than with the previous option. Here you will have to compact all the layers much more carefully, and therefore the ideal option would be to rent a vibratory rammer, since carrying out all the work manually will be very difficult and much longer. Each five-centimeter area must be carefully processed. The work can be considered successful if, after a person walks on the ground, there are no traces left on it.
The sequence of layers for laying tiles on the garage floor with your own hands is as follows:
- The first layer is sand with a thickness of 5 cm.
- The second layer is medium-fraction gravel. Layer thickness - at least 10 cm.
- Next comes another sand cushion, but with a thickness of 10 cm.
- Next, for the base you will need a cement base or purified sand, 5 cm thick.
- Finish coating of the selected tile.
Here we need to go into a little more detail. After the first layer of sand has been laid, it is recommended to lay one, or preferably two layers of waterproofing material. As such a material, you can use roofing felt or, for example, thick polyethylene film (300 microns). The most reliable option would be to lay geotextiles on the garage floor with your own hands.
If the base has two layers of waterproofing, they are glued together with double-sided tape or soldered. Strips of material are laid with an overlap of 5 cm. Each joint must be additionally treated with bitumen mastic.
When the tiles have already been laid, it is recommended to fill all existing seams with a mixture of cement and sand 1:3. This is done to prevent dirt from getting into them. The excess mixture is swept off the coating. After this, the seams are sprayed with water and left to dry. Any cement that ends up on top of the tiles must be removed immediately. A small nuance - you cannot use watering from a hose, since the water pressure will knock the mixture out of the seams; only working with a spray bottle is allowed.
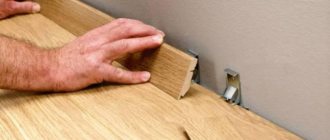
Arranging a wooden floor
How to cover the floor in the garage? Wood is a budget-friendly and quite acceptable option. The service life of this material in such conditions is up to 20 years, and if it is processed, even more. The sequence of work when arranging such a foundation is approximately as follows:
- it is necessary to remove the entire fertile layer of soil;
- the surface is compacted using a vibratory rammer with moisture;
- Next, you need to lay a layer of waterproofing - a material such as geotextile, roofing felt, film or a special waterproofing membrane will do;
- A layer of sand or crushed stone 10 cm thick is poured on top of this, which is also carefully compacted.
One very important nuance. When installing a heated floor in a garage made of wood, it is necessary to check each layer with a level so that it is perfectly level. If the garage is large enough, then it is better to use a laser level rather than a regular building level.
- The next step is laying the wooden joists. Here, boards with dimensions of 50x50 cm or 40x40 cm are most often used. This material must be treated with an antiseptic or resin and fire-retardant impregnation, which will protect against rotting and fire. An ideal option for lags would be railway sleepers, since they are impregnated at the factory with all the necessary compounds and will last much longer.
- To successfully install a wood floor in a garage, the joists must be installed in recesses. They are fixed against the wall with anchors or you can use a gypsum mixture. This option will be much faster and easier to implement.
- The pitch of laying the logs is 50-100 cm. It would be ideal to lay them so that the car, when entering the garage, passes over them or at least next to them. In addition, it is worth adding that the more boards are laid, the less the coating will “walk”.
- To provide a floor in a warm garage, you need to use extruded polystyrene foam. The thickness of the sheets must be at least 5 cm. In addition, this option is two in one. Expanded polystyrene and waterproofing and insulation.
- If you don’t want to use such material, then it can be replaced with granulated foam glass, which also performs two functions at once.
- There is an option for budget-friendly floor insulation. You need to use broken brick, glass and expanded clay. However, such a base will still allow moisture to pass through.
Economy option: plank flooring and classic concrete
Another cheap option for garage flooring is plank flooring; it can be single or double with insulation between the layers.
Considering that tires wear out wood quite quickly, a floor of this type will last about 5-7 years. To protect against dampness, it is necessary to have a concrete base under the flooring: if you put the boards on compacted soil, they will simply rot in a year or two. A wood garage floor is bad because it absorbs all substances, making it almost impossible to remove stains and odors.
Reinforced concrete is considered to be the traditional option for covering garage floors. Note that a layer of cement mixture is always present, but it is not necessarily the finishing layer. A concrete coating is called when a layer of cement screed is poured on top of the monolith. This type of garage floor is inexpensive, yet durable and resistant to harsh conditions. Cracks or potholes may appear on the concrete surface due to mechanical damage or temperature changes, but usually they are not even noticeable.
A serious disadvantage of concrete coating is that it is dusty, and any liquid spilled on it remains there forever, forming stains and stains, which can also cause an unpleasant odor.
However, these disadvantages can be mitigated by covering the top layer of a concrete garage floor with special paints or sealants, which will not only make the floor more convenient to use, but also give it an aesthetic appearance.
You can also do this very cheap finishing method yourself, using a brush, roller or sprayer to apply paint to the garage floor. By improving the concrete surface in this way, you get a good garage floor that will last for many years.
Return to contents
Budget option for wooden flooring
You can make a garage floor covering without insulation. In this case, you can lay the logs on the posts.
- The soil is leveled and compacted.
- Next, a gravel cushion is made, on which brick columns are installed. The size of the elevation is two bricks wide and the same in height.
- The distance between each support is one meter.
- The brick pillars are laid using cement mortar, which means that you will have to wait until it is completely dry before continuing work.
- The top of the support is covered with two layers of waterproofing or bitumen lubricant.
- The last stage is to install the logs and lay the wooden floor.
Dirt floor for garage
This is the simplest and most economical garage floor. Despite all its shortcomings, the adobe surface does a good job of its main task: supporting the weight of the car.
In addition, following the technology for installing such a coating allows you to obtain a completely acceptable floor for a metal or wooden garage.
Its setup does not take much time or money. It is enough to simply compact the soil in a certain way, and the floor in the garage is ready.
Well compacted earth is a good solution for a temporary garage. The installation of such a floor requires a minimum of tools and skills. It is enough to have a tamper and a shovel; the work itself does not require special qualifications and can be done in several stages.
Non-sparking floors include all types of concrete coatings using non-sparking fillers (asphalt concrete, PVA concrete, mosaic concrete, etc.), as well as floors made of various polymer materials.
Interior designers say that organizing the space of a modern room begins with the floor. Read about how to make a decorative floor in this article.
Since humidity in the garage should be kept to a minimum, it is necessary to cover the entire surface of the base with a layer of waterproofing. The simplest and most effective is ordinary clay.
You need to spread a small layer of clay and compact it. The plane should not be level with the ground, but slightly inclined towards the gate; a difference of 2 mm per meter of garage length is sufficient.
The tamper can be made from a piece of a large channel, or by welding several smaller ones. A dense layer of earth always remains dry, as it does not absorb water well, and it flows down the slope from the garage.
Which garage floors are better?
Another base option is a concrete screed. This option is rightfully considered one of the best. However, the work to create it requires much more effort, time and money.
Work begins with preparing the foundation for work. At this stage, you need to decide on the height of the floor. It is necessary to take into account the fact that the screed should be slightly higher than the threshold. Once this step is complete, you can begin removing excess soil from the garage area, if any. The next step is to lay out two pillows. The first is made of crushed stone with a height of 30 to 85 cm. This parameter depends on the type of soil. The second pillow is sifted sand. The thickness of this layer is from 15 to 20 cm.
Pouring the floor in the garage begins with the existing base being carefully leveled, compacted, watered and compacted again. You can use both improvised means and special equipment, if available. The surface should be almost perfectly flat. The slope should not exceed 5 mm per meter.
After this, you can proceed to arranging waterproofing, insulation and reinforcement of the coating. Any suitable waterproofing material, for example, roofing felt, is laid on the compacted surface. Recently, it has become very popular to use expanded polystyrene as insulation, and therefore sheets of this raw material with a thickness of 5 to 10 cm are laid on top of the roofing material. After this, the expanded polystyrene is covered with a film or waterproofing membrane. If the installation took place in separate sections, then you need to work overlapping, and tape all the joints together with tape.
Concrete floor
How to lay a floor in a garage: a concrete floor - now we’ll look at it. Everything can be done completely independently and no special skills are required. You just need to follow some requirements and recommendations.
Attention: As a rule, concrete screed is an excellent base for various floor materials, but also acts as an independent floor covering.
Concrete is considered to be a durable coating, but for its high-quality production, pouring technology must be followed (see Pouring a concrete floor in a garage). All materials are available in retail stores and you can purchase them.
Pouring concrete mortar and reinforced mesh
But if you are less fortunate, then know that you will definitely have to use the soil, because it is necessary as a foundation, and certain measures must be carried out under it, which every owner must remember.
So:
- It is necessary to carefully and efficiently level the soil, compact it, and then coat the layer with liquid clay; Using a laser or water level, you must correctly mark the future screed.
- On top of the soil you need to pour a layer of gravel, the thickness of which will be 80 cm. Before you start filling the gravel, you need to install wooden posts along the wall. Remember that the level of their placement will be convenient for you to navigate in the future.
- Once the gravel is compacted, large and sharp stones must be removed.
Attention: Modern coatings or ordinary polyethylene film, which you probably have, will thoroughly protect the floor from moisture. It is necessary to fill the area of the screed with polyethylene; also know that this must be done with an overlap, and do not forget to secure the seams with wide tape.
Apply film as waterproofing
- Naturally, you want to end up with a durable and reliable coating, so you need to strengthen the reinforced mesh; it should cover the entire surface. Now you will need to place galvanized or wooden slats according to the level you set.
- But it is best to choose the first option, since it is convenient, because zinc coating, as a rule, is not susceptible to corrosion. The screed that you receive must be in contact with the walls and pipes. When curing occurs, be aware that the compound will often shrink, which can seriously damage the flooring, so you need to be mindful of that as well.
Making reinforcement
- As soon as the entire area is filled, the subfloor must be covered with polyethylene; this must be done. It must be left in this state for three to four weeks. In this case, cracks will not appear on the floor; you also need to spray the concrete surface with a small amount of water, and then everything will be done correctly.
- If you want to insulate the floor, know that as soon as this layer hardens, you need to apply a thermal insulation layer on top. This can be polystyrene foam, mineral wool - they are the most popular and relevant.
- In work, experts advise using rolled materials, as they are convenient. Do not forget that you must protect the insulating layer from steam and moisture; for this, a plastic film is spread on top.
Filling the garage floor
Now all that remains is to pour the concrete. It should be liquid and not leave voids inside.
How a concrete floor is poured using beacons
Now let's look at how to properly lay floors in the garage using beacons. After all, the floor should be level with respect to the ground and the car should not roll if you forget to put the handbrake on.
It is for the correct filling of the plane that beacons are used. It is also useful to set them when screeding after pouring the main part of the concrete. After all, a screed is, essentially, a finishing touch.
Filling the garage floor using beacons
Attention: When starting to lay concrete, be sure to look at the base available in the garage. If the room was built on a reinforced concrete slab, there will be no problems; you can consider yourself lucky, since you can work with it without problems.
- All that needs to be done is to thoroughly clean the slab of dirt, sealing the cracks, and after that you can apply a primer to the surface, subsequently pouring concrete.
- Many owners encounter problems and difficulties when they hear about finishing pouring; in fact, it is no different from its rough counterpart, you should know this. It is necessary to set up beacons, install reinforcing mesh, it is also necessary to properly level the concrete, but to a new level, and the problems will be solved.
- In this option, beacons are set according to the marks mentioned above. These are slides of mortar, and they are connected to each other by a profile, for example. This will be a guide when pouring. It is at this level that it will be done.
- In conclusion, it would be a good idea to sand the concrete layer with a special machine; this can also be done manually, using a special steel trowel, everything is easy and simple, as you yourself noticed. If there is no insulation, then the intermediate layer must be covered with a homemade composition called “cement milk”. Attention:
- You should always take into account the fact that a slight slope towards the exit is allowed in the garage. In order to protect the coating from dust, you must treat the top layer; for this you can use special impregnations or coloring compounds. With the second option, it should be noted that the surface is antistatic and reliable.
Section reinforcement
How to fill a garage floor? To successfully create a concrete base, it is necessary to have a reinforced layer to strengthen the future floor.
For reinforcement you will need reinforcement rods with a diameter of 8 to 12 mm. This material is selected depending on what load will be placed on the base in the future. Naturally, if the garage is equipped for a large number of cars or for trucks, then the thickness of the reinforcement should be as large as possible.
All elements are connected to each other with wire. Only such a connection is possible. Welding is not suitable, since the structure must be characterized by a certain mobility, and welding the base will eliminate this possibility. 6 mm reinforcement can be used as transverse posts for the frame. The finished version should be a two-layer mesh, in which the distance between the rods is from 5 to 10 cm.
Next, you need to know some conditions by which the thickness of the concrete layer is determined. For example, if the soil is sandy and the area is characterized by the absence of low temperatures, then the thickness of the slab can be from 25 to 35 mm. But in those areas where there is low temperature, and the soil itself is considered heaving, it is necessary that the thickness of the concrete screed exceed 45 mm.
You also need to pay attention to ensuring that the reinforcement frame is separated from the walls by a compensation gap. The concrete base will need this space for free expansion or contraction, depending on climatic conditions.
Garage floor base preparation technology
Before pouring the floors in the garage, it is necessary to carry out a number of preparatory measures.
Careful adherence to the order of work performed will allow you to quickly obtain a strong and durable surface, which can serve as a good basis for subsequent finishing.
The first step is to plan the soil, compact it and protect the floor from the influence of groundwater. For planning you will need a shovel and a rake. Using this tool, the top layer of soil is leveled.
Tamping can be either mechanical or manual. Since a mechanical tool has an impressive price and can only be used for a narrow range of tasks, for an individual garage it makes sense to make a tamper from scrap materials. These can be pieces of channel bars, a sheet of thick metal, a small deck and other durable materials with a smooth surface.
Ordinary liquid clay can be used as waterproofing. Its water-repellent properties will prevent groundwater from reaching the base of the garage.
The next step will be laying the gravel-sand mixture. When performing this operation, you must remember that this is the cheapest material of all subsequent ones, therefore the cost of the future floor depends on its quantity.
If you plan to insulate the floor with polystyrene foam, the distance from the gravel to the zero mark should be 30-40 cm; without insulation, 20 centimeters is enough. First, the surface is covered with gravel and compacted, then a layer of sand 10 cm thick is applied. This combination of natural materials ensures minimal moisture in the garage floor.
The compositions of mixtures for making mosaic floors vary. Both in terms of the mosaic filler and the type of binder, it depends on the purpose of the premises.
Mosaic floors are called floors with a surface that has a decorative appearance due to the inclusion of multi-colored fillers of various sizes and colors in the concrete or other mass of the front monolithic floor covering. Read more about the construction of mosaic floors here.
Before pouring the concrete base, it is necessary to lay the reinforcing mesh. It will give the layer the necessary strength. Filling is best done in one go. A monolithic base is much stronger and more reliable than scattered pieces of concrete.
While the solution has not hardened, it needs to be leveled using a shovel or special devices.
The best effect can be achieved by using a structure in the form of a large mop as a leveling tool.
Made from boards, it has a large coverage area and allows you to quickly level the solution. This plays an important role, since concrete hardens quickly.
Pouring the base
In order to have a good foundation in the garage, it is recommended to use durable and frost-resistant cement grade M300 or higher. If the area is characterized by rather harsh or difficult climatic conditions, then it is necessary to add special additives and plasticizers to the composition. One of the main requirements for ready-made concrete is a completely homogeneous consistency. Enforcing this requirement manually will be very, very difficult.
To solve this problem, the best option was to order a mixer for mixing concrete mortar. In addition, it is almost mandatory to do this, since the concrete screed must be poured at a time. It is impossible to divide this process into several parts, since in this case the integrity of the coating will soon be compromised.
When the mixture is being poured, a leveling rule is used, and beacons serve as markings. These are the ones you need to navigate. It is also important to expel absolutely all air bubbles that will appear in the concrete. The main goal that should be pursued at this stage is to obtain a continuous, even mass of solution that does not have voids inside.
The next day after the base has been poured, it must be covered with a solid rag, which must be wetted from the outside every day. Until the strength level reaches the desired point, it is necessary to avoid exposure of the solution to sunlight. Complete and final hardening of the concrete slab will occur only 28 days after pouring. Only after this can you begin the floor finishing stage, if necessary.
How to paint a concrete floor in a garage
A day after you fill, go into the garage only wearing soft shoes. Blow up the installed beacons, and the depressions remain for up to 3 days. During this period of time, the concrete should be moistened with water.
After a week, the floor needs to be sanded and can be painted. For this, it is better to choose latex types of paints. The floor must first be opened with a special primer. You can also choose one-component epoxy paint. And the most durable and do not require a primer are two-component epoxy paints!
Rubber floors
Recently, rubber flooring for garages has been gaining popularity. It can be made in two versions. Either rubber floor tiles or rolled rubber flooring can be used.
As for tiles, its advantages include high resistance to abrasion, icing, static and dynamic loads. In addition, it successfully resists the effects of chemicals. It is very difficult to damage such material, and therefore using it as a garage flooring is a great idea. This version of the base is laid in separate sections, but for its installation it is best to call a specialist. When compared with rolled rubber floors for garages, two advantages can be distinguished:
- The first is that it is easy to replace. If any area is damaged, then it is enough to simply replace it with another one. If the rolled floor is damaged, you will have to replace the entire strip, and not just a separate section.
- The second thing is styling. To successfully lay such a base, you will not need to use special adhesives, since the segments have special fastenings.
As for the thickness of the sections, the maximum is 4 cm.
If we talk about rubber rolls, it is worth noting that they are produced from used car tires. For this purpose, there are special devices - drum-type vulcanizers. This flooring has a long service life and high durability.
Installation of rubber floor
You should start by laying modular tiles. If large loads are not planned on them, then you can not glue them to the floor, but only fix the edges of the segment. In addition, for ease of connection with each other, each section has docking protrusions. Because of this, installing the floor resembles assembling a puzzle. After several sections have been joined together, all remaining seams are sealed with sealant. The service life of a properly assembled coating is at least 10 years. In addition, to install this type of rubber floor there is no need to treat the base, which saves a lot of time and effort. In addition, the slabs can be installed on the subfloor even without first leveling it.
As for the installation of roll rubber coating, here you will have to work with the base. The rough layer of the base is carefully primed, after which it is covered with a special mixture of polyurethane glue and turpentine. Approximate primer consumption is 300 g per m2. The rubber rolls themselves are spread on a concrete base, after which they need to be allowed to rest for several days. In addition, unlike laying segments, the use of glue for installation is necessary in any case, regardless of further loads.
The latest technology for installing rubber flooring is self-leveling coating. The composition used in this case includes rubber chips, dye and polyurethane glue. The finished mixture is liquid. It is evenly applied to the prepared base according to the instructions. This substance can be applied by spraying, which allows you to easily apply it not only to horizontal, but also to vertical and inclined surfaces. It is worth noting that the cost of any of these three types of rubber flooring is quite high, but this is justified by the reliability and service life of the base.
From all of the above, we can conclude that the question of how to make a floor in a garage is no longer such a problem as it was before.
Concrete floor
Many owners, without thinking for a long time about what is best to make a garage floor from, make their choice in favor of the cheapest material - concrete.
Perhaps they are right in some ways. Concrete floor has the following advantages:
- low cost;
- long service life;
- resistance to physical stress and aggressive environments.
Naturally, visual defects may occur under the influence of the impact force: cracks, chips, potholes, but in a garage they do not cause dissatisfaction among the owners. Also, such defects can occur due to frequent temperature fluctuations.
As for the disadvantages of such a coating, a concrete floor also has enough of them:
- a large amount of dust released, settling on various surfaces and, of course, in the owner’s lungs;
- It is not recommended for use as a flooring material in a garage under conditions of intensive use of various chemicals, since most of these substances are actively absorbed by this building material. An occasional puddle on the floor can become a stain that emits an unpleasant odor and creates discomfort for the owner, both inside the building and in the vehicle.
However, it is quite simple to eliminate such shortcomings if you cover the surface with paint or sealant.