To eliminate chips and scratches on cabinet furniture made of chipboard and MDF, the following materials and components are used:
Designed for:
for sealing chips, scratches, cracks, and dents on wooden and laminated surfaces that bear light physical and chemical loads (cabinet furniture, doors, MDF panels, etc.), to ensure moisture resistance of the damaged area.
Application of soft furniture wax.
| Damaged areas: hole from a self-tapping screw, chip at the end. | |
| Application with a spatula or edge knife. | |
| We cut off the excess with a knife or a piece of plastic, for example a plug for a furniture corner, which is more preferable because plastic eliminates accidental scratching of already damaged material. | |
| And carefully polish with a clean cloth, preferably felt. | |
| If the material being restored has a distinct wood texture or some other texture, then you can finish painting it on the putty area with alcohol-soluble felt-tip pens or markers. | |
| The more colors you have, the more accurately you will be able to seal the surface. They can also be used to sketch not deep scratches. | |
Designed for:
for sealing chips, scratches, cracks, and dents on wooden and laminated surfaces bearing medium and heavy loads (cabinet furniture, doors, MDF panels, etc.), to ensure moisture resistance of the damaged area.
The only difference from soft wax is that it is more resistant to mechanical stress and is applied in a molten form and, accordingly, costs much more, is more difficult to obtain and the color range is not as wide as that of soft wax.
Furniture touch.
Unlike alcohol felt-tip pens and markers, it has the word “furniture” in the name, is more expensive, rare and limited in color range.
| Designed for: For quick repair of small chips, scratches and cracks on wooden and laminated surfaces (furniture, doors, floors, windows, etc.), as well as for wide household use. |
Furniture made from laminated chipboard has been and remains the priority purchase option for the vast majority of our population. Perhaps its main advantage is its affordable price, which can be obtained by using chipboard that is inexpensive relative to other materials (for example, wood). Thanks to the lamination of the surface of the board, the furniture acquires a quite decent appearance and fits well into almost any room.
However, like any other product, such furniture is prone to damage during use or transportation. Now we will look at what damage is typical for this type of furniture, how restoration and repair can be carried out.
Repair or change
Is it worth it to start repairing a laminated chipboard countertop yourself? To do this, you need to assess the degree of destruction. Sometimes it is not profitable to repair; it is easier to purchase a new laminated surface.
Often it is necessary to update only the surface layer by fixing a small fragment, and everything else can be left unchanged. Wood is one of the materials most suitable for repair; it is easy to extend and insert patches. In the case of laminated chipboard, everything is a little more complicated. Therefore, it is better to undertake repairs when the damage is small.
If the damage is small, then you can do your own restoration. Otherwise, you will need to replace a separate piece of the panel.
Helpful advice! It is problematic to repair built-in furniture and kitchen appliances. A good way to update is to replace just one wood countertop. Sometimes you have to change the entire facade, but this is cheaper than modernizing the entire kitchen.
It happens that the new surface contrasts with other planes of the kitchen unit, and it makes no sense to completely restore the original appearance of the kitchen. Then it is recommended to find a creative method, for example, cover the surface with a beautiful pattern, cover it with glass exactly to the size of the tabletop and seal the ends.
Operation "Liquidation"
Repairing chips
To repair chips on chipboard you will need:
- retouching felt-tip pen (or a regular one of a suitable color);
- hard tint wax;
- wax melter or lighter for melting wax;
- chisel or spatula;
- felt fabric;
- fixing varnish spray.
Chips usually appear at the corners and are small, light-colored indentations (chipboard color).
The elimination process consists of several stages:
- Preparatory treatment of the chip
. In this case, it is necessary to process the chip with a chisel so that its edges become straight. - Repairing the chip
. To do this, hard wax of a suitable color is melted with a wax melter or lighter and applied to the chip with a small margin. - Leveling the surface
. After the wax has dried, using a chisel, having worked through each plane, carefully cut off the excess wax, forming a clear right angle to the surface, and lightly sand it with a felt cloth. - Texture restoration
. Using a thin retouching felt-tip pen, apply lines along the chip in accordance with the overall texture, wiping each time with a paper napkin to easily blur the clear boundaries of the lines and make them more believable. - Opening with varnish
. To fix the seal and to give the restored surface a characteristic shine, it is treated with a spray varnish.
Removing scratches
Such damage is detected especially often. To remove scratches, you will need the same tools for repairing furniture as for repairing chips, only instead of hard wax it will be more convenient to use soft wax.
How to remove scratches: sequence of work
- Using a spatula, apply wax transversely to the scratch, simultaneously compacting and leveling it.
- Use a thin retouching felt-tip pen to fill in the missing texture.
- To fix the place of sealing and level the surface gloss, apply a fixing varnish.
Scratches on chipboard
Advice! To seal cracks when wax is unavailable, you can use a special furniture touch.
Restoring a worn surface
Scuffs, like scratches, often occur on laminated chipboard due to constant contact with the surface of foreign objects. For example, you can find them in the kitchen.
As a result, the top protective layer and partially or completely the paint layer are worn away.
In order to eliminate the abrasion that has already appeared, you need to do a few simple manipulations:
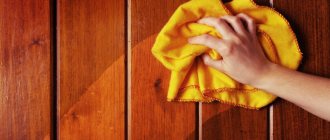
- Stretch a microfiber cloth over your finger and dampen it with a matching colored marker.
- Use a napkin to touch up the abrasion, rubbing along the surface structure.
- Apply several thin layers of fixing varnish.
Repairing cracks
Cracks in chipboard furniture often appear under the influence of moisture, heat or improper use at the attachment point of the cabinet doors.
To repair cabinet furniture with your own hands you will need:
- clamps (adjustable clamps);
- syringe with needle;
- PVA glue.
Repair process:
- PVA glue is filled into a syringe without a needle (for easier and faster penetration) and the needle is put on.
- Using a syringe, fill the entire internal volume of the crack with glue.
- Place a clamp on the slab on either side of the crack and tighten it.
- Remove excess glue with a napkin and leave in this position for at least a day.
After the glue has dried, the element will be ready for use again.
Do-it-yourself repair of a kitchen plastic countertop made of chipboard
Postforming is a budget option for equipping a kitchen unit. Plastic lining gives the working surface sufficient wear resistance characteristics for intensive use. However, even at the installation stage, it is necessary to ensure proper protection of the internal filling of the tabletop (usually chipboard) from moisture penetration and subsequent swelling:
- After cutting into the sink or hob, the bare ends of the sections must be treated with sealant or thoroughly painted.
- Along the junction of the tabletop to the wall you need to install a plinth. It plays not only a decorative role, giving integrity to the working surface. And it not only covers uneven joints if the wall “goes away”. But it also prevents water from entering the back end of the tabletop.
- If the stove is free-standing, special end strips must be attached to the edges of the tabletop near it to protect it from drying out. Docking and connecting strips also play a protective role.
How to remove scratches, chips, cracks from the postforming surface
What typically involves repairing a chipboard kitchen countertop? Usually it is necessary to restore chipped corners and somehow disguise deep scratches and cracks.
You can make “patches” using a mixture of shavings and a two-component composition, similar to the methods described in the restoration of chipboard. If you “tint” the composition to match the color of the countertop, after complete drying, grinding off the excess and then polishing, the “patch” may be practically invisible. And it will slightly increase the service life of the repaired work surface.
What to do if the plastic peels off from the chipboard during postforming
There are often cases when the plastic “moves away” from the base of the chipboard, forming a kind of bubble or peeling. This rarely occurs somewhere in the center of the countertop. Usually on one of the sides adjacent to the sink (due to humidity) or the stove (due to overheating).
If the plastic peels off from the base at the junction with the stove, hob or sink, you can repair the countertop yourself as follows:
- Carefully remove the edge from the end and sand down any irregularities.
- Clean off the dried loose chipboard particles from under the plastic.
- Apply a little glue inside and tighten with clamps through the bar. She will control the overall level of thickness of the countertop being repaired so that there are no differences. It is recommended to remove the clamp only after complete drying.
- The sanded edge of the tabletop can be covered with a wide melamine edge using an iron. If the edge is covered with a metal strip, then it is enough to simply treat it with sealant.
But since the cost of post-forming is inexpensive compared to other kitchen countertop options, it's best to consider a replacement.
Briefly about materials
Edge gluing
The most commonly used materials are hard and soft wax, special retouching and shading felt-tip pens or markers, furniture touches, PVA glue, and laminating edge.
Soft wax differs from hard wax in that in its original form it is immediately ready for use (it does not need to be melted), but it is applicable only on those surfaces that are not subject to mechanical stress.
Soft wax is more convenient to use, while hard wax is more reliable.
The stroke is used to cover minor damage (scratches, small chips, abrasions). It must be applied to the surface, allowed to dry slightly, and then sanded with a felt cloth.
Laminating edges are glued to the worn end surface of the board, having previously removed and sanded the old edge.
The edge is placed on the end and a heated iron is passed over it, causing it to stick.
Repair of marble and granite countertops
If an object made of marble is partially damaged, it can be repaired right on the spot. But there are other situations when the damage is so severe that repairs are only possible in a workshop.
Excluded from the rules are products made of cast marble, which, even with extensive damage, do not require dismantling and transportation to the workshop. A good example would be a bathtub made of cast marble - in any case, it can be repaired without transportation.
Repair operations for cast marble are very different from restoration of granite and marble objects. Many companies currently specialize in providing the latter type of services. Our specialists are excellent at repairing objects made of granite, classic and cast marble, and do it at a high professional level.
Summing up
We hope our article was useful to you. In order to more accurately understand the technological and practical issue, our website provides detailed photo and video instructions in which you will find useful information on this issue.
Well, who among us would refuse to have entirely wooden furniture at home? It is elegant, reliable, but expensive, and it is because of this that we are forced to purchase furniture made from chipboard, which is more susceptible to damage. But even these defects can be eliminated, even if repairing chipboard furniture with your own hands seems like a complicated process. Now we will prove to you that you can cope with such work on your own.
Features of restoration of a kitchen countertop made of laminated chipboard
It is the kitchen countertop that is exposed to negative influences: moisture, household chemicals, high temperature, etc.
As a result, over time it begins to deform. One of the most important surfaces for cutting food and cooking is subject to the greatest load and quickly loses its original appearance. Delamination of the base occurs due to daily use of a humid environment; the surface often comes close to the stove and overheats. The laminated layer is often cleaned with abrasives. Because of this, there is often a need for restoration.
Defects on the countertop may vary. The type of restoration will depend on their type.
The main operational defects of kitchen countertops:
- corners and some other parts are deformed;
- cracks on the laminated surface;
- swelling and peeling;
- broken fragments along the edges;
- scratches and bald spots on the decorative layer;
- traces of mechanical damage.
In order for the repair to be correct, you need to know exactly the composition of the countertop, since they usually include a combination of different materials.
Helpful advice! Each defect is eliminated in its own way. Before you repair a chipboard countertop yourself, check what each layer consists of so that all work can be completed quickly and efficiently.
- A tabletop made of natural wood has its advantages and disadvantages. The product is easily saturated with wet and greasy environments, leaving stains. It may crack if it dries out. But such a surface is not afraid of hot pots and abrasive products for cleaning kitchen furniture. Varnished wood is better protected from food contamination, but hot objects leave circles, stains and cloudiness on it.
- MDF has a number of aesthetic advantages, but is often subject to the destructive effects of moisture and overheating, hence the problems of deformation. Film coating is not able to protect kitchen furniture if it is handled carelessly - hot objects are placed, meat and vegetables are cut, nuts are cracked.
- Laminated chipboard is well protected, but if there is the slightest detachment of the protective layer, penetrating water quickly leads to swelling of the base. The quality of laminated chipboard in terms of performance characteristics is slightly inferior to MDF. Both materials are more difficult to restore than natural wood.
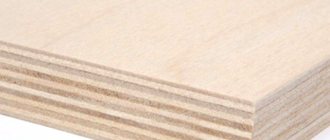
- Decorative plywood is less often used for kitchen countertops; more often it is used to make furniture doors. Repairing defects is much more difficult due to the characteristic longitudinal-transverse layering of wood fibers.
A little about materials
The most commonly used are soft and hard wax, special retouching and tint markers or markers, PVA glue, furniture touches, laminating edge:
- Soft wax differs from hard wax in that in its original form it is immediately ready for use, that is, it does not need to be melted. But at the same time, it can only be used on surfaces that have not been subject to mechanical stress.
- Using soft wax is much more convenient, but hard wax is more reliable.
- The touch-up is used to cover minor damage, such as scratches, small chips, and abrasions. It must be applied to the surface, wait until it dries slightly, and then sand it with a felt cloth.
- Laminating edges must be glued to an already worn end surface, after removing and sanding the old edge.
- The edge is placed on the end and a preheated iron is passed over it, due to which it sticks.
How to order tabletop restoration?
To apply for our company’s service, just call and tell us about the problem, after which we will jointly make a decision on the location of the restoration and we can negotiate its preliminary cost. The final price is announced upon a visual assessment of the countertop during a personal meeting or after viewing photos of the damage sent by you via Whatsapp.
+7
Order restoration
+7 (965) 347-83-83 Quick price calculation using photos on WhatsApp
Repairing chips
Chips, as a rule, appear in the corners and are small, light-colored depressions. Therefore, it is necessary to repair chips on furniture made of chipboard with your own hands.
In order to repair such defects, you will need:
- a retouching felt-tip pen or an ordinary one of a suitable color;
- hard wax;
- lighter or wax melter;
- spatula or chisel;
- fixing varnish spray;
- felt fabric.
The liquidation process consists of several successive stages.
Preparatory treatment of the chip
Process the chip with a chisel so that its edges are straight.
Repairing a chip
Melt hard wax of a suitable color with a wax melter or lighter and apply it directly to the chip with a certain reserve.
Leveling the surface
When the wax is dry, use a chisel to work through each surface, carefully cutting off any excess wax. Form a clear right angle to the chipboard surface and lightly sand it using a felt cloth.
Texture restoration
It is enough to use a thin retouching felt-tip pen to apply lines along the chip, in accordance with the overall texture, wiping each time with a paper napkin in order to slightly blur the clear boundaries of the lines and for greater believability.
Opening with varnish
In order to fix the seal and give the restored surface a characteristic shine, it is necessary to treat it with spray varnish.
Removing scratches from a surface
Especially often, such damage is discovered during the renovation of children's rooms. In order to eliminate scratches, you will need all the same tools for repairing chipboard furniture as for repairing chips. Only now, instead of hard wax, it will be more convenient to use soft wax.
How to eliminate scratches - sequence of work:
- Using a spatula, apply wax crosswise to the scratch, simultaneously leveling and compacting it.
- Using a thin retouching marker, add the missing texture.
- In order to fix the sealing areas and level the surface gloss, apply a fixing varnish.
Important! To seal cracks if wax is unavailable, you can use special furniture touches.
Restoring a worn surface
Scuffs, like scratches, quite often occur on laminated chipboards due to frequent contact of foreign objects with the surface. For example, you may find them during renovations in the hallway or kitchen.
As a result, the top layer of protection and part or all of the paint layer are erased. In order to eliminate the abrasion that has already appeared, you must perform several simple and uncomplicated manipulations:
- Stretch a microfiber cloth over your finger and moisten it with a felt-tip pen of a suitable color.
- Touch up the abrasion with a napkin, rubbing along the surface structure.
- Apply several small layers of fixing varnish.
Removing cracks
Cracks in furniture made from chipboard often form under the influence of moisture, heat, or improper use in the place where the cabinet doors are attached.
To repair cabinet furniture, you will need:
- clamps, also known as adjustable clamps;
- PVA glue;
- syringe with needle.
The procedure for repairing chipboard furniture with your own hands in this case will be as follows:
- For the easiest and fastest penetration, put PVA glue into a syringe without a needle and put on the needle.
- Using a syringe, fill the entire interior of the crack with glue.
- Place a clamp on the slab on both sides of the crack, and then tighten it.
- Remove excess glue with a napkin and leave in this position for about a day.
- After the glue has dried, the part will be ready for use again.
Lately, the presence of cabinet furniture in the house is almost mandatory. Cabinet furniture is interior elements made up of massive rigid vertical and horizontal elements. Connections are made using angles, self-tapping screws, bolted connections and other fasteners. One of the advantages of prefabricated furniture sets is the ease of their transportation and installation. Cabinet furniture is found in many rooms of ordinary apartments, is subject to stress and, of course, breaks during use. But this doesn’t mean it’s time to go shopping for a new cabinet. Each person can perform simple repairs to cabinet furniture on their own.
Before carrying out repair work, you must prepare a set of tools:
- If the surface is damaged, you will have to restore it using improvised means. A wax pencil, an ordinary walnut, vinegar, glue and many other repair items can help in this matter;
- Screwdrivers of suitable size;
- If required, you will have to find the missing elements of the mechanisms;
- Furniture varnish.
Repairing cabinet furniture with your own hands is a creative process; no one can accurately list the entire set of tools, because all breakdowns are unique and require a special approach.
Surface restoration
The most common damage is surface defects. This is not surprising, because cabinet furniture is often used in not the best conditions and the surface is often subjected to heavy loads. You can fix minor damage yourself. To do this you will need your skill and some tools depending on the damage.
Minor scratches
The appearance of small scratches is a natural process during the use of furniture. The cause of such a defect can be pets or careless handling of furniture. Usually scratches appear as if by themselves, the owners simply notice them and begin to choose a repair method:
- Walnut. With its help you can make small scratches on the surface less noticeable. The material covers up scratches. To carry out repairs, it is necessary to divide the whole nut into two halves and lightly rub the damaged area with the inside;
- To correct damage, you can use a pencil of a suitable color. With its help, you just need to paint over the scratch;
- MDF and chipboard panels can be repaired using furniture wax. To do this, the wax pencil is melted using a thin knife heated over an open flame, and the mixture is applied to the scratch. After drying, the remaining wax should be removed with a blade and wiped with a cloth. Under no circumstances should wax be melted over an open fire; the beeswax contained in it is highly flammable.
After completing the work to eliminate scratches, the surface can be varnished; this will not only improve the appearance, but will also help protect the furniture from further damage for a while.
Anti-scratch pencil
Scratches are removed with walnut
Major damage
Major damage cannot always be repaired with your own hands; they often require the involvement of specialists. Many companies carry out repairs of cabinet furniture at home, this saves the energy and nerves of the owners. In this case, the technician will professionally assess the amount of damage and carry out repairs. If the damage is unusual or non-specific parts need to be replaced, you will have to wait until the specialist returns with a set of everything necessary.
Some major damage can be repaired on your own. A common defect in furniture is cracking of legs or other parts due to use in unfavorable conditions, with constantly changing humidity. To repair this defect you will need the following tools:
- PVA glue;
- Syringe with needle;
- Rag;
- Clamp.
The work is carried out in several stages, at which time the operation of the furniture becomes impossible
. To ensure that all work is carried out efficiently, the objects being repaired are advised to be freed from cargo.
- First you need to remove dust and other contaminants from the crack. Do not allow moisture to get on the surface; all work must be carried out with dry parts;
- Carefully draw glue into a syringe without a needle. At this stage, air bubbles should not be allowed to get inside;
- To work, put a needle on the syringe. Through it, the crack is carefully filled with glue. It should protrude somewhat above the surface of the furniture;
- The part is compressed with a clamp and excess glue protruding from the crack is removed;
- After 24 hours, the clamp is removed, the surface is sanded and coated with varnish to protect it from scratches and other damage.
After performing these simple steps, the furniture completely restores its functions. Crack repairs should be carried out as early as possible, immediately after damage appears. This is due to the ability of cracks to expand as time passes.
Cleaning the surface
Filling the crack with glue
Sanding the coating
Chips
Cabinet furniture is made from chipboard or MDF - these are sheets of tightly glued sawdust, wrapped in a decorative coating. They are often varnished or laminated. The top layer of furniture parts is susceptible to chipping. This unpleasant incident can result in the appearance of noticeable defects, because the unprotected surface is subject to significant damage.
Chips in the paint layer can be easily repaired using furniture repair wax. It is simply applied to the surface, wait until it dries completely and cover with an additional layer of varnish.
The situation is somewhat more complicated with chipped edges of structures. These are noticeable light indentations on the edges and corners of chipboard panels. Such damage causes further destruction, so they must be “treated” immediately. To complete the work you will need:
- A felt-tip pen for giving the repaired area an inconspicuous color. The most difficult thing in repairing chips is choosing the required shade;
- Repair wax of a suitable tone;
- Thin knife and lighter;
- Putty knife;
- Felt;
- Fixing varnish spray.
The repair process includes several stages:
- The edges of the chip are given a straight shape. The damage is treated with a knife and sandpaper;
- The chip is sealed with wax. The pencil should not be melted over an open fire, so it is applied using a hot thin knife. It is necessary to leave some wax reserve;
- After the wax has completely cooled and hardened, it needs to be processed with a chisel and the frozen mixture must be given the required shape;
- When the shape of the part is restored, the wax is lightly polished with a felt cloth;
- A pencil is used to repair surfaces with a clear structure. It helps restore texture;
- If the chipped area looks invisible, it means the work was done well and you can coat the repaired part with varnish.
If you cannot find wax of a suitable color in the store, then this problem can be solved by mixing different shades. Purchase two tones that are close to the color of the furniture being repaired. The shavings of these wax crayons are placed in a waste tablespoon and melted. You should get a substance of the required shade. By adding shavings from one of the two pencils you can achieve the perfect color.
Making straight edges at the chip
Cover the surface with wax
Processing with a chisel
Countertop repair
The imperfections of the countertop are not always so global that it needs to be replaced. Sometimes the surface is easier to repair. Repair of each type of canvas is carried out in its own way depending on the characteristics of the material.
Tabletop made of wood or chipboard
Repairing a wooden countertop consists of the following steps:
- the deformed surface layer is removed;
- the problem area is thoroughly dried and sanded;
- A thick mass is made from sawdust and glue;
- the voids formed are filled with the resulting solution and formed using a spatula;
- the canvas is left under pressure for a day;
- the finished surface is coated with silicone.
If damage occurs to the laminated chipboard surface without swelling of the surface, then you simply need to treat all joints with a waterproof sealant.
Stone countertop
It is recommended to entrust repairs to natural stone surfaces to specialists. This is a labor-intensive process that requires special skills. Any mistake can completely ruin the surface. Restoration of an artificial stone surface occurs as follows:
- the surface is reinforced;
- damaged areas are treated;
- then the surface is degreased;
- Small scratches and damage are repaired with a glossy solution or repair acrylic.
If the outer parts of the tabletop have peeled off, then restoration occurs in the following stages:
- four types of sandpaper, felt and PVA glue are prepared;
- the stone surface is ground and polished;
- prepare a solution of glue and acrylic plastic;
- the resulting composition seals problem areas;
- the surface is dried and sanded with sandpaper;
- Finally, polishing with felt occurs.
Restoration of a stone countertop, video:
Plastic table top
The plastic surface is susceptible to cracks or chips near the edge during use. To repair such a canvas, you need to purchase a special glue for plastic. It is applied with a special gun. To eliminate cracks, you need to grind the plastic into powder and mix it with glue, and then fill the resulting voids with it.
Glass table top
It is impossible to repair a glass surface at home. Small scratches can be removed using special equipment. Therefore, the glass tabletop must be carefully looked after and handled carefully. The countertop is one of the most functional parts of a kitchen set. It should be convenient and comfortable to use. When the surface loses its original appearance, it can be replaced or repaired. Then cooking will be fun again.
Source: relend.ru