How to repair the subfloor in an apartment with your own hands? I will talk about the specifics of this work, and also show options for restoring two types of coatings - wood and concrete. You will learn what materials are needed for this and how to do the work yourself.
Every home craftsman can repair the floor in an apartment.
Start of renovation
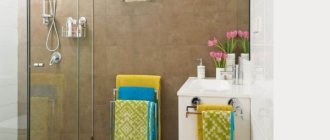
Repairing an old bathroom floor is a major undertaking. It should begin with a thorough study of repair options and the work required to be performed. If necessary, you can only repair the floor or the entire room in the bathroom.
The idea of repairing an old floor can arise for various reasons: updating the floor covering, installing a heated floor, installing waterproofing and replacing a damaged screed. In addition, floor repair may be required if there is a smell of dampness and mustiness in the air, the tiles simply fall off the floor or are covered with cracks.
Before carrying out work, it is necessary to carefully study and plan all the materials to be performed, perform the necessary dimensions and calculations, select the necessary tools and materials, plan the work schedule and the optimal purchase of materials.
Repair work must begin with the complete removal of the old decorative coating. If it is necessary to replace the screed or waterproofing, then these elements are completely removed.
Partial replacement of plank floors
If the wooden joists are in good condition, then the finishing material needs to be replaced. In such a situation, floor repairs proceed according to the following scenario:
- we sand the boards, removing paint to assess the condition of the wood;
- we select material suitable for further use;
- dismantle rotten sections of the floor;
- we strengthen suitable boards, fasten them to the joists with self-tapping screws, and bury old nails;
- restore the evenness of the surface using putty;
- we install new boards on damaged areas;
- we go over the floor with a sanding machine;
- we clean the boards with a brush, vacuum, do wet cleaning, and let the wood dry for at least 12 hours;
- paint or varnish. Watch this video for more details:
Related article: Camouflage net for gazebo - decor and sun protection
All the work is not complicated and does not require special skills, so anyone can repair wooden floors with their own hands.
The best posts
- How to make a plasterboard box in the bathroom - step-by-step instructions
- Drywall figures or how to make the interior stylish and fashionable
- DIY decorative corner fireplace made of plasterboard
- Wiring under drywall: lay it out correctly
- Painting drywall - step-by-step instructions
- How to join drywall in corners and the process of building a decorative niche
- Socket boxes for drywall: correct selection and installation
- Sealing drywall joints - recommendations from professionals
Flooring installation
At the final stage, the floor covering is laid. The most practical and common coatings are ceramic materials: tiles and granite. Studying photos of renovated bathroom floors on various thematic sites will help you choose the best design solution.
You should choose matte, not glossy tiles. Such tiles will not be slippery when wet, and the glossy layer will not wear off.
There are different ways to lay tiles. In any case, before gluing the tiles, you should first lay them out on the floor and, if necessary, cut them. The layout of the tiles should be done in the same way as when gluing using crosses.
The tiles in the bathroom are glued using moisture-resistant tile adhesive. This operation is quite simple, but requires care and attention. The adhesive is applied to the tiles and the floor. The total thickness should not exceed 5 millimeters.
After installing the tiles, they are tapped with a rubber hammer. Then the remaining remaining tile adhesive is removed. After the tile adhesive has completely dried, the final operation is to grout the joints using a special material.
Warm floor in the bathroom - installation technology and do-it-yourself coating installation (120 photos)Bathroom floor tiles - step-by-step instructions for installing the optimal floor covering (120 photos)
- Bathroom floor: rules and design features of modern floor coverings (140 photo ideas)
All joints are tightly filled with grout using a rubber spatula. Excess grout is removed wet with a sponge after it dries a little.
Repairing a bathroom floor with your own hands is not a major job. This requires quality planning and free time. Carefully done work with your own hands will definitely please you.