Peculiarities
The need to update the appearance of a painted ceiling arises quite often. This is the least expensive process in terms of effort and time. Many property owners choose it precisely because of these advantages, but they also face the question of how to reapply the paint so that the surface is painted as evenly as possible and there are no streaks left on it.
This type of finishing work is easy to do with your own hands, the main thing is to know some of the features of such work.
- If the old coating layer is in good condition, has no chips, cracks, is not flaking, is not flaking, has simply faded and lost its attractiveness, then painting can be done over the old coating. This process will not require a lot of money and time, since no preparatory work is needed. There is also no need to putty the surface before painting it.
- If the ceiling has already been coated with paint, and the surface has small fragments of peeling material, do not despair; the layer of water-dispersion paint does not require complete removal. In such a situation, it is enough to clean the exfoliated areas and apply the coloring composition over the old coating.
- If there are severe finishing defects, additional work cannot be avoided. Painting agents cannot repair cracks, irregularities and wrinkles; such defects require the consumption of additional building materials.
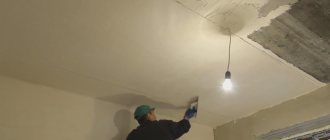
The old paint layer should be completely removed. This can be done with a spatula, thoroughly cleaning the entire surface. Using a brush and a special product, you need to start priming the ceiling. After the primer layer has dried, the surface must be well puttied, correcting all irregularities and defects. A special base for water-based paint should be applied to the dried surface; this layer precedes painting.
Process Features
Painting the ceiling is not as difficult as it seems at first glance. As a rule, before this process, workers remove the old layer of finish. The fact is that a thick layer of old paint can show through and spoil the appearance of the surface. If cracks appear on the ceiling, then the matter is completely hopeless - no matter how you paint them, they will still be visible. If repairs have not been carried out for a long time, then under a layer of old paint you may even find mold, which will negate all your attempts to update the surface.
If there are no such serious problems, then you can safely apply a new layer of water-based emulsion or acrylic to the old paint. Take a close look at your ceiling. If you are satisfied with its appearance, and pieces of paint do not fall off, you can leave everything as it is.
Professionals also advise paying attention to the following: if you have previously painted the ceiling with water-based paint, then you are in luck. It's better than whitewash. Even if this type of paint begins to flake off and fall off in pieces, it may not be completely removed. You can easily limit yourself to superficial cleaning by removing loose pieces and cleaning the area around them. After this short work, you can safely apply a new coat of paint.
Some nuances
Surely, you already know how to whitewash a ceiling - the video on our website will once again illustrate this process. There are two known variants of such work. You can do them using slaked lime or carefully ground construction chalk.
Note! It is impossible to apply chalk whitewash to a layer of slaked lime. This can cause streaks and stains.
Hand whitewashing is the most affordable finishing option, but sometimes ceilings have to be painted to improve the aesthetic appearance. And here one problem may arise. Is it possible to paint a whitewashed ceiling without first preparing it? Definitely not! And that's why.
If the surface is covered with a thick layer of whitewash, under the weight of the paint it will certainly swell and begin to fall off, reducing all repair work to zero. Even if the layer of lime is thin, not every paint will adhere to its surface. Many will simply fold.
And yet - how to paint the ceiling after whitewashing? First you need to determine what the surface was treated with - chalk or limestone mortar. The technology of preparatory work will depend on this. Chalk whitewash is easy to wash off, but you will have to tinker with lime. Let's look at these points in more detail.
Paint selection
If you decide to paint the ceiling over the old layer of material, then you will have to face the question of choosing the appropriate option. For such work, different paints are used. Each type has its own advantages and a number of disadvantages.
Acrylic
Perhaps this type of paint is the most popular. It is good because it is highly resistant to all kinds of dirt and dries quickly. So you can safely use this material, for example, in the kitchen, where working with food is not always neat.
This paint also withstands high humidity well. If there is any contamination on the painted surface, it can be easily removed with a damp cloth or napkin without fear of the paint cracking.
Acrylic paint can be easily applied to a variety of surfaces. It fits well on metal, wood, plastic, and even on already plastered substrates.
Painting with acrylic is also good because it perfectly hides minor surface imperfections. Textured paint can mask small cracks or places where pieces of the coating have already fallen off.
How to paint a ceiling with water-based paint over old paint
Only owners of tension systems do not have to wonder about updating the paint on the ceiling. In all other cases, sooner or later you need to refresh the ceiling covering. As a rule, this requires a lot of dirty work that requires a lot of time and effort. First, all layers of the old coating are removed, the surface is primed, puttied and sanded. After this, re-priming is carried out and, finally, a new layer of paint mixture is applied.
Not everyone wants to spend so much time, so some apply water-based emulsion directly on top of the old paint layer. Can such a coating last long or is there no point in such treatment?
How to paint a ceiling: professional painting of the ceiling with water-based paint
Painting the ceiling
with a long-handled
Painting the ceiling with water-based paint is much better than, for example, whitewashing. Why? There are many advantages, and the main one is that the water emulsion does not crumble and does not get dirty. But the ceiling is the largest uncovered surface in the room. If the walls and floor are partially covered with furniture, then the ceiling is there, all there. People have always paid great attention to the beauty of ceilings. Remember ancient museums, palaces, decorations on the ceiling, luxurious paintings. It would seem, who will look up? But they are watching.
And today, finishing ceilings is one of the most important works when renovating premises. Any flaws and imperfections on the ceiling immediately catch the eye, because the ceiling cannot be covered with furniture or covered with cheerful wallpaper. One of the most important stages of finishing the ceiling is its finishing coating - painting.
Now there are a lot of videos on the Internet on how to paint a ceiling with water-based paint, since today water-based paint is the most common paint used for ceilings. This paint gained its popularity due to the absence of odor and harmful emissions. This paint is also very convenient to use, since even an inexperienced craftsman can paint the ceiling with water-based emulsion. The paint is diluted with water, tools and hands can be easily washed after use.
We will look at how to properly paint a ceiling with water-based paint in this article in detail.
Surface preparation
Before you start painting the ceiling, you need to carefully prepare the surface. You cannot count on painting to correct, much less hide, finishing defects. On the contrary, a layer of paint reveals all imperfections like an x-ray - any scratch or wave after painting becomes much more noticeable. You can do everything perfectly and ruin the impression of your work with one unnoticed flaw.
Therefore, before whitening the ceiling with water-based paint, you need to carefully examine the entire surface of the ceiling, illuminating it with side light. If the result is satisfactory, then you can prime the surface with a special deep penetration primer recommended for the selected water-based paint.
Is it possible to paint a ceiling over old water-based paint? Of course it is possible, but in this case the surface of the ceiling must be thoroughly cleaned of old peeling paint. Please note that if painting is carried out over old lime white, then simple stripping and priming will not be enough. It is necessary to remove all the old paint layer and wash off the residue with an alkaline soda solution. And only after this you can start painting the ceiling.
Types of water-based paints
Based on the type of binder base, paints are divided into four types:
- acrylic,
- silicate,
- silicone,
- mineral.
Paint roller with short handle
The most widespread is acrylic paint, which is so called due to the inclusion of acrylic resins in its composition. The main advantage of this paint is its low price with good quality of painting. Latex is sometimes added to acrylic paints to give it elasticity (which significantly increases the cost of the product). These paints can be used to paint surfaces with cracks up to 1 mm.
Silicone paints have increased water resistance and at the same time satisfactory vapor permeability. These paints can be used in damp and damp areas. They have the ability to bridge cracks up to 2 mm. They owe their name to the silicone resins that make up their composition.
Silicate paints are made on the basis of liquid glass. They last much longer than others, but have not gained much popularity among consumers.
Mineral paints contain slaked lime or cement. But due to their fragility, these paints are gradually leaving the market.
You will probably use one of these paints, since it is easiest to whitewash the ceiling with water-based paint. After all, the natural color of these paints is white. However, all water-based paints can also be painted beautifully in any other color.
It is not difficult to choose water-based paint for the ceiling, but you should pay attention to such a parameter as coverability. It depends on the number of layers that need to be applied to obtain a uniformly colored surface.
You should also pay attention to the recommended area of application of the paint, in which rooms it is permissible to use it.
How to paint a ceiling with water-based paint
It is better to paint in the afternoon - the surface will dry well overnight. In the morning it will be possible to apply the second layer. Before work, it would be useful to watch a video about painting the ceiling with water-based paint. Then it will be much easier for you to imagine the next sequence of actions.
First, be sure to apply masking tape along the border of the space to be painted. Then thoroughly stir the paint and, if required according to the instructions, dilute it with water. For coloring we will need:
- brush 3-4 cm wide,
- roller for water-based paint,
- special cuvette for paint,
- telescopic extension handle, since it is best to correctly whiten the ceiling with water-based paint with its help.
It is more difficult to apply an even layer of paint with a brush,
than a paint roller
So, pour a small amount of paint into the ditch and paint all the corners and hard-to-reach places with a brush.
Then we start painting with a roller. We apply paint to the roller and, rolling it along a special platform in the ditch, evenly distribute the paint over the roller. The painting itself must be done in parallel stripes, each time moving towards the unpainted surface by about 2/3 of the stripe width.
You need to roll out the paint until there are no sagging or streaks left. Each subsequent layer of paint should be applied perpendicular to the previous one. It is useful to take a photo at each stage of painting the ceiling with water-based paint - this way you will insure yourself against repeating mistakes.
The last layer is applied parallel to the direction of the main light. Before finally painting the ceiling with water-based emulsion, it is recommended to take a new roller in order to achieve the best result.
Theory without practice is nothing
You can read a lot of books on how to paint ceilings with water-based emulsion. However, nothing beats practice. Start with a room where you don’t need a perfect result - whitewash the ceilings in the entrance or on the veranda. And in order to work more confidently, first watch the video on how to whitewash a ceiling with water-based paint.
The key to a high-quality and beautiful coating is usually the correct choice of materials and tools. The savings must be reasonable. If during painting the lint begins to fall out of the roller, then even with very great skill it will be impossible to achieve a good result.
Is it worth applying new paint over old?
There is no clear opinion on this matter. If you ask a specialist, he will say that there must be good adhesion between the two materials, which can only be achieved if the surface is first cleaned of the old coating.
But, in practice, many people carry out such cosmetic repairs and forget about problems with the ceiling for a long time. However, in this case it is necessary to take into account several important aspects:
- It is recommended to apply a composition to the ceiling that will be similar to the one that was used previously.
- If there are already many layers of paint on the ceiling and serious defects are visible, then in this case it is still worth dismantling the old coating. If part of it is already falling off, then a fresh layer will only be able to contain it for a very short period.
- If lime whitewash was previously applied to the ceiling, then in this case there is only one option - remove the old coating and process it according to the standard scheme.
It is worth paying attention to the fact that water-based emulsion and water-based emulsion are different. Gone are the days when there was only one type of mixture available. Today there are paints on sale that are not resistant to water and compositions that, on the contrary, cannot be washed off so easily. If the old coat is water-based and you plan to use the same type of paint, then it is better to remove the old coating. The fact is that while you are applying new paint, the old one will begin to be damaged. This will cause peeling.
In what cases is it better not to paint the ceiling and walls over whitewash?
Do not paint with water-based paint over uneven whitewash.
The demand from specialists to dismantle the old coating in most cases is not caused by a desire to complicate life or add work, but by the need to protect people from future problems.
Pay attention to: How to dye a down jacket at home
A whitewashed ceiling and walls, after treating them with water-based or acrylic paint, may simply lose their attractiveness, since under the lime coating the condition of the base, which has various defects, such as cracks and chips, depressions, is not visible.
When painting whitewashed surfaces, deformation of the new coating is possible due to unevenness of the old layer. The whitewash gets wet under the influence of the absorbed paint and then becomes sticky. In this case, lime sticks to the roller or brush and is then spread over the surface to be treated.
In addition, you will have to wash off the old whitewash in the following cases:
- There is a thick layer of plaster on the ceiling and walls. Due to its hygroscopicity, it will absorb paint, then swell, crack and collapse. In this case, the paint will bubble and become covered with cracks.
- If there are traces of leaked water on the surfaces being treated, then the paint, despite the selection of colors and textures, will stand out sharply in these places. Any attempts to correct the situation will not be successful.
- Old walls and ceilings have defects such as microscopic cracks and pits. Painting such a surface will sharply highlight these imperfections. Therefore, first you will have to work with a spatula and putty.
- Traces of mold and fungal infection appear. If you paint over them, these simple organisms quickly spread over all surfaces. Therefore, when this danger is identified, it is necessary not only to wash off the whitewash, but also to treat the room with antiseptics.
- The old coating begins to crumble spontaneously. Adding paint will speed up this process.
If at least one of these factors is identified before starting the repair, you will have to remove the old lime and then start painting.
Types of water emulsion
All paints belonging to this category are water emulsions, which consist of pigment particles and binding components. Today you can find many varieties of such compositions on sale:
- Acrylic. This is the most popular option, which is used for residential premises. It is easy to guess that acrylic resins are present in such mixtures. This water emulsion also contains latex additives. All this makes acrylic paint durable and resistant to moisture. Due to its high elasticity, it hides unevenness of the old coating well and penetrates into cracks no more than 1 mm wide.
- Silicone. These are waterproof and resistant water-dispersed compositions, which are essentially an intermediate form of chemically pure organics and substances of inorganic origin. As a rule, they are used for bathrooms and other rooms with high humidity. Silicone resins make it possible to create a reliable coating, but it should be noted that such water-based emulsions are not suitable for ceilings if there are large defects on it. This paint is used if there are cracks on the surface of the spruce tree no more than 2 mm wide.
- Silicate. These compounds resemble silicone ones. Only in this case the basis is liquid glass. Additionally, the composition may contain silicon-organic resin. However, they are very expensive, and their characteristics are more than enough for a residential area, so they are most often used in the industrial sector.
Paint the ceiling with water-based paint
Painting the ceiling is not the most difficult type of painting work, but in order not to be disappointed when painting it yourself, you must first understand the nuances of the technological process and carry out basic preparatory work.
Nowadays, whitewashing the ceiling with lime or chalk mortar is no longer popular. Despite the low cost of the method and the harmonious combination with any interior, the preparatory work for this type of finishing is very labor-intensive, and the whitewashed surface quickly loses its attractive appearance and becomes dirty. Therefore, painting the ceiling with water-based paint remains one of the most popular finishing methods.
From this article you will learn:
The painted ceiling surface is easy to care for and retains its aesthetic appearance for a long time. In terms of its composition, water emulsion is a suspension in which polymer particles and pigment substances are dissolved. When applied to the surface, water intensively evaporates from the paint, and the polymer particles form a moisture-resistant coating.
- How to hang a chandelier correctly, read here.
- This article contains a short guide to gluing polyurethane foam ceiling plinths.
- Paintable glass wallpaper is a practical solution for the home. Our publication is devoted to this topic.
Unlike oil paints and enamels, water-based paint is non-toxic. It contains drying oil, resin, varnish, emulsion and water. It is an environmentally friendly material that does not have a negative effect on the human body. The building materials market offers paints with a variety of additives. There are emulsions with acrylic and with the addition of latex, with a silicate or silicone base, based on polyvinyl acetate and with a mineral composition.
- Polyvinyl acetate paints are cheap, but they can only be used in dry rooms, and surfaces painted with them cannot be washed.
- Latex paints are the most expensive, but the ceiling can be cared for using detergents, and the surface itself will be smooth and beautiful.
- Paints with the addition of liquid glass (silicate) are used primarily for painting concrete, stone or plastered surfaces.
- But the advantage of silicone paints is their vapor permeability, so they can be used in bathrooms and kitchens. They are applied without primer, directly onto the plaster.
- The most popular are acrylic water-based paints. They are used in any room and are wash-resistant.
In order not to make a mistake with the choice of paint, carefully read the label. Typically, the description indicates what types of work this paint is intended for, as well as its consumption per square meter, the degree of hiding power (can the paint cover a dark background with white), as well as the paint’s resistance to wet cleaning. Some other nuances may be written down in fine print: about using in dry rooms or cleaning the painted surface with a vacuum cleaner or a dry cloth. The label of the best water-based paint will say that it has dirt-repellent properties and is resistant to abrasion during intensive washing.
Based on the quality of the resulting surface, water-based paints can be matte and glossy, as well as semi-gloss and semi-matte. Matte paints can visually increase the height of the room and disguise small defects in the ceiling, but they are less easy to clean. Glossy paint is easier to clean, but flaws in the ceiling will be more noticeable. Semi-gloss or semi-matte paint would be the best choice.
There is one more point that must be taken into account when choosing water-based paint. When it freezes, its structure is damaged and cannot be restored. Therefore, you need to buy paint in a store with an insulated warehouse. Paint designed for painting ceilings is almost non-drip, adheres easily to the surface and would be the best choice.
There is no point in buying expensive colored paint, because with the help of the color that is added to white paint, you can always get the desired shade. In large construction stores, the paint mixing procedure is free. Preparatory work involves freeing the surface from layers of old paint and whitewash. To do this, the ceiling is generously moistened with water with a paint roller, and then the chalk or lime whitewash is scraped off with a steel spatula. After this, wash the surface with a sponge.
If the ceiling has already been painted with water-based paint, then the preparatory work will be more labor-intensive, since layers of old paint are almost insoluble in water. Typically, peeled paint is simply removed with a spatula.
To level the ceiling surface, a thin-layer putty with good adhesion is used, which, due to its plasticity, gives a smooth surface and is easily sanded using fine-grained sandpaper. For high-quality painting of the ceiling, the following tools are needed:
- paint brush (for joints between the ceiling and wall and corners - 8 cm);
- narrow brush (for correction – 3 cm);
- fur (long-haired) roller;
- paint tray;
- ribbed surface (to distribute paint evenly across the roller).
The first secret is a properly selected roller, which determines the overall quality of the painting. For a large area, it is better to choose a roller with a large painting surface and medium pile (a long pile will apply too thick a layer of paint, while a short one can leave poorly painted areas). It is not recommended to use foam rollers or rollers with a bolt-on handle as they quickly break down.
The second secret is the same as when whitewashing with chalk: the first layer should be applied parallel to the rays of light from the window, while the second should be applied parallel to the window frame. The direction of the light flow and other nuances are very important for the correct painting of the ceiling surface with water-based paint. If you don’t know and take into account the subtleties, the surface will turn out spotty and with streaks from a brush or roller.
Painting should always begin by painting the corners and joints between the ceiling and the wall. First, paint the corner farthest from the door. A wide (from 3 to 5 cm) strip around the entire perimeter will subsequently hide the junction of the walls with the ceiling.
All main whitewashing of the ceiling with water-based paint is carried out with a roller. Any type of paint is applied in three passes: the first is applied parallel to the rays of light falling from the window, the second - in a direction perpendicular to them, the third - should always be directed towards the window. Each subsequent painting is carried out exclusively on a well-dried previous layer of paint, that is, after 8-12 hours. The tray is filled with paint, the roller is moistened in it and passed three or four times over the rough surface, which will allow the paint to be evenly distributed over the roller. Make the first pass along the ceiling section, starting from the wall located opposite the window, from the left corner. Make sure that the paint is applied in an even layer without visible transitions. The roller can be moved not only left and right, but also in W-shaped movements.
To remove excess paint, go over the painted surface with a roller that has no paint left on it - it will absorb all the excess. The quality of painting is checked using a directed bright beam of light, and a uniform surface will be obtained by using a new roller during the last painting process. After each pass, the instruments are thoroughly washed and dried.
Drafts in the room are not allowed until the paint has completely dried. It is also advisable to protect the newly painted surface from direct sunlight to prevent staining. There is no need to dry the painted surface with electrical appliances - drying should occur naturally. If you try to speed up the drying of the paint, it may peel off from the ceiling.
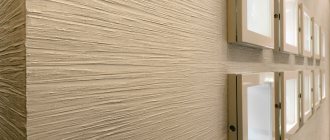
The plastered surface can be painted using a special spray gun or even a regular vacuum cleaner. This type of painting gives an even distribution of paint on the plastered ceiling and is of quite high quality.
Following the technology when painting the ceiling with water-based paint will give a uniform surface, and the result will not disappoint you.
diskmag.ru
Painting the ceiling
If it was decided not to remove the old coating, then some work will still have to be done.
Preparatory work
At this stage, it is recommended to carefully inspect the ceiling covering and assess its condition. Experts recommend using special lighting “at an angle”, this will reveal all the flaws. If there are serious defects on the ceiling, then it is necessary to remove the exfoliated elements, apply putty to those places where there are deep potholes and treat everything with a primer.
Important! If you find mold on the ceiling, you must get rid of it and treat the area with a special impregnation that will prevent the spread of spores.
The prepared ceiling dries quite quickly. For example, if you applied primer in the morning, then after lunch you can start painting. The second layer of water-based emulsion (if necessary) is usually applied the next day.
Painting
The work of applying a fresh layer of water-based paint over the old layer looks like this:
- We prepare the necessary tools. To work, you will need a brush 3-4 cm wide, a roller, a paint tray (cuvette), a rag and a telescopic handle. You also need masking tape and polyethylene (or you can buy a special covering material with adhesive strips).
- We cover the furniture and floor with polyethylene.
- We study the instructions for the selected paint. Some formulations are sold ready-made, others require dilution with water. In addition, you may need to add pigment (color) if you plan to create a colored ceiling covering. It is also important to adhere to exact proportions, as they may differ depending on the manufacturer of the coloring composition.
- Pour the required amount of paint into the cuvette. We dip the brush into the composition, blot it so that the paint does not run off and thoroughly treat all the corners and joints. Also, using a brush, decorative elements made of plaster, if any, are processed.
- We take a roller and begin processing the ceiling. In the wide part of the cuvette, the roller is wetted, and in the narrow part it is blotted and rolled several times so that the paint is evenly distributed over it.
- Moving the roller in parallel movements, we begin to apply the composition. It is necessary that each subsequent strip overlaps the previous one by half.
- If you need to add another layer, then this should be done the next day. Experts recommend applying the finishing layer parallel to the window or other light source. To do this, you should use a new, soft and better quality roller attachment. This will give you a smoother finish.
If the previous coating is damaged or is a whitewash, then it is better to remove it.
How to paint with water-based paint over whitewash
First, it is recommended to prepare all surfaces for further processing. Then a primer is applied. After its layer has dried, the main actions begin. The paint is used 3 times if a spray gun is used, since it produces relatively thin layers. When doing work at home with a roller or wide brush, painting is done in 2 layers. It is recommended to take breaks of 7-8 hours while working so that the layers have time to dry.
Surface preparation
Surface grinding.
In order for the ceiling and walls to be painted well, they must first be prepared. To do this, it is recommended to remove the top layer of whitewash. To make it come off faster, you need to moisten it with water, and then clean it off with a spatula after 15-20 minutes.
After this, the treated slabs are washed with clean water and then dried for several hours.
In this case, all defects appear, which are eliminated with a spatula and putty. It is necessary to pay attention to the joints of the slabs, where the whitewash crumbles more and crumbles faster. Using fine sandpaper, all overlaps are sanded until smooth. Then use a damp cloth or vacuum cleaner to remove the accumulated dust.
Painting - step by step instructions
A layer of primer is applied to the cleaned surfaces. To do this, choose mixtures that penetrate deeply into the whitewash. If there is a suspicion of the presence of fungi and mold, then use formulations that contain antiseptics.
The primer is applied with a roller or spray gun. It should cover all treated surfaces evenly, without streaks.
It is recommended to purchase masking tape before painting. It is used to cover vertical surfaces right up to the ceiling to protect them from paint penetration.
Please note: Instructions for painting sheepskin coats in an apartment or private house
The paint is poured into a tray with a grooved bottom. A roller with short hairs is dipped into it, and after collecting the substance, the excess is removed by squeezing along the grooved surface.
Painting with a roller.
Before starting work, the composition is thoroughly mixed. To do this, use an attachment on an electric drill or a construction mixer. If you don’t have a spray gun, then use a brush to pre-treat the corners and joints in the places where the tape was glued.
Apply paint with quick movements. Drops and smudges must not be allowed to appear. Coloring is done in small squares, the sides of which slightly overlap each other.
After applying the first layer, wait for it to dry for 7-8 hours. The first time they paint parallel to the window opening, and the next strokes are made perpendicular to it. This allows you to get rid of defects in the form of stripes or spots.
If you use a spray gun, then to obtain the desired tone, it is advisable to first practice on a piece of cardboard. After completion of work, the device is disassembled and thoroughly washed.
According to experienced builders, it is better not to paint the old whitewash, but to completely remove it. But if this is not possible, then it is necessary to strictly comply with all the requirements of the technology for carrying out such work.
Read further:
Painting walls with water-based paint: surface preparation, choice of paint and step-by-step instructions for painting
Painting the ceiling with water-based paint: surface preparation, step-by-step instructions for painting
Painting surfaces with washable water-based paint
Whitewashing ceilings with water-based paint: features of the coloring composition and instructions for use
Painting the ceiling with water-based paint: choosing a roller and tips for use
Features of dismantling the old coating
If lime whitewash was previously used on the ceiling, the easiest way to get rid of it is to thoroughly wet the ceiling surface. Lime has excellent absorption, so it is best to apply water several times. The thicker the whitewash layer, the more moisture will be required.
After this, you need to open the windows in the room. In draft conditions, the lime will begin to bubble and quickly peel off. After this, it can be easily removed with a regular spatula. You need to wear safety glasses when working, after which it is recommended to rinse the surface again with water.
If you need to dismantle a layer of old water-based paint that is badly damaged, then of course you can try to wash it off or get rid of it with a spatula. But this is a very long and tedious process. Therefore, it is best to use a special chemical composition that will quickly corrode the old paint. However, before using it, you need to carefully study the instructions. Work is carried out in a respirator, safety glasses and rubber gloves. Additionally, you need to take care of good ventilation of the room. The water-based emulsion quickly reacts with the chemicals and begins to bubble, after which it is easily and quickly removed with sandpaper and a spatula. At the final stage, it is enough to rinse the surface with water.
If there are large cracks and potholes in the ceiling, they need to be filled. After this, the irregularities are erased with fine-grained sandpaper.
Repainting the ceiling with water-based paint
There is a popular wisdom: surviving repairs is the same as surviving two fires. I want to save not only money, but also time. If there is an opportunity to avoid excess dirt, you should take advantage of it.
If the ceiling that requires repair is already painted with water-based paint, you should worry about how to paint it again and how to repaint the ceiling with water-based paint without streaks.
Characteristics of water-based paints
Water-based emulsion is a higher quality and more practical dye than ordinary lime, which crumbles and is harmful during the dyeing process. This material is odorless, easily diluted with water, and tools can be quickly washed after it.
The water-based emulsion is tinted well. The surface color is even and dense, even if it is re-painted with water-based paint.
Before starting work, it is important to consider in which room you plan to finish the ceiling surface. A moisture-resistant water emulsion is suitable for the kitchen and bathroom.
Popular types of water-based paints:
- Latex Its advantage is that it has good coverage and density. For some surfaces, only one coat is sufficient. After drying, such surfaces can be subjected to wet cleaning.
- Silicate It is used mainly for exterior decoration. It is made on the basis of liquid glass. Thanks to this, it can be easily applied to stone or concrete bases. It can be used to paint a garage, garden house, work shop inside or outside.
- Acrylic This coating can hide gaps up to 1 mm. Pure acrylic is used for painting surfaces in dry rooms; it is sensitive to moisture.
- Silicone Has self-cleaning properties. It can be washed. Suitable for rooms with sudden temperature changes and high humidity.
Water-based paint for the ceiling has been selected, let’s figure out how to re-paint the ceiling surface and whether it’s worth doing it without washing off the old coating.
Is it possible to paint a ceiling using old water-based paint?
Painting the ceiling with water-based paint over old paint is allowed if the paint holds up well and there are no swelling, cracks or unevenness. In this case, the ceiling is cleaned of dirt and dust, primed - and can be repainted after the primer has dried. If the water-based emulsion is in poor condition, it is better not to paint the ceiling with a water-based emulsion over the old one. The master must remove the loose, peeling areas (the old layer of water-based emulsion does not have to be completely removed, and this is its advantageous difference from whitewash).
Preparing a painted surface for repainting
Before repainting the ceiling with water-based paint, you need to figure out what the ceiling was covered with at the time of repair. Lime is removed in one way; plaster and old paints have their own tricks.
At this stage you will need special tools:
- Warm water
- Roller
- Putty knife
- Brush
- Fine grit sandpaper
How to remove lime whitewash
First, the ceiling is well wetted. Lime absorbs moisture well and can be processed two or three times depending on the thickness of the whitewash.
When the lime is well saturated with moisture, open the windows. The resulting draft will cause the surface to bubble, and the lime will begin to peel off.
Next, the spatula comes into play. Carefully, preferably wearing safety glasses, thoroughly clean the surface of whitewash.
How to remove old water emulsion
A special chemical solution or a large amount of very hot water works wonders when you need to paint a ceiling after water-based paint. Before applying a chemical solution, you must wear a respirator and safety glasses, and ensure ventilation. The water emulsion will bubble under the influence of the composition, and then it can be removed with sandpaper. When finishing cleaning the ceiling, rinse it with clean water and allow it to dry thoroughly.
How to restore plaster
Sandpaper will easily cope with minor irregularities. The cracks and potholes are covered with putty.
When the surface is dry, it is necessary to re-treat it with sandpaper. The finer the grain of the paper, the smoother the ceiling will be after processing.
After complete drying, the ceiling must be coated with a deep penetration primer in all cases: after lime, paint removal and plaster renewal. Then let the ceiling dry thoroughly again.
Technology of painting the ceiling over old water-based paint
When repainting a ceiling with water-based paint, it is advisable to use the same color that the ceiling was painted in, otherwise there is a risk that the ceiling will have to be painted many times to achieve the desired result.
A thick paint straight from the can will lay out too prominently, no matter how good the paint roller is. The brush may leave grooves. A small 2-3cm brush can be used to cover corners or hard to reach areas.
Water-based paint must be diluted with water - approximately 10% of the total volume. This will reduce the viscosity and the paint will lay down in an even layer. You need to stir it well. Leave it for a while, usually no more than 5 minutes. Repeat mixing again. To do this, it is permissible to use a drill or hammer drill with a special attachment.
To achieve the best effect of painting with water-based paint, apply it in the second and third layers.
The first layer of paint is applied in the direction from the window (in the direction of light). The second layer is applied across the sun's rays. The third layer is again laid in the direction of the light. In this case, you will get a uniform distribution of water-based paint over the old surface.
Liked? Share on social media networks!
remontcap.ru
Painting the ceiling with water-based paint over old paint
The advantages of water-based coating - the absence of a strong odor and toxic properties, the formation of a durable layer that allows cleaning, wiping and washing, the possibility of tinting - have made it a popular material for decorating ceilings.
However, such painting, especially over a layer of old paint, has a number of features and mandatory preliminary operations.
Painting the ceiling with water-based paint over old paint
How to paint it yourself?
To paint the ceiling with your own hands, you do not need to have experience in performing such work. If you follow simple rules, the finish will delight you with its appearance for a long time.
Coloring rules
- It is necessary to provide good lighting to control the progress of painting.
- Following the manufacturer's recommendations, you need to observe temperature conditions when painting and avoid drafts.
- Painting should begin from the corner farthest from the door, that is, from the window. If painting is done in two layers, the first is applied along the window, the final one is applied across, that is, in the direction of the light.
- To avoid streaks, do not turn the roller over to the other side during the painting process.
- It is not permissible to interrupt work until the layer is completely applied. Stopping causes the coating to dry out at the joints of the painted and unpainted surface. Uneven areas are very noticeable in good lighting.
To avoid unpainted areas and uneven areas, you need to work quickly. You need to correct defects before the paint hardens. In this case, you can get an excellent painting result.
- It is necessary to constantly monitor unpainted areas and thickenings and eliminate them before the paint layer dries. It is better to inspect the ceiling from different angles before applying a new portion of paint.
- If possible, use a new roller for each coat to improve paint quality.
Ceiling preparation
Before painting the ceiling, you need to prepare the surface for painting. To ensure that the paint goes on smoothly and evenly in the future, you must adhere to the following sequence of actions.
- First you need to get rid of the old whitewash or paint on the ceiling.
- It is necessary to carry out plastering work to seal the seams between the floor slabs and eliminate cracks and irregularities.
- The next step is to apply a primer.
- The next step is to putty it before painting. You need to be especially careful when choosing materials if you are going to putty a plasterboard ceiling for painting.
- Finally, it is necessary to sand the surface with fine-grained sandpaper.
Step-by-step instructions for painting the ceiling with water-based paint
In accordance with the technology of painting the ceiling with water-based paint, it is necessary to perform the work in the following order.
- Stir the paint. To avoid the appearance of small lumps, you can filter through gauze folded in several layers.
- Place the roller in the paint tray. It is necessary to roll the tool along the ribbed side several times so that it is evenly absorbed.
- The first layer must be applied parallel to the window, the second - perpendicular. It is better to move the roller from the wall to the window to be able to evaluate how the paint lays down.
- Roll the roller with a 5-10 cm wide overlap onto the previously applied strip of paint. To ensure the necessary force, the angle between the tool handle and the surface to be painted should be no more than 45 degrees.
- Carefully paint the junction of the walls and ceiling and the areas behind the heating pipes with a brush.
- If after two layers stains and unpainted areas are visible, it is necessary to apply a third. For the previous coat of paint to dry, you need to wait about 12 hours.
Video tutorial
The following video describes the features of painting the ceiling. Following the recommendations from the video tutorial will help you avoid mistakes in your work.
Tools and materials - a complete list for all occasions
To carry out the necessary preparatory work and high-quality painting of the ceiling with any composition of the previous coating and surface condition, you will need:
- wide, durable plastic film or oilcloth to cover the floor and furniture that could not be removed;
- sponge for soaking and washing off old coating;
- steel spatula for removing the previous layer of paint (whitewash) and applying putty when leveling the surface for painting;
- serpyanka mesh for gluing the joints of ceiling tiles;
- main and finishing putty;
- penetrating primer;
- mesh graters for leveling the putty surface - larger preliminary and fine finishing;
- special solutions for eliminating yellow streaks, rust stains, and mold;
- water-based paint of suitable quality in the required quantity;
- a medium-width brush with a fluffy edge for painting corners, joints with walls, areas around ceiling lamps; before use, it is soaked in water; the swollen wood of the handle will tightly hold the bristle hairs, so they will not remain on the surface covered with the coloring composition;
- a narrow brush for eliminating minor paint defects;
- a paint roller in a fur coat with medium-length pile and a handle with a telescopic extension; the width of the roller depends on the area of painting - the larger it is, the wider the roller;
- a rectangular tray with a corrugated inclined surface on which a roller is rolled to remove excess paint.
Necessary tools and materials: 1. Film. 2. Sponge. 3. Spatula. 4. Serpyanka mesh. 5. Putty. 6. Primer. 7. Grater nets. 8. Cleaning products. 9. Paint. 10. Medium brush. 11. Narrow brush. 12. Roller. 13. Special bath.
Water-based paint for whitewash
In order to evenly paint surfaces over old whitewash, it is recommended to treat the ceiling and walls with a primer before applying the base layer. This can be ceiling paint diluted in water at least 5 times. If high quality work is required, then it is advisable to purchase a special primer mixture that will ensure normal adhesion of whitewash and water-based paint.
For this purpose, compositions such as ST17 are used. Such primers prevent delamination of whitewash and eliminate its cracking.
After this work, water-based paint will adhere well to the whitewash. Any type of dye of this class that is non-toxic is suitable. To ensure that the new coating does not stand out, it is advisable to consult a specialist when choosing a paint color. Most often they purchase the option with a matte tint. This allows you to better hide minor coating defects.
Pay attention to: How and with what to paint plaster products
Surface preparation
The even, monochromatic coating provided by water-based paint compositions does not hide, but, on the contrary, makes all surface defects, irregularities and stains more noticeable. Therefore, the ceiling must be carefully prepared before painting.
Prices for water-based paint
Removing the previous coating
First of all, you need to cover the floor and the remaining furniture in the room.
Then, if the ceiling was whitewashed, you should:
- Gradually, in squares, moisten the old whitewash with a sponge and warm soapy water;
- remove the soaked layer with a spatula, placing a tray in order to stain the floor less;
- finally wash off the previous coating with a sponge.
If there is old water-based paint on the ceiling, it will not be possible to wash it off . You should at least remove this coating where it has peeled off.
To identify and eliminate all such areas, you need to:
- moisten the ceiling generously with a roller;
- let the water soak in thoroughly;
- open the windows and doors and create a draft in the room;
- Use a spatula to remove the old water-based coating from all areas where it has peeled off as a result of this procedure.
Removing old peeling paint
Special processing
If there are rusty spots or dark streaks, they are covered with one of the following compounds:
- 3% hydrochloric acid;
- thick lime “milk” with 50 ml of denatured alcohol;
- 5% copper sulfate;
- 20 parts crushed lime with one part drying oil.
If there is black mold (a common occurrence in kitchens and bathrooms, and other damp areas), you need to follow these steps.
- Strip the plaster down to the concrete. To reduce dust, it should be moistened first.
- Treat the concrete surface with an antiseptic primer. A budget alternative is a detergent containing chlorine, for example, “Belizna”.
- Cover the problem area with a penetrating primer and re-plaster it.
Special ceiling treatment: 1. Stripping down to concrete. 2. Applying an antiseptic primer. 3. Plastering.
Method of applying water-based compositions
How to ensure quality?
If you decide to paint the ceiling with water-based emulsion with your own hands, then you need to take into account that without preparation the result will be disastrous.
Removal technique
- Firstly, it is important to clean the base from old whitewash. It is convenient to remove a thick layer with a spatula, and wash off the residue with water from a spray bottle.
- After cleaning the ceiling, it is necessary to expand and seal all cracks. As a rule, large defects do not form in concrete slabs, so we focus on the joints of the parts and the junction with the walls. To prevent “cold bridges” from leading to paint peeling, we fill all voids with sealant or cement mortar.
Advice! As a rule, in damp rooms the base is impregnated with an antiseptic before leveling. This impregnation helps to avoid contamination of the painted layer by fungi and bacteria.
- Next, we level the overlap. You can only use putty, but it is better to mask large differences with plaster. If the difference in height is more than 20-30 mm, then it is more rational to install a suspended structure made of gypsum board: it will be cheaper and more reliable.
- The surface is finally leveled with finishing putty, which is then sanded and primed. This, on the one hand, will ensure adhesion of the paint to the base, and on the other, will allow us to get a perfectly flat ceiling.
Advice! If there are metal parts on the ceiling, then Zinga conductive paint or other zinc compounds are used to protect them from corrosion.
Painting Tips
As a result of preparation, we should get the surface that is most suitable for solving our problems. If you whiten it, the coating will be of better quality than when processing the floor itself.
However, since we have already spent time and money, it is worth using high-quality finishing:
The perimeter is painted as shown in the photo. This will protect the walls from drops
- We dilute the paint by half and apply the first layer. In order not to stain the walls, we paint the perimeter with a brush, and then use a roller or sprayer.
Advice! The floor must be covered, since drops will occur even with the most careful work.
- Apply the paint in parallel stripes, making sure there are no unpainted areas.
- Dry the first layer (time depends on the type of material) and re-paint the ceiling with a thicker mixture. In this case, we move the roller in a direction perpendicular to the one in which we worked at the first stage.
- If you have chosen a paint with good hiding power, then two layers will be enough. After this, it is enough to dry the ceiling with good ventilation.
Finishing
Leveling the ceiling surface and priming it
If the ceiling is fairly level and even with side lighting there are no significant surface defects, the steps below are necessary.
- Coat the ceiling with a penetrating primer. In this case, it is better to use a brush so as not to miss a single depression or irregularity.
- After the primer has dried, remove any unevenness with finishing gypsum putty.
- After 5-8 hours, level the putty areas, first with a coarse and then with a fine mesh grout.
- Prime the leveled putty areas.
Primer of leveled putty areas
If cracks have formed at the joints of the slabs , and the old plaster is crumbling, then the algorithm will be slightly different.
Prices for putty
- Clean down to concrete using a spatula or hammer drill. There will be less dust if the surface is pre-moistened.
- Coat with penetrating primer.
- Re-plaster, checking the quality of work with a level and a steel meter. Cover the filled cracks in the joints with reinforcing mesh.
- After a day, putty and finally level the surface with trowel mesh.
Gluing serpyanka mesh to the ceiling
After leveling is completed, the surface is primed with water-based paint diluted with water.
Coloring
When purchasing a water-based paint composition for the ceiling, it is especially important to have a good understanding of the assortment.
Currently it is represented by five main types of products:
- with acrylic;
- with latex and acrylic;
- with silicone;
- with polyvinyl acetate;
- with silicates;
- with mineral supplements.
The cheapest water-based mixtures are with polyvinyl acetate, but the surface painted with them cannot be washed. The most expensive compositions are those containing silicone - they adhere well to plaster even without a primer, and the coating they form can withstand wet cleaning with detergents. Due to their good permeability to water vapor, they are ideal for kitchen and bathroom ceilings. Medium-priced and durable coatings are acrylic and latex-acrylic paints; They are also the most in demand. Silicate compositions are intended for painting the surface of concrete and brickwork; they are durable, but not moisture resistant.