Schoolboy, this is not a baby anymore
Yesterday's baby, today has become a schoolboy. The child will not change radically in a day. He also loves toys and walks. But at the same time, he had new responsibilities. It is necessary to cultivate in him a responsible attitude towards them.
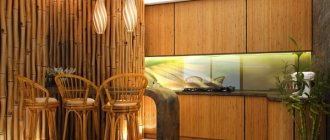
The design of a student’s room should also change. Thoughtful design of the room will help the child to harmoniously engage in the learning process.
Toys need to be reduced, those that the child is not interested in due to his age should be selected. Books, notebooks and teaching aids should take the place of toys.
Don't forget that cravings for toys won't go away quickly. It is advisable to leave his favorite cars, planes and add intellectual games for his age.
Veneered plywood
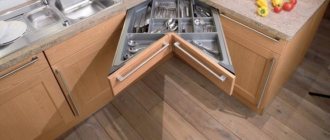
Schoolchildren's corner
The furniture set we offer consists of the following elements:
- Cot. True, its dimensions are a little non-standard, but if you wish, you can make it according to the height of your child.
- Corner wardrobe for children's clothes. It also serves as one support for the crib.
- A desk for preparing lessons. The desk is in the form of a corner table, there is a cabinet for storing various accessories.
- An original ladder for getting up to bed. The steps of the stairs have retractable bedside tables.
- Second bed support. It is made in the form of a corner with a shelf to which the table is rigidly attached.
| Children's corner with crib |
To make a corner you will need a standard set of hand-held electric tools. To make the work easier, we recommend ordering the cutting of parts according to the drawings from specialized companies. They will also process the edges of the cuts with decorative plastic tapes. The fact is that a children's corner consists of a large number of elements, cutting them out yourself is long and difficult, and any mistake can cause large material losses - you will have to start all over again. We advise you to only assemble the kit from already cut parts.
| dimensions |
Furniture assembly procedure
After you have delivered all the individual parts home, lay them out on the floor and carefully examine each of them, find out its purpose, determine the locations of fastenings and installation of accessories.
According to the drawings, you need to install hinges, legs and drawer guides; one by one, you can begin to assemble individual furniture modules. We recommend starting work with a ladder with pull-out shelves: drawers, a wardrobe, a corner holding a crib, a work table and a children's bed. The final fixation of all models with each other can begin only after the individual parts have been completely assembled and the linear dimensions have been checked for correctness.
Procedure for assembling a children's bed
The bed consists of load-bearing longitudinal beams; they will serve as the base. The parts of the transverse ribs need to be fastened with confirmations (you already know how to install confirmations from previous articles), the bottom of the bed is fixed to the assembled frame using wood screws, the fastening must be done from the inside of the bed through the transverse ribs. The sides are fastened to each other with confirmations, the sides are fixed to the bed with self-tapping screws, and fastening is also done through the ribs. Now you can start working on the base for the mattress. You can use plywood sheets or OSB boards; the dimensions must correspond to the dimensions of the mattress.
| Bed |
Assembling a staircase with cabinets
One of the most difficult elements. First you need to attach the drawer guides to the sides, then you can start assembling the drawers. It is better to assemble the boxes using confirmations, but other methods of fastening can be used. Choose those that are easier for you and that you are used to. Then you need to start assembling the staircase modules; we tighten the modules together using body ties or large self-tapping screws. The length of the fasteners is selected taking into account the dimensions of the modules. We recommend placing additional wooden dowels in the upper riser and lid for strength. The drawer fronts should be installed after the modules have been completely assembled.
| Staircase with lockers. Side view |
| Ladder drawers |
Table assembly
The table consists of a relatively large cabinet for storing accessories and a lid. The cabinet does not have a back cover - this option was chosen in order to save money. We recommend starting work with the drawer guides, then assembling the drawer itself. The procedure for assembling the box is standard and has no special features. After this, we completely assemble the cabinet, check all dimensions and reliability of fastening. At the very bottom of the tabletop, the planks should be secured to plastic corners and pins; the tabletop and the support cabinet are connected through the planks with screws.
Assembling the angle stop
The simplest element of the set consists of a minimum number of parts. The assembly is carried out according to the drawings, all parts should be connected with confirmations. Before planting on confirmations, you need to knock out special supports with a nail into the lower ends. The last one is attached to the corner shelf; the fastenings are carried out with confirmations.
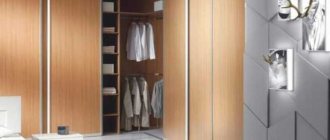
Assembling a wardrobe
Don’t forget that the corner wardrobe for children’s clothes also serves as a second support for the bed; therefore, make the connection strength of all its components especially reliable, do not skimp on the number of hardware and do not rush. The load on the load-bearing elements is maximum; in addition, it can have variable directions and be not only static, but also dynamic. In terms of the number of individual parts, assembly will not be very difficult for you; the algorithm for attaching individual parts into a single frame is not much different from the usual actions.
The lid and bottom of the cabinet are cut at an angle, the edges are covered with flexible plastic tape, the corners are sanded and cleaned. Additionally, the lid is covered on four sides with a decorative durable PVC edge (the use of a paper edge is allowed, but we would not recommend reducing the cost of the product in this way). All parts of the cabinet are fastened with confirmants; metal or plastic shelf holders must be installed for the shelves.
| Corner cupboard |
Some final tips
Due to the fact that such corners have become quite popular, some of our readers have shared their impressions and comments with us from practical experience in operating the corner. We will be happy to share them with you.
- To increase stability, it is recommended to additionally fix all parts of the crib with dowels (dowels) and attach them with glue. Children often not only sleep on the crib, but also play - its design needs to be strengthened.
- It’s a good idea to attach a simple handrail near the steps with retractable shelves. The surfaces of the boxes are quite slippery, which can lead to grass-hazardous situations.
- It is advisable to install an adjustable footrest under the children's table - the child will be able to take a more comfortable position while preparing lessons. And this is very important in our time, the load on a child’s spine as a result of prolonged immobile sitting is not at all child-like.
← How to make formwork for an indoor pool Some methods for decorating an old plywood cabinet →
We recommend watching:
Plywood FC | 8mm | 1520 mm x 1520 mm | birch | grade 2/3 | Ш2
650 rub.
Plywood NEEDLES | 18mm | 1220 mm x 2440 mm | coniferous | grade SM | NS
RUB 1,400
Plywood FC | 18mm | 1520 mm x 1520 mm | birch | construction | NS
650 rub.
Plywood FSF | 9mm | 1220 mm x 2440 mm | birch | construction | NS
700 rub
Plywood LAMINATED FOF | 21mm | 1220 mm x 2440 mm | birch
RUB 2,300
Plywood FSF | 21mm | 1525 mm x 3050 mm | birch | grade 3/4 | Ш1
RUB 2,500
Plywood FC | 15mm | 1520 mm x 1520 mm | birch | grade 3/4 | Ш2
870 rub.
Plywood LAMINATED FOF | 21mm | 1500 mm x 3000 mm | birch
4,000 rub.
Plywood FC | 15mm | 1520 mm x 1520 mm | birch | grade 4/4 | NS
740 rub.
Plywood FC | 15mm | 1520 mm x 1520 mm | birch | grade 2/3 | Ш2
1,100 rub.
Plywood FSF | 4mm | 1500 mm x 3000 mm | birch | construction grade | NS
1,200 rub.
Plywood FSF | 18mm | 1500 mm x 3000 mm | birch | grade 3/4 | Ш1
RUB 2,200
Plywood FSF | 9mm | 1220 mm x 2440 mm | birch | grade 3/4 | Ш2
1,000 rub.
Plywood NEEDLES | 12mm | 1220 mm x 2440 mm | coniferous | grade 2/3 | NS
1,200 rub.
Plywood LAMINATED FOF | 18mm | 1500 mm x 3000 mm | birch
RUB 3,500
Plywood FSF | 9mm | 1525 mm x 3050 mm | birch | grade 3/4 | Ш1
RUB 1,500
Plywood FC | 15mm | 1520 mm x 1520 mm | birch | construction | NS
550 rub.
Plywood FC | 10mm | 1520 mm x 1520 mm | birch | grade 2/3 | Ш2
800 rub
Plywood FSF | 6.5mm | 1500 mm x 3000 mm | birch | grade 4/4 | NS
1,000 rub.
Plywood FC | 21mm | 1520 mm x 1520 mm | birch | grade 3/4 | Ш2
RUB 1,150
We also recommend reading
11/14/2015 → Beds, sofas
Antique style wooden crib
The crib we offer was used by our great-grandparents. All children grew up healthy and beautiful in them. So we decided to remember the ancient secrets of making cribs from boards.
11/24/2015 → Furniture
Furniture made from sheet plywood. Children's desk and chair
Teaching a child to do homework with pleasure is not an easy task for all parents. A homemade children's desk will be an additional incentive for the child to do his homework without parental coercion.
11/25/2015 → Tables
Folding children's desk-chairs made of sheet plywood
Making home furniture with your own hands is always a pleasure, but making these things for your child is doubly pleasant. We will tell you how to make a folding desk-chair from an ordinary sheet of plywood. The work will require a minimum of time.
03.12.2015 → Beds, sofas
How to make your own children's bed with drawers
A children's bed with drawers is very convenient to use. You can put not only linen and clothes there, but also your baby’s favorite toys. The article contains a complete set of drawings and manufacturing tips.
Comments
No one has left a comment yet
Schoolboy's room
It is not always clear to parents how to properly redecorate a nursery when the child becomes a schoolchild. It is necessary to refer to the photo of a children's room for a schoolchild, created by professionals.
Photo catalogs from construction sites clearly demonstrate the style and design of such rooms. They show the correct zoning of the room, the choice of color palette, and the arrangement of furniture.
Zoning of a schoolchild's nursery
The multifunctionality of a room for a schoolchild dictates the mandatory allocation of various zones with a specific focus.
A room where each zone is designed taking into account its specifics will be comfortable for children:
- bedroom area in soothing colors, with a comfortable bed;
- the playing area is decorated somewhat more expressively and with bright accessories;
- the mini gym is equipped with a wall bars, ropes, and exercise equipment;
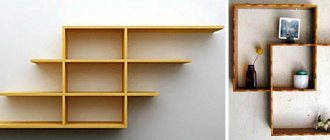
- the study area is equipped with a comfortable table, above it there are shelves for books and notebooks;
- in the living area, it is necessary to install transformable chairs so that children can sit comfortably in them.
It is better to zone the room with furniture.
Each zone must have its own proper lighting.
Note!
Children's room in an apartment: TOP-190 photos and videos of children's room design ideas. Color solutions, selection of furniture, lighting settings
Chandelier for a children's room - TOP-160 photos + video of chandeliers for a child's room. Environmental friendliness of materials and safety of mounting a chandelier in a nursery
Furniture for a children's room: the best interior solutions and features of their styling (video + 135 photos)
Features of furniture selection
You need to decorate a student’s room taking into account his age group. Furniture for a schoolchild's children's room is selected taking into account his status.
Primary school children must get used to their new life. The educational process dictates increased attention and development of responsibility.
The study area should become the main one during this period. It is better to choose a comfortable table, armchair or chair with height adjustment, because the child grows quickly.
The color palette of this area should be invigorating so that the child does not want to fall asleep while doing homework.
Schoolchildren aged 10-13 have their own hobbies. They need to read more, school loads are increasing. It is important to create a small library, a gallery of academic or sports achievements. Cabinets and shelves need to be added to the interior.
Note!
How to decorate a children's room - step-by-step instructions for beginners and tips for masters. 135 photos and videos master class
Floor in a children's room: choosing materials and design options for flooring (190 photos)
- Children's room for children of different sexes: ideal combinations and the most beautiful design ideas (165 photos + video)
Teenagers 14 years old fully participate in the design of their room. They choose their main zone.
If the passion for sports prevails over the rest, then the emphasis is on the sports area. It is equipped to the maximum with exercise equipment, sports equipment, taking into account the area.
Children of this age become tall, children's beds and wardrobes are replaced by adult ones.
They receive their friends in the room, the living area also becomes central. It is necessary to create it as a comfortable and cozy area.
What needs to be taken into account when arranging a corner for children to play in a suburban area
Children's playground at the dacha
In order to make the time our child spends in the fresh air as comfortable and useful for his general and physical development as possible, it is not necessary to buy special equipment and educational play elements in specialized stores.
You can make them yourself using materials that are at hand.
Before you start making the elements of the children's corner, you need to decide on the place where it will be placed.
At the same time, the size and shape of the site directly depend on the total area and location of the land.
It is also impossible not to take into account the age of the child: the older the child, the more area must be allocated to place the corner and the more massive and complex the game elements placed on it will be.
When choosing a location, you need to pay attention to the fact that more than 30% of its area should be in the shade of trees. If this is not possible, you can build an artificial awning.
This is due to the fact that it is extremely harmful for a child, like an adult, to be constantly exposed to direct sunlight, which can have a negative effect on the skin and general health.
Even if children aged 10 years or more play on the site, they need constant supervision from older people. Therefore, it is recommended that the place for the playground be located in a place where it is possible to observe.
Since this is still a suburban garden plot where vegetables and fruits are grown, albeit in small quantities, the playground should be located as far as possible from the beds and flower beds. Otherwise, fidgets can nullify all your efforts in a few minutes.
Ideally, use a special small fence or fence between the site and the beds. An ordinary net is perfect for this: in addition to the fact that it will protect the play area from plantings, children will not be able to get hurt on the net.
When choosing a location, you should also consider the presence of drafts. The site should be located in a place where they are not present. If this factor is not taken into account, children will constantly get sick and catch colds: while playing, they warm up and often sweat.
And when there are gusts of wind on a heated child, it is possible that a sore throat or other cold may develop. If there is no such place, you can use a hedge of climbing plants as protection from gusts of wind.
Among other things, such a fence will look like a wonderful and original decorative element.
As for the total area of the corner, it is necessary to take into account exactly what game elements will be installed on it. For example, to install a hammock or swing you will need approximately 14 - 16 m2 of space, taking into account a 2 m2 safe area.
If you plan to make all the game elements yourself, the material that is used for this is of no small importance. Despite the fact that it will be at hand, the working material must be durable and light, environmentally friendly and safe for children.
Particular attention will have to be paid to the development of the designs of elements for games. Which will be located on the site. During manufacturing, you should try to minimize the number of sharp corners.
All connections of working parts must be strong and reliable in order to withstand the weight of the child and play inertia. To do this, the fittings that will be used in the work process must be durable. Under no circumstances should you save money on this.
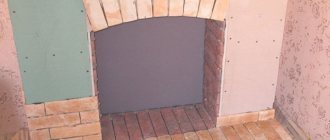
Also, we should not forget about covering the territory where it is planned to equip a playground for children.
Ideally, it is recommended to use a special material for coating, which is sold in specialized stores. If this is not possible, you must first thoroughly prepare the site:
- Remove roots and plant debris
- Remove all stones and construction waste
- Level out existing holes or bumps
The area can be sprinkled with regular sand or wood shavings. If possible, the area can be sown with a mixture of special, abrasion-resistant grasses.
Summarizing all of the above, I would like to note that when arranging a children's corner in a garden plot, it is necessary to take into account the following factors:
- Child safety
- Good visibility throughout the site
- Protection from wind and ultraviolet rays
- Fence from garden plantings
- Use of high-quality materials and fittings, etc.
These rules should not be neglected, otherwise it may cause injury to children.
Interior of a schoolgirl's room
The appearance of the room of a schoolboy and a schoolgirl are completely different from each other. When they say that the interior of a schoolchild’s children’s room has been created, they mean the general principles of design.
Girls develop a sense of taste earlier. The need for beautiful, comfortable, sometimes flashy colors and shades is increasing.
Girls are more inquisitive than boys. Therefore, in their room, the study area should not be located next to the TV or play area. A desk or desk for completing tasks should be placed near the window. This is the correct location.
Modern furniture is multifunctional and comfortable, and can be easily transformed. By purchasing a “bed with a loft”, you can use such a bed to divide three zones at once: study, play and bedroom.
The sleeping area is in the “loft” of the bed, and underneath there is a well-equipped study area with drawers and cabinets for books and notebooks. This is especially true in small apartments.
Beautifully designed window openings, elements of girly decor, school accessories will create a uniquely beautiful airy interior.
Is it possible to do without a corner in a children's room?
Of course, no one will force parents to place such a set of furniture in the children's room. Many may argue that you can do just fine without it. And indeed it is. You can place it on an ordinary table with an ordinary chair, and store everything you need for studying in a closet or on shelves located on one of the walls of the room.
And yet, one cannot help but pay attention to the advantages that the corner provides for the student. They are definitely worth knowing about. In many ways, they are a good and convincing reason to still purchase a similar product for the nursery. What are these benefits?
- Thanks to the corner, you can save a lot of space due to the fact that the furniture is combined into one set, which takes up very little space;
- You can save money and time by purchasing it; manufacturers try to make this product as affordable as possible, so they care not only about its price, but also about organizing delivery throughout the region;
- A set of furniture will be more likely to be combined with the overall design of the room than individual elements;
- Among other things, it is also very convenient for the child himself, because everything he needs is at his fingertips;
- A schoolchild's corner allows you to easily arrange a proper place for your child to study, which is also of great importance.
In addition, one cannot help but pay attention to the reviews left by satisfied parents about purchased products of this kind. The best advertising is a recommendation from someone who has already tried what they are advertising. Often it is reviews that help parents make the right choice.
Schoolchild's room interior
Boys, these are people who are more restrained in their emotions. In the style of their room they prefer comfort, minimalism, technical and sports equipment.
Their “personal space” should be controlled by their parents so that the room is always tidy and comfortable.
Nowadays the most popular furniture in boys' rooms is the attic bed. Parents or the owner of the room can play with the “attic” in different ways:
- create a sleeping place in the form of a tent if you are interested in tourism;
- in the form of a schooner, if he is delirious about sea travel;
- cosmic motifs, in the form of floating space rockets attached to the ceiling on cords. Part of the ceiling can be painted in the form of a starry sky.
The staircase to the sleeping place can be made in the form of a staircase; a library is located in the hollow spaces of the steps. It's both stylish and functional. The student's workplace is under the berth.
Sports corner equipment
A home sports complex for children should consist of several equipment. Typically, a classic set includes a horizontal bar, a climbing rope, parallel bars, and rings. Despite the small area, such a corner will be very useful and necessary for the physical development of the child. Additionally, you can add a rope ladder, a monkey bars, a wall, a rope wall, and a board with press hooks to the kit.
If the baby is still very small, a good option would be to install a swing and slide. They can be removable and portable. Additionally, for creative development, you should install a slate board and children's abacus. As a rule, guys of any age show interest in them. On shelves and racks you can place a variety of things for creativity: pencils, paints, albums, etc.
These simple tips will help you organize your own creative and sports corner for children of any age. Kids will always find it interesting and pleasant to spend time here playing, modeling, drawing and physical exercise.
Children's room for two schoolchildren
It is not easy to decorate a nursery for one schoolchild, but when it should house a nursery for two schoolchildren, the complexity doubles.
Every child wants to have personal space. The fact that everyone should have a sleeping place is not even discussed.
For this purpose, two beds are placed in spacious rooms, taking into account the height of children. If there is not enough space in the room, the best option is a two-tier bed. This allows you to increase the study area.
The study area is equipped for everyone so that children do not interfere with each other when doing homework. It makes sense to use folding tables that can be put away after homework. Curtains are not appropriate on the windows; there should be blinds that match the style.
The play area and sports area should be common and well-equipped, and most importantly safe.
Basic Variations
It is not necessary to purchase a ready-made structure that will take up a lot of space. You can make a children's sports corner with your own hands. There will be enough available things for this. In particular, we are talking about a simple stool, a children's chair with a hard back, sofa cushions and the main task is to create a stimulus for the baby's active movements. He needs to crawl, overcome obstacles from pillows, stand up and rest his hands on a stool, and so on. You can place the ironing board on the sofa and take your baby on this unique slide.
Selection of materials and filling the children's corner
This game requires a minimum of three players, but can be played with many others. Draw a large square cord with smaller squares drawn at each corner in a different color. Draw a circle in the middle of the yard. One person is designated as the "counter" and stands in a circle in the middle of the courtyard. The counter closes its eyes and counts up to ten. While their eyes are closed, the other players skip around the court and choose a corner to stand. With their eyes still closed after counting to ten, the counter calls out one of the four corner colors.
Room of two schoolgirls
In a room equipped for two student sisters, the same principles must be followed as when decorating a nursery for two boys.
However, due to the specific development of girls, it is still necessary to provide two small round tables for toiletries. As girls grow up, self-care requires more and more attention.
It's ideal when girls find a compromise. Problems often arise in children of different ages. Everyone has their own interests and requirements. Parents should, if possible, take into account everything:
- individual sleeping places;
- separate study areas;
- common gaming and living areas.
The solution to problems can be “attic” beds, in the niches of which study areas and original tables with drawers for cosmetics and all sorts of small things are equipped.
Airy textiles and decorative elements will decorate the room well; at first glance it will be clear who the owners of the room are.
Student room layouts
When building a house or renovating an apartment, it is necessary to carefully plan a children's room for a schoolchild, taking into account his age, tastes, and hobbies.
The layouts of children's rooms for schoolchildren can be completely different both in the set of furniture and in the decor of the room.
The purpose of decorating a student’s room is to create maximum comfort, beauty and convenience. If this goal is achieved, the child will be happy to study, play and relax in his room, without being burdened by monotony and boredom.
Do not overload the room with furniture. Areas that require maximum light and air are concentrated here. Heavy curtains on the windows or fluffy carpets on the floor with long pile will collect a lot of dust. Children run around the room while playing, kicking up dust.
The easiest way is to cover the floor with good quality artificial turf that does not cause allergic reactions. Cleaning will be much easier.
Lighting the areas of the room is of utmost importance as it relates to the child's vision. Multi-level lighting is what is necessary for a schoolchild's nursery.
Taking into account all aspects of a child’s life, involving him in discussing the design of a child’s room, you can create rooms for a schoolchild that are amazing in comfort and style.
Passport Schoolchild's corner transformer NEW
· Do not hit surfaces with sharp, heavy or hard objects.
· Do not place hot objects on the surface.
· When cleaning, to avoid damaging surfaces, do not use brushes, hard cloths, or granular powders. To care for furniture, use special products designed for furniture.
· Do not allow substances such as solvents, gasoline, degreasers, etc., to come into contact with the surface.
· Periodically, in case of loosening of threaded connections, they need to be tightened.
· If you wish to modify the product yourself, remember that in this case our warranty will not apply to the product.
· Failure to comply with any of the above conditions, resulting in defects in the furniture, is grounds for loss of the right to warranty service.
Warranty
The manufacturer guarantees that the product meets the requirements of regulatory documents and that the furniture and materials for its manufacture comply with the Certificate of Conformity. In case of purchasing discounted furniture, claims regarding quality and appearance will not be accepted.
Product service life – 7 years; Warranty period – 1 year.
| № | Name | Size | Qty | № | Name | Size | Qty |
| 1 | Shelf | 505x550 | 2 | 8 | Shield | 1900x885 | 1 |
| 2 | Base | 506x74 | 1 | 9 | Tabletop | 1980x600 | 1 |
| 3 | Bottom | 506x580 | 1 | 10 | Shelf | 2001x245 | 1 |
| 4 | Top | 542x600 | 1 | 11 | Shield | 2001x828 | 1 |
| 5 | Facade | 874x538 | 1 | 12 | Rear fiberboard wall | 890x536 | 1 |
| 6 | Side | 950x580 | 1 | 13 | Side | 965x600 | 1 |
| 7 | Side | 950x580 | 1 |
Guide to assembling the Schoolchild's Corner:
Attach thrust bearings No. 70 to parts No. 6,7,13 using self-tapping screw No. 63. Connect parts No. 6, 7 with confirmations No. 51 to part No. 3. Screw in eccentric dowels No. 79 into parts No. 4, 10. Insert eccentrics No. 78 into parts No. 6, 7. Connect part No. 4 with parts No. 6, 7, aligning the holes with the posts, and tighten them by turning eccentrics No. 78 using a screwdriver. Screw part No. 2 to part No. 3 with confirmations No. 51. Screw part No. 11 with confirmations No. 51 to part No. 7 (if the cabinet is located on the right, to part No. 6.) Connect part No. 11 with confirmations No. 51 to part No. 13. Connect part No. 10 to part No. 11, aligning the posts with the holes, and secure by turning eccentrics No. 78 using a screwdriver. Using angle No. 000, secure part No. 10 to parts No. 13, 7. (If the cabinet is located on the right, to parts No. 13, 6.) Screw part No. 12 with self-tapping screws No. 61. Using self-tapping screws No. 61, screw hinges No. 88 to part No. 5. Install and screw part No. 5 to part No. 6 (if the cabinet is located on the right, to part No. 7). Install handle No. 000 on part No. 5. Parts No. 9, 8 are attached to the bed mechanism (see instructions for installing the mechanism). Install handle No. 000 to part No. 8. Install shelf holders No. 72 into the holes in parts No. 6, 7, and install part No. 1 on them. Install plugs No. 52 on the visible heads of confirmations No. 51. Install plugs No. 54 on visible eccentrics No. 78. After assembly, adjust hinges No. 88 of door No. 5.