Let's start furnishing the doll's home with an armchair . It's easy to make: please note that the dimensions are shown in the photo. All you have to do is transfer them onto cardboard. We specifically do not provide chair templates, since it is made based on the personal considerations of the child or parent who is involved in the process of creating furniture. Cut out the parts you see in the photo from cardboard and get to work. To create a chair seat, use square blanks. Their number depends on the thickness of the cardboard used. Place a stack of cardboards together and glue them together. Attach the seat to the back of the chair, glue it to the bottom. Lubricate the front part of the seat with glue and attach the plug piece. It is a rectangle with rising bed elements. Now between the back and front of the chair there are supports on which cylindrical beds will be placed. Secure the cylinders of the beds and hide the sides under the cardboard. The chair is ready! To avoid leaving the furniture in this condition, cover it with a beautiful fabric or secure it with decorative paper. Please note: if the child is small, the paper will become a short-lived cover for the chair.
Simple origami diagrams of a paper chair
A miniature chair is very easy to make using the origami technique. To do this, you will need a sheet of paper measuring 20x20 cm. Schemes for manufacturing can be found on thematic websites and downloaded from the Internet.
There are also many books on this technique. However, it is quite possible to experiment and create your own scheme. There is a very simple scheme for making a high chair, understandable to both adults and children.
Follow the strict sequence of actions:
REFERENCE!
An ordinary chair can be easily made from a simple origami pattern in 5 minutes.
IMPORTANT!
In the origami technique, strictly follow the recommended steps and try to make all folds as accurately as possible with the smallest error.
Stages of making a paper chair with your own hands.
Let's look at creating a paper chair step by step.
This option is quite difficult to implement and may not work the first time.
Read and repeat the following steps carefully:
- Take a square piece of paper and fold it diagonally twice.
- At the same time, return the sheet to its original position each time. It is important to make the diagonals visible.
- Next you need to get a horizontal fold line. To do this, we also bend the sheet and immediately return it to its unbent form.
- We take the sides and connect them to each other so that we get a triangle.
- We bend the left edge and direct it to the center. This is a kind of mark at the bottom of the triangle.
- We direct the right tip towards the resulting mark, and then tilt it downwards.
- We bend the lower part twice so that the product is thinner.
- We bend a small corner in half and direct it to the left side.
- Next we straighten it. You need to insert some thin object into the corner.
- Then we straighten the corner and see a part that is very similar in appearance to the leg of the future chair.
- Next you should make another leg.
- In exactly the same way, we get a small but noticeable mark and bend the right side to the center. And we bend the left corner to the right side towards the mark and bend the corner back and down.
- Then the lower part must be bent in half.
- We repeat all the steps for the second leg in the same sequence. As a result of the work done, the chair already has two supports.
- Let's start making the third support.
- We tilt the second part of the right corner to the left.
- We tilt the bottom corner back up to the vertical line.
- We bend the left side towards the right, and point the bottom corner up. We open it, straighten it and get a small triangle-shaped figure.
- We bend it in half and get the third leg of the craft.
- The fourth support can be made using a similar and already proven technology as the previous one.
- Bend the sharp corners of each leg upward.
- We make the back of the product. To do this, bend the top of the workpiece back in the opposite direction.
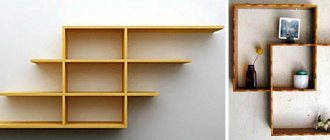
A simple way to make a chair from cardboard
As a prototype, you can use an ordinary home chair or other furniture. It needs to be scaled to a miniature format and all the dimensions of the future craft should be written down.
Let's consider the main stages of creating a chair from cardboard:
- We draw the components of the future product on cardboard. These will be four strips for the legs of the chair, two parts of the seat, crossbars, and back.
- First, let's make the legs of the chair. They are made from a sheet of paper rolled into a tube.
- We connect the legs and the first part of the seat with glue.
- After the adhesive has dried, glue the legs to the second part of the seat.
- For greater strength and reliability, we add kind of partition bars to the chair legs. Everything is like on a real big chair. They make the craft more stable, which makes it possible to place your favorite doll on it.
- We connect the back and seat together.
There is an easier way to make furniture for a doll:
- To do this, a cardboard sheet must be connected in the shape of a cylinder with a diameter equal to the seat area.
- Next, you need to place the cylinder vertically and mark the height of the chair and its legs.
- Next, you need to cut out a piece of cardboard so that you get a kind of ottoman without legs. So that the doll can sit on it, the empty space is filled with paper and the seat is glued.
- The chair is ready.
- You can leave it like this, or you can paint or decorate it.
ATTENTION!
You can use cardboard of different quality and texture. It can be multi-layered, matte or glossy.
School table for two children
Convenient and practical
An option for two children could be
a corner
table.
Each child is provided with a work space and drawers
for storing school supplies. Tabletop width – 600 mm, thickness – from 16 mm.
Stages of work
Step 1.
Cut
the
material or order it from a carpentry workshop.
Step 2.
We collect all
the boxes.
There should be 6 large ones (3 pieces for each table base) and 4 small drawers for various small items under the tabletop itself.
holes for confirmations
using a Fostner drill. We nail hardboard to each box.
Note:
confirmations can be replaced with ordinary self-tapping screws, but their connection is not so reliable.
Step 3.
Using corner
clamps,
assemble the cabinet.
We fasten the guides
for the drawers with self-tapping screws.
Step 4.
We assemble the table.
the cabinet and the side
wall on top with small chipboard.
We cover part of the back
wall with a larger sheet.
We install guides and fronts on small drawers.
Step 5.
In the same way, we assemble
the second
table, which will be
longer
due to two cabinets.
Step 6.
We install the tabletop on
a short
table.
To do this, we screw it onto small
sheets.
Step 7
We attach the tabletop to
the second
table.
Step 8
We install
the fronts
on large drawers and attach handles to them
.
We nail hardboard.
To make the child comfortable
When working at a new desk, you should
consider
the following:
- The width
of the table for a child should be from 60 to 80 cm, length from 120 cm. - Boys need more
work space than girls.
It is recommended to organize the student’s
workplace near the window.- Be sure to install a table lamp
with bright
lighting.
For right-handers, the light should fall from the left, for left-handers - from the right. - The chair should be comfortable, its back should be
rigid and curved.
A good solution is orthopedic
chair. - screen
should be
below
eye level at an angle of 15-30 degrees.
- The color scheme
of the workplace should be selected based on the child’s wishes, but you should not make it too colorful and full of poisonous colors.
A tacky table can distract
a child from doing homework. It is enough to choose bright accessories and furniture. - Accessories should be chosen a creative
form: and the children's table should have its own zest.
Business minimalism is
not the best option for a child.
How to make a table for a schoolchild with your own hands, watch the video:
How to make a children's table so that it can be both an original desk for the child and at the same time a playhouse for toys. In this article we will tell you how to do all this in one day.
Many parents prefer to buy a ready-made table for their child and not bother. But there are also those who simply cannot afford it. Or they like to do everything with their own hands and to the required dimensions of their interior. The advantage of this table is its versatility. This is a desk, a playhouse, and a place to store toys.
In order to make a wooden desk, you need to purchase material, a sheet of furniture chipboard, of a suitable color. Or you can construct it from leftover material from previous creations, or from unnecessary furniture. This is exactly the economical option that will be described in this article, and besides this, you can read what else you can do
Required tools and material
— Electric jigsaw (hand-held circular saw) — Hacksaw for metal — Hand-held milling machine (can be replaced with a pen drill for wood of the required diameter) — Drill — Angle with ruler — Utility knife — Tape measure — Pencil
Material - chipboard - fibreboard - Self-adhesive film of a suitable color - End tape on chipboard, corresponding color - Self-tapping screws or furniture screws, nails
Accessories – Piano hinge 1 pc., – Furniture hinge 4 pcs.,
conclusions
In this simple way, after practicing on a chair, you can make a whole set of things for a dollhouse. To do this, you need inexpensive and readily available tools, such as cardboard, paper, scissors and glue. There are many proven simple schemes using the origam technique.
And such products will also be useful for adults as exclusive elements for the interior. You can use more expensive and beautiful paper to make small crafts. So, unique miniatures look beautiful. For example, it could be a table and two chairs. You can place small dishes on them.
We hope this article was useful and will help you make a lot of interesting miniature things.
Children's games require a lot. In this case, you cannot do without it, which may require a lot. If the furniture in the toys does not fit in size, you can make it yourself. In particular, our master class offers a step-by-step process for making a paper chair.
To work you will need:
- square sheet of paper;
- scissors;
- scotch.
The final dimensions of the chair will depend on the size of the sheet.
Stages of making a paper chair:
Fold the square in half. After this, the edges need to be folded towards the resulting midline. As a result, we got two more folds. The square sheet is divided into four parts, one of which needs to be cut off. We do this with scissors. Fold the resulting workpiece in half. We bend its right edge and form a triangular fold in the upper part. You also need to do the same with the left edge. We bend the right edge of our future chair towards the center. We do the same with the left edge. These will be the sides of the future high chair. We slightly unfold the edges and bend the central part upward. This is the seat of our chair. We give our blank the shape of a chair. Now all that remains is to secure the seat. To do this you will need scissors and transparent tape. We fix the seat from below (on both sides) with small strips of tape. Our paper chair is ready.
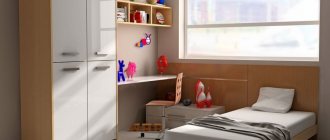
Hello friends! Our cardboard workshop received an order to design and manufacture comfortable and durable school furniture for dolls from cardboard. It was necessary to make a school board, a desk and a teacher's table with a chair. Moreover, the furniture was intended for playing with dolls 30-40 cm tall.
The play furniture turned out to be quite large (for a doll size). For a more visual understanding, here are the general sizes of items from our set:
— school board: width — 31.8 cm
, height -
35 cm
, width of racks -
16 cm
;
– table (length×width×height): 30×17×20 cm
;
– chair: seat – 10×10 cm
, height -
21 cm
;
— desk: length — 31 cm
, width -
30 cm
, height - about
20 cm
, bench -
10x30 cm
.
This is what a school desk looks like:
And here you can take a closer look at the chair.
Our model doll is very comfortable both at the table and at the desk. 
Thanks to the use of several layers of cardboard, the furniture is actually durable enough for long-term use. No worse than plywood. And the undoubted advantage is that it is much easier to make furniture from cardboard with your own hands. I will now show you exactly how and tell you in detail.
Master class No. 2
DIY furniture for dolls made of cardboard is a great find for needlewomen. In this master class we will not provide clear instructions: the bed on display is so simple to make that even a child can handle its making. So, take a close look at the template and off you go: creating a beautiful doll crib! Important: The dimensions of the bed are set independently based on the parameters of the toy for which it is planned.
Master class: how to make doll school furniture from cardboard
Materials and tools:
— sheets of A4 size office paper (for printing templates); — packaging corrugated cardboard (3 mm thick); - standard (stationery) knife; — creasing tool; - metal ruler; - scissors; - double sided tape; - Moment Crystal glue, toothpick; - hot glue gun (optional).
As you can see, the materials needed to make doll furniture from cardboard are more than affordable. Getting packaging corrugated cardboard is now not at all a problem: you can find something at home in the pantry or on the mezzanine, huge quantities of used boxes are recycled in furniture and grocery stores - and there you can quite get the necessary amount of cardboard, and for free.
You can also inexpensively buy corrugated cardboard sheets individually at craft stores, packaging stores, or directly at a cardboard factory (if you have one nearby). In this case, I recommend choosing three-layer corrugated cardboard brand T-24
- it's denser. But in principle, softer cardboard of the T-23 brand is also suitable.
The process of making furniture for dolls, like all our cardboard toys, begins with preparing templates.
Generally speaking, having familiarized yourself with the technology itself, you can, if you wish, design doll furniture according to your dimensions.
Or you can use ready-made templates, carefully calculated and tested in practice. A set of templates for making doll furniture “Playing at School” can be ordered from.
PREPARATION OF TEMPLATES
So, if you took advantage of our offer, print the templates on sheets of A4 office paper.
Cut out small templates (which fit entirely on an A4 sheet) with small allowances.
Glue large templates according to the composition diagrams (see example). And also cut with small allowances.
Place pieces of double-sided tape on the back of the templates. Then each template must be attached to the back
side of the corrugated cardboard.
Note:
The templates have a special round icon indicating the recommended direction of the waves of the corrugated layer. That is, the lines inside this icon should be approximately parallel to the lines that are visible on the wrong side of the cardboard.
It is not necessary to follow this direction exactly. Sometimes you have to adjust to the size of an existing piece of cardboard.
Just keep in mind that a cut made transverse to the direction of the waves of the corrugated layer will be stronger and more rigid. And, conversely, a cut made along the waves wrinkles easily.
Therefore, you need to try to ensure that, if possible, all the edges of the parts are exactly across the waves. In addition, they will look more aesthetically pleasing.
Well, now you can proceed directly to making doll furniture with your own hands. Let's start by making a chair and a table.
TEACHER CHAIR FOR DOLLS
Using a standard (stationery) knife, we cut out the parts of the chair S-4.1
,
S-4.2
,
S-4.3
and
S-4.4
. Long straight lines are cut using a ruler, short and curved sections are cut by hand.
On detail S-4.1
Use the tip of a knife to mark the fold lines (before cutting out the part). Having cut out the part, we crease it. A creasing stick used in scrapbooking is suitable for this operation. You can also score with the end of a flat-head screwdriver or scissors (you just need to act carefully so as not to tear the cardboard: the tool must be tilted as close to the surface of the cardboard as possible).
Carefully bend part C-4.1
.
Cutting out parts C-5.1
,
S-5.2
,
S-6
. There is no need to score anything here. And we will make the folds on the parts in the following way: along the blue lines on the template, we will make cuts to approximately half the thickness of the cardboard (be careful not to cut through), and then separate 2 layers of cardboard in the areas between the cut lines.
To make the layers easier to separate, first bend the piece outward along the score lines. In the end it should look like this.
The chair parts are ready. Let's start assembling.
Glue the part C-5.2
inside part
C-5.1
with Moment Crystal glue. It is enough to apply glue along the edges and around the holes. To prevent excess from leaking out, spread the glue with a toothpick into a thin layer.
Glue the second part of part C-5.1
- it turned out to be the seat of a chair.
Glue the halves of part C-6
(the back of the chair). At the same time, we apply glue to single-layer areas.
Place the glued parts under a press for a short time (for example, several books) for a reliable connection.
Notice how neat and precise the end of the seat turned out - this is due to the fact that in this area we separated 2 layers of cardboard.
Inside part C-4.1
First glue part
C-4.2
, then
C-4.3
and
C-4.4
with the right sides facing out.
Check: when bending the chair legs, the specified parts must fit together exactly at right angles.
When the chair legs are dry, glue them to the seat. Pour glue into the slots of the seat, and use a toothpick to lubricate the protrusions on the legs. We connect the parts as shown in the photo.
Glue the back of the chair. Here, in addition to the protrusion and slot, we also lubricate the back surface of the legs with glue.
We connect everything, press and hold until the glue sets.
The cardboard doll chair is ready.
TEACHER'S TABLE FOR DOLLS
Now let's figure out how to make a table for a doll.
Cut out parts C-1.1
and
S-1.2
: 2 pcs. with slots and 1 pc. - without slits.
Cut out 2 parts C-2
and tabletop parts
C-3.1
and
C-3.2
.
Glue the doll table supports using Moment Crystal glue: 1 piece C-1.1/C-1.2
without slot + 2 parts
C-1.1/C-1.2
with slots. In this case, the parts must be positioned so that on both sides of the support the cardboard is facing out.
We also glue the cross member.
And we glue the tabletop: first we glue part C-3.2 inside part C-3.1, then we bend and glue the free halves. Don't forget to apply glue to single-layer areas as well.
The table elements are ready. Assembling: glue the supports and crossbar, then glue the tabletop. For this operation, you can use a hot glue gun. It will be faster and stronger this way.
That's all. The doll table is ready!
Let's move on to the next piece of doll school furniture.
SCHOOL DESK FOR DOLLS
Using the templates, we cut out the parts of supports P-1.1
and
P-1.2
(2 pieces each),
P-2.1
and
P-2.2
(1 piece each),
P-3
(2×3 pieces).
To speed up the process, repeating parts can be cut in 2 layers
: Place 2 pieces of cardboard with right sides facing each other and secure the edges with pieces of masking tape. In this case, you will not need to print additional templates.
But cutting in 2 layers requires more effort. Therefore, if this method turns out to be inconvenient, it is better to cut all the parts in 1 layer. It will be more careful.
Cutting out the details of the bench P-5.1
and
P-5.2
,
P-6.1
and
P-6.2
. Don’t forget: we only make cuts along the blue lines, then separate the 2 layers of cardboard between them.
We cut out the details of the crossbars for the desk P-7
and
P-8
- 3 pcs.
Using the P-8 template, you need to cut out 3 parts, slightly different in size (3 parallel lines are drawn along one long edge of the template). You can do this as follows:
- attach the template to the cardboard and use the point of a compass (or a sewing needle) to mark all the corners of the part along the outer contour;
- transfer the template to a free section of cardboard and mark the corners of the part with the point of a compass, but now using the middle of 3 parallel lines along one long edge;
- transfer the template again and mark the corners of the smallest part.
Mark with a pencil which part is which and where the top is, so you don’t get confused later when gluing. The differences in size are necessary so that the upper end of the crossbar is at an angle corresponding to the inclination of the desk top.
In addition, we cut out the details of the base of the desk P-9
(6 pcs.). The photo shows parts with rounded corners (although on the templates all corners are straight - for ease of cutting). If you wish, you can do this too. To do this, use nail scissors to round each corner of the part, first cutting off only the top layer of cardboard, then only the bottom.
The tabletop for the desk is made in the same way as for the teacher's desk.
Glue all the parts together as shown in the photo. The principle, I think, is already clear.
And let's start assembling. At this stage, you can use a hot glue gun. Or you can continue to use Moment Crystal glue.
We glue the parts of the bench together by inserting the tabs into the grooves.
We assemble the desk: first we glue the supports and crossbars, then we glue the tabletop.
Glue the desk to the base.
And glue the bench to the base.
The school desk for dolls is ready!
SCHOOL BOARD FOR DOLLS
The final element of our furniture set.
Cutting out parts D-1
(1×2 pcs.),
D-2.1
and
D-2.2
(2×2 pcs.).
If desired, here you can use the method of cutting 2 layers of cardboard (see description above).
Cutting out parts D-3
,
D-4
and
D-5
.
We glue the board itself: inside part D-3
glue parts
D-4
and
D-5
, as shown in the photo. Apply glue only to the edges and spread a thin layer with a toothpick.
We bend and glue the outer parts of the board.
Apply glue in the gap between the main part of the board and the shelf. Bend the shelf and press until the glue sets.
All that remains is to glue the board to the supports. And you're done!
Puppet school board in all its glory. :)
Let's admire the doll furniture in action a little more.
The school furniture for dolls turned out just like the real thing, durable and comfortable. And, most importantly, it is harmless - there are no sharp corners, no small parts that break off, and the material is environmentally friendly!
On the spacious shelf of the board (its width is 4 cm) you can put homemade visual aids, mini-books, pieces of chalk or a felt-tip pen.
You can attach a sheet of paper to the board and write problems on it, or you can glue a special film that imitates a blackboard, and then you can even write with crayons - in general, everything will be for real! And the children will be delighted!
If desired, cardboard doll furniture can be painted. It is better to use acrylic paints for this.
Although, in my opinion, it’s very stylish anyway.
Now you know how to make furniture for dolls from cardboard. And you can easily make the same one with your own hands for your children or for your group in kindergarten. And our templates will help you with this!
I wish you pleasant creativity and entertaining games with your children!
If you have any questions about making doll furniture, write them in the comments. I will be glad to clarify all points.
Yours Inna Pyshkina and the Kartonkino team.
The little owner of a dollhouse will definitely want to furnish it with beautiful furniture and will ask her parents to help her with this. The house must have a sofa, table, bed, chairs and other pieces of furniture. Of course you can buy them. But you can easily make it yourself, using a minimum of funds.
How to make furniture from clothespins
It is not necessary to use wooden ones; plastic clothespins are also used. They vary in size and color, but with wooden clothespins the furniture turns out more comfortable and beautiful.
To make a table or chair from clothespins, you need to separate them. Halves of clothespins are used, which are connected to each other. Connecting them in a circle
, make a tabletop, legs can also be made from halves of clothespins.
The beauty of this material is that you can easily shape the clothespin into the desired shape or cut off as much as necessary. Some people make their own theater on clothespins. Templates can be found online.
Making furniture for dolls is quite a fun process that can involve the whole family. Dad can do the crafting, gluing, twisting, and preparing for framing. Mom and daughter will be happy to paint furniture, decorate it, sew tablecloths, pillows and bedspreads. This is a wonderful family activity that will delight your little princess.
Attention, TODAY only!
Children's games require a lot. In this case, you cannot do without it, which may require a lot. If the furniture in the toys does not fit in size, you can make it yourself. In particular, our master class offers a step-by-step process for making a paper chair.
To work you will need:
- square sheet of paper;
- scissors;
- scotch.
The final dimensions of the chair will depend on the size of the sheet.
Stages of making a paper chair:
Fold the square in half. After this, the edges need to be folded towards the resulting midline. As a result, we got two more folds. The square sheet is divided into four parts, one of which needs to be cut off. We do this with scissors. Fold the resulting workpiece in half. We bend its right edge and form a triangular fold in the upper part. You also need to do the same with the left edge. We bend the right edge of our future chair towards the center. We do the same with the left edge. These will be the sides of the future high chair. We slightly unfold the edges and bend the central part upward. This is the seat of our chair. We give our blank the shape of a chair. Now all that remains is to secure the seat. To do this you will need scissors and transparent tape. We fix the seat from below (on both sides) with small strips of tape. Our paper chair is ready.
A small paper chair can be used as a decoration or toy in a homemade dollhouse. You can make this craft in 15–20 minutes.
To make it you only need a piece of paper or cardboard and a little patience.
Approximate Dimensions
Before you think about how to make a table for dolls yourself and from what material, you need to decide on the dimensions. You need to start from the height of the doll itself and the size of the house. The interior will look beautiful if all the furniture is approximately the same scale and style.
The easiest way to make all objects proportionally the same is to calculate the scale. You need to divide the average height of a person by the size of the doll. You will get a number by which you will subsequently need to divide all the real sizes of the furniture to get the doll sizes.
For example, the height of a doll is 20 cm. We divide the average height of a person 175 cm by 20 cm = 8.75. The actual dimensions of human furniture must be divided by this number to obtain the dimensions of doll furniture.
On average, dolls have a size from 7.5 to 15 cm. If the doll for which this or that piece of furniture is made fits these parameters, you can use the following sizes:
What should school furniture be like?
School desks and chairs must comply with ergonomic, pedagogical, sanitary and hygienic, artistic and architectural standards. All features are specified in GOST. Note that the criteria have not changed since Soviet times; they started talking about new ones only in the 2000s. Let's consider the basic modern requirements for furniture for students.
1. Taking into account the anthropometric data of the child. Furniture in the school must be made in accordance with the student’s body size, age and weight. The child should sit at a desk with a straight back. In this case, the legs are at right angles to the body, their feet reach the floor, and the arms and elbows rest freely on the surface. The distance between the knees and the tabletop (no more than 110 mm), between the back and the back of the seat is taken into account. Based on these points, the height of the table and chair is determined. Ideally, they should be adjustable in height, because children in the class have different heights and also grow in leaps and bounds. It is necessary to take into account that the distance from the eyes to the surface of the tabletop cannot be less than 30 cm.
2. Dimensional criteria for a school desk:
- working area depth (tabletop size) – from 60 to 80 cm;
- width – 120–130 cm;
- for the legs you need about 50 cm in depth and the same in width.
3. Light weight. Often, during the educational process, a child needs to rearrange or move furniture, so it should not be heavy or bulky.
4. Safety precautions. School furniture must meet safety standards. To do this, the corners of the desks are rounded, ABS plastic edges are used, pipes are used for the round profile frame and the mechanism that regulates the table supports on an uneven surface. The stability of the structure must be increased.
Environmentally friendly materials
School furniture is made from hard wood, plywood (thickness from 6 to 12 mm), laminated chipboard (emission class E1) or furniture board. It should not be made of plastic or glass. Under certain conditions, these materials can be dangerous and can easily burn or break.
The desk top must be varnished. The main requirement for it is colorless, anti-allergenic. It is important that the surface is not rough or, conversely, mirror-smooth (acceptable reflection coefficient from 35 to 50%), but at the same time retains its texture. Color options for furniture - yellow, light green, bluish-green, grayish-blue, light blue, greenish-yellow. Painting in dark colors, white, and electric blue is prohibited.
It is recommended to purchase desks whose base is assembled on a metal frame - from special profile pipes (25 * 25, thickness - 1.2), painted using powder coating technology. This coating method is high-quality and durable, there is protection against peeling and corrosion. The chair is made of bent-glued plywood 8 mm thick. The optimal angle of curvature in the backrest area allows the student to sit upright.
The seat of a school chair must be sanded, and its front edge is bent inward to avoid injury and also not to damage the student’s clothes. Soft parts on the seat are allowed - chairs are upholstered exclusively in fabric or vinyl leather.
Furniture for dolls made from matchboxes
This is just a godsend for creating a dollhouse environment. You can create a huge number of pieces of furniture from them:
An excellent material for making a doll set is cardboard. It is very easy to cut and is glued with regular PVA or hot glue. From an old cardboard box you can make all the furniture in the house. The only drawback of cardboard
- this is that without decoration and finishing on top with some kind of material, it does not look very beautiful.
Corrugated packaging cardboard will not last long, as it wrinkles quite quickly and loses its shape. It is better to use cardboard for scrapbooking or just thick cardboard.
Gluing a bed out of cardboard is quite simple. You need to cut the bed walls to the required size and connect them with glue. The back can be decorated with wrapping paper or decorated using decoupage technique.
You can make a bed without glue. The walls will be fixed using grooves cut in the walls.
Making doll furniture from color schemes
In the old days, paper cutting houses could be purchased at almost any bookstore. Follow the instructions and use scissors and glue to create a charming dollhouse or palace with furniture.
Knowing the basics of working with any graphic editors and the principles of constructing such diagrams, you can easily make similar blanks. If making a whole palace for a doll is not part of your plans, it wouldn’t be a bad idea to create a wardrobe, chair or bed and, after printing them, make vintage furniture for your favorite. Needless to say, only laser printing is suitable for this method, since inkjet printing, although more colorful, can float or simply fade over time when it comes into contact with water.
As for the choice of glue for this furniture, it is best to use double-sided tape or it is also acceptable to use a glue gun, but very carefully.
Making furniture from paper
If it is not possible to buy ready-made doll furniture, you can make it from paper. How to make a chair out of paper so that it is strong and does not immediately wrinkle? Roll the paper into tubes! Craftsmen have long been weaving anything from newspaper tubes. Sets for dolls will be no exception. Weaving patterns can be found on the Internet
. Such items will decorate the house and look very cozy. In addition, they will be quite durable if painted or coated with several layers of varnish.
To make paper furniture you will need:
You need to roll thin tubes out of paper. This can be done using a knitting needle. They should dry well. Then the tubes need to be glued lengthwise using glue. It is better to use a hot gun, so the connection will be stronger and the paper will not get wet.
In this way, small blocks (walls) are glued together, which are then connected to each other. They are easy to cut into the desired pieces. For better fastening, you can use wire or thread.
Then shelves and doors are made in the same way.
. The doors need to be secured with tape or wire.
The legs and arms are made from the same tubes, rolled into a roll. The edge needs to be glued with hot glue.
What should a school desk look like now?
Over the years of development, standards have been formed that almost all manufacturers adhere to. They need to be taken into account if you are choosing a desk for school or for studying at home.
Height . The desk should be of such a height that the student’s arms, bent at the elbow, create an angle of approximately 90 degrees, and the shoulders do not lift up.
Material . There are desks made of natural wood and modern models made of plastic. It is important that the material is environmentally friendly, without toxic fumes and has a quality certificate.
Weight . It is important to take into account the child’s strength so that he can move the desk independently if necessary. This is considered an appropriate weight.
Fastenings . All parts must be secured and the mechanisms fixed so that during the work nothing breaks, falls off or injures the student. Sharp corners are excluded. Low quality fittings and tools are unacceptable. There should be no additional protrusions in the desk that a child could catch on while walking or running past.
Tabletop tilt angle . A prerequisite for preserving the child’s vision and healthy back is adjusting the angle. This is especially important for elementary school students. The desk plays a role in the formation of posture, so it is advisable that the tilt of the tabletop be adjusted within 5-30º. It’s good when, depending on the type of activity, the child himself adjusts the angle of inclination that is convenient for himself. For a high school student, a constant, flat surface is sufficient.
Table top surface . No varnish or gloss is allowed. Shine and glare create additional strain on the eyes. Neutral desk colors are encouraged so as not to irritate or distract the student.
Plywood doll products
A doll's wardrobe for clothes can also be made from plywood. He will serve his owner for a very long time. You can connect the walls and shelves together with hot glue or PVA. A hanger bar can be made from a wooden skewer or a Chinese stick. Hangers are made from straightened paper clips.
The bed, table and chairs can also be made from this durable material. Some craftsmen even carve beautiful patterns on such furniture, imitating carved furniture. It looks very nice. The plywood needs to be painted or covered with fabric.
It is better to stuff the sofa with cotton wool or foam rubber so that it takes shape, and then cover it with fabric.
The table can be made as square
, and round using a jigsaw. The legs will be wooden skewers or sticks. Chairs are made using the same principle.
Cardboard box furniture
From one TV box you can make all the furniture in the house. To create it you will need:
- The box itself.
- Double sided tape.
- Scissors.
- Regular wide tape.
- Glue gun or PVA glue.
- Materials for decoration.
All furniture must be cut out, cut into the necessary parts and glued together.
Next begins the most interesting process - finishing. Cardboard can be painted, covered with wallpaper or paper . On the front of the cabinet
or dressing table, you should glue a piece of foil, imitating a mirror. You need to put a tablecloth on the table, and pillows on the sofa - this will add coziness.
Be sure to involve the child himself in the decorating process. This is a great opportunity to feel like an interior designer and show creative thinking. Anything can be used: small stones, shells, beads, rhinestones, stickers.
After finishing the design work, the arrangement of furniture in the house and filling it with details (vases, figurines) begins.
Of course, you need dishes in the kitchen. It can be cut out of cardboard, wood or molded from plasticine. How to make a bottle for dolls is a more complicated question. Here you can use bottles of drops for the eyes or nose, or ran out of perfume samples.
Cabinet made of wooden rulers
Another way to quickly create a doll closet. To make one cabinet you will need approximately six rulers. You will also need a jigsaw and PVA glue for the job.
.
Cut and sand the rulers to prevent splinters. Everything was glued with PVA glue. After the product has completely dried, it can be painted. For a beautiful, even color, you need to cover the cabinet first with a layer of white paint, and then with the desired color.
In the same way, you can make tables, chairs, bedside tables and other furniture for dolls.