What people don’t do to rationally use living space.
However, there is a simple way to achieve this goal - to make shelves on the wall of any configuration. Simple but compact designs have served their owners for the benefit of their owners for centuries. They fit wonderfully into the modern interior of the room. The shelves are convenient for storing a variety of things so that they can be easily accessed. In addition, they are a stylish decoration for residential and office apartments. On this topic:
How to make the work of a summer resident easier: a miracle shovel with your own hands,...
Aug 15, 2020
A note to poultry farmers - how to make a drinking bowl for chickens...
Aug 1, 2020
How to make a tree of happiness with your own hands - general...
Jun 2, 2020
DIY polycarbonate gazebo, photo
May 14, 2020
BACK FORWARD 1 of 42
Zoning
Designers do not advise giving in to fashion trends and copying design ideas without taking into account dimensions, location and other nuances. Before planning and arranging furniture, every detail is thought through. There are several simple rules that experts advise you to follow:
- Let the room have natural light. To do this, remove excess walls (except for load-bearing ones).
- If the rooms in the apartment are small (12 sq. m or 16 sq. m), the layout of the kitchen combined with the dining room will be the right solution.
- If the ventilation system is not designed correctly, the smell of food will spread throughout the apartment.
How to make a hanging shelf on ropes?
For rooms, including youth rooms, the ideal option would be to make hanging shelves from improvised materials. A rather interesting and unusual option is to make shelves on ropes.
These are so-called suspended or hanging shelves that can be attached to the ceiling or wall. The base is the same as for standard shelves - it is an ordinary board. Moreover, it is not necessary to purchase some kind of high-quality timber or polished board; even a piece from an old door will do. But you will have to modify it a little.
Shelves on ropes
Instructions for making a hanging shelf on ropes:
- First you need to figure out the size of the shelf and the number of tiers. It can be made as a small single-tier shelf, which will resemble a children's swing in its structure, or consisting of several shelves.
- For such purposes, boards of the same size or one large board are selected, which is cut into several parts.
- Using a sander, it is advisable to remove a small amount of the rough surface and make it smoother.
- Next, the board is covered with a layer of paint, and then with wax or matte varnish. All these materials can be purchased at any hardware store.
- Next, using a regular drill, four holes are drilled in each board in the area of the corners. Now you need to pass the rope through these holes. This is an ordinary decorative rope, which is made of jute using triple weaving. You can also purchase them at any hardware store; these ropes are sold by the meter.
- For a small hanging shelf that you do not intend to heavily load, a rope with a diameter of 8 mm is suitable. If you want to add some roughness, you can purchase a thicker rope, with a diameter of 2 cm.
- In this case, the holes must be installed with a larger diameter. It is necessary to pass a rope through the holes in the board and tie knots in order for the shelf to hold.
- Knots are also tied at the ends and attached to hooks or brackets. In advance, using a drill, holes are drilled in the wall into which hooks are screwed. Shelves are then hung on them. Below are several unusual, varied options for making shelves using boards and ropes.
Shelves on ropes
Manufacturing instructions
Shelf on ropes
Stylish interior
Partitions
The interior of the kitchen and living room begins to be thought out from the junction of two zones. Here are some of the methods and objects that delimit the space: installing a bar counter; a kitchen island; a large table; installing a low partition. Designers advise installing a wide counter, since you can sit at it like at a regular table, and high chairs are quite suitable for the whole family. However, in small rooms (16 sq m), narrow counters are installed. Kitchen islands are convenient to use, but are only suitable for large kitchen-dining rooms (25 sq m or 30 sq m). Capital low partitions are installed only if it has been decided in advance what they will be used for (for example, as a TV stand).
Wooden shelves
For a homemade shelf, the best material is wood. Such a product will be environmentally friendly, strong, safe and stylish. If desired, it can be painted in various colors.
In addition, it is easiest to work with wood. Softwoods that are pliable and inexpensive are best.
Before you begin assembly, you need to prepare the boards. To do this, sand each workpiece and coat it with stain or a special solution. If you plan to paint the shelf, treat the workpiece with an antiseptic primer. This way the paint will lie smoother and the product will become even stronger.
Before you start making a shelf, decide on its location in the room and take measurements. After this, you can buy boards or take materials stored at home and saw them.
Furniture items
A few examples of furnishing a kitchen combined with a living room:
- 1. Sofa. It becomes an object that zones space. The sofa is placed with its back facing the place where food is prepared. In small rooms (less than 20 sq m) a corner is placed, which is placed against a wall installed perpendicular or parallel to the kitchen.
- 2. Set. According to designers, minimalist models without elaborate details look modern. The service, vases or glasses are placed on an open shelf. You can buy a fashionable display case for them. Furniture is placed near the wall. If the space is large (20 sq. m, 25 sq. m or 30 sq. m), then in the central part you can install an island, which also has sections for kitchen appliances.
- 3. Furniture set. The style should be combined with the design of both rooms. In small rooms, a compact table and chairs made of transparent material or painted in light colors look good. You can add a table with a round top to your living room interior. In spacious rooms, the kit is installed near the wall or in the central part. An elongated rectangular dining table would look good here.
Read here: How to make a folding table - 120 photo ideas on how to make a compact table with your own hands
DIY wall shelves: advice from an experienced craftsman
Before you start creating a useful structure for your home, it is advisable to think about secure fastening. The safety of household members and the safety of valuable things for which the shelf is being prepared depends on it.
There are different types of fasteners for wall structures:
- regular loops;
- decorative brackets;
- for glass options - the so-called “pelican”.
For example, hinges are most often used for wooden shelves. First, they are attached to the wall with self-tapping screws. Then holes are made into which dowels with a small head are screwed. It is on them that the homemade structure is hung.
To create regular and thick shelves on the wall you will need:
- boards (maximum thickness 20 mm, width - 180 cm);
- self-tapping screws;
- fastening devices;
- dowels;
- screwdriver;
- wood hacksaw;
- level;
- pencil for marking;
- sandpaper.
When the tools and material are prepared, they begin to create a useful structure.
For shelves, it is best to use pine wood, plywood, laminate, chipboard or MDF.
Marking and preparing material
Most often, the dimensions of a hanging wall shelf created by yourself are chosen in random order. In this case, the future method of use, the square footage of the room and the location of the structure are taken into account. If the edges of the top and bottom panels are connected to the side parts of the structure, then when calculating the height, allowances are made for this.
When marking corner options, it is better to use suitable boards. Their edges should be oblique. Thanks to this, the connection will fit harmoniously into the outer or inner corner of the wall.
A huge help when creating plywood shelves with your own hands are drawings made by experienced craftsmen.
Before proceeding with the installation of the structure, experienced craftsmen sand the wooden surfaces with sandpaper.
The finished elements are coated with a protective substance:
- stain;
- primer;
- varnish;
- paint.
On this topic:
Homemade mousetraps from a plastic bottle - two...
DIY refrigerator incubator: two simple models...
How to improve a summer cottage with your own hands (photo)
Do-it-yourself beds made from plastic panels are easy to...
BACK FORWARD 1 of 41
However, you always need to take into account the interior of the room, the color scheme of decorative items and furniture.
To reliably connect the ends, they are lubricated with special glue. Then the elements are connected using clamps or self-tapping screws so that they dry completely.
Creating a secure place for print publications
As an example, let's look at how to make a shelf for books on a wooden wall with your own hands.
First, the craftsmen prepare a set of tools:
- hacksaw;
- electric drill;
- level;
- ruler;
- pencil;
- stain;
- varnish;
- grinder;
- fasteners.
The next step on the way to the goal is a well-written sketch of the future design. It should indicate the expected dimensions and configuration of the shelf. Next, boards are installed on the desktop, on which the appropriate markings are applied. After this, they are sawn, polished and treated with protective agents.
In a similar way, you can make a shelf for a computer on a wooden wall with your own hands.
To assemble the structure, you must perform the following operations:
- markings are made on the prepared boards;
- drill the joints of the parts;
- assemble the structure using self-tapping screws;
- brackets are attached to the side ends;
- prepare mounting points in the wall;
- install the structure in a permanent place.
A wooden book shelf can last for several decades without losing its original appearance. Often such structures are decorated with vases of fresh flowers, figurines, souvenirs or family photographs.
Multi-level floor
To zone the space, craftsmen install floors at different levels. They advise installing a podium to separate the kitchen and dining room. This option is considered one of the most practical because, among other things, the owners have additional free space where they can hide something. It is convenient to use boxes or drawers for this. Wicker baskets will look good. But such space can remain free.
For podiums, reliable materials are selected that can withstand heavy loads. Usually builders make wooden or metal podiums.
However, such a design should not be made if there are small children in the family, since the podium can become an obstacle for him. In addition, various floor coverings can be used. They will zone the space between the living room and the kitchen and protect the podium from damage. For example, tiles are laid in the kitchen area, and laminate flooring in the dining room. The main thing is to choose colors and textures and combine the finishes correctly.
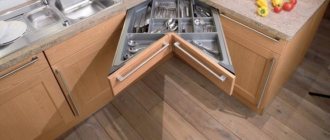
Corner wooden shelf
At home, you can also make a corner shelf, with very different heights and with a different number of levels. Let's look at how to make a wooden corner shelf from 20*50 mm slats.
First of all, select the most even, smooth slats. Parts with a lot of knots will not work. Two frames are made from them, each measuring 40*70 cm. You will need to prepare 4 parts 70 cm long and 6 parts 30 cm long. Glue them together securely, clamping them with clamps.
Now let's start making the shelves themselves. They can be made in sets by connecting several slats and cutting out parts of the desired shape from them. You can take a regular sheet of plywood, laminated chipboard, or a flat piece of old furniture.
Screw the shelves to the frames and cover them with several layers of varnish as described above.
Fasten the loops. A set of 2 hinges is suitable for a corner shelf. Hang the shelf in its place and check the result of the work.
Loft
This year the style remains in demand. It is often used to equip kitchens combined with a living room. This combination gives more free space, which will only emphasize all the details of the loft.
Today, such a definition as “classic style” is used less and less by designers. Loft - any interior design in which various technical elements are not hidden, but emphasized.
For example, stylists play with brickwork, wires or concrete walls. The photographs clearly show how successful it can look like a living room that is combined with a kitchen. For loft, rough and heterogeneous surfaces and rough materials are selected. In apartments decorated in this style, wall lamps are installed. In this case, the light is directed along the walls. Due to this, shadows fall so that uneven surfaces look three-dimensional. At first, loft was viewed with caution, but it quickly became popular. Designers do not hide finishing materials and even fake them. To imitate a concrete surface and smudges, decorative plaster is used.
Choosing a shelf type
Before you start making a shelf on the wall, selecting materials and tools, it is advisable to decide on the type of future product. It depends on the characteristics of a particular room, as well as on your taste preferences. We will give the following options as examples:
- classic straight products, which can have almost any configuration, consist of one or several shelves at once;
- suspended structures. Unlike classic ones, they are not simply hung on special hooks or nails, but are attached to vertical posts, cables or even chains - it all depends solely on your imagination;
- corner products, which, as their name suggests, are conveniently placed at the junction of wall structures;
- closed shelves on the wall, which are equipped with either transparent or solid doors made of glass, wood, plastic and other materials.
Provence
The name of this destination comes from a region in the south of France. Even a small kitchen-living room, the decor of which was inspired by French aesthetics, will be filled with warmth and comfort.
The main thing is that it has a lot of daylight, textiles with romantic prints, and floral patterns. The dining room in the Provence style is designed in pastel shades. Furniture items can be vintage or artificially aged. Plain walls will contrast with large checkered curtains. The door in the kitchen area set is sometimes replaced with curtains made from the same material as the tablecloth. A good addition would be vases and figurines, clay pots, forged metal parts and ribbons.
Placement of shelves depending on the room
This is an important point for the owner, since the arrangement of a wall product in a particular room of the home will be slightly different. Let's briefly look at a few options:
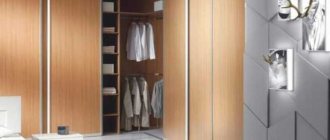
- Living room. The most interesting option from the point of view of freedom for imagination. You can use one large or a number of small shelves. It can be above the TV to place cassettes or discs, or it can be above the sofa just for a vase. A corner version of the shelf somewhere closer to the window is conducive to placing flowers and flowerpots on it. Wood and glass materials are often used for these purposes. The mount can be either elaborate, suspended, or simple, traditional.
Advice. A win-win option is to place a wall shelf in the center of the room for a frame with memorable photographs. Sometimes this seems like a better solution than just hanging them on the wall.
- Bedroom, study. These two different rooms are united by their love of bookshelves. If in the first case you need a good book just for relaxation, then in the second case there is often specialized literature. One way or another, shelves are a must.
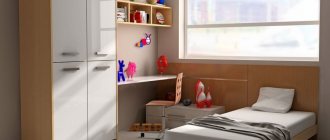
- Children's room. Here it is recommended to use hard materials (preferably natural wood with smooth corners), since children may well test its strength. It is advisable to use bright colors that match the purpose of the room.
For a children's room, the best option would be brightly colored shelves made from environmentally friendly material.
- Kitchen. In this room, it is necessary to be aware that the product will be exposed to an aggressive environment: temperature changes, various gases, fumes, etc. Therefore, it is recommended to use stainless steel as a material for making decorative shelves.
- Bathroom. The classic option is a shelf made of glass and stainless steel. However, in order to save money, modern houses also use plastic products. At the same time, a relatively modest bathroom can be equipped with not one, but several shelves at once. For example, a small one near the mirror above the washbasin and a corner one near the bathtub are already of substantial size. This arrangement allows you to place everything you need on them. If there are a lot more things, you can additionally arrange a locker.
Color combinations
Stylists advise taking into account the following nuances:
- direction in the interior;
- combination of shades;
- illumination
It is much easier to choose a palette if the style for the kitchen and living room has already been selected. For example, neoclassicism and Provence have their own combinations. In a classic interior, designers combine pastel colors, pale colors, which are slightly diluted with dark shades. In French country houses you can often see soft blue, pink, and pistachio colors. Art Deco designers make up objects and finishing materials in black and white, sometimes beige and brown or silver and black. The main thing is to choose a shade for the walls. White will become universal, it will expand the space, and later you can paint them with any paint. However, in the cooking area, white ceases to look fresh. Beige or gray shades would be more practical. This background will highlight the other colors. In a monochrome interior, designers recommend gluing wallpaper in an unusual color or with a photo print.
Waterproof surfaces are easy to clean, so washable wallpaper is recommended. The colors of the furniture echo the details and accessories, be it cushions for the sofa, curtains or other items.
Stylistics of wall products
Each style has its own option, you might just get tired of listing them. Therefore, let’s look at a few of the most popular ones:
- Country. Characterized by a love of vintage, rustic aesthetics. The name refers to the style of small buildings in the American outback, where open shelves made of wood are popular. Forged edging is also welcome. As a rule, wall products are used for practical purposes.
- Provence. These styles have undeniable similarities due to the provincial origin of the latter, however, a number of characteristic features still distinguish Provence from country. For example, if in country they prefer to paint wooden shelves or cover them with dark varnish, then the hallmark of Provence is considered to be the deliberate “aging” of the material until white threads appear. And also decorate the shelves with snow-white textiles. Shelves can be used both for purely decorative purposes - for placing trinkets and emphasizing style, and for practical ones - storing food in the kitchen.
- High tech. It is contrastingly different from the above-mentioned styles, since it uses a completely different material - decorative metal and glass. The minimalist design of the shelves attracts with its ultra-modern look and limitless range of shapes.
An indispensable product in human life, the wall shelf has become an integral part of the interior. Designers love to use it for aesthetic purposes, and owners love it for its practical properties. In addition, you can easily make it yourself.
Hanging wine rack made from pallets
From pallets you can make not only shelves for shoes, but also for the kitchen, for wine. This is an excellent decorative element that will serve as an organizer for storing bottles of wine and spices.
Instructions for making a hanging shelf:
- For this, not the entire pallet is used, but part of it. You need a side part with a bar at the bottom. Using a saw, you need to remove part of the pallet, leaving only something similar to the letter “G”.
- Thus, you will get a product made from boards, the bottom of which has a plank, and the front is closed with a board. Thus, inside you get a kind of recess or niche in which you can store spices and bottles of wine.
- In order for such products to look organic, they can be decorated. After removing unnecessary parts using a saw, you need to sand all surfaces and parts of the pallet with a grinder or sandpaper.
- After this, you can fire using a gas torch or soldering iron. This way the structure of the tree will be visible. Next, everything can be covered with varnish or stain.
- After this, the hanging shelf is secured using fasteners or hooks. Decorative rope can also serve as fasteners. The result will be a kind of mix of shelves on ropes, made from pallets. Below are several such options. Choose the one you like and try to bring it to life.
Wine shelf
Wine storage
Bottle organizer
Hanging shelves made of plastic bottles
You can make a shelf organizer with your own hands from plastic bottles. For this you will need plastic bottles with a volume of 5-6 liters.
Instructions for making a hanging shelf:
- It is necessary that the size of these bottles be the same. You need to remove the labels from the bottles in advance and use a utility knife to cut off the top so that the box remains.
- Now you need to make small holes along the edges, in the area of the corners. They will serve as fasteners for ropes. Now, using a glue gun, you need to connect several bottles together.
- The number of bottles is selected depending on the required shelf size. This will serve as a kind of organizer for the bathroom or nursery. You can put towels, cotton pads, and toothpaste and brushes in it. This is a great option if you have recently moved and do not yet have the funds to purchase normal furniture.
- When the glue dries, you need to insert a rope along the edges of the resulting structure. Using this rope, you need to hang the structure on the fasteners. It all depends on the design features of your bathroom.
- The gluing of parts is carried out using hot hot glue and a hot melt gun. In order for the blocks to dry well, you need to hold them for 10-15 seconds. Below are several interesting and unusual options for shelves made from plastic bottles.
- Using a similar principle, you can make a shoe rack. It is suitable if there are many children in the house, and therefore all the shoes do not fit on the floor in the hallway.
Shoe organizer
Shoe shelf
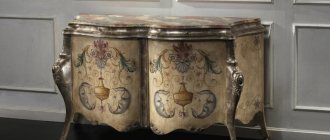
Hanging shelves from old boxes
The easiest way to make a shelf is from an old chest of drawers. The most interesting thing is that many designers find such things in landfills, since people really throw away a lot of old furniture. In fact, it can serve as an excellent basis for creating new items that will decorate your interior.
Instructions for making a hanging shelf:
- In order to make a hanging shelf from a box, you will need several boards and plywood, 2.5 cm thick. It must be glued with hot glue inside the box, forming partitions.
- Next, you need to start transforming the shelf. Be sure to unscrew the handles and sand any remaining holes. You can cover them up using regular wood putty.
- Remove the old paint using sandpaper and paint with the desired paint. There are several options for fastening such a shelf; these can be ropes that are threaded into holes that are drilled with a drill and hung on hooks and brackets.
- You can make invisible fasteners that are screwed onto the back wall of the shelf, and simply hung in the standard way using dowels or screws.
Decorating a children's room
Unusual decor
Old boxes