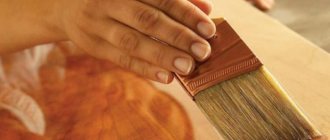
Concealed mounting guides.
They are considered to be mega cool. Of course, when you pull out the drawer, you can’t see them at all, and that’s crazy cool. This may seem like a very expensive solution. Not really. They cost a little more than regular ball guides. But if you order furniture with such a solution on the side, they will give you a price tag as if they were made of gold. By the way, they also come without pressing.
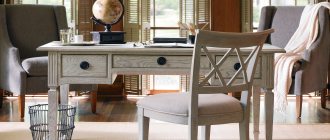
And if you have a kitchen or chest of drawers made of solid wood, then you can admire and admire this creation:
My mistakes when choosing hidden mounting guides:
You can find instructions for each guide, and there will also be an additive diagram. If it is not included, download it from the manufacturer's website. On normal, simple hidden-mounted guides, you don’t need to drill anything special:
And here's what I bought. They were just for a promotion, and I was a victim of the promotion. At first glance, everything is the same, but you need to drill a lot more, even at the very edge. So be careful, if you don't have a drill stand or drill press, you will get depressed when assembling these boxes.
Varieties and design
First of all, it is worth noting that there are several types of this fittings. They differ from each other in their sizes and methods of installation inside furniture. Moreover, each specific type may have its own separate purpose, not directly related to its name.
Pull-out panel 100 mm wide
Typically, the size of a bottle holder for the kitchen is chosen solely for the convenience of placing this device in the cabinet (see also the article on the size of kitchen cabinets).
However, some manufacturers pay special attention to it, suggesting that it will become not only auxiliary equipment for storing small utensils, but also the main storage for plates and other small utensils.
- Large boxes are usually made 200 mm wide. In this case, several shelves are located in the standard section. They are convenient for placing plates, cups, cutlery and a host of other kitchen items.
- Medium bottle holders are used for various boxes, jars, powders and other utensils. They have a lot of purposes and an optimal width of 150 mm. Moreover, this size can be considered the maximum when installing fittings using the side fastening method.
- The third most common bottle container width size is 100 mm. It is used in cases where it is necessary to save space in the volume of furniture. Moreover, its purpose justifies its name perfectly, since this device can only accommodate bottles, boxes of spices or small containers.
Advice! When choosing certain sizes, you must be guided by considerations of practicality and the possibility of placement in the wall. This will save space and get functional furniture.
Pull-out panel 200 mm wide
Side mount
This type of similar fittings uses a fastening that involves placing guides on the side panel inside the cabinet. In this case, it is best to use devices with a width of no more than 150 mm.
This allows you to place the maximum amount of necessary kitchen utensils and at the same time does not provide a lot of space to overload the load-bearing elements.
- First you need to choose a kitchen cabinet where the bottle holder will be placed. In some furniture models, a separate compartment is allocated for this, but if you make the set yourself, then you can use any box in which an additional partition is simply installed.
- After this, the guides are secured to the inner wall using fasteners that are included with the device. If they are not available, then you can use small self-tapping screws designed for working on wood no more than 1 cm long.
Standard installation instructions for installing retractable fittings with detailed indication of fastening elements and their fixation on the device
- Next, you need to install the bottle holder itself, as shown in the instructions for this model.
- After this, you need to attach a pre-prepared facade panel, which will serve as a kind of door.
- If desired, you can attach a small handle to the resulting door.
Advice! This bottle holder design is best used when saving space and installed in a ready-made box. At the same time, you should not overload it with various items, which may affect functionality.
Installation instructions for retractable fittings with side mounting on stationary guides
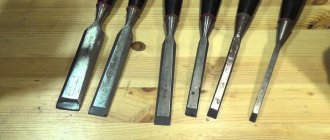
Ball guides.
Conventional ball guides, only with a built-in pressure opening system. Cheap and cheerful. But complete hemorrhoids with front adjustment - there is none. Those. it initially needs to be done smoothly the first time. Otherwise you will have to redo everything. So... before the installation, you are forbidden to drink and you need to take a sedative, especially if your patient has a whole kitchen.
Some advantages of telescopic guides
Sometimes problems arise with such structures during operation, but these are just minor drawbacks compared to the characteristic advantages of telescopic drawer guides. Among the main advantages of retractable systems:
- Increased reliability of boxes of this type compared to roller mechanical systems.
- Long service life of structures.
- The quality of metal parts made from alloys that are durable. This ensures that the guides will not “twist” under the weight of the box.
- Easy and quick drawer extension completely or to the desired depth, combined with reliable fixation of the device.
- This option is more accessible due to its low cost compared to its analogue - tandem box.
Knowing how to remove a drawer from the guides and how to easily mount it back, you will not have problems using telescopic structures. With simple instructions on hand, consisting of just a few steps, you can dismantle the box yourself and just as easily return it back.
Nowadays, so-called telescopic guides are often installed on furniture, even those you bought at IKEA. It seems like nothing, the design is really not bad, but sometimes it fails. Or in the kitchen, small objects may roll behind the drawers and they simply won’t close properly. In general, in both the first and second cases it is advisable to remove them, but how to do this is not entirely clear! Today I will try to describe this process as simply as possible...
Door solutions
Special stops are purchased and mounted on the cabinet rack. There are magnetic and regular ones. I didn’t notice much of a difference, you have to look, touch in the store and choose what you like. When I made the cabinet, I used magnetic ones, but in order not to drill a hole for the counter part, I bought special stickers. Very convenient, sold in hardware stores.
How to remove a drawer with telescopic slides from a nightstand
Oil painting. You come home and the drawer on your nightstand won’t close. Something behind the drawer has fallen from other drawers and this “something” is preventing your drawer from closing properly.
You are trying to somehow get this box and remove it from the nightstand altogether, but you can’t do anything. The drawer has some kind of retractable slats on the sides that extend only to a certain length, but are not completely removed. And this whole situation only causes you extreme indignation.
How to remove a drawer with telescopic guides from a bedside table?! I'll tell you! Or rather, I’ll even show you (there will be a corresponding video at the end of the article).
There may not be many options.
Option 1. If the drawer has telescopic guides (not on wheels)
These are these long metal things that go around the sides of your box. As a rule, one telescopic guide extends out of the other. And to disconnect the drawer guide from the one that holds it, you just need to find and switch the corresponding lever. As a rule, the lever (antennae) is perfectly visible provided that the drawer is fully extended. It is often located at the junction of the guides on one side and the other and, in fact, holds them together.
Lower the lever (antennae) with the screwdriver down and the guide will freely move out of the other guide along with the drawer.
Option 2. If the box has telescopic guides on wheels
Everything is quite simple here. You just lift the cover a little so that the wheels come off the rack and the drawer pulls out perfectly.
Option 3. If the box has exit telescopic guides, but at the same time there are no antennae or wheels
This is the option that was in my case. The drawer had a rail without wheels and without “antennae”. She was just holding the box somehow.
After closer examination, it turned out that the bar was simply screwed to the sides of the box. To disconnect it, you need to unscrew the screws on one side and the other. And then the box will have complete freedom!
Here's a visual video for you.
shkudun.com.ua
How to install ball guides on drawers with your own hands
So, we have come to the moment for which, in fact, you were looking for this article. It involves learning how to independently install ball guides on drawers for a cabinet or other piece of furniture. So let's get started.
Drawer on ball guides
Step No. 1 – make markings for fittings
So, first of all, you need to make markings for the fittings being installed. It is done using a pencil and a ruler, since we need to mark the axis passing strictly through the central part of the box.
First of all, we need to draw an axis under the guide
After this stage is completed, we move on to the next one.
Step No. 2 – Attach the component runner to the marked side of the drawers
So, we have drawn the axis along which the parts will be installed. Now you need to place a guide rail on it so that the front edge of this part is flush with the façade of the furniture segment being equipped. However, you need to carefully ensure that the part does not bulge forward, since in this situation it is quite possible that a gap will appear, which we do not need at all.
Pay attention to the runner. The regulating holes cut on it will help us place it correctly. They are small and oblong.
The required adjustment holes are needed in order to correctly secure the runner relative to the box
Using the discovered holes, we align our runner strictly along the marked axis. This is easy to do: just line up all the holes with a line so that it clearly runs through their center.
Then we insert a self-tapping screw into the hole located horizontally on our part. Now we can move the runner back and forth without changing the position of its segment.
Adjustment hole responsible for the direction of movement up and down on the back of the drawer
We secure the rear segment of our runner through the gap responsible for the movement of the box along the vertical axes. This will be necessary in order to subsequently be able to adjust the height of the box by following the next few simple steps.
- Using a screwdriver or screwdriver, remove the self-tapping screw from the front hole, which is responsible for the horizontal movement of the box.
- We will re-screw the same self-tapping screw, however, into the front hole, which is responsible for the movement of the box along the vertical axis.
Duplicate adjustment hole for the “up and down” direction, for the front segment of the cabinet part being equipped
Then we will get that the part will subsequently be attached to the box through two control holes located both in the front and in the back of the box, which are responsible for its movement along the “up and down” axis.
Step No. 3 - installing the guide directly to the side of the box
Now, in order for our device to work and the drawers to slide out, it is necessary to attach the second part of our guide system to the inside of the cabinet box, inside which the drawer is then installed.
The mounting hole, inside of which a self-tapping screw is placed, is of the most common type, round
Prices for cordless screwdrivers
Only here you need to take into account one important point: unlike the segment of the guide system that attaches to the side of our drawer, the part that goes into the box has much more adjustable holes. And in addition to the gaps through which the system can move along the axes of interest to us “up and down” and “forward and backward,” they also have other grooves of the horizontal and vertical type, into which screws also need to be screwed.
Mounting hole and adjustment grooves, the presence of which must be taken into account when installing this part of the guides
Attach the guide and adjust it, thus inserting screws as in the previous step into only two holes so that the box fits inside the correct box. Once you are sure that everything is installed and adjusted as intended, remove the boxes again and screw the screws into all the holes of the box parts.