Hearing the word “screen” usually brings to mind a doctor’s office, where we most often encounter this piece of furniture. But even at home, screens are becoming increasingly popular.
The screen is ideal for dividing a room into zones.
Once upon a time they almost disappeared from everyday life, but today modern designers use them to create unique interiors in a romantic and retro style. What does it take for a homemade fabric screen to please its owners for many years and add a touch of sophistication and charm to the interior of the room? We’ll talk about all the nuances of manufacturing and use further.
Using a Screen
A fabric screen, as an interior item, is quite a multifunctional item.
Its main task can be called dividing the space of the room into zones. It fits well into both large rooms and very small ones.
In a small area it is even more in demand, since there is no need to use bulky furniture (wardrobes, chests of drawers, etc.) to divide the room. And another advantage, of course, is its mobility.
Here are some of the most common examples for its use:
- using a screen you can fence off the sleeping area;
- or workplace;
- A screen as a dressing room is also quite common in interiors.
You can choose or make a screen to suit any taste. A beautiful portable partition will not only delimit space, but also transform the interior of your room, adding sophistication and romantic style to it. Simply put, a fabric screen is quite versatile and very convenient.
Return to contents
Advantages and disadvantages of using screens
If there is limited space in an apartment or a specific room, there is a need for its proper distribution. It is not always possible to make an additional wall in a room, because you will have to make changes to the layout of the apartment, which will entail additional expenses. That is why many people choose convenient screens that are quite easy to install and, if necessary, dismantle.
The main advantages of using screens:
- Mobility. Some types of structures can be transported from place to place without any problems.
- Low cost for self-production.
- The ability to increase the functionality of the product using additional shelves or hooks.
- Decorating the room, because the screen can be decorated in any way you wish.
- The ability to design a structure according to the exact dimensions of your room.
The disadvantages of screens include the following:
- poor sound insulation;
- unreliability of the fence.
Such designs have significantly fewer disadvantages. Moreover, they are not relevant for everyone.
Product Variations
The standard version of the screen usually involves the presence of 3 sashes, the width and height of which are the same. They are connected to each other like an accordion. Wooden frames and fabric are usually used as screen materials. But there are other options, it all depends on your preferences and tastes.
On sale you can also find non-standard options, for example, those in which the height of the middle sash is greater than that of the outer ones. Or the shape of the valves is not the usual rectangular shape, but resembles a trapezoid. The average height of finished screens ranges from 1.5 to 2 meters.
As for the frame material of ready-made screens available for sale, here you can find wooden, metal, and even plastic ones. Instead of fabric, paper, leather, bamboo, even lace can be used. Basically, the options are quite varied, both in appearance and in price.
But if you want the screen to fit perfectly into your already finished interior, then it is best to make it yourself. In this case, you definitely won’t worry about the wrong size, color and shape.
Return to contents
Types of portable screens
As a rule, a standard screen is 3-4 doors of the same height and width, connected to each other according to the “accordion” principle and covered mainly with fabric. There are also specimens in which the middle part is wider and higher, the side parts turn inward, and the top is shaped like a trapezoid. The height of the products ranges from 1.5 to 2 meters.
Screens, kindly offered by modern manufacturers, are made of a wide variety of materials. The frame base itself is most often made of wood or metal, less often of plastic. But the decoration can dazzle your eyes: paper, fabric, leather, lace, rattan - you can’t list everything.
DIY making
The most difficult thing in making a screen yourself is the frame (the base for future sashes). This is due to the fact that not everyone has the skills of professional carpenters. But the main thing in the design of the screen is the perfect match of all the doors in shape, size and their evenness, as well as the prevention of distortions.
Perhaps only specialists can cope with such a task. But do not despair, as there are other options in which it is not at all necessary to be a professional carpenter.
- In order not to complicate the work of making frames, you can simply purchase ready-made subframes. They are sold in any store intended for artists and creative people. The finished wooden subframes are of high quality and expertly crafted. That is why they are distinguished by their durability and are ideal for creating an original screen. The sizes of subframes are very varied, and you can easily choose the option you need;
- So, to get a screen of three sashes with a height of 1 m 80 cm, you will need stretchers measuring 50x60 in the amount of 9 pieces. They will need to be grouped in three for each of the doors.
But this is not the only option. So, if you choose larger stretcher frames (60x80), you can easily make a screen whose height will be 1 m 60 cm. Its doors will consist of two parts. Basically, you can choose the option that suits you.
Return to contents
Materials and tools
As noted above, in order for a DIY screen to please you with its ease of manufacture, you will need commercially available wooden subframes. We have already determined their number above. These are: either 6 or 9, but there may be 12 parts.
In addition, you will need:
- fabric (preferably dense) to fill the space of the stretchers. When you calculate the required yardage of fabric, pay attention to the fact that you will need approximately 3 cm for allowances around the entire perimeter. In addition to the fact that the selected fabric is selected in accordance with your taste and interior, it should also look good in light;
- braid, preferably wide, since with its help you will need to close the end parts of the stretchers. The length is calculated based on the total perimeter of all sashes;
- furniture stapler - will be used in the process of stretching fabric;
- hinges for connecting finished sashes to each other. These can be either piano or card loops;
- screws (with their help we will secure the hinges on the sashes);
- screwdriver;
- electric drill;
- nuts and bolts;
- glue - it will be used to attach the braid to the ends of the stretchers;
- paint - useful for painting the underside of the stretchers. you can use both oil and acrylic as per your choice.
In old merchant and aristocratic houses, with their enfilades of walk-through rooms, it was not always possible to find a secluded place for changing clothes, so a decorative screen was a mandatory element of furniture. It was forgotten for a long time and undeservedly, but it still returned to modern interiors. We offer you a simple step-by-step master class on how to make a folding accessory with your own hands. Why buy if you can make a screen of the required size from scrap materials.
SCREEN WITH SOFT LINING
1. Cut out the soft lining
A screen lined on both sides with a soft lining makes a very pleasant impression. The linings are cut out (again using a template) strictly according to the dimensions of the board. Cut out two pieces of fabric for upholstery with an allowance.
2. Attaching the soft pad
Place the board with its back side up on the table or floor, and on it - a soft lining cut to size. Check if it matches the shape of the board. If everything is in order, attach the lining around the perimeter with fabric glue, starting from the bottom edge of the board. In the same way, glue the lining to the front side of the board.
SOFT WASTE LINING
The soft lining can be made from scraps of non-woven material, such as polyester, left over from other projects.
To do this, you need to attach them to each other, sew them with a herringbone stitch and cut them in the same way as a solid piece.
3. Final operations Covering the boards with fabric over the lining, gluing their edges with decorative tape, attaching hinges and connecting the boards to each other is carried out in the same way as mentioned above.
Related link: Decorative screen (shoji) in Japanese style
How can you use a screen to your advantage at home?
A sliding partition can still be used to change clothes, especially if there are guests in the house and the bathroom is occupied. But overall it's a much more powerful thing because it can:
- zone the premises;
- create an intimate area for a breastfeeding mother;
- provide privacy for a family member preparing for an exam or simply wanting to relax;
- serve as a backdrop for a home photo shoot or the basis of a puppet theater;
- organize a fitting room for a fashion designer who sews houses to order.
The main advantage of the screen is its mobility. Place it here today, and there tomorrow, divide the room in a dozen ways. And when you no longer need it, put it in the pantry or on the balcony; the screen will take up almost no space.
Tools and materials for making screens
To make your own screen, you will need two main materials: frames and fabric stretched over them (silk, flock, taffeta). The frames can be made from wooden beams (not thick, preferably 3x3 cm, otherwise it will turn out to be rough), slats with a 6x2 section, and for those skilled in working with metal - from a profile pipe with a rectangular cross-section.
Decide how many sections you want to see in your screen and what size they will be. Keep in mind that narrow and low sections add mobility to the product. The frame should be drawn to scale and the required amount of timber (pipe) should be calculated.
When choosing fabric, you should take into account the functionality of the screen, that is, the material should be:
- dense and opaque;
- pleasant to the eye and touch;
- in harmony with the wallpaper and furnishings of the room.
One of the recommended options is curtain fabric, decorative on both sides. When calculating its quantity, be sure to take into account the hem allowances of 3-4 cm. These allowances should be folded twice so that there is no frayed edge left, and ironed.
Advice. If you know the batik technique - painting with paints on fabric - or want to try it, the screen will be an excellent opportunity to learn this exquisite art.
We will make a screen on a wooden frame, so the tools we will need are:
- hacksaw;
- screwdriver and screws;
- furniture corners;
- piano or door hinges;
- stapler for furniture;
- stain, varnish and brushes for them;
- square, scissors, pencil.
And so that the finished screen does not scratch expensive parquet, you should purchase thrust bearings for its legs.
Drawing, materials, tools
The manufacture of even such an elementary structure is impossible without its detailed diagram. Before this operation determine:
- the number of sashes for the future screen, the best option is three or four sashes: such a product will not be too large, but there will be no problems with its stability;
- dimensions, in this case the parameters depend only on the main location: for a child’s room you can limit yourself to a low partition, for other rooms (a suburban area) you need a higher and wider screen.
To create a timeless classic model you will need to purchase or prepare:
- wooden beam (20x60 mm) for the frame;
- dense, preferably opaque fabric, one or more colors;
- pattern paper (for example, wallpaper);
- small door hinges;
- furniture corners (corner brackets);
- paint and/or varnish, stain, brushes;
- sandpaper;
- wood glue (carpentry glue or PVA for wood);
- self-tapping screws;
- decorations - appliqués, ribbons, beads, etc.
The following tools will be needed:
- drill;
- chisel;
- pencil;
- ruler;
- hammer;
- hacksaw;
- furniture stapler;
- clamps;
- screwdriver
Rubber glue can be a substitute for a stapler, but in this case, fixing the sheets will take more time, since the composition will need time to set. Otherwise, the fabric will inevitably sag and become deformed.
The first step is to make the frame.
- On each part, lines are drawn on both sides, 60 mm from the edges. Having marked all the parts, make cuts with a depth equal to half the thickness of the slats (10 mm).
- They are engaged in connecting half a tree. Using a hammer and chisel, cuts are made: layers of wood are removed before cutting. These surfaces are lubricated with glue.
- All elements are fastened together, fixed in clamps, and the composition is waited for complete drying. Metal corner brackets are attached to the joints to strengthen the structure.
- The semi-finished product is carefully sanded, then coated with varnish (stain, paint) in several layers, each of which is left to dry. Door hinges are attached to the frames with self-tapping screws - two fasteners per connection.
Fabric and construction
Now they move on to sewing work, and then to connecting the sashes.
- Transfer the full-size drawing of the frame onto paper, but do not forget to add seam allowances. Leave about 50 mm for the hem. If material of different colors is chosen, the pieces are first sewn together and then cut. After production, the canvas is ironed.
- Finished fabric products are attached to frames using a stapler. First, the material is fixed at the top, then, with tension, at the bottom. The sides are secured last.
- After all structural elements have been designed, the frames are connected with door hinges, which are mounted on self-tapping screws.
READ MORE: Gazebo with barbecue 88 photo project for a summer house with a recreation area, brick construction, order and diagram, closed structure with glazing
Decorative screen - other ideas
The screen can be assembled from ready-made stretchers. Two or three subframes connected with self-tapping screws make one sash.
The fabric can be stretched by wrapping it around the frame, which eliminates the steps with stain and varnish, since the wood simply will not be visible. But in this case, the fabric allowances need to be increased to 10 or even 15 cm, depending on the width of the beam. And before attaching furniture hinges, you need to carefully make holes in the fabric with an awl, otherwise the self-tapping screw may pull the thread, and the material will be hopelessly damaged.
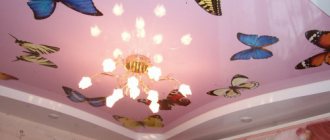
A screen intended for a nursery can be decorated with fairy tale characters by sewing or gluing them onto the fabric using the applique technique.
Instead of fabric, you can use thin plywood or cardboard, covering them with the remains of expensive wallpaper - in this case, everything will be perfectly smooth.
In ancient China, a screen was called a “moving wall.” Putting it on and putting it away is a matter of two minutes. Build yourself such an assistant, and the issue of zoning even a one-room apartment will no longer bother you.
Types of screens
Modern screens are divided into various types depending on the structure, materials used and purpose.
The original glossy screen serves as a decorative element.
And if the purpose of a screen can be very diverse and depends only on the imagination of its owner, then the most popular types by design are the following.
Until recently, this was the only possible type of screen. A rigid sash frame with fabric stretched over it (paper, glass inserted into the frame, etc.), the sash is connected to each other like an accordion.
A screen along the entire length of the room along the wall acts as a decorative element.
The fastening is made with furniture or piano hinges, in some cases with strong soft material (leather, thick fabric, artificial leather). Initially, the frame was made of wood, but later it was replaced with lighter aluminum.
Currently, the main material for folding screens is plastic.
- Single screen.
This is the main type of office screens. It is used when it is necessary to divide a large space into smaller, individual “offices”.
An unusual single-screen screen in a relaxation corner.
- Composite.
Recently, this type has become especially popular among those who like dramatic changes in their interior. This screen is assembled like a puzzle from several elements. The material is usually plastic, but a textile option is also possible.
In this case, you can choose the number of elements, the material for them and in what order they will go in yourself.
- Flexible.
This type of screen is the latest invention of designers. The structure does not consist of separate doors, but is a single wall made of flexible material.
The screen can be easily rolled up if necessary, can take fancy shapes and be used in various situations.
It can be bent at almost any angle, creating not only small zones in space, but even labyrinths. If necessary, the screen is folded and removed.
A new product in the world of partitions is a flexible screen.
If you are faced with the question of how to make a screen with your own hands, then you need to proceed from the design features. For example, it is not possible to make a flexible screen yourself, because it’s all about the material. Such a screen can be subjected to design changes or assembled independently.
DIY screen ideas
One of the most original decorative elements of any apartment is the screen. The first functional screens, which served to divide a home into functional zones, appeared in Ancient Japan. Today, screens are also used to divide the space of rooms, but their decorative role is also important. However, you don’t have to buy a beautiful screen. If you have an interesting design idea, all the necessary materials and tools. In this case, even without special skills, you can make a modern, stylish screen.
Sliding screen made of MDF boards
The easiest way to make a decorative sliding screen with your own hands is to simply fasten together ready-made MDF boards that already have decorative door hinges. In order to connect 2 fairly high doors, you will need 3 door hinges. Once the base of the screen is ready, you can start decorating it. Such a screen can suit any stylistic design of the room. To make the screen lighter, you can use plate doors as a basis. In order to give the screen functionality, you can attach wheels to it. You can make the screen original by covering it with stickers, painting it in your favorite color, decorating it with photographs, mirror elements, or covering it with a beautiful fabric. You can make such a screen for the bathroom with your own hands.
Screen for a room with a frame
A more complex and time-consuming process of making a screen with your own hands is a screen using a special frame. For such a screen you can use a wooden or metal frame. Since creating a metal frame at home is difficult due to the use of welding, it is better to make a wooden frame from bars connected to each other with wood glue. The finished wooden frame should be primed and painted.
After the paint has completely dried, you can begin decorating the doors. If you need a blank screen for a room, the doors can be made of thick cardboard. Cardboard doors can be painted in your favorite color or covered with decorative packaging paper. A screen, the doors of which will be decorated with floral paper, will let some rays of light through, and at the same time hide from prying eyes everything that is hidden behind the screen. For an eco-style room, a home-made screen, the doors of which are covered with natural materials such as bast or sisal, is perfect. However, fabric remains the most popular way to decorate screen doors. Absolutely any fabric is suitable for this purpose. It can be like satin, current and organza. You can attach the fabric to the sashes in different ways. You can alternate fabric of different textures and colors, gather the fabric into folds or pull it tightly, the fabric can be sewn to a screen or attached with decorative pins.
How to make a screen for a room with your own hands
The fact that a home-made screen-partition for a room will cost much less is beyond doubt, but, in addition, such a thing will have every chance of becoming a real decoration of the room. Making a simple screen is not difficult, and the exciting process of making it will bring you a lot of fun.
Designers and artists create amazing paintings on handmade screens
Tools and materials for manufacturing
A small antique screen will look appropriate in almost any room. Vintage decorative elements have long become an indispensable attribute of modern interiors: they create a nostalgic, warm atmosphere in the room. In addition, having separated yourself with a screen, it will be pleasant to sit in a chair reading a fascinating book.
Vintage-style partitions fill the room with a special charm of nostalgia
Before you make a screen with your own hands, make sure that you have all the necessary tools and materials. To make a small wooden screen-partition, consisting of three sections, you will need:
- wooden beam with a cross section of 40 x 40 mm - to make the frame you will need 6 bars about 2 m long and the same number of slightly shorter elements;
- a piece of fabric, preferably dense and light-proof - to fill the sections of the screen;
The process of creating a screen with your own hands can be very exciting.
- pages with text or poetry, cut out from books, newspapers, personal notebooks, diaries - for decorating the screen canvas. If you need any clippings in the future, you can simply make copies for work;
Decorating a partition using a stencil and white paint
- tea leaves solution - will be needed to give the sheets of paper an aged look. It is advisable to prepare a strong solution;
- scissors, paint brush, PVA glue, wood varnish;
- hammer, square, tape measure, screwdriver;
- nails, screws;
- construction stapler - for fixing fabric to frames;
- door canopies - you will need 4 small neat hinges to connect the screen sections;
- braid for decoration.
Connection diagram of the compartments of the folding partition frame
Helpful advice! To make screen-partition frames, you can use other materials, for example, bamboo rods, aluminum or plastic profiles.
The process of attaching paper to the screen frame
Ordinary and children's screen in oriental style
A bamboo screen is perfect for an oriental-style interior. In order to make such a screen with your own hands, you first need to make a frame from thick bamboo stems. The screen doors can be made from thin bamboo stems and connected with jute cord. You can make a wooden screen for a children's room with your own hands.
If desired, you can build a frame for a screen of any shape and decorate the doors in the way you like. In addition, the decor of the doors can be updated at any time, thereby slightly updating the boring interior.
Open spaces make the room feel freer and visually larger, but sometimes it is necessary to allocate a separate area. For example, covering a bed with a sleeping child while one of the parents is working at the computer. The same may be required in an office to divide the room into separate work areas, in beauty salons and in cafes to give greater privacy and seclusion.
A light and mobile partition made of fabric performs this role best. It looks stylish and elegant, does not take up space, and, if necessary, can be removed quickly and without consequences. This makes it strikingly different from various partitions, which leave marks after dismantling, take up space and can significantly change the perception of space.
Using a fabric-based screen, you can quickly and without significant material costs obtain the desired zoning, and also easily change the geometry of the existing space. The mobility of the screen allows you to move it throughout the room, creating islands of privacy according to your mood or urgent needs.
Textiles used to create screens can have a variety of colors and patterns. With this product you can give the room a special charm, make it unusual, individual and stylish.
Advantages of screens with fabric upholstery
A variety of fabric screens are very popular due to their wonderful qualities and attractive appearance. When purchasing such a product, each client of our company will be able to appreciate the following advantages:
Lightness of design. The screen body, covered with fabric, has minimal weight, so anyone can easily handle it. This property will be especially appreciated where there is a need to frequently change the location of such a mobile product (for example, in hairdressing or beauty salons, in cafes or in studio apartments).
Easy to care for. Textiles can be easily and quickly cleaned using a vacuum cleaner or brush. Some products provide fastening of the fabric with Velcro tape, which allows you to quickly remove the upholstery, wash it and return it to its place clean and neatly ironed. Moreover, the Velcro fastening allows you to change the fabric not only when it gets dirty, but also to suit your mood. Today it can be a monochromatic canvas, and tomorrow it can be a reproduction of a painting by a famous artist or a stylish abstraction.
Versatility and a great combination of frame and upholstery. The wood from which the screen frame is made is painted in different colors, making it very easy to choose the ideal combination. Similar shades or contrasting colors of fabric and wood are used.
Excellent properties of the fabrics used. The materials are dense, resistant to external influences, and printed fabrics have excellent color fastness. They do not fade in the light and are not afraid of even frequent washing, since they do not fade.
Unusual appearance and stylish performance. Fabrics for screens are so diverse that they allow you to choose the most suitable option for any interior style: from baroque to hi-tech and even strict minimalism.
You can order screens in our online store in a few clicks. We offer many different products, as well as additional parts: wheels, stops, etc. You can make a different number of sashes, and there is also the possibility of making custom-made screens.
According to many, the most original part of the decor of any living space is the screen. It is worth saying that the first screens used to divide a room into different zones appeared in Japan. Nowadays, screens are used for the same purposes, but in addition to this, they also began to serve a decorative role. To decorate your living space with a new interior element, there is no need to buy a screen. If you are not alien to bold design ideas, then you can make a screen for the room with your own hands, and without mastering special skills. As a result, you will receive a new, modern and, most importantly, stylish interior detail.
Step-by-step instructions for making a screen from plastic pipes
The simplest, but very functional option. An important condition is that the master must have special tools and devices for cutting and welding plastic pipes. The screen consists of three sections, height ≈ 170 cm, total width of all three doors ≈ 160 cm. We give approximate dimensions; for screens, a few centimeters in one direction or another does not matter.
The cheapest thin pipes are suitable for making a screen.
Preparing parts
Step 1. Take a standard pipe Ø 24 mm and, taking into account its length, determine the dimensions of the screen. If it’s difficult for you to do calculations right away, then first draw a sketch of the screen indicating the sizes of all the individual parts. For the product you will need the following parts:
- long vertical posts, two pieces per sash. Total 6 pieces;
- two legs for each leaf. Total 6 pieces;
- horizontal lintels; the width of the sash depends on their size. One requires two pieces, a screen requires six pieces.
To correctly calculate the amount of material, you need to draw up a design drawing
Step 2. Prepare parts taking into account the required quantity and length. A plastic pipe can be cut with special scissors, a hand hacksaw or a grinder with an abrasive disc. The first option is the best, it gives an even end, the pipes are cut without much effort and quickly. Using a hacksaw is very long and nervous. A grinder is much faster, but extremely dangerous, and the quality of cutting depends on the professionalism of the master.
It is best to use special scissors for cutting pipes.
Scissors for cutting plastic pipes
Check the parts, if everything fits, then start assembling the screen. To do this you will need special plastic pipe fittings. For one sash you need to prepare the following additional elements:
- two plugs, installed on the ends of the legs;
- two tees connecting the leg, lower cross member and vertical posts;
- two 90° angles connect the upper cross member and the vertical posts.
For three sashes you need three times the number of fittings.
To connect the elements you will need plastic fittings
Let's consider options for making screens from various materials.
Made of wood
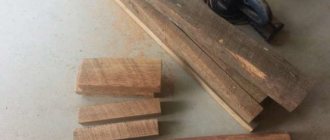
Making a wooden screen for your dacha yourself is quite simple. The classic version of this product is assembled from fabric and a wooden base. The material is simply pulled onto the frame. By varying the specific design and color of the canvas, it is easy to adapt a “homemade” product for any room. To work with timber, along with the tools listed above, you will need another dozen door hinges, 96 screws, durable and beautiful material, universal glue, and decor of your choice.
You can make a full-size screen using 24 bars, 6 cm wide and 2 cm thick. Half of the bars should have a length of 1.7 m, and the other half should have a length of 0.6 m. Lines are drawn on the planks 6 cm from the edge and the excess is sawed off exactly along the marks.
The next step in making a homemade room screen is to make notches along the edges of the slats using a chisel. The wood is removed layer by layer, right down to the cuts. The inside of the grooves is covered with glue. After assembling them into a single frame, the entire workpiece is pressed tightly. Only after the glue has completely set can you continue working.
When sanding wood with emery, pay special attention to all joints. Next, use varnish. Please note: regardless of the number of leaves, ordinary steel corners can be used instead of door hinges. The fasteners are fixed with a screwdriver. After this, all that remains is to decorate the screen with fabric, choosing it at your discretion.
Be sure to make a pattern; in addition to the dimensions of the frames, they also take into account kinks and difficult places. The use of multi-colored and heterogeneous fabrics is allowed. To avoid sewing it with your own hands and a needle, it is better to use a sewing machine. It will also help stitch the edges. Attaching the material to the frames is done with a construction stapler from top to bottom; At the same time, they carefully ensure that everything is tensioned perfectly.
The sidewalls are worked on after attaching the fabric at the top and bottom. When this is ready, two loops or corners for each connection are connected to the parts of the screen. This is the amount of fasteners that is considered optimal for the convenience of folding the partition.
From cardboard
But if you need to make a screen for the bedroom yourself, then it is better to use cardboard. A mobile modular partition will not externally overload the space. It is enough to cut out any parts you like according to the diagram and fasten them into a single fabric. If necessary, such a screen can be easily remade at your discretion.
Parts can be fastened not only straight or at an angle, but also in a wave-like manner. The only negative: they are completely unsuitable for the street; they can deteriorate from moisture, wind and sun.
For a serious screen over a large area (in the office or in all rooms of the house at once), binder cardboard and corrugated cardboard are used. The color of the source material does not matter. High-density cardboard is used for the supporting part.
Another option is to use a box from a TV, refrigerator or washing machine. Then the sides are cut off and the place where the first and fourth edges meet is removed. The second of the three seams of the rectangle is bent in the opposite direction to ensure the rigidity of the screen when unfolded.
From plastic pipes
Creating a screen from PVC and polypropylene pipes does not have any significant differences. These can be any pipes - heating, water supply, sewer - as long as they are durable. Such products are suitable for mobile and fixed, transparent and opaque partitions. The transparent option involves fastening the pipes together and stretching a light material over them. Sometimes they even use starched gauze.
Pipes can be connected using flanges, that is, fittings. Before starting work, the edges must be cleaned. Having placed the fittings on the cuts, put on a gasket with a rubber layer inside, and the flanges are already pulled onto this gasket. Sometimes counter bolts and counter flanges are used.
An alternative is to glue the pipes together. All connected elements are freed from chamfers and then covered with special marks. From the markings it is easy to understand to what depth to screw the flange. Of course, 100% of the parts are degreased. Glue is applied to a clean surface from the inside of the socket, to the chamfers and pipes. Then the pipes are inserted into sockets or fittings, turned ¼ turn and clamped for 60 seconds.
There is another option - using a rubber seal. It is available at the end of any socket. The rubber seal allows you to connect pipes quickly, easily and completely airtight.
Surfaces need to be cleaned as best as possible. On a smooth area, get rid of the chamfer. Then they make a mark showing how deep the pipe will go into the socket. All smooth areas are coated with silicone. Next, the structure is assembled. Despite the simplicity and ease of dismantling, such a product will not be particularly durable.
If the screen is made with wheels, they are attached to self-tapping screws. It is advisable to use a weighting agent that is placed at the bottom of the base. It must be secured with screws and holders. Flanges for inserting pipes are placed on top. Above the horizontal pipe there are several more vertical elements; Once assembly is complete, the structure is often painted.
READ MORE: How to unlock an electric stove
An interesting option is plastic screens made from pipes cut into rings.
Important: whenever possible, it is better to cut pipes to size using special machines. The width of the plastic screens is approximately 5 cm. If it should be smaller for some reason, you will need to work with a handy tool. It is recommended to mark the surface every 5 cm. The workpieces are clamped in a vice and cut with a handsaw.
Next, you need to align the edges perfectly. The best tool for this purpose is an iron. They need to work through pastry paper.
The rings must be placed from larger to smaller; the pattern is selected to your liking. The edges are usually straightened, but they can also be curved. Of course, all this is thought out in advance. In addition to their structural role, rings are suitable for storing small items. The screen itself is made both mobile and fixed to the wall.
An alternative version of the plastic screen consists of the following parts:
- set of wheels for furniture;
- steel pipe as a weighting material;
- pipes to the frame;
- paints and brushes;
- fasteners;
- flanges;
- board.
The frame is assembled in the same way as in other options. Attention must be paid to choosing a good paint. Before applying it, all surfaces are degreased and cleaned. All metal parts are coated with anti-corrosion protection. The finished structure is easy to repaint.
To learn how to make a screen with your own hands, see the following video.
What materials to use
In order for the final result to please you with reliability and beauty, you need to take the selection of the frame very seriously, which plays a key role when installing the screen.
So, to create a classic, a wooden frame with separate doors is perfect. In this case, it is necessary to use the material that is best suited taking into account the expected dimensions of the screen. If you like a screen with carved wooden frames or colored glass, wooden blocks are perfect for making it, the use of which will allow you to withstand the significant weight of the finished structure. Wooden planks will also find their use, especially if thin fabrics or exclusive rice paper/cardboard are used in covering the screen. Currently, screens made of lightweight materials - wicker or bamboo - are in demand.
When making screens for an interior in a modern style, it is better to use materials such as aluminum or light steel alloys. They go well with transparent decorative segments made of glass and plastic. If desired, you can use LED light sources, for example, install them on a frame. Before purchasing materials that will be used to make a screen, you must clearly understand what kind of screen will be made and using what materials.
For a classic screen made of ordinary fabric, stretchers are required. Very often, simple stretcher frames are used - wooden. Their number can vary from 8 to 12, taking into account the number of sashes the screen will have.
Subframes in the form of a rectangle are fastened with wood screws or knocked down with a hammer using nails. They are then wrapped in thick fabric that serves as upholstery. It is better to choose an original or brightly colored fabric so that the screen stands out as a separate piece of furniture and does not “merge” with the room. The main thing in this matter is a sense of proportion.
What materials can it be made from?
A real classic is the wooden screen. Now it is no longer possible to establish what the very first structure of this kind in history was made of. But there is no doubt that wood is traditional and has been used since ancient times. Along with monolithic boards, partitions in the past were also made from slats. In the second case, fabric of various types was pulled over them - whatever was at hand and whatever they liked.
Today, wooden screens are still in demand, and their main types are still the same. But, along with simple slats, timber is used quite often. Plywood structures have also gained considerable popularity because they:
- allows you to save money;
- weighs relatively little;
- processed without any problems.
Design developments do not stand still. And recently, screens made from louvered doors (and simply from unnecessary wooden doors) have begun to appear more and more often. They usually still contain fairly good quality wood, but the structure itself becomes morally or technically obsolete.
But some home craftsmen try to use metal (usually stainless steel or aluminum). In this case, you will need a frame of a certain shape. Any experienced welder can make it, although sometimes it is better to contact a metalworking company. The following is inserted inside the frame:
- wooden panels;
- sheet glass;
- plastic.
READ MORE: Hose for drip irrigation; features of oozing capillary hoses for watering plants; characteristics of mainline and other models. Which ones are better to choose?
Instead, small pipes (up to 5 cm in diameter) are also suitable. Tubular screens are widely used in gardens and courtyards. Regardless of the shape of the frame, it should be covered with elegant fabric or paper with an original image.
If you choose a high-tech style, then it is logical to use a steel screen for blinds to frame it with your own hands. But those who want to simplify their work as much as possible should abandon metal and focus on PVC. Pipes made of this material are quite light and, in addition, practical.
You can also use it in your work:
- cardboard;
- polymer panels;
- cane;
- willow or bamboo branches;
- CDs or vinyl records.
How to calculate material consumption
To calculate the amount of material for the screen, you need to add up the dimensions taken from the frames and add a few centimeters for allowances on all sides. If the design of the future screen involves the presence of frames of complex geometric shapes, you must first prepare sketches from which the fabric will be cut, while the material consumption will take into account the type of pattern. To decorate the edges of the fabric, a thick braid is needed. To calculate its length, you will need the dimensions of the subframe; they need to be multiplied by the number of screen sashes. You will also need piano hinges at the ends of the frames to secure the sashes to them. This will allow you not only to fold the screen frames, but also to rotate them in different directions. Self-tapping screws are useful to secure the hinges.
Installation stages
- Assembling subframes with drilling holes for tie rods. Along the entire length of the stand, strips are attached to the screen to strengthen the structure.
- Covering, in which case the planks at the outer part of the frame must be beveled slightly inward. The stretched material should be positioned evenly, without folds or other distortions. The first staple is fixed in the central part by the length of the side, after which the fabric is stretched on the remaining sides. The fabric is attached to the frame and the back in the same way. The short sides of the fabric are attached at the last moment, after which, when the fabric is stretched, it is necessary to fix it with staples, maintaining a distance of 5 cm.
- Next, a tape is pulled along the edges of the fabric using glue, this will hide the unevenness and protect the floor from scratches.
- At the final stage of manufacturing the frame, its wooden parts are varnished/stained or painted with decorative paint. In this case, the color of the paint is used to match the color of the fabric. If you wish, you can make a screen with decorative lighting, using safe LEDs of various colors.
A partition screen is not the most complicated design, but when installing it you will need a drill, a screwdriver and small fittings for assembling the frames.
This is how, using simple tools and materials, you can make an original part of the interior, which will surely delight the eye for a long time and give a romantic and cozy home environment.