How to make a wardrobe with your own hands from design to assembly
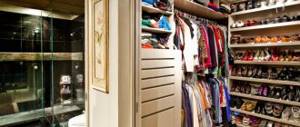
If you make a wardrobe with your own hands, then it can rightfully be considered the most functional piece of furniture. It fits easily even in a limited area and at the same time you can put almost all things in it. Such a cabinet is a real find for small apartments and small hallways. But even in spacious houses there is a place for it, where it can become a real decoration of the room. In a word, a wardrobe is a universal piece of furniture, which nowadays is difficult to do without.
Looking at the finished wardrobes, it seems that making them is quite difficult. In fact, there is nothing complicated about this, you just need to correctly calculate all its parameters.
Preparing for painting
Before painting lacquered furniture, you will have to work hard. Wood coated with varnish certainly looks advantageous. But such a piece of furniture is not suitable for the modern Scandinavian style. How to repaint a closet is up to everyone to decide for themselves. Some limit themselves to the facade, leaving the insides in their original form. If you want to completely transform the closet, you must remove the doors. Take out the built-in lamps and wrap them with tape. Carefully remove the doors with the mirror. In order for paintwork to adhere flawlessly, you need to carefully prepare the surface. The old layer is removed completely until smooth. Mechanical processing is used. To remove the old coating, liquids are not used to prevent the wood from swelling. Sanding should be done with light circular movements, without damaging the veneer or laminate layer. Remove the entire layer of varnish, resin, paint. To soften thick, too old coatings, it is allowed to use the aerosol product “Paint Destroyer”. Defects on furniture are puttied with special compounds, cracks and traces of fastenings are covered up. If you screw hardware into an old hole, the doors will quickly become loose. After sanding, the surface is thoroughly degreased. Remove all substances that impair adhesion to paintwork materials. The kitchen cabinet is first cleaned of old grease, using a knife and steel wool.
Before painting it is necessary to remove the old layer of paint
Deep damage must be puttied. Please note: How to paint interior doors made of MDF
Applying primer
Do-it-yourself cabinet painting is often done without priming. Soil is used in two cases:
- to create a perfectly flat surface;
- when they want to reduce the consumption of paint and varnish material.
A thick layer is not needed; the primer is applied in a thin layer. They cover the furniture, preventing smudges and without gaps. It is recommended to prime the chipboard to strengthen the surface being treated.
Primer for wood
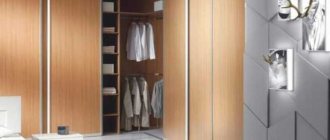
Making a wardrobe with your own hands
Basically, cabinets are made from laminated chipboard sheets. If you decide to make a cabinet yourself, it is better to go to a workshop that has special woodworking machines to cut sheets according to prepared templates. At home, it is impossible to obtain high-quality cuts, not only due to lack of experience, but also due to the lack of necessary tools. Also in the workshops you can make cuts of complex shapes, shelves with rounded corners, cut out patterns, etc., make edging of ends, additives for hinges.
And here a completely logical question arises: what then is included in the concept of a “do-it-yourself wardrobe”, since almost all of its parts need to be ordered from a workshop? The fact is that, with rare exceptions, almost all companies that sell sliding wardrobes do not have their own workshops, but order the production of individual parts “outsourced”. Their responsibilities include designing furniture according to the customer’s wishes, drawing up cutting and edging plans for products, purchasing the required amount of material, delivery and assembly. For this they charge a fee, which can exceed the cost of the cabinet by 1.5-2 times, or even more. The cost of cutting chipboard sheets and processing them is a small part of the cost of the cabinet as a whole. Thus, by drawing, calculating and assembling the cabinet yourself, you will save a lot of money.
It is more profitable to make a closet yourself and take time. When ordering it from a company, you will have to wait about two months, which, you see, is not always convenient. It is quite possible to assemble it yourself in two weeks, including design and calculations. Take a closer look at the manufacturing sequence of the wardrobe.
How to update an old cabinet with your own hands: brilliant ideas for a master
Hi all! The wardrobe can safely be classified as an interior item that changes extremely rarely and can last for decades, going through several repairs. Therefore, the question of how to update an old cabinet and make a modern and attractive version of furniture based on the old design becomes quite natural.
I’ll say right away that if this is an old wooden and varnished cabinet, or a product made of low-quality chipboard, which is almost completely destroyed and requires serious restoration, simple decorative solutions will not solve the problem.
If it is a solid structure, a well-preserved polished Soviet one, some kind of bookcase, built-in wardrobe, kitchen set, furniture in the hallway, or even a more modern wardrobe that requires updating its appearance, our further advice will be perfect here. Do-it-yourself remodeling is not difficult.
Wardrobe design
The first step in making a wardrobe is designing it. To do this, you can schematically draw a cabinet with all dimensions, designation of internal compartments, cabinets and drawers. This “old-fashioned” approach is quite lengthy and inconvenient, especially in the presence of high technology. Nowadays, almost all companies use special computer programs to design furniture, allowing them not only to evaluate the future result, but also to fully calculate the specifications of the product.
One of such programs is “Basis-Furniture Maker”. This is a fairly powerful design tool that includes a number of supporting programs. The basis is designed to create both simple and quite complex furniture elements. If you are interested, you can go to the manufacturers’ website and familiarize yourself with it in more detail. To design a cabinet, it is not necessary to complete the full “young fighter course”. A fairly simple and accessible interface allows even beginners to use the program effortlessly. To install Basis, you need an emulator, since it uses hardware protection, but for “confident PC users” this has long ceased to be a problem.
If you have never used Basis, you can watch demo videos on design. In our case, this is the video “Basis-Closet 7.0 Video Clipboard Construction”. Viewing it will clearly introduce you to all stages of design, as well as the capabilities of the program. It will take a little time (about 30 minutes), but even a beginner will be able to figure out what’s what without any problems.
Designing a wardrobe in the Basis-Furniture Maker program takes about 1 hour, taking into account the calculation of the specifications of the necessary materials. Manually it would take much longer and would not eliminate possible errors in the calculation.
The process of creating a virtual closet includes the following steps:
- choice of wardrobe dimensions;
- dimensions of the bottom, base and lid of the cabinet;
- selection of material and dimensions of the rear wall and its stiffeners. The back wall is made of fiberboard, and the stiffeners are made of chipboard;
- division of the internal space of the cabinet into horizontal and vertical sections;
- filling the resulting sections with boxes (if necessary);
- entering basic door parameters;
- adding a mezzanine and open side sections (if necessary);
- designation of the ends that need to be edged;
- selection and arrangement of fittings;
- printout of drawings of individual cabinet components and specifications.
If you wish, you can also print out a three-dimensional image of the finished cabinet, which can then be used to easily assemble it.
Updating chipboard cabinets
Furniture made from particle boards loses its attractiveness over time, no matter how carefully it is used. You can return your products to their beautiful appearance and add fresh colors to the interior by painting old chipboard cabinets.
It should be taken into account that chipboard does not absorb paint well, since the furniture is covered with a moisture-repellent laminated layer.
In addition, if the condition of the cabinet fastening elements is unsatisfactory, it is recommended to replace the fittings and further strengthen them. How to paint an old chipboard cabinet:
- All removable elements are removed from the furniture so that an empty frame is left for painting.
- Using coarse sandpaper, remove the layer of old paint (if any) and varnish.
- The surfaces must be rubbed carefully so as not to damage the base. The cabinet is swept with a dry rag to remove dust.
- Corners, edges, joints and protruding elements are treated with fine-grained sandpaper.
- Water-based acrylic paint is a better option than painting chipboard. The color scheme is chosen according to your taste.
- Before painting, a chipboard cabinet must be primed so that the paint is less absorbed into the material.
- The primer is applied in a thin, even layer and the composition is allowed to dry - usually acrylic primers dry in no more than 12 hours.
- Apply several layers of paint with a roller or brush (preferably a brush), each time drying the coating before painting.
- When the furniture is painted to securely fix the coating, after complete drying, the chipboard cabinet is treated with varnish, and the product is assembled using new fittings.
When painting furniture, choose only high-quality tools that do not leave lint on the painted surface. The more layers of paint are applied, the richer the color of the decorative coating will be. You need to repaint with a brush in one direction - from top to bottom, apply the paint with a roller in a cross-shaped motion.
On video: detailed instructions for updating an old chipboard cabinet.
Making cabinet parts in a workshop
The next step is to make the cabinet parts in the workshop. So that in the workshop you don’t have to explain “on your fingers” what you need, just print out the specifications of all the elements and their drawings in advance and give them to the craftsmen. In addition, Basis can also make a cutting map, for which the workshop requires a separate fee.
To do this, you just need to use the Basis-Cutting module, specifying the dimensions of the original chipboard sheets. This card is a pattern according to which structural elements will be cut from a sheet of a certain size, taking into account indentations, thickness of cutting materials and other subtleties. True, some nuances still need to be coordinated with furniture makers, so it is better to entrust the cutting map to them - they have a better understanding of these issues, and when cutting they will take into account the tools they have.
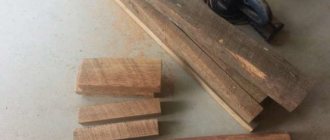
As an example, let's consider the manufacture of a wardrobe with a height of 2.5 m, a width of 1.2 m, a depth of 0.4 m. According to calculations, it turns out that for its manufacture you will need two sheets of chipboard with an area of 4.08 m2 and a sheet of fiberboard with an area of 4. 67 m2.
What should you pay attention to when making a wardrobe?
When choosing a color, you should not rely on names like “Milanese walnut”, etc. Each manufacturer has its own understanding of what this very nut looks like, and there are no uniform standards. So it’s best to go and choose the color of the material yourself, based on its type, and not on its name.
After all the elements of the cabinet are cut out in the furniture shop, you may be offered to take with you the scraps of the sheets from which they were cut, because you bought a whole sheet, which means the scraps are yours. If you don’t need them, furniture makers will keep them and give you a small discount. This solution seems more attractive to many. It seems like we got rid of garbage and also saved money. But it is not so. During the assembly process, some elements may be damaged, and you can use the scraps to replace them. If you order a separate part from a workshop that is not made from your own material, you can overpay up to 25% of the cost.
One more nuance. You need to pay not for the manufacture of each individual part, but for cutting the sheet. At first glance it seems that these are one and the same thing, but in fact this is not entirely true. Therefore, when calculating the amount of starting material, you need to clearly determine the number of sheets and send them for cutting. Programs like Basis will help you decide on the issue of material consumption quickly and accurately. Manual calculations often give inaccurate results, especially if there are a lot of parts.
A separate expense item is the production of shaped elements, for example, side shelves with a rounded corner or baseboards. The cost of such cuts is higher than cuts of a simple rectangular shape, which must be taken into account and agreed upon in advance, so that later there are no misunderstandings when paying.
Let's summarize. The costs of making parts in a workshop consist of:
- drawing up a cutting map (it’s still better to entrust this to the craftsmen);
- cutting laminated chipboard and LDVP sheets;
- making plinths;
- production of rounded elements.
Decoupage cabinet
Restoring an old cabinet will bring you real pleasure if you choose the decoupage technique. Currently, its popularity is increasing day by day. The principle is this: with the help of the selected picture, the design of your furniture changes completely.
What tools and materials are needed:
- wood primer;
- paint (acrylic);
- acrylic varnish (colorless);
- PVA;
- sandpaper;
- paint brush;
- roller (if the cabinet area is large);
- picture (you can take a napkin with a pattern, cut out a picture you like from a magazine, or order a photo print).
The work plan is as follows:
- Clean the surface with sandpaper.
- Apply the primer mixture and leave it until completely absorbed for a day.
- We paint the cabinet in the chosen color (when choosing a color, be guided by the shade of the selected picture).
- We wait for the paint to dry completely (one or two days).
After the preparatory stage, we proceed to the most crucial moment. Cut out the selected image (don’t forget to match it to the color, size or theme of your interior).
We apply the cut out picture to the surface and see what happens. If you don't really like it, then try another picture. Mark it with a pencil. Then, in order not to get the effect of pasted paper, but the effect of painting, you need to use sandpaper to carefully thin it by five to seven millimeters on the back side of the picture along the edges. This way we will get a very thin, literally papyrus edge.
How to properly paste an image:
- Place the picture in a container of water. Let the paper soak well.
- Place it on a towel and cover the top with the free edge.
- Using a brush, apply glue to the place where your picture will be located.
- Place the damp paper on the surface and carefully straighten it from the center to the edge. Make sure that the fit is perfect, without wrinkles.
This is how the images should be glued.
As a result, you will get a delicate, neat cabinet:
Applying edging to cabinet parts
After all the parts have been cut out, you can start edging. Usually this is also done in the furniture workshop where the parts are made, since this requires special equipment. For edging, edges made of PVC of different thicknesses are used depending on the position of the ribs. Hidden ribs (bottom or rear) are edged with thinner edges, the thickness of which is 0.4 mm. For visible ribs, thicker edges made of 2 mm PVC are used. The edges of adjacent parts that are connected end-to-end do not need to be edged.
To make it clearer, here are a few examples:
- The ribs of the inner shelf are edged only on the front side using a 2 mm edge. The remaining ribs are butted against the inner walls of the cabinet;
- the ribs of the cabinet lid are external on all sides and therefore must be edged on four sides, while the rear invisible side has an edge 0.4 mm thick, and the rest - 2 mm thick;
- The edges of the drawer front on all four sides have a 2 mm thick edge.
These subtleties seem confusing at first glance, but using Basis, you don’t have to worry or think too much, because the program selects and places edges of the required thickness and in the right places on its own.
Like manufacturing, edging of parts with complex geometric shapes is paid separately at a higher price.
Thus, the cost of edging, including materials, consists of the following items:
- edging with PVC edges 0.4 mm thick;
- edging with PVC edges 2 mm thick;
- edging rounded parts.
On average, the production of cabinet parts and their edging takes up to 5 working days, but for an additional fee “for urgency” all these operations can be completed in one day. Some workshops also include home delivery of products in the cost of work.
How to paint an old cabinet?
Once all damage has been repaired, you can prepare the cabinet for painting. Do you want to transform your furniture to such an extent that even your family won’t know? First you need to sand the areas with putty and apply a layer of primer mixture. This important part of the work should not be skipped, because the paint may lie unevenly on an unprepared surface.
How to paint a cabinet:
- First, take a can of the main color. We chose metallic color. Use construction tape to limit the area that will not be painted the main color.
- Apply the base color to the surface first and wait for it to dry.
- The next stage is applying the second color.
Immediately after painting you will see how much your furniture will change.
Then let's start assembling: take the mirror glass and insert it into the cabinet doors, screw on the fittings.
Accessories for wardrobes
Cabinet fittings are selected depending on the number of drawers and compartments. In our example, the cabinet has 3 drawers and a main compartment. Drawers need guides and handles. The main compartment has one caveat. Since, due to limited space, the depth of the cabinet is small (only 38 cm), the hanger for hangers will be non-standard - end-mounted. This hanger will allow you to hang clothes parallel to the back wall and save space. The length of the end hanger is 30 cm.
Euroscrews (confirmats) with plugs will be used as fastening. It's better to buy more of them just in case.
So, from the accessories you will need:
- end hanger;
- drawer guides;
- handles for drawers;
- euroscrews;
- plugs for euroscrews.
Master class No. 3. Painting a polished cabinet
Some people can’t believe that you can make such a piece of vintage-style candy out of an old polished cabinet, without losing functionality. And then we'll tell you how to do it.
Materials and tools.
- Old polished cabinet;
- vintage paint (regular acrylic matte);
- white spirit or acetone;
- brushes;
- sandpaper or sanding machine;
- gold handles for drawers.
Painting process
Step 1.
Despite the fact that we are creating a vintage effect, there is no real need for the dresser to look shabby. Therefore, we carefully prepare it for painting.
- To do this, we remove all the old fittings and sand the entire surface of the chest of drawers. First we use coarse sandpaper, then fine-grained sandpaper.
- It is not necessary to putty and prime, except for serious chips on the surface. Degrease the surface with white spirit or acetone and let it dry.
TIP: Since the paint will be applied in several layers, it is very important that it is well absorbed into the wood.
Step 2.
- Cover with the first layer of paint. Very thin, you don’t have to try too hard and leave unpainted areas.
- Sand the first layer with fine-grained sandpaper. We clean off dust, but do not use wet rags, sponges, etc. in the process. Wash only with a dry cotton lint-free cloth.
- Next, apply a second layer of paint, also rubbing it in. Let it dry and rub it in a little again.
- We repeat this until the color becomes even, but a little rough. For this we used matte paint with a vintage effect. After a few days, it will be completely absorbed and dry and begin to turn yellow (pay attention to the instructions on the can so that you don’t have to repaint everything again later). To avoid this, you can try this coloring method on a small and inconspicuous area. Proceed with full coloring when you are satisfied with the result.
If you bought new handles, check if they match your color and screw them into place. Golden brass carved handles with patterns match the white aged chest of drawers.
Check the chest of drawers to see if it meets your requirements - it is still comfortable, beautiful, and, paradoxically, modern. Vintage is in fashion now!
Assembling a wardrobe with your own hands
When everything is prepared and purchased, you can begin assembling the cabinet. Here again I would like to say a few flattering words about Basis. This program not only designs the cabinet structure, breaks it down into components and calculates the consumption of materials, but also marks on the drawings the locations of the screws, along with their sizes and distances between them. So when assembling, you don’t have to think about where it is better to connect certain elements. Ideally, all holes should be made on a CNC woodworking machine under the guidance of the “Basis-CNC” module, but this is quite expensive, and sometimes it’s not easy to find a computer-controlled machine. It is quite possible to make the holes by hand.
To do this, you will need a pencil, a square, an awl, a drill with a special drill for Euro screws, a screwdriver with a hexagon bit and, of course, printed drawings of the cabinet with holes marked for fasteners.
First, the bottom and walls of the cabinet are installed in the place where the cabinet is planned to be placed in order to double-check that the overall dimensions are correct.
Markings of fastening locations are applied to the bottom surface, holes are drilled for fasteners, after which a base of two strips and a central partition are attached. The side walls are attached to the bottom with confirmations.
The edges of the side walls and base must be protected with a special waterproof profile, which prevents water from getting onto the PVC surface, as well as dust from getting under the cabinet. The edges themselves, which rest on the floor, must be made of PVC 2 mm thick.
Next, the upper shelves are attached and a stiffener made of chipboard is installed. The stiffener is attached to the rear wall of the cabinet to fix the entire structure in the correct position. The wall itself is made of HDF.
When installing the cabinet cover, it may be difficult to secure it. The fact is that the height of the cabinet is usually taken to be the maximum possible, and it is quite difficult to tighten the fasteners. In such cases, you must first use pliers and then an end ratchet. It is better that the gap between the cabinet lid and the ceiling is at least 7 cm.
Installation of side shelves
To fasten open side shelves with rounded corners, confirmats are used - 4 for each shelf. The shelves are attached to the surfaces of the side and rear walls with 2 fasteners for each. The top and bottom shelves are slightly larger than the others, which needs to be taken into account when installing.
The installation sequence is as follows: first attach the top shelf, then all the others from top to bottom.
The lowest shelf is located on the same level with the bottom of the cabinet, so confirmations are not suitable for fastening it - they simply cannot be screwed in. In this case, dowels are used instead.
Wardrobe door assembly
Wardrobe doors are a separate mechanism, the selection and assembly of which must be approached with all responsibility. It is the cabinet doors that determine its appearance, and their serviceability and ease of use make its operation as comfortable as possible. First you need to decide on a profile. Its quality determines how long the doors will last and whether they will jam, so in this case there is no need to save. The profile is sold disassembled, and in order to fold it, you must strictly follow the manufacturer’s instructions, which can be found on the company’s website or received upon purchase. The instructions contain all the necessary assembly diagrams, as well as calculation formulas for determining the length of the guides and door leaf parameters.
The door profile consists of the following elements:
- lower and upper guides, which are attached to the bottom and lid of the cabinet, respectively. They are a kind of rails along which the doors will move when opening and closing;
- the lower frame of the door leaf is the base to which the lower rollers are attached;
- There are two types of side frames: C-profile and H-profile. These frames are used as handles for moving the door leaf, and also form the basis for attaching the upper rollers;
- the upper frame makes the profile design more rigid;
- the middle frame is used if the door leaf consists of several parts to connect them together;
- upper and lower rollers ensure easy movement of the door leaf along the guides. The lower rollers are made of plastic, the upper ones are rubberized. Typically, one door has two rollers installed on top and bottom;
- a stopper is a small metal insert that secures the blade in the closed position. The stopper is mounted on the lower guide;
- Schlegel is a strip of pile that is attached to the end of the canvas. Schlegel softens the impact of the door leaf when closing the door abruptly, protecting it from damage, and also makes the structure airtight;
- The seal is used to attach the mirror to the canvas. The seal is made of silicone.
To choose a profile for sure, it is better to first assemble the entire cabinet and then measure the parameters of the resulting opening.
Profiles are usually selected with some margin in size, so that if necessary, the excess can be cut off. The standard dimensions for the side frames only are 2.7 m; other elements are ordered based on the dimensions obtained.
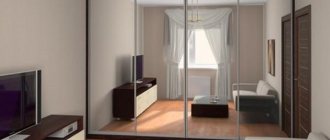
You can use various materials to fill the profile, but most often the choice is glass or mirror. The use of a mirror cloth can further visually increase the space of the room; in addition, it can be decorated with various patterns, decorative elements, etc.
Mirror installation
The mirror is selected on a film base with a thickness of 4 mm. Usually, when ordering a mirror, the required size is immediately indicated (preferably with a small margin). It should be taken into account that the mirrors are quite fragile and heavy, so when transporting them you need to be careful, carry them together and one at a time.
To install the mirror in the profile, a silicone seal is used, which is placed on its edge. The sealant must be applied evenly along the entire length of the edges without folds.
Next, the mirror is inserted into the profile frame. To get it into the desired position, you can use a rubber hammer, tapping it on the profile until the mirror is completely inserted into the profile and the seal is hidden inside the structure. It is important to maintain the perpendicular position of the frame relative to the mirror, otherwise the mirror may be installed crookedly. The sequence of installing the mirror is as follows: the mirror is laid on a horizontal surface, the upper and lower frames of the profile are put on it, the excess seal is cut off with a knife. Then the side frames are attached, turning the mirror vertically and resting it on its edge.
Installation of a sliding wardrobe door
Next, the profile frames, after they are placed on the door leaf, are fastened together with self-tapping screws, which should be included in the profile kit. Holes for the self-tapping screws are pre-drilled in two passes: first for the thread, then with a wider drill only in the front strip to hide the head.
The lower profile fasteners are also fasteners for the lower rollers. The screws for fastening the rollers are made adjustable so that, if necessary, the height of the rollers can be changed.
The holes for fasteners at the ends of the side frames do not have to be made neat and even - they will still be hidden under the schlegel - a strip of pile that is glued on both sides. When using a C-profile, it even has specially cut out places for the Schlegel, so gluing it is not difficult.
The door leaf guides are secured with self-tapping screws and press washers. Holes for self-tapping screws are pre-drilled. The top guide is installed first, flush with the side frames of the profile. Based on it, the lower guide is set using a building level. The guides must be strictly one below the other to avoid tilting or skewing of the door leaf. Special stoppers are inserted along the edges of the lower guide to secure the door in the closed position.
To install the door leaf, rollers are inserted into the upper guide, the lower rollers are pressed and the leaf enters the profile, resting on the lower guide. It is imperative to check the verticality of the canvas and the tight fit of the ends to the sidewalls in the closed position.
If the door is mounted at a slight angle, its position can be adjusted using the lower roller adjustment screws. The lower rollers also adjust the height of the doors, raising or lowering them. If the upper rollers pop out of the guide during use, the doors need to be raised. After installing the blade, you need to adjust the stoppers on the lower guide.
Manufacturing of internal drawers
The cabinet frame is ready, and now it's time to start making the interior drawers. The drawers, like the cabinet itself, are made from blanks cut from laminated chipboard. To prevent fasteners from being visible on their surface, a false facade will be used, connected from the inside to the real facade. To make a box you will need a front, a false front, a bottom, sides, a back wall, as well as guides and a handle. The bottom of the facade will be inset, limited on all sides by walls and a false facade.
When assembling a box, it is very important to control the position of its individual parts. The angles between adjacent walls and walls and bottom should be straight. To achieve this, you can use a pre-prepared template that controls the size of the angles. In principle, you can do without it, but then the angles need to be constantly measured.
The two-part slides are attached with one part to the drawer and the other to the side of the cabinet. In this case, you need to ensure that they are located horizontally and parallel to each other. The drawers should be recessed into the cabinet so that their handles do not touch the door leaf from the inside. The width of the drawers is chosen smaller than the width of the door so that they can be pulled out.
That's all, we made our own wardrobe.
Source:
Series of messages “FURNITURE RESTORATION”:
Part 1 - Changing the upholstery ourselves Part 2 - Master class on creating a table in the shabby chic style... Part 18 - Do-it-yourself sofa bedspread Part 19 - Colorful cover for a stool Part 20 - DIY wardrobe Part 21 - Beautiful mandala stand. An unusual way of knitting to the center Part 22 - How to sew a cover for a stool
LiveInternetLiveInternet
» Antique wardrobe: details by ~Minerva on deviantART
So, I got this cabinet somewhere, somewhere in the month of May.
I can’t tell much about its history: I bought it from an advertisement, it was positioned as pre-war, but I think this is not the Second World War, as the owners mistakenly believed, but rather the First. They got this closet, as I understand it, along with the old dacha, and there it happily existed for several decades. You understand - a dacha, dampness, and a very cold and snowy winter this year. In general, the snow broke through the roof, right where the narrow part of the cabinet stood, and water flowed along its outer side wall when all this disgrace melted. I dried it at home, and when it was completely dry, cracks and peeling of the veneer appeared on this wall. Well, and here and there on the front doors too. That is, after drying, when the veneer shrunk, everything turned out to be not so rosy and beautiful. In a nutshell - in the narrow part there was cracked and peeled veneer, and in the wide part, where the veneer was much better - mega-overlay hinges were inserted conscientiously. In order not to refer to the old post with “before” photos, I’ll post them one more time. The first thing I started processing the coveted item was cleaning
. There were not only layers of dirt/dust/grease on it, but also on the wall along which water was flowing, some kind of crap came out in the cracks, looking like either mold or mildew. This is probably wrong, and for this you can probably kill right away - but I cleaned it off with a steam generator. If the tree had been in perfect condition, I’ll be honest, I would hardly have decided on such barbarity. But there was nothing to lose here; the veneer still had to be glued and puttied. The steam generator, with a powerful jet of hot steam, blows out and disinfects the surface even from the smallest cracks, and does not saturate it with water, as if, for example, wiping with a sponge/rag, plus no additional cleaning chemicals are required. I cleaned it with a small stiff brush attachment, which I usually use to clean tile seams, so at the same time a thin layer of stain and polishing oil was removed until clean wood, behind the layer of dirt it’s hard to tell what exactly it was. After cleaning, to be sure, I dried the cabinet for another week . And then I strengthened the legs where they were loose, tapped the backs where they came loose, knocked out fastenings for shelves and hangers and other preparatory work from the inside and outside.
The next step was gluing
peeled
veneer
.
If anyone wants to repeat it, I’ll share the recipe. To do this, we will need PVA glue (not the usual, thin kind, but a thicker and stronger one, for construction purposes); 20 cc syringe and iron. First we draw the glue into the syringe, then insert the needle and inject the glue into the cavity where the veneer has risen from the surface, pushing the needle as far as possible. You must press on the piston carefully and slowly, the glue is thick, the needle can easily be torn off and then you will have to remove the glue from the entire surface. When squeezing out the glue, you need to simultaneously squish it along the very wave of the veneer - in order to evenly distribute the glue when it starts to stick out from the crack - that’s enough. Now you need to remove the excess with a damp cloth and leave it for 15-20 minutes so that it becomes saturated and begins to set a little. Next, heat up the iron. And here begins the most challenging stage of the gluing process. Firstly, depending on the area of the glued area, you will have to dry it with an iron for at least 20, or even 40-50 minutes. It’s difficult to say exactly about the temperature: a lot depends on the glue, the thickness of the veneer, the thickness of the rag (if ironed through it) and I would also add on the color of the veneer. I think that the light one can easily darken and burn, and for it I would take a lower temperature. And yes - a rag. You shouldn't run the iron directly over the wood, otherwise it will become shiny. In my case, this was not fatal, because it still had to be sanded and tinted, but if you keep the natural color, then why bother yourself with extra trouble? In general, based on the above, my recommendation is this: if you need to glue more than one section of veneer, you should not coat them all with glue at once, but do them one by one. It’s not easy to move the iron across the surface, but to press down on it with your entire mass. Ironing and drying a piece of wood, which will swell after absorbing glue, is not like ironing a sheet; it requires physical effort. Have a damp cloth at hand to remove protruding excess glue from the wood and iron, and under no circumstances should you stupidly put the iron in one place and lean on it, it must be moved continuously, smoothing the veneer. After gluing the veneer, the next intermediate stage is sanding
.
This time I didn't use the machine at all. Firstly, the veneer is thin, and secondly, I cleaned the wood with a steam generator. So I manually simply removed the wood fibers and traces of glue that had risen from the brush. Not the most time-consuming, but dirty process. And after that I started puttingty
.
I’ll say right away that on this cabinet I learned to love this process just as much as sanding. And it turned out that I putty three times more than I thought I would have to at first. Not out of great love - but it happened that way. First, you putty large, immediately obvious cracks and chips. After eliminating them, you begin to notice the average ones. And after they are eliminated, it is no longer possible to stupidly ignore the small ones. If anyone is interested, I’ll tell you in a nutshell about the putty. In principle, any crack, even a small one, is puttied in at least two stages. When the first layer of putty dries and its excess is sanded off, it becomes noticeable that it has dried out and sagged slightly. For perfect alignment, you need to add at least one more layer. Well, the key to success is a convenient spatula. Well, how I am thrilled by the sight and touch of a smooth and even, like a testicle, putty crack, which cannot be found by touch (it looks clear, it is extremely difficult to get the color) - this is one of the most vivid experiences of a fetishist maniac, I can’t even describe it I won’t. By the way, let’s talk about putty. The worst part was not the cracks and chips, but the shriveled veneer on the doors (where the joints of two boards are), holes from screws and chips where the drawer handles were, keyhole holes on the doors and drawers, and most importantly, the mutilated door of the wardrobe. There, the overhead hinges were expertly made, and for them, such nasty potholes were cut into the cabinet frame and door. Yes, and in the door, apparently when it was torn off from the standard fastening, there was a decent crack in the upper corner right on the outside, closed with a self-tapping screw. And on the sides of the door there is delamination of wood. I glued it in such a way that it had to be seen. I couldn’t find a clamp to clamp it properly, so I sat on the door for several hours, at the gluing site, unable to think of a heavier pressure than my own body. Smoothed holes on the fronts of the drawers can be seen in the previous photo insert. Now for the door alignment details. Now about solving the hassle with restoring the casing of
the wardrobe section.
The option of putting putty was out of the question, of course, it didn’t work - the casing protrudes from the body. The casing was invoice, so there were two options: tear off this one with the clippings and order the same one, or make patches. When I thought about it properly, I decided that there was no special point in making a completely new one; the chances of getting into the texture and color of hundred-year-old wood were 1/a million. Therefore, dad was solemnly instructed to carve/plane something similar suitable for a patch. Dad completed the task with 10 points out of a possible five. I glued the patches in, then puttyed them and sanded them level with the old plank. Thank God, then my engineering thought made a breakthrough - and I figured out to use a mount from a table lamp as a clamp! So, now is the time to devote a few words to the interior decoration. The wood inside was not perfectly smooth and not perfectly clean. That is, the board itself is not perfectly smooth, plus something was stored there that left a stain that showed through even through the ground. That’s why I decided to paper the cabinets from the inside. On the back walls were the remains of the rose-striped wallpaper that I used to cover the chest. And then I bought companion wallpaper, with the same rosette, but without stripes. I used them to cover the side walls and the door of the wardrobe. (On the inside, such plywood was also not comme il façade. There was an idea to put a mirror there, but we rejected it - the door itself is light, and when returning to the old fastening, it can warp on these pins due to the weight of the mirror.) Wooden parts of the frame, not glued wallpaper and ceiling are painted with white paint and rubbed with sandpaper. The completion of the interior decoration
is a hanger stick in the wardrobe part and a shelf above it, and three new shelves in the pencil case.
The shelves and the stick were carved by our furniture god, the godfather. The shelf and hanger can be seen above, where there is a photo of the finished product in detail. Well, and the exterior decoration
. In order to immediately stop the groans and sighs about the unpreserved natural color of the wood, I will once again draw attention to the door with the holes covered up from under the hinge and patches on the platband, as well as the potholes of the keyholes and previous handles covered up. Due to the many filled and restored areas, it became necessary to prime a little more densely than I originally intended. The paint was acrylic enamel, white, applied with a roller. I deliberately did not saturate the natural cracks in the veneer with it, so they remained dark and clearly visible. I also rolled the thread with a roller, and then covered its background with a sponge. I don’t know how noticeable it is from the photos - after all, the remains of the stain gradually saturate the paint. And now he no longer looks strikingly white. In a year, I think, just like the bedside table, it will be saturated to a noble ivory color. On the edges and those parts of the surface where nothing was puttied, I then added abrasions with sandpaper. This is partly why I have so many photographs of the work process - I was afraid that after painting I would not find the right places where I could sand without opening the putty ones. Well, then again the favorite process. Varnish and polish. 4-5 layers of varnish, dry, sand, coat again. I varnished it for about a week, and it’s difficult for me to say how many layers there are. The handles have all been replaced with new ones. The old ones were made of brass and in such a lousy condition and appearance that they were no good. or were of no historical value. In general, I think so, judging by their flimsiness and appearance, they have already been replaced. (For example, on my old bedside table from the 30s, which I remodeled a year ago, the handles were the same type, but steel and stronger.) There were no handles on the doors at all - there were keys and brass plates. I didn’t knock out the locks, they fit very well and it was a shame to pick the side. Therefore, I covered up the holes and dents from the trim only on the outside, and Dima drilled holes for new handles through what was left inside. And yes, I completely forgot about the top canopy - this semicircular element with a bouquet, which is above the door of the wide part. Previously it was nailed down. I tore out the nails, covered up the holes from them, and the visor is now attached with glue. The last thing to be installed was the large door. I wanted to restore the old door fastener. It’s there as it should be - prehistoric, now I only see this on doll furniture - when there are two pins on the door in the corners, at the top and bottom, and in the body there are holes for them. These studs on which it should be inserted - the top one was missing, and the bottom one went too deep inside the door. I had to unscrew it and grind new ones a little longer along it. There were no special problems with this, because my husband has his own production facility at work with machines and other useful crap. All that remained was to move the finished treasure to its place and put all the things in it. It’s also a task to transfer from a series like yours with geometry and orientation in space - because the dimensions of the furniture, to put it mildly, do not quite correspond to modern doorways. Well, we got over it.
And they also coped well with sorting out the clothes - although the previous wardrobe was clearly larger in volume, everything fit, but only one package was sent to the “rags for sewing dolls” and “rags to wear at the dacha” sections.
Almost five months in dust, dirt, with the wardrobe either standing or lying on its back in the middle of the large room; watched “Friends” twice, “House”, “Spartacus”, “Rescue Me” and “The Sopranos” once, and “The Lord of the Rings” an unlimited number of times - and la voila! All is ready.