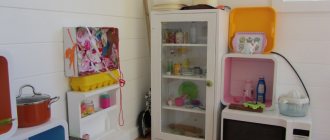
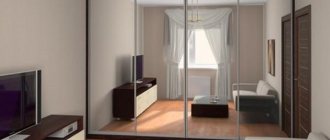
Photo of lighting in the dressing room
Types of tapes and their selection
The main criterion by which you should select a lighting strip for the kitchen is its protection from moisture.
LED diodes can be used to illuminate kitchen backsplashes made of glass or stone from the back. They effectively diffuse light from miniature light sources
Moisture, condensation, and temperature changes are inevitable in the kitchen, and LEDs must withstand this. Today there are the following types of tape according to the type of protection of electronic elements:
- Open. They are not sealed, and moisture easily gets onto the contacts of the conductive path. This type of tape is designated IP33. They should not be used for kitchen lighting.
- One-sided. The top part, where the LEDs are located, is sealed with a silicone protective casing. The marking of this type of tape is IP65.
- Double sided. This is the best solution for the kitchen; it is completely sealed, because the light elements are covered with a plastic casing. Similar tapes are marked as IP67 and IP68.
Tapes with maximum moisture resistance are also suitable for outdoor lighting. They also withstand sea water perfectly and do not suffer from condensation in the temperature range from -30° to +85°C
Also, when choosing this lighting element, you need to pay attention to:
- Power. It is also called illumination power. This indicator depends on the number of diodes in the lighting area. The brightest strips include 120 lighting components per meter. Such tapes combine design and lighting functions. Slightly “weaker” in light, the tapes have 30-60 sources per 1 meter. These are often used only for decoration; they are used to decorate the kitchen interior.
- The strength of the glow is determined by the energy consumption of the tape, and it is in the range of 4.8-32 W/m.
Strips with minimal luminous intensity are suitable for interior decoration and for installation inside shallow drawers and cabinets
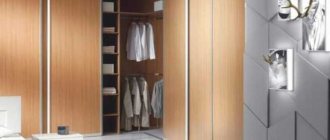
Custom cabinet
First, before ordering a wardrobe, you should pay attention to the range of stores in order to decide on the type, design, model.
It is necessary to formulate as accurate a picture of the idea as possible in order to make the designer’s work easier.
It is necessary to ask the manufacturer for a 3D virtual drawing in advance.
The advantage of the design work will be its only copy. It is better to entrust such work to a reputable company for custom-made sliding wardrobes.
Such work will be completed much faster and with better quality.
Sources of light
A variety of lamps are used as lighting, which are presented in a wide range in specialized stores. Remember, the choice depends solely on your needs, taste, and individual preferences. Today, perhaps the most cost-effective, simple and quick way to create lighting in the kitchen is the use of LED strip; it tolerates moisture and dampness well, while meeting all the requirements for safety, functionality, and creating a cozy atmosphere. It is usually glued to the bottom of wall cabinets. You can use LED strip in all kitchens, regardless of the design of the room, since the lighting is unnoticeable due to its compact size.
Illumination of cabinets in the kitchen interior in raspberry color
Kitchen lighting under cabinets can be made in different colors. The blue, green, and white colors emanating from the lamp are considered relevant today.
Designer recommendations:
In order to create a cozy home environment, you should avoid using cold fluorescent light, which is often used in the office. In kitchens of small areas it is possible to exclude the central lamp, which, on the contrary, is not permissible for kitchens of large dimensions. It is necessary to plan kitchen lighting in advance, since the wiring of each zone is carried out before the finishing renovation work is completed. It is important to think in advance about the areas of the kitchen that should be illuminated. The choice of size and type of lighting depends solely on the importance of a particular kitchen area.
Lighting for kitchen cabinets is as indispensable as having a stove in the kitchen, since it will be very difficult for housewives to do without it at present.
How to make lighting in a closet with your own hands
The most popular lighting option for wardrobes is LED strip. Let's take a closer look at its installation.
The interior lighting of the sliding wardrobe can be additionally equipped with a motion sensor, as well as an ultrasonic sensor. Moreover, in the latter option, the lighting will work only after opening the cabinet door, and not when people are simply near it.
Interior lighting can be equipped with a motion sensor
To assemble the LED circuit and connect it to the power supply, it is recommended:
- Cut the required amount of tape at the appropriate location where the dotted line of the scissors indicates.
- Prepare a wire of the required cross-section. For a five-meter tape you need 1.5 mm. If the tape is longer, you will have to calculate it using the formula. And the connection diagram for such an LED will be more complicated. If you connect all the pieces in series with each other, individual segments can heat up.
- Use alcohol to degrease the LED contacts.
- Strip and tin the wires.
- Solder the red wire of the terminal to the “+” and the blue wire to the “-“. If you mix it up, the light won't come on.
- Use heat shrink tubing to insulate the solder joints. You can replace the heat shrink tube with a glue gun.
- Guided by the color coding, connect the wires of the LED strip to the power supply.
Let's start installing the tape:
- Measure the required length of tape. Moreover, this must be done in special places. Be careful.
- Where you need to mount the LEDs, attach a 10*10 mm plastic corner. It will allow you to hide the tape itself and will not spoil the appearance of the cabinet.
- Connect the wiring to the cabinet. To do this, you need to make a hole in an inconspicuous place. If each shelf is intended to be illuminated, an additional hole must be made in the corner so that the cable can be lowered lower along the cabinet.
- Place the cable ducts on liquid nails and hide the wire in them.
- Place the LED strip on the corner and turn on the power supply. After all, install the limit switches and the backlight is ready.
To avoid tearing out the chipboard when making a hole, it is recommended to immediately go 5 mm deeper inside. And then drill from the back of the sheet.
Before assembling the backlight, you need to sketch out the connection diagram. You can use not only LED strip, but also lamps in the housing
Fastening is carried out using self-tapping screws or glue
Having illuminated the closet, you will no longer need to use a floor lamp or lamp to illuminate the work surface and search for underwear on the shelf. And if you use high-quality devices and do everything according to our instructions, you will be able to enjoy the practicality of opening the door and the functionality of this type of lighting for a long time.
https://youtube.com/watch?v=dWoz6Ui7yX8
DIY selection and installation
The main stages of self-installation of an LED strip in a room
Before you begin installing wardrobe lighting, you must, of course, choose the most appropriate lighting option. Practice shows that the most acceptable lighting sources for sliding wardrobes are fluorescent and LED lamps or LED strip. They ensure safety of use, save energy and are characterized by low installation complexity. But the simplest and most efficient way to illuminate furniture is to install an LED strip. In this case, it is necessary to take into account:
- acceptable tape length;
- lighting solution;
- the need to purchase a 12W power supply.
LED strip for furniture lighting
Decorating with LED strip, in addition to the indicated advantages, allows us to determine another advantage: there is no need to spoil the surface of the furniture to install it.
Despite the fact that the installation of such a light source does not require serious skills in working with electricity, this does not mean that they are not needed at all. Therefore, if the owner is not at all comfortable with technology, it is better to seek help from a specialist.
However, if you have the desire, you can master even very difficult moments, but installing an LED strip is not such a thing.
Approximate diagram of connecting an LED strip to a power source
The tape is mounted as follows.
- A plastic corner or small plinth is attached to the prepared place for installing the tape, which is secured using “liquid nails”.
Box or plinth for installing LED strip
- A tape is laid through the corners and secured to them.
LED strip in aluminum profile for furniture or ceiling lighting
- The adhesive layer is removed from it and it is glued to the surface.
- The backlight is connected to the power source with proper polarity (this may be the most difficult step for some). However, for most people, connecting it will not be difficult if you carefully read the installation instructions.
Installation instructions for LED strip for additional lighting
Advice. To avoid power losses, the length of the wire should not be more than three meters.
- The backlight switch can be installed on the side surface or under the shelf. It is better to place the power source at the top: it is convenient and safe.
Placing the backlight switch on the side wall of the cabinet
Attention! It is worth remembering that the transformer heats up during operation. Therefore, when securing it, you must comply with fire safety requirements.
- In order not to spoil the appearance of the furniture and protect your household from troubles, you need to take care to hide the wires and cables.
Shaping the interior of an apartment using lighting will bring originality to its design, indicate the taste preferences of the owners and their desire to live in comfort and beauty.
Beautiful built-in wardrobe with additional lighting for a romantic bedroom
Unusual wardrobe with photo printing and additional lighting
What are the advantages of LEDs
LEDs are some specific conductors that produce light when electricity is generated. The compositions may differ in chemical properties, which determines the brightness level of the light stream that they emit.
Lighting in a cabinet using LED strip is not always done directly. And all because the tape can overheat, or even crack over time. Therefore, a voltage stabilizer is needed.
Whatever tape you take, they have five-centimeter segments, each of which has three LEDs, and also has a special one. markings for easy cutting. The LEDs are first connected using a circuit.
LED lighting installation work
To illuminate your closet using an LED strip, you need to purchase:
- power supply (it can be replaced with an open type transformer) -
- strip with LEDs (if you buy an RGB strip, you will have the opportunity to customize the color of the lighting as you wish) -
- controller (now you can find cheap models that come complete with a control unit) -
- connecting terminals or blocks -
- electrical wire-
- fork.
When purchasing a tape controller, look for models with infrared meters. They can be controlled not only using a specialized unit, but also from a simple remote control designed for a TV. If you choose single-color diodes, then you will not need a control panel for the wardrobe lighting.
At the initial stage of installation work, you need to gradually connect all components into a common circuit. To do this, the supply wire is connected to the power supply. The controller is connected next.
As a rule, the wires intended to connect this component are quite thin and short. This makes them difficult to work with. And therefore, it is more correct to first clean them from the insulating coating, freeing the tips to a length of approximately 1 cm. To thicken the contacts, apply solder. Thanks to this simple action, the contact becomes much more reliable.
It is quite easy to attach the tape to the controller due to the fact that manufacturers mark the appropriate connections in different colors. In other words, you just need to combine wires of the same color together. You can combine them using terminals or soldering contacts. If you use soldering, do not forget to insulate the joints. If you decide to use terminals, add solder in advance. Otherwise, the contact may not be reliable enough.
Before the furniture lighting is completely installed, check out the LED strip by connecting it to the network. If you have used RGB diodes, test their performance in different light. If, for example, you are completely satisfied with the effect, then the tape can be glued inside the wardrobe. In most cases, it is fixed to the ceiling of the compartment and to the walls at the back. But part of the tape can be displayed on the front panel. Then your furniture will become an unusual design decoration.
Preparatory stage of installation
Previously, halogen lamps were often used to illuminate wardrobes. But their main drawback was that they got quite hot during operation. Therefore, it was possible not only to get burned by such a lamp, but also to damage the clothes stored in the closet. In addition, it is unsafe to use them, since modern furniture is made of flammable materials.
Therefore, fluorescent lamps or LED backlighting are now used. Such lamps remain cool even if the owners forget to turn off the lights.
You can install lighting only inside the wardrobe.
But furniture can also be illuminated from the outside by building lamps, for example, into the upper cornices.
Image 1. Backlight connection diagram.
Then this piece of furniture will also become a real decoration of the room.
Before starting work on installing the lighting, it is necessary to draw up a detailed connection diagram.
If you are not confident in your knowledge, then it is wiser to involve a specialist at this stage. An example of such a scheme is shown in Image 1.
In modern stores you can purchase ready-made kits designed for lighting furniture.
Usually the set includes from 3 to 5 lamps. But sometimes a standard set may not fit a particular cabinet according to some parameters. Then you will have to assemble the system yourself.
Related article: Decorating the bathroom in various ways
Required materials and tools
If you decide to use halogen lamps for lighting, then you definitely need to purchase a transformer. When choosing, you must consider the following parameters:
- Rated power. With its help, you can calculate the total power of the lamps that can be connected to this device. This means you can determine the number and personal characteristics of the lamps. But remember that the power of the transformer itself should be 5% greater than the sum of the power of the entire connected backlight.
- Output voltage. It should be equal to the operating voltage of the lamps that you want to use for the wardrobe.
- Transformer type (winding or electronic). When installing lighting for furniture, it is preferable to use option 2.
The device of a fluorescent lamp.
In addition to the transformer, you will need the following backlight components:
- electrical plug;
- wire (two-core cross-section 0.75);
- household switch;
- connecting terminals.
When planning lighting for the cabinet, remember that you should not use a wire longer than 3 m. Otherwise, power will be lost. When choosing a location for a transformer, do not forget that, unlike lamps, it heats up during operation. Therefore, it must be mounted at least 15-20 cm from the heat source. When calculating, it is also necessary to take into account central heating radiators, which are often located close to the walls of the wardrobe. Do not place the transformer in too narrow cavities.
To install the backlight you will need the following tools:
- screwdriver tester;
- a set of screwdrivers (it is wiser to prepare tools with flat and Phillips tips of different calibers);
- drill;
- special cutter attachment (crown).
The diameter of the cutter must match the internal diameter of the lamps. Otherwise you will have to widen the holes manually.
Lighting for the kitchen under the cabinets, light beams
Regarding light beams, only one thing can be said - these are somewhat outdated fluorescent lamps, which have recently been used extremely rarely. In fact, these are ordinary fluorescent lamps of a thin tubular design - they are relatively bulky and have practically no aesthetic appearance. True, recently small lamps of this type have appeared, which even look beautiful - they are up to half a meter long and, if necessary, can be connected to each other indefinitely. In principle, this is a good solution for the kitchen, but if you take into account their energy consumption, you can find something better - in general, an option for a solid four.
Installing such kitchen lighting under wall cabinets is quite simple to do it yourself. The only caveat is the power supply, which you will have to sort out a little. In principle, for these purposes you can also use a standard kitchen outlet located nearby - ideally it should be located behind the cabinets, since in this case the wires will not be visible. Also, such lighting can be powered from a kitchen hood, having previously equipped its connection point to the apartment electrical network with a standard socket. If you understand this point, then all the rest of the work will seem trivial to you.
- We take the first light beam and remove the shade from it, having first removed one of the side caps.
- We remove the fluorescent lamp and gain access to the holes for attaching the light beam.
- Now we simply install it in the right place at the bottom of the wall cabinets and fasten it with the small supplied screws.
- To top it off, connect the power cable to the light bar (from any side convenient for you) and insert the plug into the socket. If necessary, this wire can simply be extended.
If there is a need to connect two, three or more light beams into one circuit and thereby create full-fledged lighting for kitchen cabinets, then all subsequent beams are mounted in exactly the same way, with the exception of one nuance - each beam following the first is connected to the previous one using a small adapter , which is usually supplied with the product. First, we connect one beam to another, and then attach it to the wall cabinet. Everything is simple, clear and there are no unnecessary complications. This is one of those products whose ease of use is 100% taken care of by manufacturers.
How to make your own lighting in a wardrobe
This article will discuss how to install lighting in a closet. Sometimes we don't think about the fact that we might need a light in the closet when we buy a cabinet. But over time, it is difficult to do without additional lighting in the closet.
You constantly have to rearrange, put away, reconsider just to find the right thing. I think the situation is familiar to everyone.
As a rule, apartments have poor lighting, so very little light gets into the closet. To solve this problem, designers use many solutions.
These can be canopies in which lamps with or without motion sensors will be installed.
What are the cabinet lighting options?
Lamps with built-in motion sensors are installed so that the light turns on automatically when the cabinet doors are opened. Why bother turning the lamp on and off?
By the way, you can buy and install such lamps yourself, which will allow you to save money. Solutions and forms of lighting can be very different, depending on the needs.
Types of lighting:
- Mortise lamps, they save space and are quite economical. Such lamps are most often used in Shatura cabinets;
- Fluorescent lamps, they are used in large closets and dressing rooms;
- LED strips, such lamps are always easy to use, economical and will easily fit into any interior and cabinet shape;
- Also, in some cases, special control panels are used to control the light.
Before purchasing a cabinet, be sure to consider all possible light connection options.
Any type of lamps requires electricity, so first of all it is necessary to install the wiring to install the lamps.
Furniture lighting installation
Table of characteristics of fluorescent lamps.
First you need to prepare the sockets for the lamps. To do this, it is wiser to remove the panel on which the lamps will be attached. Before forming holes, be sure to mark their location. Moreover, both on one and the other side of the furniture board.
Related article: Sliding gates: practicality in operation
The nest is drilled to a depth of 7-10 mm. Next, you need to turn the panel over and finish forming the hole on the other side. If this is not done and you drill right through, then there is a high probability of damaging the wardrobe part. Especially if your furniture is made of chipboard.
The lamps are installed in the sockets intended for them and connected to each other. In this case, it is wiser to use a parallel connection. Then one lamp that has become unusable will not disable all the lighting. The transformer is connected last.
All lighting elements are connected to each other using terminals or terminal blocks. Modern pads are an aluminum plate with contacts. Such features allow you to connect wires with aluminum and copper conductors.
This cabinet lighting is controlled using a switch. It can be located outside the wardrobe or inside it. Sometimes chains are used as a switch, which give the furniture an original look.
General information
Creating a dressing room in an apartment or private house is a trend. A wardrobe is a place for convenient storage of things. A good housewife's clothes and shoes are always in good condition. The carefully thought-out design of such a room concerns not only shelves, niches, hangers and other attributes, but also lighting. Good light is an important element of a storage room, both open and closed. He helps you find the thing you need and put it in order. Such rooms often have mirrors, ironing boards, and sometimes provide privacy.
The location of things depends on the overall dimensions of the room that will be allocated for these purposes. It can be done in a separate room, if the area of the object allows it, or it will be located in a part of the room designated for these purposes. In the latter case, the dressing room is made in a sliding wardrobe, which is usually located on the entire wall.
The principle of wardrobe lighting
An important component of such dressing rooms are doors. Doors can be hinged or sliding, the latter design is preferable
The cabinet space should have a good view and here you need to think about interior lighting. It would be good if it turned on automatically when the doors opened. Lamps equipped with a motion sensor have this property. For lighting in the dressing room, any lamps are suitable, both built into the flat ceiling with diffused light, and wall lamps, as long as they shine with light as close as possible to daylight, i.e. natural. Local lighting of pull-out drawers will make the lighting multifunctional.
Special furniture lamps of mortise or surface-mounted type will perform the necessary function. Comfort and convenience depend on their location. You can also highlight the dressing area using spotlights. Wardrobe lighting is based on ease of use and safety. It is better to entrust it to specialists; they know the intricacies of installing lamps of various types.
Lighting for dressing rooms
Lighting in the dressing room is carried out using fluorescent, halogen, LED lamps or LED strips. When using halogen lamps, it is necessary to take into account the factor of their heating during operation. They should not come into contact with things to prevent ignition, which could lead to a fire.
For small-sized dressing rooms, spotlights or LED strips located around the perimeter are used. If the room allocated for these purposes is of impressive size, then chandeliers can be used for lighting. When placing a dressing room in a corner, it is recommended to use lamps on clothespins. They are easy to move to the desired location and change the lighting angle
If there is a mirror in the room, special attention must be paid to its lighting. This can be done by installing light sources on the mirror itself or using special brackets
Light sources for large walk-in closets can play a decorative function. And here everything depends on the flight of fancy and the capabilities of the owners.
The most economical lamps for lighting in the dressing room are considered to be products from the following companies:
- Omnilux (China);
- Reccagni Angelo (Italy).
The quality of these companies' products is well known. They produce modern design lamps that can decorate not only dressing rooms, but also any room in an apartment, private house, commercial and public premises.
Ideas for decorating dressing rooms in the following video:
Properly selected wardrobe lights save time on searching for clothes, necessary accessories and shoes.
Bedroom wardrobe
A wardrobe for a bedroom should be chosen taking into account the needs of everyone who will use it.
Practical content will include laundry baskets, trouser racks, a microlift for shirts, drawers for accessories and small personal items, as well as hangers specialized for belts.
LED lighting for the kitchen under cabinetsinstallation stages
It’s easy to highlight the work area with tape. Having the tools and materials listed above, you can get to work.
First, you should measure the length required for installation. To do this, under the bottom of the wall cabinets, you need to measure the area on which you plan to stick the tape. If the tape was bought in a reel, then it has a standard length of 5 m. You need to measure the required length from it and cut it.
Reel with LED strip and miniature remote control “card”
After cutting, the outer contacts are exposed from the silicone casing; they will be needed for soldering or connecting connectors. It is better to connect the wire to the tape using soldering. Mounting points are marked + and -. This method is more reliable, although a little more time-consuming. The use of detachable connectors is fraught with burnt contacts and fire.
Do not turn on the backlight for at least several hours after installation! During heating, it may peel off and the glue will dry out. There's no way to fix this anymore
The next step is to insulate the connection using electrical tape or heat shrink tubing. Electrical tape is a familiar option and there is no need to explain how to use it. A new and more convenient solution is heat-shrink tubing - it provides a better appearance and seals the connection better. You need to buy a tube with a diameter slightly larger than your connection, cut off the required piece, put it on the contact and heat it with a hair dryer. Due to exposure to warm air, the material shrinks and tightly covers the joint.
Neutral white lighting for backsplashes and countertops in a kitchen with wood-grain facades
The tape is installed directly on the kitchen cabinet, under its lower part. The location of the tape depends on the size of the working surface. It is optimal to make two backlight lines:
- Right under the wall.
- In the middle or along the edge of the cabinet.
If the tape does not contain self-adhesive, double-sided tape should be used. First you need to fix it on the tape, and after degreasing the surface, carefully removing the protective layer, glue it to the selected area.
Before gluing the tape, you need to thoroughly degrease the surfaces. This must be done especially carefully under the slab if the tape will pass there as well.
The transformer should be secured near the place where the tape is glued. The wires, which were attached to the tape at the first stage, are connected to the 220V network through a transformer. And it is already plugged into the outlet using a plug.
Contour decorative lighting of the podium, furniture and shelves in the loft kitchen
LED strips along the edges of the shelves in this pantry act as main lighting.
You can watch the video for details on how to install the LED strip.
Red backlighting in a snow-white glossy kitchen
Stylish lighting of metal mosaics using LED strips on open shelves
Conclusion
Installing LED lighting in the kitchen is the best solution. The tape is easy to install, lasts a long time, and does not require special care. With its help, you can create optimal lighting for the work area and provide lighting in the most secluded corners of the kitchen.
Neutral white lighting will help achieve the ideal lighting configuration for work areas, and low-power decorative color lighting will create a unique mood in the evening.
Tabletop lighting with LED strip
LED lighting for the kitchen under the cabinet using a diode strip is by far the best option - it has many advantages, but the most important of them is invisibility. In the sense that the tape is a very thin lighting device, and after installation it is invisible to the human eye. If it does not work, then it is almost impossible to guess its presence. Among other things, continuing the theme of the advantages of LED lighting, you can additionally add efficiency in operation, ease of maintenance and almost elementary installation, which can be represented as a sequence of work in three main stages.
Lighting of the main areas of the kitchen space
The atmosphere of the kitchen must meet three main criteria: functionality, convenience, coziness
When developing a kitchen lighting project, it is very important to take into account that the housewife must see what she is cooking, otherwise the meaning of the lighting is lost. LED lighting for the kitchen on cabinets will help create such an environment, which is easy to install even with your own hands.
The main devices designed to illuminate the working kitchen surface are: fluorescent lamps, lamps, LED strips and other special devices, which are presented on the market and in stores in a wide range.
Bright black and orange set with illuminated cabinets
As a rule, the kitchen can be divided into the following main zones:
- Food preparation area. This is where the stove and hob are located. As a rule, halogen lamps are used to illuminate this area, which are pre-installed in the hood. If they are not available, we recommend installing accent lighting fixtures.
- Dining table area. Currently, the use of lamps for table lighting is of a secondary nature, giving way to the use of LED strip, which can be placed along the perimeter of the ceiling of the room.
- A work area presented in the form of a tabletop. This is the place where all the preparatory work takes place (cutting, stuffing, etc.). The illumination of this area requires special attention, so we will consider the lighting of this area in more detail.
Ideally, it is important to provide a combination of centralized light in the kitchen, usually located in the form of a lamp in the center of the kitchen and local lighting above a certain area. A rational solution is the use of lighting installed in each zone, which together serve as components of the overall design concept
Functional lighting of drawer cabinets with fluorescent lamps
Wardrobe lighting
Lighting device in the wardrobe
The presence of lamps in the wardrobe is not only impressive, but also very convenient. Light sources, in addition to performing a decorative function, allow you to use the interior space with maximum efficiency and comfort. Thanks to sufficient lighting, searching for the right thing does not become a problem, and items on the shelves are viewed quite easily and simply.
If you plan to use furniture lamps in a sliding wardrobe, you must first lead the wire to the installation site of the sliding wardrobe and the liner must be located in the upper part of the room.
Backlighting intended for lighting furniture cannot fully replace conventional incandescent lamps and its service life is very short; the furniture manufacturer’s warranty, as a rule, does not apply to them.
In most cases, to install lighting in a wardrobe, they use a canopy, a protruding part of the roof by 10-15 cm. It can be of any shape: both straight and curved. It depends on the design idea. Most often, the number of light bulbs is equal to the number of doors - compartments, i.e. Each door has its own lighting. But this is not a mandatory rule and depends on the designer’s imagination.
Installation of lighting can include either a simple switch or automatic activation when the door leaf is opened. The issue of automatic on/off is solved in a variety of ways. For these purposes, photo relays, limit switches, motion sensors, and a reed switch in combination with a magnet can be used.
The switch for furniture lighting is usually located either on the side of the cabinet or under the shelf. The transformer itself is usually located deep in the mezzanine or on the roof.
Lighting solutions and types of lighting in wardrobes
External lighting. This lighting is mounted on the canopy outside the wardrobe. The facade, glowing as if from within, looks very catchy and makes an impression. However, the maximum that weak light bulbs can illuminate is the contents of the very top shelf. They do not help to clearly see what is inside the cabinet, and serve rather as decoration. However, the effectiveness of this type of lighting increases significantly if there is no natural light in the room. This is especially true for hallways that do not have windows.
Interior lighting. The light from the electrical appliance system mounted inside the wardrobe is distributed evenly and is as comfortable as possible. The presence of multiple light sources greatly facilitates the visibility of the contents of the shelves and facilitates internal navigation.
Combined system. Light sources are placed on both internal and external structures, complementing and somewhat duplicating each other.
Any of the listed types of lighting can be either spot or general.
Spot, in addition to its immediate purpose, creates a mood and a special, unique atmosphere. This type of lighting is a kind of interior object and decoration not only of the cabinet itself, but also of the room as a whole. It is much more suitable for illuminating the desired shelf or section if necessary.
If desired, the lamps can be built directly into drawers, door leaves, ceilings and wall panels; you can shine light on clear glass shelves or create a variety of patterns using LED strips. It is entirely acceptable to use track lighting systems mounted directly on the ceiling panel.
When assembling the lighting system, the following types of lamps are used:
invoices,
mounted,
mortise (built-in).
Mortise lamps are the most convenient and traditional. When they are installed, all wires are completely hidden and invisible to prying eyes, and the light bulbs themselves are “recessed” into the ceiling or wall slabs. Overhead lamps and hanging lamps are fixed on special legs. They have many stylistic ideas and design incarnations, which provides great opportunities for original colors and beautiful finishing.
Wardrobe lighting typically uses halogen or LED lamps, which, unlike conventional lamps, provide soft and diffused light. The reflected light from interior items when using these lamps gives a special and unique shade.
The latest achievement in furniture lighting technology is LED lamps. They are very convenient: they last a long time, can be installed both inside and outside the cabinet, heat up slightly and consume minimal energy. The only drawback of LED lamps is their higher price. But if we remember that their service life is six to eight years, and the number of inclusions is not limited, then this drawback does not seem so serious. In addition, the bright and rich light of these lamps very favorably emphasizes the advantages of the furniture. Unlike halogen light sources, the power and intensity of LED lamps can be adjusted. Their work can be programmed by zoning the cabinet space by color and lighting, using a fading effect, etc.
It features low energy consumption and fluorescent lighting, which produces a pleasant blue and soft light. It is quite expensive to install, but fully pays for itself during operation.
Halogen light sources can also be used. Halogen lamps are convenient, beautiful and, importantly, inexpensive. However, they have one significant drawback: they get very hot. Firstly, there is a danger of burning your hand when taking something out of the closet. Secondly, an object in contact with the lamp may catch fire (and, as a rule, non-fireproof items are stored in the closet). In addition, halogen lamps easily burn out with minor voltage changes, so they have to be changed frequently.
In a very deep cabinet that requires bright light without a diffuse effect, a lamp can be installed in which one or more fluorescent lamps are located. They are very convenient in terms of lighting, but are not entirely practical for a wardrobe due to the strong heating.
Xenon lamps are not subject to the same intense heat. Xenon light is pure and bright, so color distortion in such lighting is completely eliminated. Another advantage of these lamps is the complete absence of ultraviolet rays, which lead to fading of clothes.
So, when ordering a wardrobe for a bedroom, hallway, nursery or any other room, do not forget to take care of the lighting. This will not only decorate the interior, but will also allow you to create additional light sources in the room, and will also make using the closet more convenient. By installing the same lamps as in the closet into the wall panels, you can combine the lighting design of the room into a single whole.
Ironing board built into the wardrobe
Since there is always not enough space in the apartment for this necessary item, the “ironing iron” is usually huddled in some gap between the closet and the wall. Taking it out, laying it out, and then collecting it and putting it back in place is an activity that is disliked by all family members. It constantly interferes with something, sometimes it’s inconvenient to get it out, and sometimes it’s all of the above. This problem can be solved by placing a built-in ironing board inside the wardrobe. Specially designed designs of several types allow her to be in this furniture without taking up much space.
An ironing board built into a cabinet can either simply be pulled out in a straight line and, through simple steps, be assembled into an object familiar to us all, or be equipped with special hinges and gas struts, thanks to which it folds and tucks away into a narrow cabinet opening, specially designed for such goals.
Types of wardrobes
It is necessary to buy sliding wardrobes based on the intended location in the apartment.
There are both cabinet models designed to be moved, and built-in ones.
When moving, the owners will be able to place the cabinet model in the new apartment, but the built-in versions cannot be transported so easily. Even if it is possible to disassemble such a structure, the parameters of the new room may differ from the previous one.
Which lighting fixtures should you choose?
Each home owner independently selects the lighting fixtures that seem most suitable to him.
However, there are still several popular solutions that are used in most cases:
Experts explain the popularity of the products by the fact that with their help you can bring various ideas to life. After all, they can be mounted not only directly into the ceiling, but also under shelves, above mirrors, on cornices or even on doors.
Thanks to this, the light in the dressing room can be organized so that certain areas are better or worse visible. This option is very well suited for decorating modern dressing rooms. But if your room is decorated in a classic style, you will have to refuse to purchase these lighting fixtures.
Brackets are also quite popular lighting devices, since with their help you can illuminate things and a room from all sides. This is possible due to the fact that the body with claws is installed around the perimeter.
Pendants - they can also be placed inside drawers and shelves, so using them, you get the opportunity to create better lighting for the room. The original design of the products allows you to change the direction of the light as needed.
An example of its use is the lighting in the dressing room, the photo of which is presented below.
The room depicted in the photo is illuminated using spotlights and wall sconces. Thanks to this, a more comfortable environment is created, because sunny shades emphasize comfort and coziness.
List of sources
- decorationinfo.ru
- okuhne.net
- bezkovrov.com
- 10i5.ru
- happymodern.ru
- www.remontpozitif.ru
- ZonaKuhni.ru
- metrodomos.ru
- amperof.ru
- allstroygroup.ru
Light outside, light inside
Wardrobe light performs two functions – decorative and practical. Decorative, as the name implies, serves to decorate the cabinet and has no special significance for its functionality. The practical purpose of lighting is to make it as easy as possible for owners to find the things they need, as well as to illuminate the area in front of the mirror on the door so that you can make sure that your outfit is in perfect order.
Lighting fixtures may be located:
- inside the cabinet - located in such a way as to evenly illuminate the entire internal space, can be installed directly in drawers, on door leaves, on the ceiling, on the walls;
- outside - as a rule, they are mounted in hanging canopies and serve primarily for decorative illumination of the facade and illumination of objects located in front of the mirror; they cannot illuminate the contents of the cabinet;
- combined installation is the most successful option, with external and internal lamps complementing and duplicating each other.
It is clear that combined lighting in a wardrobe will make it as comfortable as possible for storing things, searching for them, and trying them on.