A bed with lighting is not only an original interior solution, but also allows you to create a romantic atmosphere in an adult bedroom or save a child from the fear of the dark when installed in a children's room. What lighting methods exist, how to select the equipment yourself and install it, read on.
Bed complemented by decorative lighting
Backlight options
Bed lighting in a bedroom or children's room can be made:
- LED strip;
- from duralight.
An LED strip is a circuit board on which special light bulbs - LEDs - are located.
The advantages of LED strip are:
- diversity of species;
- ease of installation. The tape has an adhesive base that allows you to fix the equipment on any surface;
- long period of use;
- minimal energy consumption;
- the ability to create specific effects, for example, a floating bed as in the photo earlier.
The disadvantages of LED strip include:
- higher cost compared to spotlights and other lighting devices;
- low color rendering coefficient.
LED strip allows you to make beds:
- with illumination from below, which can be located around the perimeter or at certain points (picture above);
- with lighting in the headboard. The LED strip can illuminate the headboard, wall, any shelves or decorative elements.
Using LED strip to illuminate decorative elements in the headboard
Duralight is a flexible cord containing incandescent lamps or LEDs.
Flexible glow cord
The advantages of a flexible cord are:
- complete moisture resistance;
- resistance to mechanical stress;
- ability to work in a wide temperature range from -20°C to +60°C;
- duration of use.
The following are produced using duralight:
- lighting under the bed;
- podium made of pallets with lighting.
Bed on a podium made of pallets with lighting
Bed lighting with LED strip
An LED strip is a board with LEDs placed on it. It also has its pros and cons. The advantages include the following:
- easy installation due to the adhesive layer;
- ease of use, compactness;
- the price is lower than for duralight.
Flaws:
- low moisture resistance;
- lack of protection from mechanical damage.
Most often, LED strip is used to illuminate the bed. Now let's look at the installation methods step by step.
Organization of lighting
How to make lighting with your own hands? Manufacturing technology depends on the chosen type of lamps.
Selection and installation of LED strip
When choosing an LED strip, you must consider:
- type of lighting. Ribbons with single-color and multi-color glow are available for sale;
Types of LED strips
- lighting intensity (brightness), which depends on the number of light bulbs and the power of the equipment.
To assemble a lamp from an LED strip, you will additionally need:
- power unit;
- connecting wires;
- controller and control panel for multi-color ribbon. The equipment is designed to select and switch operating modes;
- aluminum profile. The equipment can be replaced with a plastic profile or cable channel;
- additional equipment: sensors (a lamp with a motion sensor or sound sensor will turn on automatically), a dimmer (a device for smoothly increasing/decreasing the brightness of lighting), a device for providing autonomous power, and so on.
The process of organizing the backlight is as follows:
- making an improvised lamp. At this stage, the tape is cut into individual elements and connected into a finished structure. To join the sections together, you can use special adapters or the soldering method;
Possible tape joining technologies
- installation of the power supply and selected additional equipment;
Connection diagram of the tape to electrical equipment
- fastening the tape. To obtain directional light, aluminum profiles are used, which are fixed to the bed using self-tapping screws. The tape is fixed in the profile on an adhesive base. Installation of the tape can also be carried out in profiles made of other materials or without them (fixation with glue or clamps);
What are the advantages and popularity of curtain lighting?
By installing lighting for curtain niches using LED strip, you will see the following advantages:
- the room will have an original design. The effect of sunlight falling on the window is created, regardless of the time of day and weather;
- diodes emphasize the contours of the room and create an attractive view not only from the inside, but also from the outside of the house;
- Due to lighting, the living space visually increases.
Another undeniable advantage is that LEDs consume a small amount of electricity , especially when compared with incandescent lamps. They are also less dangerous and will last longer. Low voltage is sufficient for illumination, so LEDs do not have a detrimental effect on the appearance of curtain or blind fabric.
We recommend watching the video: DIY curtain rod lighting.
Preparation and installation options
At the preparatory stage, the size of the bed and the location for placing the LED strips and power supply are calculated. To do this, you will have to remove the mattress, find the optimal place to mount the LED strip so that its light is directed downward, and measure the length of all the segments that will be located around the perimeter of the structure. Then you need to select the type of light-emitting chips:
- SMD 3528 IP20 with a brightness of 420 lm, costing about 60 rubles/m;
- RGBW-SMD 5060 IP33 with a brightness of 2000 lm, costing about 200 rubles/m + RGBW controller;
- or some other intermediate option.
After this, you need to purchase an LED strip and a profile of the same length. Why the cost of a profile? Firstly, the LED strip will stick well to the clean and smooth surface of the profile, and secondly, it will serve as a radiator, since it is not recommended to operate fairly powerful LED strips without an additional heat sink. Often the supporting part of modern double beds is made of fibreboard (MDF) or wood, which have extremely low thermal conductivity. But even if the bed frame is made of steel, it is not advisable to glue LED segments to it. Only inside the aluminum profile will the LED strip be reliably protected from any mechanical impact, such as:
- vacuum cleaner tubes during cleaning;
- children's curious hands;
- teeth and paws of domestic animals.
Installation of LED strip
- Buy LED strip according to the size of your bed. Use the same principle to select a profile. The LED strip can already be found with an existing power supply, but if you bought the parts separately, then the power supply and other elements are connected using a soldering iron, according to the diagram below.
- Cut the tape and profile into pieces of the required length.
- Install a profile following the instructions in the photo below. Do not forget to degrease the mounting surface of the future lighting.
- If you decide to use RGBW tape, then make sure that there is an RGBW controller in the circuit. If it is missing, buy it separately and connect it using a soldering iron.
- Below is a diagram using RGBW.
- According to the diagram, connect all the elements together and check for functionality.
- Be sure to insulate exposed joints and solder joints.
If you want to add some zest to the design of your bedroom, then using the same principle you can use LED lighting for shelves, headboards, etc. Let me remind you that it is easier to purchase an LED strip with a power supply included if you do not consider yourself a jack of all trades.
This completes the installation of the bed lighting.
From all that has been said, we can conclude that LED lighting is the best analogue to conventional lighting. With the help of such lighting, you can create an unusual bedroom design, with your own hands.
LED lighting under the bed
The device is an LED strip equipped with a motion sensor and a light sensor. The device will only operate, so you won't have to turn it off during the day. It is enough to install the device once and you can use it constantly.
The backlight operates from the mains. There is no need to worry about the batteries running out. And due to the fact that the light source is LEDs, the device is completely safe. And you can safely equip a children’s room with it, because this is one of those places where light may be needed at any moment.
Installing the backlight is quite simple. The LED strip is attached to the bottom of the furniture using double-sided tape, which you will find in the kit. In a little while, you will be able to equip your bedroom with additional lighting.
Characteristics
- Light source: 36 LEDs;
- LED strip length: 120 cm;
- Sensor range: 3.5 m, angle 120 degrees;
- Color temperature: 2700 – 3000 K;
- Possibility of adjusting the backlight switch-off timer: from 30 seconds to 6 minutes.
Equipment
- 2 x LED strip;
- 2 x Motion sensor;
- 1 x Connecting cable;
- 1 x Power supply.
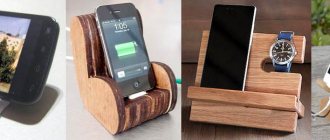
Making a bed with your own hands is by no means an easy task. But with a strong desire, as well as the availability of the necessary materials and tools, it becomes real! Now we will learn how to build a bed, but not quite an ordinary one - we will build LED lighting into the headboard, it will allow you to read books before going to bed. There will also be a cell phone charger on the bed.
We will need:
- boards, beams (boards of a contrasting red color will also be required); — car USB connector; — LED strip; - solder, soldering iron, adapter, wiring, clamps; - wood glue; — carpentry tools; — boards from chargers.
Step 1
The author began by creating a model of the future bed.
You can sketch it out either on a piece of paper, noting your calculations, or create a layout using a graphics program on your computer (fortunately, you can find a lot of them on the Internet). In the photo you can see what the final bed project of the author of this master class looks like. The legs are curved downwards, there is also a low side on the opposite side, there is a headboard (this is where the LED strip will be located). The author’s mattress is supported by transverse beams in a box; the height of the bed is quite high, so you can safely make a place under it to store bed linen. Just remember that your layout must be adaptive.
Some dimensions may have to be adjusted, this is influenced by the dimensions of the source materials and their quantity. Step 2
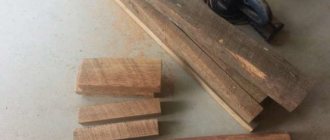
Make a panel from red boards. Take narrow boards, glue large squares for the headboard. You can't do without clamps and wood glue. Glue is applied to the sides of the squares, the author fastened the boards tightly, and after half an hour removed the excess glue that appeared. Then wait for the glue to dry completely.
Step 3
Legs are more difficult to make. They need to be made curved. The basis for them is a 4x4 beam. Adjust the length of the bars based on the layout of your bed. Make a cut on one side at the bottom, glue small pieces of timber to the opposite side, after adjusting them to the required shape. Fasten the legs with glue; when it dries, sand them with coarse sandpaper, then with fine-grained sandpaper to give the material a smoother texture.
Step 4
Make bases for the headboard for the opposite side of our future bed. In appearance, they resemble rails fastened with boards (they are transverse). Secure the parts with wood glue and self-tapping screws.
Step 5
For panels, blanks need to be more aesthetically pleasing. Cut off the edges of the squares and sand. This is a very painstaking job - be patient. Prepare a layout for setting up your router in advance.
Step 6
Insert the finished panels into frames for the headboards of the bed. Almost everything is secured with wood glue. Clamps are also needed; remove them only when the glue dries.
Step 7
Now move on to the bed frame. Fasten the side parts together, prepare holes for securing the cross beams. They need to be secured with glue and bolts.
Step 8
Now create a screen - it should mask the LED strip. This is a thin figuratively carved board, its length is equal to the head of the bed.
Step 9
Cut grooves on the side for the USB connector. Carefully insert the wires, circuit, adapter from the car USB. To cover the inserts from the boards, cut out the plates with holes and insert them into place.
Step 10
Secure the tape under the top cross board in the gap. The photo shows everything.
Building pieces of furniture with your own hands is not an easy task. But if you want and have the tools, everything becomes possible. This master class will demonstrate how to build a bed, but a little unusual. Its back will have a built-in LED backlight, which will allow you to read before bed, as well as a special device for charging your mobile phone.
Materials
To make a bed with LED lighting with your own hands, you will need:
- beams and boards, including wood boards of contrasting red color;
- LED Strip Light;
- car USB connector;
- soldering iron;
- solder;
- wiring;
- adapter;
- carpentry tools;
- charger boards;
- wood glue.
Step 1
. The very first step is to create a bed layout. You can sketch it out on paper, at the same time noting all your calculations, including materials, or create a layout in the appropriate graphics program. The final project of this bed looked like in the photo. The bed has a headboard into which the tape will be built. There is also a low side on the opposite side; the legs of the bed are curved outwards. The mattress will be supported by cross beams in the box, and the bed will be high enough to provide storage space underneath.
Please note that your layout must be responsive. Be prepared for the fact that you will have to adjust some dimensions. This can be affected by the source materials, or rather their dimensions.
Step 2
. Make a panel from mahogany boards. In this case, the boards were narrow, and therefore large squares for the headboard had to be glued together. For this job, use wood glue and clamps. Apply glue to the sides of the squares, secure the boards and after half an hour, remove the excess glue, leaving parts of the headboard in this state until completely dry.
Step 3
. It's a little more difficult to make the legs. In this project they had to be curved. The base of the legs will be a regular 4 x 4 beam of the size that suits you. Adjust its length according to your own project. In the lower part, on one side, you need to make a cut, and to the opposite side, glue small pieces of the remains of the timber, adjusted to the desired shape. The legs should also be secured using wood glue. After the materials have completely dried, the legs need to be sanded. First with coarse sandpaper, and then with fine-grit sandpaper for a smoother texture.
Step 4
. The next step is to make bases for the headboard and for the opposite side of the bed. Outwardly, they will resemble rails fastened with transverse boards. All parts must be secured to each other using self-tapping screws and wood glue.
Step 5
. Blanks for panels should be made more aesthetically pleasing. To do this, the edges of squares and rectangles need to be cut off and then sanded. Please note that this is a painstaking work; it is better to prepare a layout for setting up the router in advance.
Step 6
. Insert the finished panels into the frames for the headboard. Secure all parts together with wood glue and clamps. Remove the latter after the glue has completely set.
Step 7
. It is also necessary to make a bed frame. To do this, fasten all the side parts together and prepare holes for attaching the cross beams. They need to be fastened together with bolts and wood glue.
Step 8
. Now for the head of the bed you need to make a flap that will disguise the tape. The damper itself is a thin figuratively carved board as long as the headboard.
Step 9
. On the side of the headboard in the bed you need to cut grooves for a USB connector. The circuit itself, the wires and the adapter from the car USB should be carefully inserted. To close these inserts from boards of the same color, you need to cut out plates with holes and insert them into place.
Step 10
.The LED strips should be secured in the gap under the top cross board of the headboard.
Step 11
. In order for the LED strips and USB connectors to receive a charge, you need to install adapters at the back of the headboard. Use touch sensors to turn bands on/off. All these structural parts must be connected using soldering irons and wires.
One of the options for decorative lighting in a children's room and bedroom is to create hidden lighting for the bedside area. To do this, as a rule, they use an LED strip or duralight, which is attached around the perimeter of the bed. Next, we will take a closer look at how to make a bed with lighting with your own hands, providing several options for instructions with photo and video examples!
Ready-made options with photos
The result obtained directly depends on the idea. The above describes the standard installation option, which can be varied at your discretion. Below (pictured) are bold solutions, but at the same time difficult to implement. Therefore, if you do not have confidence in your own abilities, it is better to entrust the work to professionals.