Peculiarities
Mosaic is a special type of facing material. This tile consists of small elements, which is why it looks special in the interior. In appearance, this is an ordinary rectangular tile, which has a different base, thanks to which all the small segments stick together. The base can be made of mesh, paper or silicone. Thanks to it, you can easily install tiles.
The main feature of this material is that it can be used independently (create a continuous installation over the entire surface). In addition, it is suitable for partially decorating surfaces. It can be used as decorative fragments, combining mosaics with regular tiles or some other finishing material. Often, mosaic slabs are used for cladding bathtubs or sinks, after which boring plumbing items begin to play with new colors, becoming the center of attention in the interior.
This type of tile is durable and easy to maintain.
Today, global manufacturers and well-known brands offer a very wide selection of mosaic tiles.
There are different tiles on sale (tile, decorative, marble, glass, mirror, gold) :
- The most popular type is tile or ceramic tile . Like regular facing tiles, the mosaic surface can be different. It can be matte, glossy, rough, pearlescent surface. The color palette pleasantly surprises, allowing you to choose not only classic shades, but also interesting color combinations. This type of tile can be used in a variety of rooms. It is used for finishing ceilings, walls or floors, decorating facades, and fireplaces. The material is very versatile, which is why it is in great demand.
- Glass mosaic has been very popular since ancient times. This finishing material is durable and impact resistant. The color of this tile may vary. During its production, glass melt is painted in different shades. This material will look great in the bathroom.
- Today, stone It can be granite, marble. The uniqueness of this material lies in its texture, thanks to which you can create unique decorative elements. This type of tile is often used to decorate the floor; it can even create a stone carpet.
- Mirror mosaics are used when they want to not only add some zest to the room, but visually expand it. This material is completely safe for health, like all others. In addition, such tiles are easy to install.
It is easy to care for it using modern means. It looks very original in the interior.
Glue selection
The quality of attachment of the material to the surface, as well as the final result of the work itself, depends on the correct choice of glue. When choosing an adhesive, you should consider the material from which the tiles are made. An important role is played by the thickness of the facing material and its transparency. You can choose a special glue, which is sold in every hardware store and is intended for all types of mosaics.
As a rule, this glue contains sand, which is why it has a gray tint. This type of glue is suitable if the material is opaque and is glued to a familiar surface (floor or wall). If the mosaic is transparent, it is better to pay attention to glue with a similar composition and white color.
This glue can be used during installation of glass material.
Epoxy glue is one of the more reliable. It can be used for cladding those surfaces that will be subject to frequent use. For example, this glue is often used for laying floors.
You can pay attention to the hard or deformable composition:
- The first option can be used for concrete or brick surfaces. As a rule, this glue is chosen for walls.
- Deformation will be needed if the house is subject to frequent vibrations (for example, if a railway passes nearby). This type is suitable for finishing surfaces that are subject to temperature changes.
It is not difficult to correctly calculate the glue consumption for the selected surface. If you have already purchased adhesive for mosaic installation, it is enough to carefully study the instructions, which usually indicate all such nuances. To make an approximate calculation of glue consumption, you can multiply half the thickness of the selected tile by the average glue consumption (1.3). As a result, you will get the result for consumption per 1 sq. m. As a rule, the average glue consumption is from 1 to 2 kg.
It is important to consider the thickness and dimensions of the material itself: the larger the slab, the thicker the adhesive layer should be. For example, a tile measuring 30 x 30 cm requires an adhesive layer of more than 4 mm.
Laying nuances
Laying mosaics is not as difficult as it might seem at first glance. However, without preliminary preparation of the base, the result will be much worse.
Surface preparation
Before starting any tiling work, we recommend that you properly prepare the surface. First, the surface must be cleaned of debris and small dust particles. This can be done using a paint brush or any large brush.
Mosaic tiles must be laid on an extremely flat surface. To achieve this, you need to remove the old coating. Then the base is leveled, getting rid of potholes, chips, holes and even small cracks. They can also affect the final appearance of the finished cladding. After the starting coating has dried, it is trimmed and covered with a layer of primer. It is needed to strengthen the adhesion of the mosaic to the prepared base.
You can glue the trim only after the primer has dried. If you do this earlier, you can disrupt the formation of the crystal lattice formed from the soil during the drying process.
If the surface requires special leveling, the plaster mixture is applied in several layers. In an attempt to save time, you can lose quality training. A thick layer of plaster will fall off along with the mosaic within the first year after repair. In addition, it will crack, which will lead to the issue of dismantling the mosaic.
How to lay mosaics on a wall to create a luxurious interior?
- Surface preparation.
- Applying glue.
- Gluing tiles.
- Marking.
- Removing paper and glue residue.
- Grouting gaps.
- Applying sealant.
Thoroughly clean the surface on which facing work will be carried out from peeling plaster, old paint, wallpaper and dirt. If there are recesses on the wall, they must be puttied. Finish the walls with coarse sandpaper.
Apply the adhesive evenly onto the wall using a notched trowel. You need to cover as much surface with glue as you can lay tiles in 10 minutes (drying time for the glue). You don’t have to apply glue to mosaic tiles, however, experts still recommend treating the mosaic as well for better adhesion of the cladding.
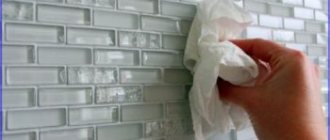
How to glue a mosaic on a wall? Begin laying the mosaic tiles with the paper side facing out. After this, press firmly on the tile with an ironing press. If excess glue comes through the gaps, it must be removed with a damp cloth.
Here's a video about laying mosaics on a wall.
After the first fragment of the mosaic is glued to the wall, it is necessary to mark the wall according to the level. To prevent the sheets of tiles from moving downwards from the level during the drying process, it is necessary to make a double gap under them in advance using special cross-spacers.
Check the level of the entire sheet of tile. If it deviates, carefully adjust it using a wooden block, lightly hitting it with a rubber mallet.
15-20 minutes after the glue has dried, remove the paper from the top surface of the mosaic. To peel the paper off easily, you need to wet it with a wet sponge. The paper will come away from the tile well after it is completely saturated with water. Use a knife to cut off any excess glue.
After the tiles have completely dried (after about 24-30 hours), it is necessary to remove all cross-spacers from the gaps. Then, using a grout float at a 300 angle, apply the grout diagonally to the mosaic tile and forcefully move it over the surface a couple of times, trying to fill the gap as tightly as possible. Grout first on a small area to determine the adhesion of the solution.
This is done in order to have time to clean the tiles from the hardening grout in time, otherwise it can grab very tightly and it will be much more difficult to remove it. Scrub the dried mortar at a right angle with a float, then wipe with a damp sponge and polish with a dry cloth.
In order to extend the durability of mosaic tiles and protect gaps from moisture penetration, apply a small layer of sealant or a special protective coating to the seams between mosaic tiles.
What glue to use for mosaic
Mosaic coating allows you to realize more design ideas than large-sized tiles. Therefore, the material is used both as a separate decorative element of the interior and for continuous cladding of the room. What glue to use for mosaics and what does the design process look like?
Which mosaic glue to choose? It is important that the composition is resistant to moisture, has good adhesion, and dries quickly. Depending on the degree of transparency of the tile, the color of the solution is also relevant. If the base has slight differences, then attention is paid to elasticity, leveling ability and degree of shrinkage.
What to glue the mosaic onto? The main criterion for a material is the binder (base). So, there are 3 main types:
- cement (sold dry);
- dispersion (ready-made mosaic adhesive with the addition of acrylic);
- two-component adhesive or reactive (epoxy or polyurethane based, prepared before use).
What types of grouts are there and how they differ
Grout for tiles and mosaics are available in two versions. Cement and epoxy. Cement grout is easy to apply and remove, and its cost is not high.
When applied, the grout is diluted with water or liquid latex. Cement grout can be used on joints no more than half a centimeter wide.
Disadvantages of cement grout: they are not suitable for enameled tiles as they will leave scratches. Also, the color of cement grout has a small range of colors.
The most popular grouts are those with an epoxy composition. They contain cement and resin. Epoxy mass is plastic and easy to work with. It will not fade over time, and quartz sand is used instead of color filler.
The color palette is very rich, and you can choose any shade, as well as gold or silver. The grout sparkling and shimmering in the sun and in the rays of artificial light makes the mosaic even more luxurious.
Although it seems that the difference in grout is not very noticeable, nevertheless, it is there. Epoxy retains its original appearance longer and looks very beautiful.
What are the other advantages of epoxy grout:
- sets quickly;
- it is resistant to chemical attack;
- epoxy is elastic, easy to work with, and the seams do not crack after application4
- the material is durable, does not crumble or crumble over time;
- has a moisture-resistant composition, ensures water resistance;
- the possibility of tinting the seams, which allows you to hide unevenness and roughness of the floor;
- if the mosaic is mirror or glass, made in the form of a photo collage, then the grout should be transparent. Only epoxy grout can do this.
For grouting floor tiles, gray or brown grout colors are most often used, but it can be in other shades, depending on the design of the room.
It is best to purchase grout together with the mosaic to see how the shade matches the tone of the tile. When applying grout to the pattern, use compositions of neutral colors.
TOP 5 best glues
What is the best mosaic adhesive? Trusted brands, numerous customer reviews and discussions on forums allow us to highlight several specific compositions.
Russian glue is suitable for both ceramic and glass mosaics. It has leveling ability (up to 15 mm) and is used for work inside and outside the building. Has high adhesion to all materials, including natural stone. The finished solution can be used for 3 hours, the tiles can be adjusted within 3 minutes. Walking is allowed after 24 hours. The seams are rubbed out after 2 days.
Ceresit CM 115
German brand of domestic production. The main advantage is the perfectly white color of the glue. In addition, they have an environmentally friendly composition, elasticity (you can lay “warm floors”) and water resistance. The working time of the finished mixture is 2 hours, it begins to harden after 20-25 minutes. The layer is limited to 4 mm. The base must be carefully leveled.
Litocol Litoplus K55
Italy supplies adhesive for mosaic tiles on a white cement-based grid for laying transparent, colored mosaics and natural stone. A wide range of permissible temperatures (from -25°C to 60°C) allows the composition to be used inside any room and outside the building. Walking is possible within 24 hours, but full operation is possible only after 14 days. The working time of the solution is 8 hours, adjustments are possible within 40 minutes.
Russian glue is made on the basis of gray or white cement. The scope of application has no restrictions. Laying on concrete and brick, as well as on plasterboard, is allowed. If the solution is prepared with the addition of latex, then you can create open water storage facilities (swimming pool, tank). Working time is 2 hours with adjustments up to 15 minutes.
One-component white adhesive from Ukraine based on acrylic is sold in finished form. Suitable for all types of mosaics. It is not afraid of dynamic loads, water and serves for a long time without losing its characteristics. You can lay tiles on the wall, floor and ceiling. Cladding of thermal insulation boards (expanded polystyrene, hardboard, MDVP) is allowed.
How to glue mosaic tiles, what glue to use to glue mosaics
If you decide to update the interior of a bathroom, toilet or kitchen using such a popular and expensive material today as mosaic, then you need to take a more responsible approach to this process. Moreover, one of the main questions here is: what glue should I use to lay the mosaic? This is primarily due to the high demands placed on the reliability of adhesion of mosaic elements to the base. Therefore, before gluing mosaic tiles, pay attention to the choice of adhesive. To do this, you should take into account the operating conditions of the cladding, its technical characteristics, evaluate the type and condition of the surface: what can be used to glue the mosaic on, and what base is not suitable for this. This is the only way to avoid future peeling of the coating.
As you know, for rooms with high levels of humidity, finishing materials must have good moisture-repellent properties. If you already know how to glue mosaics in the bathroom, then select an adhesive solution with enhanced fixation, as well as increased hydrophobic properties. Another important quality is its elasticity, which allows mosaics to be laid on curved surfaces. And since we are dealing with a group of glassy materials characterized by low porosity, then, accordingly, the answer to the question: “what glue should I use to glue the mosaic?” obvious - on glue with high adhesion, guaranteeing strong adhesion of the cladding to the base.
How to glue mosaics on walls?
One more important point should be considered: how to glue a mosaic on a wall. In this case, a white mixture is recommended so that the translucent coating does not acquire unwanted shades. The solution must be of a thick consistency, with texatropic qualities that ensure the cladding is resistant to slipping. However, it is worth remembering that before gluing the mosaic to the wall, it is necessary to prepare the surface itself. It should be smooth, clean and dry. The adhesive composition can smooth out minor roughnesses of the base; for more serious defects it is better to use special leveling mixtures. The permissible air temperature in the room is from +5°C to +30°C. Any video on how to glue a mosaic shows that you will first need to draw the surface to be tiled into squares, which will correspond in size to the mosaic modules. Such precise geometry will help make all seam joints as uniform as possible, so that the covering looks like a single mosaic carpet.
What glue is needed for mosaic?
In each case the choice is individual. For example, for glass mosaics you need to use a special white glue. The consistency of the glue should be optimal (thick country sour cream) to hold the mosaic module on a vertical surface. Mosaic adhesive is applied with a spatula with a tooth size of 3 to 3.5 mm, onto a section of the wall not exceeding the size of 6-9 modules. If the so-called “paper” technology is chosen, then the modules are glued with mosaics, the paper should be facing outward. It is convenient to press the module from the paper side with a regular rubber roller for gluing wallpaper. After sequentially laying a certain section of the wall, you need to wet the paper of the mosaic modules with a damp sponge and remove the paper backing.
Finally, I would like to say that when choosing which glue to glue the mosaic with, be sure to follow the manufacturers’ advice. Use only special adhesives for mosaics, do not try to save a few rubles, remember that the miser pays twice. To care for mosaics, it is better to use neutral detergents recommended by the manufacturers. When cleaning heavy stains, use low-acid detergents, remembering to rinse the treated area with plenty of water.
What should be the surface for laying
On what surface can mosaics be glued? The facing material is small in size. Therefore, all unevenness of the base will be emphasized by the facing material. If this is what the designer intended, then you should choose adhesives with high adhesion rates and a short hardening time. The thickness of the mosaic adhesive is small in order to avoid “floating” the tiles. It is also important to take into account the fact that the seams should be left unfilled until the glue has completely dried.
When designing a plane, the surface must be pre-leveled. Mortars for laying mosaics may have filling ability without shrinkage, but leveling the mosaic with a large layer of glue will be inconvenient. It is worth noting that cheap materials lose the volume specified by the master during drying. This leads to the fact that the tiles will not give an even plane.
Stages of laying mosaics
Laying mosaics differs from tiles in the mobility of the finished product. The glue is applied in a uniform thin layer, and the coating is leveled using a level and a rubber roller (or trowel).
Do not put too much pressure on the mosaic. This will lead to premature filling of the seams, which will have to be cleaned out.
How to glue mosaics on a mesh:
- Preparing the base. It is important that the surface is smooth and even. The applied primer must dry.
- The markings will ensure that the installation is even.
- Mosaic adhesive is applied to the mesh with a notched trowel in 3 mm increments. It is recommended to cover a small area as the solution hardens relatively quickly.
- The canvas is pressed with a rubberized tool. This cannot be done by hand, otherwise individual elements will be recessed to a greater extent than required.
As a rule, mosaics on a grid are covered with a protective layer of paper on the front side. After the glue sets, it is washed with water using a sponge and removed.
How to remove excess glue from a mosaic? To do this, you can use a dry waffle towel or a rubber spatula. If the solution is completely dry, you will have to remove the excess mechanically (with a blade).
Depending on the glue used, grouting of joints is allowed 12-48 hours after installation. The task is performed using a rubber spatula of medium hardness (can be soft). After 20 minutes, the excess is removed with a dry cloth.
Listen carefully to the opinion of the professional in the video:
You need to choose adhesive based on the materials of the base and tiles. The evenness of the surface is also taken into account. For glass mosaics, it is better to buy a white or colorless composition. Almost anyone can implement the event themselves with their own hands. The main thing is to maintain uniform pressure and control the seams. Then the result will be high quality and durable.
Gluing mosaics to a kitchen backsplash
1. When laying mosaics on the wall apron, start from the previously determined middle and bottom. Using both hands, press evenly onto the mosaic sheet. To press the mosaic evenly into the glue, use a rubber mallet and a piece of soft wood (pine). Hammer hits on wood should be light. 2. After the first sheet, continue laying the first row. Do not forget to insert plastic tile crosses between the mosaic sheets. This will ensure uniform seams over the entire area of the apron. The thickness of the crosses should correspond to the seams in the mosaic sheet. Always remove excess adhesive from the mosaic surface. Seams and mosaics must be clean. Use a damp sponge for this.
Related article: How to choose wallpaper for the kitchen: types of wallpaper suitable for kitchen walls
3. After laying the mosaic (after 25-30 minutes), you need to remove the paper base of the mosaic sheets. To do this, moisten the surface of the sheets generously. After 5 minutes, start removing the paper. Pull the paper not away from the wall, but parallel to the wall diagonally (down or sideways). Take your time!
4. When laying mosaics around rosettes, it may be necessary to trim individual mosaics. There is a special roller tile cutter for this.
The difference between mosaics on paper and on mesh, the stages of laying these tiles on walls and floors
Mosaic tiles have long been used as finishing material for kitchens and bathrooms. Previously, craftsmen had to lay out each individual element, so laying the mosaic took a lot of time. Now the process has been significantly simplified thanks to mosaics produced on mesh or paper.
Distinguished by its originality compared to ceramic tiles, mosaics allow you to decorate a room and realize your boldest fantasies in the interior. In order to decorate a wall or floor with mosaics in a high-quality manner, you need to understand the features of this process.
Preparing walls for laying mosaics on an apron
Related article: Laying linoleum on the kitchen floor
1. If a tiled kitchen apron can be laid on an uneven wall, then the wall for laying the mosaic must be smooth and clean. Using a spatula, remove all uneven surfaces from the walls. Sand the paint with coarse sandpaper. Seal holes and cracks with alabaster or putty. After the putty has dried, clean the putty areas with fine-grained sandpaper. 2. When laying mosaics on a kitchen wall made of plasterboard, pre-glue it with construction tape and seal the seams between the plasterboard sheets. 3. Prime the wall surface before laying the mosaic. 4. To reduce mosaic waste, you must first determine the middle of the apron. By moving the mosaic sheets left and right, select the optimal installation option. Cut and number the mosaic sheets.
The difference between mosaics on paper and on mesh
Mosaic tiles on mesh and paper backing are the most popular types of finishes. The second option is cheaper, but it does not allow you to control the seams between individual elements.
Each type has its own rules. The mosaic on the mesh is glued face down, and after the glue has dried, you can immediately proceed to grouting the joints. To install paper-based mosaics, the sheets are applied to the surface with the paper side up, after which you must wait at least a day to continue the process.
Laying mosaics on the kitchen wall - preparatory work
Laying mosaics on the kitchen wall preparation Related article: Mosaics for a kitchen backsplash: laying mosaics with your own hands
1. Free up a free approach to the wall. Clean the surface of the apron from all excess (hooks, shelves). If sockets are installed on the apron, after turning off the power, remove the sockets from their installation locations and cover them with masking tape so as not to stain them and to lay out the mosaic around the socket more accurately. 2. Determine the lower limit of the mosaic laying. Attach it to a level wall according to the building level. Straight rail.
Cladding stages
The use of mosaic tiles is quite common: they are used both for finishing a room and for decorating individual elements. In this case, the tiles can be laid on the floor, on the wall, on the ceiling, on the windowsill and on the countertop.
The technology of laying mosaics is not very different from laying tiles, but requires more responsibility. A convenient point when gluing mosaic tiles is their flexibility, which allows you to stretch or narrow the seams.
Glass mosaic is most often used for swimming pools, although it can also be found quite often on walls and floors as panels. The installation of glass mosaics should be planned taking into account lighting, because... horizontal backlight will display all errors.
Tools required for installation:
- 2 spatulas (smooth and serrated edge);
- roller or rubber grater;
- building level;
- knife;
- pencil and ruler.
To lay tiles on the floor, it is better to use a more durable material: stone, marble or porcelain stoneware. Laying marble mosaics is an ideal option for a bathroom interior. This is the most durable material used for flooring. In this case, it is necessary to monitor the color of the selected glue: it should be white, not gray. This is due to the fact that marble quickly absorbs everything and changes its color shade forever.
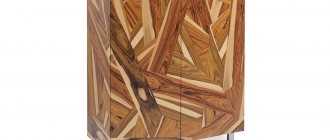
When arranging a kitchen, bathhouse, or cafe, wooden mosaic cladding is used. This option has a lot of positive properties: strength, soundproofing, durability and uniqueness.
Preparing the foundation
Mosaic tiles should only be laid on a prepared base. After removing the remnants of wallpaper, paint and other coatings, you need to check the plaster. A prerequisite when preparing to lay tiles is to apply a primer to hide traces of dust and improve adhesive properties. After priming and checking the walls using a level, you can proceed to the next stage.
We carry out the markings
After the primer has completely dried, the surface is marked. First of all, you need to decide how the mosaic will be laid. The choice will depend on your imagination and preferences. In addition to the classic one, there are other options for laying out mosaic tiles:
- alternating matte and glossy types;
- combining mosaics with tiles;
- pixel mosaic;
- panels and paintings;
- use of hexagonal mosaic.
The location of the mosaic pieces must be carefully marked. When drawing up a sketch, pay attention to the following points:
- if there are slopes and boxes in the room, the drawing begins to be laid out from them;
- if there is a decorative element in the room, then it is a priority;
- Try to hide all possible undercuts in a corner or at the bottom of the floor.
After the sketch is drawn up, it is transferred to the wall.
Apply glue
Gluing mosaic tiles is not difficult, but you need to choose the right glue. When choosing an adhesive composition, the surface material on which the tiles are laid matters. To prevent the appearance of an unwanted shade, it is better to choose white glue for glass mosaics.
As for the preparation of the glue, the solution is prepared in accordance with the requirements specified on the packaging. After studying the instructions, apply the glue to the surface using a rubber spatula.
It is undesirable to apply glue directly to a surface with a large area, because... it dries quickly and forms a film on the wall. It is better to dilute the amount of glue that will be used immediately.
Laying on floors and walls
Laying mosaics with your own hands should begin with those places that catch your eye the most. Unlike the technology for laying ceramic tiles, in this case there is no need for additional support - if the work is done evenly, the mosaic will not slip or fall off. Given the high flexibility of the material, you should not press it with your hands - because of this, the sheets may lie unevenly. The optimal tool in this case would be a silicone roller.
Laying mosaic tiles on a grid:
- In this embodiment, the sheet is turned with its front side towards itself, and its back side is completely immersed in the glue.
- The sheet is gently pressed with a rubber spatula.
- The distance between the mosaic pieces is checked (it should be the same).
- The remaining adhesive is removed from the tiles, which are left to dry completely.
Laying on paper base:
- Turning the sheet of paper with the paper side towards you, glue it to the wall and tap it with a spatula to distribute it evenly.
- After laying the second line, we return to the first and blot the paper with a damp sponge until it begins to easily peel away from the surface. Remove paper from the mosaic from the top corner, getting as close to the surface as possible.
- After removing the paper backing, the seams and tiles are leveled with a small spatula.
- Before applying grout, the tiles are left to dry for 24 hours.
We produce grout
Grouting is carried out only after the solution has completely dried, and for this a minimum of 2 days must pass. The facing surface is cleaned with a brush and warm water. If there are smudges of glue at the joints, remove any remaining glue with a knife or sharp blade.
The mixture is diluted according to the instructions and applied at an angle of 45°. The grout is left to dry for 20 minutes, after which it is cleaned with a dry cloth to remove any remaining mixture. It is then washed with water and polished after drying.
Mapei grout is a win-win option from the Italian manufacturer. Its only disadvantage is that it quickly sets to the surface.
Mosaic tiles can add sophistication and originality to even the most unprepossessing and conservative interior. This material has gained popularity among consumers and is in demand along with other facing materials. Mosaic installation work is more expensive and significantly increases the renovation budget. With the advent of mini-tiles on the grid, the installation technology has become simpler, and you can implement your planned design project on your own.
Mosaic tiles: advantages of installation
Mosaic tiles are a popular type of facing material, widely used for decorating bathrooms, saunas, swimming pools, kitchens, living rooms and facades. Mosaics are decorative compositions made from many small glass, ceramic, and mica elements. All parts are fastened on an elastic mesh, forming a flexible finishing material.
Installing mosaic tiles is a modern, original and stylish interior design solution that allows you to realize different design ideas. Before making the final choice in favor of mosaic, you should familiarize yourself with the features of the cladding:
- Small tiles are made from materials that are resistant to high humidity and temperature fluctuations. High wear resistance allows the use of mosaic decor in public places.
- Mosaic finishing has similar characteristics to tile cladding: strength and durability. The aesthetic and attractive appearance of the product is maintained for a long time.
- Possibility of installation on surfaces of different configurations: round niches and bath screens. The mosaic panel is easy to cut into pieces of the desired shape - this simplifies installation in hard-to-reach places.
- A large assortment of mosaics allows you to create any decorative panel, interesting pattern or ornament.
The disadvantages of mosaic finishing include:
- high cost of material;
- more complex installation compared to laying conventional ceramic tiles;
- High-quality mosaic installation requires careful preparation of the base.
The advantages of tiling with mosaic tiles outweigh its disadvantages. It is better to entrust laying a wall or panel of small mosaics to a professional. In order not to overpay for the work of an experienced craftsman, you can select a small accent area and lay out a strip of mosaic yourself.
Features of different types of mosaic tiles
Based on the manufacturing materials, the following types of mosaics are distinguished:
- Stone. The tiles are made from quartz, marble, granite, slate or travertine. This material is highly durable, so it is used not only for finishing walls, but also for floors. Stone mosaic has a natural aesthetic and gives the room a special style. Some manufacturers offer exclusive collections made of malachite or agate.
- Glass. Excellent for covering surfaces exposed to moisture. However, the material is less resistant to impacts and scratches, so it is not recommended for laying on floors or finishing tabletops. Glass mosaics with a translucent structure must be attached with special glue.
- Ceramic. An expensive material suitable for finishing any area of the house. The mosaic is covered with a glossy glaze or remains matte. Laying ceramic mini-tiles allows you to get a textured non-slip surface. Ceramics are resistant to mechanical damage and abrasive detergents.
Mosaic laying
Technological features
The range of use of mosaic images in architectural solutions and interior design is unusually wide. They can be used in swimming pools, kitchens, showers and bathrooms, in residential interiors when decorating halls and conference rooms, and creating façade panels. Surfaces finished with mosaics, due to their uniqueness and cost, are designed to last significantly longer than tiled surfaces. This fact determines the need to select specialized high-quality materials for preparing surfaces to be finished with mosaics and specialized adhesive compositions. The Convent Center company, along with the services of the studio for the production of panels and decorative elements from glass mosaics “BISAZZA”, offers a set of materials from the Italian company “INDEX”, developed for reliable installation of glass and ceramic mosaics.
Before starting work on laying mosaics, the following is analyzed: the type and condition of the surface to be finished and the expected operating conditions.
Traditional surfaces finished with mosaics are plastered or concrete, although modern INDEX materials make it possible to install panels on almost any existing surface, for each of which specialized compositions have been developed.
Having fine discreteness, which allows you to perform artistic work, the mosaic is able to repeat all the irregularities of the base on which it is glued, so special attention should be paid to preparing and leveling the base. To level the surface, the “INDEX” assortment includes specialized non-shrink compounds with increased adhesion: RESISTO TIXO , RESISTO UNIFIX and high-strength protective putty: RESISTO BIFINISHING , but it is also possible to use cement-sand mixtures modified with special additives: adhesive - COLLASEAL and reinforcing FIBERFLEX . After leveling, to ensure the durability of the structure, especially in rooms associated with moisture, it is recommended to protect it from environmental influences, for this purpose polymer-cement compositions OSMOLASTIC or OSMOFLEX .
Having prepared a reliable base, you can begin installing (gluing) the mosaic. Mosaics made from glass require special adhesive compositions with increased adhesion (adhesive strength), usually these are two-component mixtures consisting of a dry composition FLEXBOND or GENIUSTRONG and latex additive ELASTOBOND . The specified adhesive compositions provide the adhesion value of 30 kg/cm2 necessary for reliable installation. They differ in the speed of hardening; FLEXBOND is a slower composition, used for artistic masonry and allows you to adjust the mosaic for a long time after it is applied to the surface. GENIUSTRONG is a fast composition that allows you to work productively when laying mosaic mixtures. Experienced craftsmen, before laying the mosaic, carefully mark the surface, minimizing the need for pinning the mosaic modules, and plan the placement of the mosaic on curved surfaces and at joints and junctions. Here, each master has his own secrets, which largely determine the final appearance of the finished product.
Laying mosaics on a prepared surface is no more complicated than laying tiles, but has a number of fundamental features. The main one: ensuring a minimum period of time between applying the adhesive composition to the base and pressing the mosaic matrix to it. This ensures maximum adhesion and thus reliable installation of the mosaic. The adhesive composition should be prepared in accordance with the technological instructions in the quantity necessary for the work, but taking into account the “lifetime” of the solution. The “lifetime” of “INDEX” adhesive compositions is 4 hours, during which time the properties of the adhesive composition change within tolerance. Considering the responsibility of the work, it is recommended to prepare the adhesive composition in the amount necessary for one hour of work by the master. The prepared adhesive composition is applied to the surface to be finished using a notched trowel with a tooth height of 3.5-4 mm. When applying glue, it is necessary to ensure its reliable adhesion to the base, for which the applied composition is “combed” with force along the surface in different directions. A notched trowel ensures uniform application of glue, and the size of the trowel tooth dispenses the required amount. Experienced craftsmen apply glue to a surface area of no more than 1 m2. 9 mosaic matrices are laid on this area. In difficult cases, it is recommended to apply glue to the minimum area required to lay 3-4 matrices. This reduces the time between applying the glue and laying the mosaic, which is very important! The mosaic matrix is applied to the adhesive composition and pressed with a rubber spatula (slamming). At the same time, in order to accurately match the seams, it is necessary to maintain the orientation of the matrices in accordance with the markings on the paper, and using a rubber spatula to achieve the same width of the seams between the matrices and individual modules in the matrix. The paper on which the matrices are assembled is moistened with a damp sponge and removed until the glue hardens (15-20 minutes after installation). This is necessary for precise fitting of the mosaic. After installation, after 1-2 days, the joints are filled with colored grout and the surface is cleaned of dirt. For these purposes, “INDEX” offers 20 colors of grout: cement-based FUGOCOLOR + FUOSEAL , and epoxy-based FUGOPOX AB . Possible contaminants are removed with a special organic acid EXTRACLEAN .
Surface finishing with “BISAZZA” mosaic has virtually no restrictions on the number of design solutions. Using the services of a mosaic studio, customers have the opportunity to obtain a unique decoration for their premises, pool, or bathroom. It is difficult to determine trends in this matter, but according to the experience of our studio, designers are increasingly using combinations of various types of mosaics: glass “BISAZZA”, ceramic imitating sea pebbles “GIARETTA”, with traditional tiles. Three-dimensional images of seascapes, sea turtles and exotic fish with shadows and penumbra are popular. However, it should be noted that regardless of the design solution and type of mosaic, the fundamental approach to meeting the technological requirements for laying mosaics remains unchanged. And the technology and system of materials for laying mosaics developed by INDEX has been used in Russia for 5 years.
N. Efimenko