To maintain the correct operation of the door throughout its entire life cycle, it is necessary to carry out preventive maintenance.
There is nothing complicated about this: you just need to adjust, lubricate the door and remove any foreign objects and accumulated debris from it. The procedure will not take more than an hour, but you will save yourself from problems such as squeaks, drafts and unexpected breakdown of the locking mechanism. Today we will take a closer look at the stage of adjusting door hinges, which is the main one in preventive work.
Why are door hinges needed?
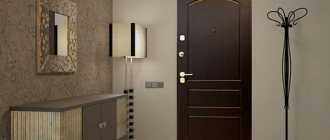
In order for interior or entrance structures to work reliably, they must have high quality not only the canvas and frame, but also other elements. These door canopies are needed for smooth, easy opening and closing. They ensure reliable fixation of the canvas in the box. There are high demands on the strength of door hinges. If you hang flimsy elements on a massive structure, the canvas will soon sag. Doors are visible, so they must fit into the interior of the room, and this applies to every detail.
Final word
The door installation and adjustment can be done independently, but maximum precision must be observed so as not to ultimately damage the door leaf or frame.
Note! If a wooden door is planned or has already been installed in your home, then remember that its maintenance must be carried out annually.
If you have doubts about your own abilities, then it is better not to take risks and entrust the entire process of installation and adjustment of the door installation to professionals.
Types of door hinges
Construction stores offer a large selection of entrance and interior structures. Plastic and metal sheets with boxes come complete with all the necessary elements. Door hinges for interior doors made of wood or MDF must be purchased separately. In order not to make a mistake when choosing them, it is important to take into account their main classification characteristics:
- installation location;
- fastening methods;
- types of structures;
- manufacturing material.
Overhead door hinges
This type of canopy is the most popular because it does not require special installation skills. Such door hinges without mortise are installed without the use of a chisel or router. For fabric weighing up to 20 kg, two similar elements are enough. However, butterfly door hinges are not suitable for heavier structures. Advantages of overlay elements:
- quick installation;
- low cost;
- universal use.
Flaws:
- small load;
- non-removable element;
- low quality;
- short service life.
Mortise door hinges
This model is similar in appearance to the overhead structure. In addition, mortise door hinges are arranged according to the card principle. They are installed at the end of the canvas, which does not spoil the appearance of the structure and ensures smooth operation. Mortise door hinges for heavy doors are used to preserve the design of the entrance or interior structure without changing. Advantages of the models:
- universal use;
- simple installation;
- long service life;
- low cost.
Flaws:
- high risk of distortion;
- small load;
- mandatory unscrewing during dismantling.
Corner door hinges
Such elements differ in their appearance, but not in functionality. Instead of straight plates, they have corners that are attached to the axial rod. Such corner card canopies are a type of straight structures. They are fastened in the same way as mortise hinges. Advantages of corner models:
- possible installation on canvases with a rebate;
- low cost;
- increased strength;
- long service life.
Flaws:
- difficulty during installation;
- impossibility of hiding in the canvas.
Screw-in door hinges
This type of canopy is produced mainly in European factories. Screw-in or pin door hinges are used primarily on rebated structures. In appearance, these are two cylinders that are screwed into the frame and sash. Hidden door hinges are equipped with threaded pins and decorative caps. A plastic bushing with a hardened ball is responsible for noiselessness and smooth operation. The advantages of these models are:
- neat appearance;
- low cost;
- versatile adjustment.
Flaws:
- low load;
- complex installation;
- non-removable model.
Hidden door hinges
Such canopies are included with modern European models. Hidden hinges for doors are successfully combined with designs in high-tech or modern style. They are often embedded into the canvas already at the factory, but they can also be purchased at hardware stores. Hidden door hinges have a number of advantages:
- invisible on the structure;
- adjustment horizontally, vertically and clamping.
Flaws:
- complex installation;
- small angle for plowing;
- non-removable option;
- high price
Double-sided door hinges
These types of canopies are suitable for different types of canvases. Adjustable double-sided door hinges can be selected regardless of which way the structure opens. This is a very convenient option for interior options. Advantages of double-sided door hinges:
- suitable for left and right structures;
- can withstand heavy weight of the canvas;
- serve for a long time.
Flaws:
- poor compatibility with modern, high-tech and other modern styles;
- inconvenient design for installation and dismantling.
Adjusting plastic entrance doors
The problems may be the same: friction, creaking hinges and loose connection to the frame, which can cause blowing. But adjusting PVC doors is simpler - the hinges and mechanisms are standardized, there are not many types. So there is hope that you can deal with the problems yourself, without calling a specialist.
Balcony door adjustment
After the summer, the plastic doors to the balcony sag: in the summer they often remain open for a long time, which is why such a nuisance happens. Then they touch the threshold, an unpleasant sound is heard, and the plastic is erased. In this case, you need to lift the canvas up. This is done using the adjustment located at the top of the lower hinge.
They do this with the lock open, but the door is closed. Take a hex wrench (usually 4 or 5) and insert it into the hole and turn it a few turns. There is no need to lift too much right away, as this can cause other problems. Raise only until the problem is fixed.
Sometimes, when closing, the doors rub from the side, hitting the metal latches. It turns out that you need to move the canvas towards the loop part. For this there is another adjustment on the same hinge. It is located below, visible when the door is open.
This adjustment is also carried out with a couple of turns clockwise or counterclockwise. If you need the doors to not rub against the counter, turn counterclockwise. Give it a couple of turns and check. Once the problem goes away, stop. Otherwise, you can move it so much that the lock stops “clinging” to the mate.
If the upper left corner “clings”, you need to adjust the loop that is located at the top. The principle is the same: one or two turns until the problem is eliminated.
Top Hinge Adjustment - Top Left Corner Pressure
Pressure adjustment (to prevent draught)
Sometimes weak pressure is observed from the side of the locking part. It seems that the canvas adjoins smoothly, but there is a noticeable pull from under the door. In summer this is not a problem, but with the onset of cold weather it significantly reduces the temperature. There are two ways. The first is to adjust the clamping pins. These are metal protrusions on the sash.
They come in two types. as in the photo above - oval and round, but with an eccentric in the middle. The position of this element determines the degree of pressing of the sash to the frame. The method of changing the position depends on the shape of the trunnion. If it is like in the photo, take pliers, clamp it and turn it slightly. The maximum pressure is if the long side is turned horizontally, the minimum is if it is directed vertically upward. There are also all the intermediate options.
If there is an eccentric in the center of the trunnion, then there is also a hole for the hexagon. Insert it and turn it, achieving the desired degree of pressure.
It is not recommended to set the stasis to the maximum value: the seals will quickly lose their elasticity. Also make sure that all eccentrics are rotated the same way. This guarantees normal operation of the fittings.
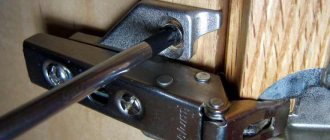
But sometimes there is a situation where the balcony door leaf is not pressed tightly on the hinge side. This can also be eliminated by adjusting the hinges. At the bottom it is located under a protective cap. Remove it (pull it up). Take the key (hexagon) and with a couple of turns adjust the clamping of the lower right corner of the plastic balcony door.
There are also hidden hinges on the frame, which also provide the ability to adjust the pressure. They are located on the frame on the hinge side. Adjustment with the same hex wrench. Turns “clockwise” and “counterclockwise”.
Adjusting plastic entrance doors
The plastic entrance doors have different hinges, and there are no locking and tilting fittings. They have closed loops of the overhead type. They have three adjustments:
- the height of the door leaf relative to the frame - at the bottom of the hinge;
- the density of pressing the canvas to the frame is on the top on the hinge;
- sash movement horizontally - sideways
They are sufficient if the doors were initially installed correctly: the limits for changing positions are significant, which makes it possible to compensate for those changes that occurred during operation.
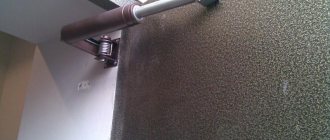
If there is a squeak in the hinges, they need to be lubricated. To do this, remove the top cap and put lubricant into the opened hole. Since plastic doors are installed as entrance doors mainly in private houses and they go out onto the street or into an unheated vestibule, you select a lubricant that does not thicken at low temperatures (Litol and Solidol).
Put lubricant here
In some models of hinges, the lid is simply lifted off, in others, you need to unscrew it and then pull it out. Determined by location.
Sometimes a situation arises when intervention is required: the lock does not lock properly. If the sash pressure is normal, correction of the striker is necessary. She is mobile in such doors. Loosen the mounting screws, use a screwdriver to move the bar slightly in the desired direction and tighten the screws back. Checking. It should help.
In order not to invite a specialist who knows how to adjust hinges for metal doors and save money, you should familiarize yourself with the following recommendations. This will allow you to do the work yourself. Adjusting the hinges of metal doors does not require special skills or the use of complex tools.
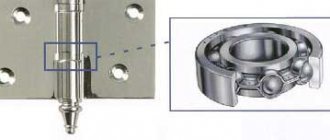
Carbon and stainless steel are used to make hinges. In some cases, an alloy of steel and brass coated with chromium (a more expensive option). Door hinges for metal doors According to their design, door hinges can be divided into:
- loop groups with support bearings;
- loops with support ball;
- hidden type;
- classic.
Classic ones are the simplest, cheapest and wear out quickly. Modern doors are rarely equipped with them, but hinges of this type are still found. Hidden hinges for metal doors have a high degree of burglary resistance. Hinges with support bearings and a ball have the longest service life: the carbide metal of the rubbing parts wears out more slowly than conventional carbon steel. In addition, during their operation, play and squeaking are eliminated.
Method of fastening door hinges
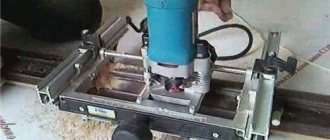
Installation of fasteners depends on their type and fabric material. The easiest way to install a universal door hinge, but mortise structures and corner models require certain dexterity and skills. Fastening is conveniently done using an electric milling cutter. It completely replaces a chisel and is needed to correct the corners of the blade. To perform fastening, you need a set of tools and accessories:
- hammer and chisel;
- screwdriver;
- self-tapping screws;
- wooden wedges;
- construction level.
How to choose door hinges?
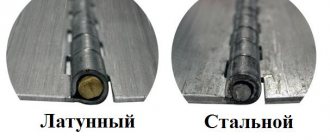
When purchasing canvas awnings, it is necessary to take into account not only the material of the entrance or interior structure. You need to know that door hinges are divided into three types:
- Steel
, which are considered the most reliable and durable. However, they are not aesthetically attractive. - Brass
, which become a decoration for the door structure. Their service life is greatly limited by the softness of the metal. - Brass plated
, which are imitation of brass analogues. They are made from alloys that give them a distinctive appearance. Rubbing parts wear out quickly.
Other factors to consider when choosing door hinges include:
- Web weight
. For example, reinforced door hinges are required for heavy doors. In addition, the increased size of the structure requires the installation of an additional loop. - Availability of bearings
. They help doors open and close smoothly, without squeaking. - Direction of movement
. This determines which loop you need to choose: left, right or universal.
How to install door hinges?
Any type of canopy is installed after careful measurements and markings. The following algorithm will tell you how to properly install door hinges:
- From the top to the bottom edge, retreat 20-25 cm and make a mark with a carpenter's pencil. It is important that there are no knots or damage to the wood where the hinges are installed. Their presence will cause difficulties when screwing the screws.
- The edges of the door hinges are applied to the marks on the canvas. Then their outline is precisely outlined.
- Using a chisel, cut down according to the marks made. It is important that the beveled part of the tool is directed towards the loop. The size of the recess should not exceed the thickness of the metal.
- Using a chisel and hammer, a sample of wood is made.
- The hinges for the doors are secured using self-tapping screws of the required sizes.
Similar actions are carried out during installation of the vertical part on the door frame. Contour outlines are cut out, hanging the canvas on wooden wedges. In this case, you need to leave a gap of 2-3 mm at the bottom, top and along the side edges of the canvas. Temporary fixation is achieved using wooden wedges. Moreover, the canvas should not be allowed to deviate horizontally or vertically. In the future, this may cause distortion of the entrance or interior model.
Why do you adjust the hinges?
To determine whether the hinges need adjustment, study the operation of the door. The main factors are:
- the door moves smoothly on its hinges;
- the leaf is tightly adjacent to the door frame, no gaps are formed;
- the door position is always stable;
- the canvas does not rub against the surface of the box;
- The clamping mechanism works without failure.
If any of the above points are violated, the loops are debugged. By adjusting the system, you will extend the life of the canvas.
If you ignore noticeable malfunctions in the operation of the hinges, in the future the canvas will sag or shift relative to the box. Such repairs are more difficult and will require the services of a professional.
Small deviations are corrected on their own. To do this, remember how to adjust the loop mechanism and what technological steps it will perform.
Sagging of the door leaf when it is necessary to adjust the hinge mechanisms
How to adjust door hinges?
After installation of the structure, final adjustments must be made. All door hinges, mortise or overhead, require adjustment. During installation, defects may have occurred that need to be corrected. If you skip this step, unpleasant consequences will soon appear in the form of creaking, deformation or distortion of the door structure. Interior or entrance door partitions made of wood or metal are subject to deformation due to the large mass of the canvas. The procedure for adjusting door hinges is as follows:
- Pinpoint exactly where friction and squeaks occur. To do this, you need to listen to the door during use. You can simply inspect the surface of the structure to identify abrasions.
- Use a hex key to loosen one of the hinges. Sometimes the two middle ones are unscrewed at once. This depends on the number of hinges installed on the entrance or interior door.
- Gradually move on to loosening the second loop. It should be located close to the point of friction or squeaking.
- Carefully remove the door leaf from the frame. Then press it, paying attention to its position. It should be parallel to the box and placed perpendicular to the floor.
- Tighten the adjusting nuts on the outer loop. Then shake the canvas with light movements so that all the hinges for the door are installed in their places.
- Finally tighten all fasteners and check the accuracy of the settings.
Adjusting window hinges
To adjust the hinges of plastic windows you will need:
- hex key No. 4, made in the shape of the letter L;
- various screwdrivers;
- pliers.
To adjust, you need to pay attention to the following elements:
- bottom loop, which is rotary. By adjusting this hinge, you can align the window sash vertically and the lower part of the sash horizontally;
- a hinge located at the top, which is tilt-and-turn. Adjusting this element of the fittings allows you to achieve the correct position of the window in the right-left direction;
- locking pins. The fittings are located around the perimeter of the window. By adjusting the trunnions, the clamping force is equalized, that is, the location is closer or further away.
Horizontal adjustment
To adjust the window horizontally, you need to:
- open the sash;
- remove the decorative trims covering the hinges;
- insert the hex key into the special hole located in the side of the hinge;
- if you rotate the key in a clockwise direction, the window sash will move closer to the hinge located in the upper part, and, accordingly, vice versa.
open the sash; remove the decorative trims covering the hinges; insert the hex key into the special hole located in the side of the hinge; if you rotate the key in a clockwise direction, the window sash will move closer to the hinge located in the upper part, and, accordingly, vice versa.
The optimal position of the window can only be achieved by simultaneously adjusting the upper and lower hinges.
Vertical adjustment
The position of the window in the vertical direction can be adjusted exclusively using the lower hinge. To perform the procedure you must:
- install the key in the hole that is located at the top of the hinge at the end;
- the window sash will rise if the key is turned clockwise and lower in the opposite direction.
install the key in the hole that is located at the top of the hinge at the end; the window sash will rise if the key is turned clockwise and lower in the opposite direction.
Adjusting the pressure
The force of pressing the window against the frame is produced by adjusting the hinges and pins.
To increase attraction in the area of window hinges, you must:
- remove decorative trims from the outer part of the hinges;
- Using a hex wrench, rotate the bolt located on the outside of the hinge.
The locking pins are adjusted according to the diagram shown in the figure.
Adjusting door and window hinges allows you to achieve the optimal location of the door leaf or window sash relative to the frame or frame. Correct adjustment helps to increase the service life of fittings and doors (windows).
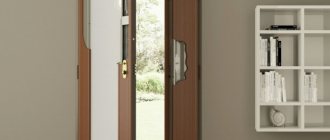
When replacing a door, the hinges in the same location are also replaced. But what should we replace them with? One option is hidden loops. A type of door hardware that allows you to hide the hinge mechanism inside the door and give a special style to the doorway.
Pros of hidden hinges:
- Long service life - they last much longer than open ones and do not require lubrication
- Durability – canopies are made from an alloy of several metals
- Aesthetics - loops are invisible from the outside, they do not violate the visual integrity of the canvas, allowing you to create various design effects
- Adjustment without removal - some models can be adjusted after installation, correcting sagging that occurs after a long period of use
- Versatility - suitable for all types of interior doors
It is also worth highlighting a couple of disadvantages:
- Cost – such hinges are much more expensive than classic open “butterfly” canopies
- Difficulty – self-installation requires special tools and skills
How to lubricate door hinges to prevent squeaks?
Improper fastening of awnings during installation can lead to a whole range of structural problems. One of the troubles that may arise may be an annoying squeak when opening or closing the door. This is due to the hinges and facing rubbing against each other. After final adjustment, door hinges without mortise or concealed models require special lubrication. This procedure must be carried out periodically. Experts recommend how to lubricate door hinges:
- any machine oil;
- universal lubricant;
- special oil for sewing machines;
- technical grease;
- vegetable oil;
- pencil lead;
- melted wax or paraffin.
Sequence of actions when adjusting doors
Adjust
- this means completing certain stages of work. These actions include: lubricating door hinges, adjusting the closer, tightening the fittings and changing the seal.
Adjusting the hinges
Standard loop processing procedures consist of the following points:
- Hinges can be replaced if they are attached with screws and not welded.
- It is necessary to lubricate the door hinges so that they do not creak. This is done using a crowbar, which lifts the door. Oils, Litol, lubricants for engines or other devices are used for lubrication.
- If there are signs of wear on the washer on the rod, it should be replaced. The door is dismantled and the washer is removed. The rod and socket are cleaned of dust. Then a new part is installed.
- You can easily lubricate the hinges of an iron door by drilling through holes in these parts.
- The rod must be treated with thick lubricant.
- By opening and closing the doors, you can check the quality of the work performed. In this case, there should be no friction between the canvas and the box.
An internal opening entrance door requires a special approach. These are more reliable designs. Adjustable hinges should be blown out, cleaned of dirt and treated with machine oil.
The substance is injected between the rubbing elements with a special syringe or oil can.
Setting up door closers
Recently, closers have been used instead of springs. They are equipped with a spring mechanism and contribute to the smooth movement of the doors.
These parts are configured by a specialist during installation of the system. Over time, the oil inside the part thickens.
- To adjust the speed of the slam, a special valve turns in the desired direction.
- The spring tension is adjusted using a nut that is turned in the selected direction.
- To hold the door open for a while, a lock is used.
Draft adjustment
Metal doors with internal hinges have a seal. Drafts may appear when it wears out. The seal must be removed and replaced with a new one. A rubber band is used for this. It is glued along the entire perimeter of the vestibule. This will help against blowing.
What to do about squeaks
Creaking in door structures occurs when the hinges are clogged. By the way,
loop or loops how to pronounce correctly can be clarified. A grinding noise also occurs when the canvas rubs against the box.
In case of such problems, the following manipulations are provided:
- Scratch marks on the canvas indicate friction.
- To perform the adjustment, you will need a spark plug wrench, as well as a hex key.
- The loop closest to the worn area is loosened. The canvas moves back and then moves towards the box. The nut is tightened to the blade. The structure needs to be shaken so that the hinges take their place. Then you need to check for squeaks and repeat the process if necessary.
- If there is a space between the end of the plate and the box, then the end surface must be lubricated with a graphite substance.
- If dust gets into the mechanism, you need to blow off the surface of the hinges. Then you need to lubricate the hinges.
It should be remembered that products such as WD cannot be used for lubrication. They are used to remove contaminants from threaded and swivel joints.
Entrance doors with hidden hinges will last longer if preventative measures are taken periodically.
- the door needs to be lubricated regularly;
- pay attention to the type of product;
- tighten various elements as necessary: hinges and fittings;
- you need to clean the crossbars from dust;
- change seals and insulation in a timely manner.
By following simple tips, you can extend the life of the product for a long time and avoid significant financial investments.
]]> ]]> Most problems that arise in the operation of interior doors (creaking, difficulty opening or closing) are very easily eliminated by adjustment. If your door was installed by craftsmen who provided you with a guarantee, then it is better to use their help again. If there is no guarantee, then you can adjust the interior structure yourself. Tools needed to adjust an interior door
The process of adjusting the interior design cannot do without:
Basic ways to eliminate major defects
1. The first defect is the door leaf not closing tightly. As a rule, in this case, the door either cannot be closed at all, or excessive physical force is required to close it. In most cases, this phenomenon can be caused by:
distortion of the installed box. In this case, the degree of fastening between all the beams is checked. If at least one of the beams is not securely fastened, then the box must be removed and each of them must be individually secured using a couple of screws; insufficient depth of loops. This causes the effect of pulling the product back. In this case, it is necessary to properly tighten all the screws. If this does not help, then it is necessary to remove the hinges and deepen the niches; violation of the degree of deepening of the hinges into the interior door or into the frame itself. To solve this problem, you need to move the hinges to the right place, and also tighten all the remaining screws.
2. The second defect occurs as a result of the product getting stuck in the opening. This is evidenced by the fact that the canvas becomes heavy or very difficult to open, while its closing occurs arbitrarily and very quickly. Typically, this can be caused by the following reasons:
the presence of a loose box.
In this case, it is stretched towards the beam responsible for the vestibule. You can accurately determine the screws that need tightening by visually checking the curvature of the counter beam. If necessary, adjust the entire box using self-tapping screws; strong deepening of the loops. To eliminate this problem, loosen the fasteners. And also, if necessary, remove the loops and place thin cardboard under them; by moving the loops far out. In this case, adjust the hinges and tighten the fasteners.
]]> ]]> 3. The third defect is that half-open doors either close or open. This may be caused by problems with the verticality of the installed box.
4. The fourth defect is the creaking of the product. As a rule, this problem can be eliminated using regular lubricant. To do this, the product is removed from the hinges, the hinges are lubricated with grease based on grease and hung back. This problem can also be solved by using the lead of a simple pencil, which is simply placed inside.
Obviously, eliminating most defects in the door structure is a very simple procedure. But at the same time, you need to ensure that all installation work is carried out slowly, and the values are carefully measured.