What you need to adjust furniture hinges
Of course, the appearance and position of the doors on a kitchen or wardrobe depends entirely on the skill of the assembler. If no gross mistakes were made when installing the hinges on the door and the inner wall, then it is quite possible to adjust the hinges on the kitchen cabinet doors with your own hands without outside help.
Hinge adjustment points diagram
In order to correctly adjust the position of the awnings, you only need three tools:
- Construction level with bubble chamber;
- Wooden school ruler;
- Crosshead screwdriver.
A caliper may come in handy if you suddenly need to adjust four hinges on a wardrobe at once. Sometimes it will be useful to get a flashlight or a portable lamp if we are talking about setting up awnings on a cabinet in an inconvenient or poorly lit area of the furniture wall. The process takes 5-10 minutes, depending on the experience and condition of the furniture facade.
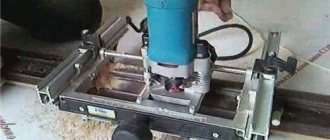
You can only insert a loop using a template
They are probably made with maximum positioning accuracy on the cabinet door, so you cannot even try to adjust the position of the doors on the cabinet by re-milling the “cups”.
How to adjust sliding wardrobe doors with rail motion
In some samples of sliding wardrobes, the mechanism for debugging doors is slightly different. For example, “STERKH” suggests that in order to adjust the movement of the door leaf, find a bracket that is located on the bolt locking device. The lock, in turn, is located on the sealing frame approximately in the middle of the wardrobe.
A rail sliding mechanism is provided in older models. It is not as reliable as a roller, but it can still be used faithfully for several years in a row. To adjust the movement of the doors of such a product, select the height of the rail; it can be raised or lowered.
According to furniture makers, the condition of the sliding mechanism is determined by the degree of its wear. The longer the wardrobe's lifespan, the more often it will have to be serviced and repaired. If the furniture is 5 years old or more, be prepared to replace the rollers every six months. The situation with rails is more complicated - they have not been produced for a long time, and if you find them on sale, they are most likely of low used quality.
In order for the doors to move smoothly on the rollers, without delays, it is advisable to periodically distribute a special lubricant or machine oil on the parts. Moreover, this must be done before the mechanism fails.
Video instructions on how to independently adjust the position of doors in a wardrobe are presented below: https://www.youtube.com/watch?v=XmF8Zvs-7DE.
How to adjust furniture hinges
To properly set up the operation of the canopy, you first need to check the position of the cabinet itself. Doors on the facade will help sag under their own weight or due to skew of the body. To do this, we check the position of the box with a level and level it either by altering the suspension on the wall, or by trying to adjust the height of the legs.
Any mortise hinge has at least three position adjustment screws. In general, the system allows you to adjust the position of the door, its displacement by 2-4 mm vertically, horizontally and in depth. Since there are usually two loops, the angular deviation can also be corrected. A more detailed description of the screws for adjusting furniture hinges is given in the video:
But you can also use the diagram below.
How to adjust furniture hinges vertically
In all training manuals and manuals, it is usually recommended to begin adjusting the door position by eliminating the most obvious problems with the hinges. If the screws are not screwed deep enough or are loosened at both fastening points, then one half of the facade will simply drop a few millimeters lower relative to the other.
In this case, you will need to unscrew the screws, place a piece of a match or toothpick in the hole and tighten the fasteners.
If the fastening is in order, you can adjust the height of the sash by unscrewing the screw 1-2 turns. Next, we will raise the cabinet door level with the other half, fix it and at the same time raise the “butterfly” hinge to the same height. All that remains is to tighten the fasteners with a screwdriver, use a ruler and a level to check the accuracy of the installation.
How to adjust furniture hinges horizontally
Since when opening a cabinet a person usually grabs the corner of the door with his hand, the main part of the load falls on the nearest hinge. As a result, the door may warp, the upper parts of the two doors will collide head-on, and a huge wedge-shaped gap will form between the doors below.
In this case, you have to adjust the horizontal displacement along the front on one of the hinges, usually the top one. To level the position, you will need to unscrew the adjusting screw, which is located first from the end, as in the diagram.
Before adjusting, you need to loosen the screw, align the door and only then tighten the fastening point
If a cabinet with a skewed door has been in use for a long period of time, then you will probably have to adjust the lower canopy. Using a school wooden ruler, it is convenient to control the size of the gap between the edges of the sashes, so as not to adjust, as they say, “by eye.”
You can configure cabinet doors with four hinges in the same way. Initially, you need to adjust the gap on the top and bottom hinges, then use the screws to level the gap in the middle of the sash. One of the options for adjusting the horizontal reach is shown in the video:
How to properly adjust furniture hinges in depth
Front or depth adjustment makes it possible to adjust the size of the gap between the ends of the side walls of the cabinet and the ends of the door in the open position.
Frontal adjustment is the most important; the durability of the hinge depends on the accuracy of the gap setting.
If the doors do not open completely to an angle of 90°, then most likely there is no working gap at all. To fix the problem, you need to adjust the specified distance at 0.6-3.4 mm. Again, it is very convenient to use a ruler as a gauge.
Adjusting the gap is easy:
- We turn out the screw farthest from the facade;
- Place a ruler on the end of the wall and fix it with your hand;
- Next, you need to adjust the protrusion of the screw with a screwdriver so that the cabinet door leaf opens fully.
It is also not recommended to make the gap too large; in this case, you will have to additionally adjust the position of the horizontal movement with a nearby screw.
Self-adjustment of hinges on cabinet doors - instructions with photos
Door distortions, their loose fit, difficulties with opening/closing - there are quite a lot of problems typical not only for new furniture after its assembly is completed, but also for old ones. First of all, this applies to elements of kitchen units, the awnings of which are affected by changes in humidity, temperature, and their high values. As a rule, most defects that appear can be eliminated by adjusting the hinges on cabinet doors. And the services of a specialist, if you understand the meaning of all operations, are definitely not needed.
All a home craftsman needs is a cross-head screwdriver, since the awnings are fastened with self-tapping screws. And, of course, an understanding of what needs to be done.
Where to begin
- Assess the correct installation of furniture. If it is skewed (uneven floors, differences in the height of its legs), then adjusting the cabinet doors may not help. Therefore, it is necessary to eliminate this shortcoming. Controlling the position of furniture is best done using a building level or plumb line; It is quite difficult to visually determine deviations from the vertical, especially minor ones.
- Inspect the awnings. This is necessary, firstly, to determine their type (the methodology for further work largely depends on this), and secondly, their condition. If the fasteners are loosened, adjustment will not be necessary; You just need to tighten the fasteners more tightly.
- Determine the type of regulation. It depends on how curved the cabinet facade is, where there are large and small gaps between its doors, in which area the fabric catches, and so on. Then it will become clear how exactly it should be adjusted: in height, depth or width.
Step-by-step adjustment of sliding wardrobe doors with rail running
The sliding wardrobe is still considered one of the most comfortable and attractive pieces of furniture.
Those who have already purchased an unusual product note the versatility of the cabinet and the small space it occupies when compared with conventional models equipped with a conventional door opening mechanism. If you look around the interior, the capacity and depth of the product will also please you. Such models are assembled by professional furniture makers. But when the sliding mechanism fails, the owner of the apartment will have to independently figure out how to adjust the wardrobe doors using a rail (sliding) motion. If you close your eyes for a long time to the loose fit of the doors to the wall, bevels, cracks, the application of physical effort, or the use of furniture can lead to breakage of parts. Then you definitely can’t do without involving a master.
You will learn below how to adjust the position of doors in a wardrobe with your own hands.
Operating procedure
It should be noted that the first time you may not get the desired result. And this depends not only on the qualifications of the master. Many malfunctions are caused by several reasons, each of which entails certain negative consequences for the correct opening/closing of doors and their position on the cabinet facade. Therefore, adjustment is often carried out comprehensively, along several axes.
By height
This is necessary in case of obvious distortion. It begins to touch the bottom or top of the cabinet partitions with its upper cut; difficulties arise with closing tightly, since adjacent doors literally rest against each other with the ends of the panels.
In most types of hinges, the screw, which is responsible for the vertical displacement of the blade, is located in a round rather than an oblong hole, stretched in the form of an ellipse. It is always located closer to the sash.
When determining how to adjust cabinet doors, you need to consider that their position is affected by both canopies. It is necessary to loosen the fasteners, move the blade, tighten the screws slightly and check for opening/closing. As a rule, two or three attempts are enough, and the deficiency is eliminated.
Width (depth)
Here you will have to “work” with another screw. It is easy to determine by its installation location - it is further from the edge of the section, and the landing “window” has an oblong shape. This is what allows you to find the optimal position of the hinge relative to the wall of a kitchen or other cabinet. The fastener becomes loose and the moving part of the canopy either moves inward or is pulled out. The adjustment range is determined by the length of the “window” in which the screw is located.
The technique is identical: loosening the adjusting element - changing the position of the door - tightening the fasteners - assessing the result of the work. But in this case, you will have to screw in/unscrew both screws (both the far and the near), otherwise the hinge simply will not budge.
The question of how to adjust cabinet doors equipped with a closer also does not seem difficult. As a rule, this is necessary if there is a loose fit or slow closing (increased inertia). Such mechanisms differ only in the specifics of installation (on the hinges, between them), but their “tuning” is carried out according to a single algorithm. It all comes down to changing the position of the screw, which affects the intensity of movement of the spring. During the regulation process, it is weakened or tightened.
Adjusting the hinges is not done at once, and there is no need for haste; This kind of work requires extra attention. To install the sash in the desired position, you will have to perform several, sometimes identical, operations. But each of them is an experience, and therefore it will take much less time to eliminate the distortions of the second and third doors.
How to adjust hinges on a cabinet door, detailed instructions
When arranging a room, you should not only think about the proper furnishings and stylish decoration, but also choose comfortable furniture. When choosing furniture elements, especially cabinets, you should pay special attention to door hinges. It is important that the structures can be opened and closed with ease. When assembling cabinets, you should carefully inspect all the component elements, and it is better to independently adjust the hinges to the required level. A process such as adjusting hinges on cabinet doors is not at all complicated; the main thing is that you need to carefully study all its features.
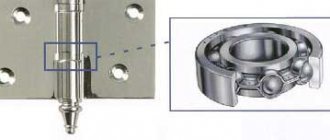
Types of furniture hinges
In general, cabinet hinges are very diverse, but in practice, samples that are quite similar in appearance are most often used. More expensive models have a closer and a quick-release mechanism. You can verify this by examining almost any finished cabinet.
This is what the most used furniture door hinge looks like
An ordinary door hinge, but even it allows you to adjust the pressure and tilt.
The popularity of this design is explained by the ease of its adjustment. Even if a mistake is made and the cabinet door hinges are attached a little unevenly, there is a chance to correct this situation through convenient and simple adjustment.
Furniture hinge with closer and quick-release mechanism
As you can see, such a hinge has a slightly more complex design than those hinges that were once used to hang the doors of Soviet cabinets. This means that such a hinge has a more complex and functional mechanism with a closer and quick release.
Variety of models and designs
It is important to take into account that there are different models of door hinges and they differ significantly in opening, size and mechanism.
Typically, when assembling cabinets with hinged doors, overhead four-hinged hinges (frogs) are used. The design differs in its high reliability and versatility. They provide a door opening range from 90 to 165 degrees.
Corner furniture hinges are often used to assemble corner cabinets. Their task is to attach the facade to the frame at the required angle - usually in the range from 30 to 175 degrees.
So-called inverse hinges are used in cases where the sash, when opened, must form an angle of 180 degrees with the side wall.
Additional door opening mechanisms TIP-ON are also sold, which help to open the doors by pressing without using handles.
Door opening mechanism with various designs
Adjustment options
Adjusting any type of wardrobe - wardrobe, kitchen, hallway, bathroom - ensures convenient use of this furniture. Typically required when purchasing new furniture or when moving old furniture items to a new location. This may also be necessary if the cabinet doors have become old or become loose.
To tighten the hinges, you do not need to have special skills or extensive experience. You can do everything yourself, quickly and without much difficulty. The main thing is to have a shaped screwdriver at hand.
Door adjustment is usually done in several ways. There are three options in total:
- vertical;
- performing door height adjustment;
- along the plane.
But to understand how to adjust correctly, it is worth carefully considering the features of each type.
Vertical
Vertical adjustment is the process with which the adjustment of furniture fittings usually begins. Adjusting hinges using this method is required when the door is located in an incorrect, crooked position, stands out from the general appearance of the furniture structure, or if there are two doors, and one is higher than the other.
So how to adjust the doors vertically. This adjustment option is made in 4 steps:
- First, open the door leaf. We find the hinges; if there are plugs, they need to be removed;
- on the areas of the two hinges, tighten the bolts that are located near the edge of the sidewall. These fasteners ensure the vertical position of the façade. At the very beginning, the two bolts need to be placed at the same level, this will help to adjust them correctly;
- then the door to the front part of the cabinet closes. Carefully inspect the entire structure in space, this will help identify irregularities. If there is a level of inclination of the upper corner to the right area, then on the upper hinge you need to tighten the adjustment bolt tightly, but on the lower hinge you should loosen it;
- Be sure to carefully check steps numbered 2 and 3. This must be done until the front part is in the normal position.
Caring for fittings
We have already understood how to install and adjust the hinges, but it is important to preserve these elements for a long time. You definitely need to be able to adjust and lubricate these components, this is what will help protect them from rapid wear.
Below are general recommendations for caring for hinges:
- The first adjustment of the hinge elements must be done after screwing them into place;
- The amount and frequency of subsequent care will depend on the intensity of use of furniture structures. If the doors do not open so often, then it will be enough to adjust the hinges 2-3 times a year; with frequent use, even 4 times may not be enough;
- be sure to regularly inspect the appearance of the front part of the cabinets; if distortions or a low level of the rebate are suddenly discovered, then it is necessary to make precise adjustments;
- In order for furniture fittings to maintain their quality for a long time, it is necessary to lubricate the hinges. Can be lubricated with motor oil with a mineral or synthetic composition;
- In order not to hear noises, and also not to feel difficulties when opening and closing cabinet doors, you need to lubricate all hinges with motor oil once a year.
When adjusting, try to adjust three main parameters at once - height, plane and vertical. This will help prevent imbalances that could place heavy, uneven stress on the hinges.
Setting up hinges is not that difficult; the whole process will take on average no more than 10 minutes. But at the same time, it will help preserve the quality of the hinges and the entire structure for a long time. The main thing is that when adjusting the hinges, do not forget about the recommendations and proper care of the fittings.
Recommendations for long-term operation of hinges
In order for cabinet doors to serve for a long time and not become loose, squeak, or deform, proper care is required for the hinges:
- The first adjustment is made after they are fixed in place.
- Time of continuous use. If the cabinet door does not open very often, then the adjustment is carried out 2 times a year. Otherwise, loop maintenance may increase up to 5-6 times.
Hinge design option for cabinet door
In general, adjusting the hinges does not take much time, but you should not rush it. Unscrewing and tightening the screw only costs half a turn no more. This way the door will stay in place and not come off.
How to adjust the hinges on a cabinet door yourself: detailed instructions
If the doors become loose, begin to close poorly, or become deformed after transporting furniture from one place to another, the cabinet hinges need to be adjusted. The causes of malfunctions may be temperature changes or high humidity. Also, the procedure is often necessary after purchasing and installing new furniture. No special skills are required to adjust the awnings. All you need is tools.
The process itself is simple and takes little time, so you can adjust the doors yourself. You just need to follow some rules and subtleties, since each case requires its own specific method of adjustment.
Types of hinge adjustment
Before you start adjusting furniture hinges, you need to determine the cause of the misalignment. This can be done as follows:
- Check that the cabinet is assembled and installed correctly. If there is misalignment, adjusting the awnings may not be useful. First you need to determine what caused the displacement - different heights of the floor or legs, incorrect assembly, etc. It is better to level the furniture structure using a special construction or plumb line.
- Inspect the hinges themselves. This way you can determine the type and condition of the awnings. Without this, it is impossible to choose a solution, since repairing each type of mechanism requires certain types of work. If the problem is that the hinges are loose, just tighten them with a screwdriver.
- Determine the type of adjustment required. It is important to detect the location of the gaps, their size, radius of curvature, and the area where the blade catches. Knowing the “scale” of the problem, you can choose a way to adjust the canopies: height, depth or width.
Before setting up hinges on the cabinet door leaves, you need to decide on what principle the work will be performed. There are several types of regulation:
- by height - performed if one door is located higher or lower than the other;
- in width - if there is an uneven gap between the doors;
- in depth.
Sometimes distortions occur because the furniture was assembled incorrectly or on an uneven surface. Therefore, it is first recommended to check the geometry of the cabinet using a plumb line, and if it is skewed, set it level. Often no further adjustment of the hinges will be necessary.
Vertical correction
Adjustment of a furniture hinge begins with adjusting the vertical position.
This method eliminates the uneven position of the door leaves relative to each other or their separation from the overall design of the cabinet.
Loops are found on the adjusting mechanism. If there are plugs, they are removed. Then they find oblong recesses in which two screws are located - in the upper and lower parts of the fittings. Using a screwdriver, the bolts are loosened slightly, and the cabinet doors are raised or lowered to the required level. To fix the position of the doors, the screws are tightened, holding the doors in the desired position.
After aligning the door leaves vertically, begin adjusting the remaining levels. If you start correction horizontally or in depth, you will have to constantly return to the beginning. This adjustment will resemble “pulling a blanket.”
Horizontal adjustment
To align the doors in height and prevent constant friction of the door leaves against the horizontal slats, it is necessary to adjust the special mechanisms that secure the doors. Inside the structure there are small oblong ears where the screws are located. Using a screwdriver, loosen the screws by carefully unscrewing them. In this case, it is necessary to ensure that the doors do not warp.
If necessary, during adjustment the façade panels are lifted and then the screws are tightened, but not too tightly so as not to break the threads.
Depth adjustment
This type of adjustment is required when the doors or one of the curtains constantly move in the opposite direction or do not fit tightly against the wall of the wardrobe.
To eliminate the distortion, find a second adjusting bolt. Take a screwdriver and tighten the screw in your direction by 2-3 mm. During the process, it is important to constantly ensure that no cracks or gaps form between the door panels and the facade.
If the twisted 2 mm is not enough, then you need to continue the process until complete alignment.
Common faults
[adv1]
The sliding wardrobe system includes one or more doors. They move along the guides using rollers that are attached at the bottom or top.
To ensure that the doors do not hit and close completely when opening and closing, the design provides for the use of a stopper and a closer.
The main reason why vertical, height adjustment or correction of other problems may be required is long-term operation. Don’t forget about initially incorrect installation or the use of low-quality fittings.
Most often, owners of wardrobes encounter the following problems:
- over time the door sags;
- the stoppers are worn out or displaced, and therefore the door does not lock;
- the gap between the doors has increased and the doors are skewed;
- the door simply dangles and flies off the guides;
- the canvas does not move well along the guides, it moves slowly;
- Uncharacteristic extraneous sounds appeared during the opening and closing process;
- the connection has become loose, etc.
You can clearly see that there are quite a lot of problems and malfunctions. The costs for a specialist in such a situation will be impressive. Therefore, sometimes it makes sense to learn how to fix problems with your own hands.
Yes, you may need to purchase a special wrench that is used to adjust and install the stops on the coupe. But believe me, if the door falls off, they will charge a lot of money for repairs. In addition, the scheme for independently restoring the functionality of a sliding wardrobe is quite simple. You can master it by reading this material and watching various videos. On them you will see how cabinets with bottom and top rollers are repaired, and much more.
Care and prevention
To avoid having to constantly adjust cabinet doors, it is recommended to carry out preventive measures that will help protect the product from rapid wear and distortion.
Care instructions:
- the first adjustment is made immediately after installation and assembly of the furniture (cabinet);
- if the furniture is used infrequently, then adjustments and tightening of bolts are carried out 2-3 times a year, with frequent use - once a month;
- It is recommended to inspect the appearance of the door panels for distortions, deviations, and other defects;
- for better operation and prolongation of the functions of the adjusting mechanism, it must be lubricated with motor or other suitable oil;
- To prevent impacts, you can install a special oil closer; it promotes smooth closing and prevents the canopies from coming loose.
After lubricating the mechanism, it is recommended to open and close the door several times to better penetrate the oil into the device.
The process of correcting distortions in the design of door panels takes little time, and inspection and preventive actions take even less.
How to care for fittings
In order for the furniture to last a long time and not cause discomfort during use, you need to regularly care for the hinges.
4 simple rules will help with this:
- The first adjustment of the hinges is carried out immediately after installing the door on the cabinet.
- The interval between the following adjustments depends on the correctness and intensity of use of the cabinet door. If you use the cabinet daily, you need to adjust it 4-6 times, and if you use it irregularly, 2-3 times a year.
- The cabinet facade is regularly inspected for distortions, sagging and door deviations. If deviations appear, adjustments must be made.
- In order for the hinges to last longer, not make sounds, and open doors easily and smoothly, they need to be lubricated. For this purpose, motor and diesel oils and lubricants are used: “Ciatim”, “WD-40”. The hinges are lubricated 1-2 times a year.
In order for the hinges to last longer, not make sounds, and open the doors easily and smoothly, they need to be lubricated.
After frequent adjustments, the screw holes break and do not hold the door well.
Improper installation of the door over time leads to deformation of the entire furniture structure. It is better to spend 15-20 minutes of time 1-2 times a year on setup than to repair or buy a new cabinet.
Adjusting hinges on cabinet doors
Furniture in our homes is not only a part of the interior that pleases the eye with its beauty or unusual design. In most cases, it is also an item that carries a certain functional purpose, for example, storing clothes, dishes or other small things important for our everyday life. Properly selected furniture is the key to a comfortable home arrangement.
To prevent personal belongings from spoiling the interior of the room, creating a mess in it, they are usually put away in a closet. This convenient and practical piece of furniture can be found in almost any home today, therefore, the problem of adjusting hinges on cabinet doors is undoubtedly familiar to many.
Easy adjustment of wardrobe doors with your own hands: instructions
Hi all! Modern sliding wardrobes have at least one door or movable door with a rail movement, with an upper carrier or with an upper guide. In most cases, roller brackets are used, which can be divided into suspended and support ones. In the case of support ones, the wheels are located at the bottom of the door, while for suspended ones they move along the upper guides.
Sliding mechanisms are much more complex compared to conventional hinges, and therefore the adjustment of wardrobe doors is carried out somewhat more often.
Ways to adjust hinges on cabinet doors
There are several ways to adjust door hinges. They all involve performing a series of simple actions that any homeowner can do, even without special skills. Let's take a closer look at them.
There are three main ways to adjust hinges:
- vertical;
- door height adjustment;
- plane adjustment.
Each of these methods is characterized by its own distinctive features. You should first of all pay attention to these features when choosing the door adjustment option that is best suited for a particular situation.
Vertical adjustment
It is used when assembling new furniture or in cases where there is a pronounced distortion between the doors and the cabinet.
Before starting work, remove the plugs, if any. Then, tighten and align the bolts located along the edges of the cabinet side. After closing the door, analyze whether it is now level and whether any of the bolts need to be further tightened. For example, if the upper corner of the door is tilted to the right, then the upper hinge is tightened and the lower one is weakened; if it is tilted to the left, vice versa. Door adjustment does not allow sudden actions. You should not immediately completely tighten or unscrew the bolts - there is a high probability that such actions will only increase the existing distortion or loosen the grooves. Make adjustments gradually, checking the result after each step and continuing to tighten the bolts until you align the doors as you require.
Having finished leveling the doors using this method, you can begin to level their height. However, it is quite possible that after learning what this method is and assessing the degree of its necessity for your particular case, you will decide that it will not be useful to you.
Door height adjustment
When making vertical adjustments of doors, you should be as careful and attentive as possible so as not to damage the furniture. The height of the door is changed by tightening or loosening two special screws mounted on elongated ears.
First, you need to loosen the screws, then set the cabinet doors at the height you need, and then fix it by tightening the screws. It is better to choose self-tapping screws for this manipulation with small threads - with their help it is much easier to install the doors to the required height.
Adjustment in planes
Using this method, you can align the position of the doors in the plane and eliminate their loose fit to the body. Scroll the second bolt located in the loop towards you. After performing this action, see if there is a gap between the cabinet body and the door. If necessary, perform these steps several times until the gap is removed. To carry out such manipulations, it is better to choose a Phillips screwdriver. The actions themselves should be carried out extremely carefully so as not to damage the head of the bolts or twist the threads on them.
Rules to follow when adjusting doors
Despite the fact that these methods are quite different, when using any of them, certain rules must be followed:
- Perform all actions sequentially - this way you will not only significantly speed up the entire process, but also make fewer errors. First, the doors must be aligned in height, and then they must be adjusted in relation to placement.
- Before adjusting the doors, you should check how the cabinet stands - if it is not level, then you must first adjust its installation and only then take on the doors.
- If it is impossible to level the cabinet, then you should pay special attention to the distance formed between its doors, which becomes when the optimal number of things is placed in it. Remember, if the cabinet is overcrowded, the existing gap will increase significantly. It is believed that the size of the permissible gap between the doors should not exceed 5 millimeters.
- It is recommended to check the facade additive under the cup. If it is incorrect, the process may be delayed, since you will first need to adjust the door hinges, and only then carry out actions to adjust the doors.
Wardrobe doors falling out
Another annoying failure is when the doors come off the guide bar. The main reasons are the accumulation of debris or foreign objects entering the lower profile.
When the rollers move along the rail, they encounter an obstacle and jump out of the guide bar. The upper roller mechanism can remain in place.
Top roller mechanism
The second reason for this situation may be closing the doors too quickly. If you forcefully throw away the canvas, a reverse inertial movement may occur, which will throw the door up. As a result, it will jump out of the guide. Try to open and close doors smoothly. What to do in this case:
- If mousse has accumulated in the profile or a foreign object has been detected, for example, a chewing gum ball has stuck, it is necessary to clean the guide profile. Vacuum the plank.
Wardrobe door arrangement diagram
The principle of adjusting doors in a wardrobe
First, install the canvas in the upper guide, then in the lower one.
Guide profile deformation
Quite often, damage such as deformation of the guide profile occurs. Most often, defects of this kind occur due to accidental mechanical shocks.
Guide profile in a sliding wardrobe
Aluminum is a fairly soft material, so it can be easily straightened. This must be done carefully using a mallet (a hammer with a rubber head). Or take a piece of plastic or linoleum as a gasket, and lightly tapping it to restore the profile. In general, it is quite fashionable to eliminate simple defects in the sliding wardrobe system with your own hands. In more complex situations, replacing glass, mirrors, worn rollers, it is better to use the services of specialists.
Caring for fittings to extend their service life
To extend the life of your cabinet, it must be properly maintained by following a few simple rules:
- Once the doors are adjusted, the screws on the hinges holding the doors in place need to be tightened as tight as possible. This will help strengthen the structure and prevent them from periodically becoming loose.
- To work with hinges, it is recommended to purchase a special thread locker or use oil paint or enamel.
- If the self-tapping screws have become very loose from long-term use, they must be unscrewed and the holes into which the bolts are screwed must be sealed by driving small wedges of wood into them, then the door must be screwed to the cabinet.
- It is recommended to periodically lubricate the moving parts of the hinges. Use machine oil for this, dropping a small amount onto each of the loops. This way, you can avoid unwanted squeaks when opening or closing the doors, or their jamming. Any excess oil that has formed should be removed immediately before it is absorbed into the surface, dried out or covered with dust. A cabinet with traces of oil on its doors has an untidy and completely unattractive appearance. Remember, old, deeply ingrained stains are much more difficult to remove from the surface, and sometimes even impossible.
As you can see, in order to extend the life of your favorite cabinet, nothing overly complicated is required other than careful use and systematic maintenance. By following the above simple rules, you will significantly extend the life of not only the cabinet, but also any other furniture that has doors and protect yourself from unnecessary hassle associated with its care and repair.
How to adjust the door?
*
Required tools: knife, flat screwdriver, screwdriver, 4mm hex key.
The compartment door is adjusted using the lower screw through the hole. To adjust, you will need a 4mm hex wrench. For clarity, let’s take the right door of our drawing:
As you can see from the photo, we need to lower the left corner and raise the right corner of the door.
First, let's lower the left corner:
Using a hex wrench, turn the bottom screw counterclockwise. The door is lowered. We make the adjustment so that the gap in the area of the left roller is 4-5mm. The next step will be the final adjustment of the compartment door using the right roller. Everything is quite simple - if you need to raise the angle, turn the adjusting screw clockwise, if you lower it, turn it counterclockwise. The ideal position of the compartment door is considered to be when the door fits tightly to the side and the bottom gap is 4-5mm.
Final adjustment of compartment doors:
Adjusting the stoppers
We press the compartment door to the side and use a pencil to place a mark in the area of the center of the roller on the lower guide. We move the door to the side and, using a flat-head screwdriver, move the stopper so that the center coincides with the notch. We try to close the compartment door. If everything is correct, the door will run over the stopper and press against the side. If the door, once in the stopper, forms a gap with the sidewall, it is worth moving the stopper closer to the sidewall. If it doesn’t reach, then move the stopper back a little. After adjusting the stoppers, if necessary, adjust the fronts using rollers. For smooth closing of compartment doors
can be used
The popularity and widespread use of a sliding wardrobe for arranging a modern interior is due to its practicality and compact storage of household items. Compartment doors, sliding in parallel planes, do not take up additional space when opened, which is an important advantage compared to traditional hinged doors. However, the daily, active movement of sliding panels during operation often leads to the appearance of backlash, loss of smoothness, distortion or jumping of the panels from the guide rail. Periodic inspection and adjustment can prevent unexpected breakdowns and extend the service life of the opening mechanism.