Types of fastenings for different shelves
There are three main types of shelves used in modern furniture:
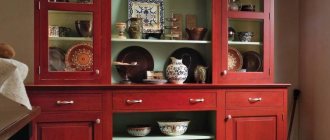
- Wooden. The material is chipboard or MDF. The most common type.
- Glass. Manufactured from tempered glass through special thermochemical treatment. As a result, additional strength is provided, which allows them to be used in furniture production.
- Mesh or wire. They are a wire frame in the form of boxes or baskets.
Today, shelves are made from almost any material, including glass.
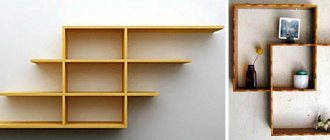
There are additional modifications to the shelves, such as folding, pull-out or height-adjustable. However, no specially designed type of fittings (with the exception of retractable ones) are used for their installation.
Shelves can have various modifications, including retractable mechanisms.
Rules for installing and hanging cabinets
Before hanging the cabinet, you must:
- carefully level the walls;
- finish laying the electrical wiring, installing sockets and switches;
- complete the finishing of the walls - plastering, wallpapering, installing drywall;
- assemble the tool;
- determine the height of the headset;
- Mark with pencil or chalk.
To work you will need:
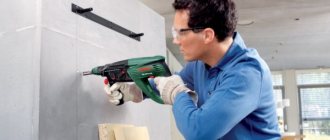
- electric or hand drill;
- hammer drill if the wall is concrete;
- level, preferably water;
- tape measure for measuring distance;
- screwdriver with a set of attachments;
- hammer and punch;
- clamps, if the boxes will be hung as a whole set;
- wrenches if anchors are used.
On a concrete wall
For hanging on a concrete base, anchor bolts are used, which guarantee reliable fixation. Mounting strips can be attached to screws that are screwed into plugs; holes for them are punched with a hammer drill. You can use a corner to attach the cabinet to the wall.
On a foam block wall
Furniture must be secured to cellular material with air bubbles using special fasteners. Dowels, anchors, and nails will not hold, but can destroy the wall when the load increases. Fasteners that can be held in hollow material are called chemical anchors. They are an adhesive mass. They also hold dowels made of plastic, nylon, and metal.
Installation of fasteners in foam blocks is carried out as follows:
- mark the wall;
- drill holes with a drill corresponding to the dimensions of the fasteners;
- inserts the dowel into the hole, previously cleared of crumbs;
- tighten the screw.
Features of fixing cabinets on a plasterboard wall
Mounting strips are attached to the surface of the plasterboard sheet with special self-tapping screws or anchor bolts, onto which furniture with adjustment fittings will subsequently be hung. This method is not suitable if the cabinets are designed for heavy kitchen utensils and appliances. Decorative cables or tubes are used to attach heavy kitchen cabinets to the wall.
Holder for glass shelf in cabinet
There are two most common types of glass shelf holders.
Special holders have been developed for glass ones.
Classic, support
In general, they represent a pin design and are structurally divided into two parts: countersunk and supporting. The first part is usually mounted into the wall. Support – designed directly to hold the plane of the shelf. It is made in the form of a platform: simple, coated, with a plastic gasket or an installed suction cup. Allows you to remove shelves without using tools.
Various modifications of classic holders may look different.
"Pelican": plug-in, with lock
This type of fastening can have different designs, but fundamentally it also consists of two parts: secret and receiving. The hidden part allows you to install fasteners on the cabinet wall, and the receiving part contains a groove where the glass is inserted and secured with a clamp. Installation requires a screwdriver or a special wrench.
Pelican holders look like this.
Attaching mesh shelves
Such shelves are often used in kitchen cabinets or wardrobes. If in the kitchen they are used, as a rule, for storing (drying) dishes, then fastening the shelves in the built-in wardrobe may require special reinforcement (in addition to the standard one or the one that comes included), since in this case mesh shelves are most often used for storage shoes
Such shelves are used in kitchens to store dishes. This imposes its own requirements due to the heavy load and increased size. In general, the mount is a stop with a pin part for mounting and a groove for placing the frame wire.
As a rule, they are attached to a supporting part.
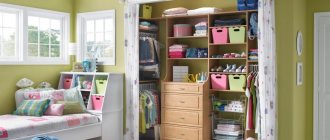
How to assemble a wardrobe: main steps
Before you start assembling a wardrobe, you definitely need to buy it. It should be noted that you will find your way around this matter easier and faster if the purchased piece of furniture includes drawings of the wardrobe. Check their availability.
Pay attention to the quality of each part and strip, make sure there are no swelling, cracks or other defects. When transporting the kit, take precautions: secure the product firmly in the car, and choose a flat road for transportation.
stage one: select the installation location and carry out the markings
- If your wardrobe will occupy space near the corner of the room, then you should measure the total length of the wardrobe from the corner. To do this, you will have to measure the length of the mezzanine;
- draw a vertical line that will outline the boundaries of the future structure. To get an even line, it is better to make several marks;
- measure a vertical line at the level of which the vertical bar will be placed, separating the compartment with horizontal shelves for things from the compartment with hangers. To do this, measure the length of the shelves and measure the required distance from the left or right border of the wardrobe (depending on the model of the wardrobe);
- On two vertical lines, measure the height of the shelves - 1 - the edge of the future structure, 2 - the vertical stand.
stage two: installing fasteners
- lean the fasteners against the drawn lines and, using a pencil, mark points on the wall for future holes;
- drive dowels into the holes;
- firmly secure the fasteners to the wall surface with self-tapping screws.
Since your main task is the correct assembly of the wardrobe, you should remember that if profile 18 is used to finish the edges of individual elements, then it is more advisable to put it on before starting the next stage.
stage three: attach the vertical stand, mezzanine, side wall and shelves
1. Vertical stand. Leaning the vertical stand against the finished fasteners, securely secure it with screws.
2. Mezzanine.
- Use a pencil to draw a horizontal line where the mezzanine will be located;
- Make holes on this line to secure individual parts;
- drive self-tapping screws and dowels into the holes, mount the fasteners on the wall;
- Place the mezzanine on the fastenings and secure it with self-tapping screws.
3. Side wall.
- measure the distance from the floor to the ceiling with maximum accuracy, adjusting the side wall to the result obtained;
- Using self-tapping screws, securely fasten the side to the fasteners.
4. Shelves.
- on the vertical stand and side wall of the cabinet, make marks where the shelves will be located;
- Install two fastenings on the wall and on the sides;
- Place the shelves on top and secure them with self-tapping screws.
In another compartment, where there will be hangers, you need to hang up the phone, securing special fasteners for this. Cut the pipe to the required size, insert and secure.
stage four: fix the false panels on the surface of the floor, wall, ceiling and sides
- drill holes in each false panel;
- Make marks with a pencil on the surface of the wall at the fastening points;
- Drive dowels into the finished holes;
- Secure the false panels to the designated places with self-tapping screws.
Installing shelves in a closet: types of fasteners
Furniture fastening fittings vary both in purpose and in the nature of the connection provided.
Fasteners for shelves differ in purpose and nature of the connection. According to the purpose of the fastener, there are:
- Frame.
- Mounting.
- Power.
By the nature of the connection:
- Collapsible.
- Non-separable.
Typically, fastening involves the use of tools such as a drill, forstner cutters, countersinks, screwdrivers, hex keys, chisels, and wood glue. In addition, some types of fasteners require the use of very specific tools, which imposes restrictions on the possibility of their use (Lamello Invis screed).
To attach the shelves you will need certain tools.
Before choosing the type of fastener, you should carefully consider the nature of the cabinet's use, so that later you can ensure trouble-free servicing of individual elements or complete disassembly.
Euroscrews (Euroscrews, confirmats)
Used to connect wooden furniture elements (chipboard, MDF). Such fasteners for a shelf in a closet impose a requirement for a wall thickness of at least 16 mm. Confirmations are manufactured in a certain range of lengths, from 20 to 70mm.
The wall for such fastening should be no thinner than 16 mm. To prepare the mounting hole, special drills with a countersink part at the base are required, as well as special keys to fix it in place. They are relatively easy to assemble, but may not be suitable for all types of furniture, since the screw head remains open. In addition, euroscrews do not allow organizing the longitudinal arrangement of shelves at the same height in the presence of vertical jumpers.
Such fastenings are quite reliable.
Fastenings for shelves in the closet: rastex (minifix)
This fittings belong to the so-called eccentrics, which indirectly indicates their principle of operation. This type of fasteners provides good joint strength, but is difficult to prepare, as it requires great precision in drilling holes. Structurally, it consists of a sleeve for the pin (footer), the pin itself, and a tension sleeve.
This is what Rastex fasteners look like. The footer is installed in the cabinet wall, in a previously prepared place. A pin is screwed into it. For the tightening sleeve, a piece of wood is selected with a milling cutter so that it fits flush into the shelf. A hole for the pin is drilled perpendicular to it, from the end. After the connection is assembled, the bushing pulls the pin and clamps it, thanks to the groove in the sidewall (hence the ex src=»https://severdv.ru/wp-content/uploads/2020/07/sverlenie-dlya-rasteksa.jpg "class="aligncenter" width="1500″ height="1143″[/img] This fastening requires precision drilling skills. Such a connection has two significant drawbacks: it cannot be used in a finished frame, and when marking it should be taken into account that when fixing the shelf can move in the plane.
Conical coupler
In this case, installing shelves in a closet is similar to installing using a minifix. Moreover, their schematic diagram is also quite similar: both have a liner, a tension sleeve and a pin. The only difference is the holding method.
This is what conical screws for fastening look like. If rastex ensures this using a groove in the bushing body, then here the fixation is carried out with a special conical screw, which, screwed into the cavity of the bushing, engages the corresponding hole at the end of the pin and tightens it, thereby creating the necessary tension.
Screw tie
Typically, this fastener is used to lengthen (splice) shelves, in particular in the presence of vertical walls. This solution provides both a fairly convenient installation method and high reliability. Can be considered as additional reinforcement of the frame.
The screw fastener is easy to install and reliable. The concept of this solution is extremely simple: a piece of wood is removed from the edge of the shelf with a milling cutter, forming a recess. A similar one is being formed in another regiment. A hole is drilled into the wall large enough to allow a threaded lag pin or screw to pass through. Specially shaped staples with a hole in the side are inserted into the recesses. The pin is threaded into the brackets and then tightened with nuts on both sides.
Fastenings for shelves in the closet: Rafix
Another representative of the eccentric type, but unlike the minifix, does not require drilling the end channel. The schematic diagram is approximately the same, only the pin is held in place with a special screw.
This is what Rafix furniture fastenings look like. The selection for the sleeve is made at the edge of the shelf, so that after processing with a milling cutter at the end there is an opening sufficient for the passage of the pin, which is installed on the cabinet wall. After this, the shelf with the inserted bushings is put on the pins. Fixation occurs by tightening the bolts. The disadvantages of Rafix include the inconvenience of installation, especially with low shelf heights.
Shelf holder
The simplest, yet no less effective option for attaching shelves. Structurally, it differs between mortise and hinged. Mortise involves a pin part with which it is installed inside the wall. Hinged - attached with screws or glue.
Shelf holders can be mortise or hinged. With this method, the shelf is freely placed on supports (under its own weight), which, if necessary, allows it to be easily dismantled. Structurally, a typical shelf holder in a closet can be equipped with a platform supplemented with spacers or a special protrusion to prevent the shelf from moving towards the door.
The convenience of such holders is that the shelf can be freely dismantled at any time.
Dowel
The same pin, only wooden - the oldest way to connect furniture elements to each other. Structurally, it is a small chop (20-30 cm in length) with corrugation along the side surface. The connected parts of the frame (or shelves) contain inlet and counter coaxial holes, so that the pin installed in the end of the shelf fits into the hole on the cabinet wall.
The wooden dowel has the shape of a small chop with corrugation on the side surface. In principle, just installing the dowels is enough. Nevertheless, for the reliability of the connection, as well as to strengthen the frame, the adjacent ends are additionally glued (sometimes confirmats are also screwed in). The obvious disadvantage of this type of fastening is the difficulty of dismantling. As a rule, such fasteners for shelves in a closet are used in non-demountable structures.
The disadvantage of such fastening is the difficulty of dismantling the shelves.
Corners
Also a simple and at the same time reliable type of fastening hardware. They differ both in design (in details) and in the material of manufacture. Of course, it is best to install metal corners, as they are stronger and more durable. However, they have a significant drawback - appearance.
Corners are simple and reliable fittings for attaching shelves. Since the installation of corners, whether to the wall or to the shelf, is carried out using screws, this may not always be acceptable. In such cases, the installation of shelves in the closet is carried out using open or closed plastic corners. The closed-type fastener has a special cover that hides the unsightly interior part.
However, recently metal corners have also begun to be equipped with decorative covers.
Attach furniture to the wall
IKEA is a European company and takes a responsible approach to customer safety issues.
In addition to the fact that all products are carefully tested before production begins, a fastening kit is placed in the box with the furniture.
According to European safety standards, all furniture over a meter high must be secured to the wall to prevent it from tipping over.
A few years ago, a tragedy occurred in America when children knocked over an unsecured chest of drawers. And although it was adults who violated safety regulations, IKEA has revised its standards and now includes mounting kits even for low furniture like bedside tables.
Of course, an Ikea rack or cabinet will stand like any other, but since this is a safety issue (primarily for children, who quite unexpectedly and even at a relatively adult age can decide to use shelves or drawers as a ladder), then, of course, it’s worth secure furniture (especially narrow and tall ones). As parents and simply responsible people, we attached all the tall furniture that we have in our house. Why? Because this is a very simple action, you only need to screw a couple of bolts into the wall. It takes a couple of minutes, but it increases your peace of mind by an order of magnitude.
Included with any cabinet furniture is a metal bracket, which is attached with one side to the wall and the other to the piece of furniture. The design allows you to step back from the wall (for example, if there is a pipe or a wide plinth running along the bottom
If the wall is painted, then usually no questions arise; in the case of wallpaper, it is recommended that before drilling, make a cross-shaped cut in the place where the hole will be and carefully bend the corners. If you decide to rearrange the furniture, these corners are glued and there is no trace of the hole left. Fastenings do not spoil the repair! Not so much as to neglect safety in order to preserve the walls. It is especially important to fasten large furniture like chests of drawers, cabinets or overshoes, but we don’t move them according to our mood! So only you will know about a couple of small holes.
As for the fasteners themselves, which are screwed into the wall, they are not included in the furniture set (the same for shelves, photo frames and other hanging elements), since different types of walls require different types of fastenings.
Another popular option is to use felt or wood pads to raise the edge farthest from the wall to create a slight angle. This is not noticeable to the eye, but shifts the center of gravity towards the wall. This method is not recommended by the manufacturer, but it is popular and definitely better than nothing.
In addition, it is also worth remembering that the heaviest items should be stored on the lower shelves and in the back of the drawers.
A shelf or drawer cannot be used as a step.
If you have small children and you need additional safety measures, also pay attention to the PATROL series of products - as a rule, most of these products are in stock here, on Kievskaya, 98
This is a staged video, the furniture is not IKEA, no one was hurt, but we really hope that it will convince you not to neglect safety precautions.
We have been bringing IKEA products to Crimea and Simferopol for a long time and are completely confident that they should bring only joy!
Order any and see for yourself.
All articles
If you liked or found this article useful, share it on social networks:
isimf.ru
How to attach removable shelves?
Removable shelves are often installed in a cabinet that is already in use. It may also be an initial decision pursuing its own specific goals. In principle, most of the above types of fastenings are suitable for their installation, but not all. The following are commonly used:
- Shelf supports.
- Corners.
- Screw or conical ties.
If you have the necessary tools, Rafix may also be a good solution, but only if the shelf does not need to be removed every other day.
How to fix a hanger on the wall
How to fix a hanger on the wall with your own hands? To complete the work you will need:
- tools for marking (pencil, tape measure);
- drill;
- screwdriver (screwdriver);
- dowels (plastic products can be purchased at the store, and wooden ones can be purchased or made independently);
- hammer;
- self-tapping screws
Fastening is carried out according to the following scheme:
- at the initial stage, markings are made, during which the locations of the fastening screws are determined;
Determining where to attach the hanger
- using a drill, holes are drilled;
Preparing holes for fixing the hanger
- dowels are inserted into the prepared holes;
Placement of dowel for self-tapping screw
- The shelf is fastened with self-tapping screws.
If a hanger suitable in size and design is not available in stores, then you can make this piece of furniture yourself. How to make it yourself and secure it, watch the video.
Hello, friends.
Today’s article is another practical point regarding the manufacture and installation of furniture.
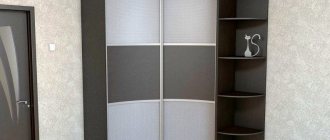
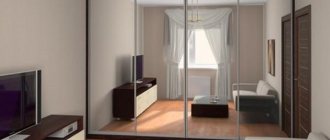
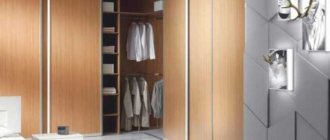
We'll talk about how to install a cabinet that has a shallow depth (300-400 millimeters), or, to put it another way, how it can be easily and securely attached to the wall.
Such cabinets are often ordered for hallways, balconies (loggias), and in general, they can be ordered anywhere.
But a cabinet that has a small depth is very unstable “by definition.”
Moreover, if the depth of the cabinet (with hinged facades) is less than the width of its facade, each time the facade is opened, the cabinet will “push” forward, and the wider and more massive the facade, the more force it will be “pushed” (in this case, by the body is subject to a moment of force depending on the width of the swing façade).
It turns out, theoretically, such furniture is not correct, it will not work.
But what happens when you need it (or when you are offered money for its production)? Sometimes there are times when it is simply not possible to make a product of normal depth in certain areas of the room.
The first thought that comes to the furniture maker in this case is that he needs to attach it to the wall.
Shelf holder in the closet: care and operation
As such, there are no special rules relating exclusively to the care of fasteners. Unless the plastic corners and tension sleeves are kept clean. The mode of operation is more important here. For example, a connection with Euroscrews does not tolerate loads in a perpendicular plane.
There are no special requirements for the care of fasteners. Minifixes, conical ties and especially rafixes have a greater degree of resistance. The weakest point of such fasteners is the cutouts for the pin. Therefore, you should not load the shelves more than usual. In addition, it is advisable not to allow excess humidity in the room, as this does not have the best effect on the mechanical properties of wood.
If the shelf is properly attached, it will last a very long time. Based on the large selection of available fasteners and auxiliary accessories, solving problems with installing a new shelf or fixing a broken one should not present much difficulty. Moreover, using original fastenings for shelves in the closet, you can try to optimize the internal space so that everything you might need fits there.
Tags: mounting the cabinet to the wall
Comments 25
Poor connection to the wall. Visible from the side. The color and material are stupid. Crap Sorry, it came out.
Glue it with double-sided tape. One will be mounted on the wall. And put the second one with tape in place and lean it against the shelf. If it sticks, take it off and screw it on. And there is no need to mark it.
An 8-10cm wide plank is made inside the cabinet, screwed to the sides with Euro screws and secured to the wall. I have installed more than one kitchen like this.
Screw one to the wall. Insert the answer into it; take the second one, insert the answer into it, and place it on the wall using a level along the top answer - naturally at a distance from each other, at which the answers will be from each other on the cabinet. Then screw the fasteners onto the cabinet, departing the required distance from the top edge of the cabinet and taking into account the distance at which the fasteners are fixed to the wall...
Now I know how to hang my monitor. Thank you.
no, this is a serious bid for victory))))
Screw the fasteners to the shelf. Place the wall ones in them (and to prevent them from falling out, lightly wedge them with a match or rolled up piece of paper). Attach double-sided tape to the wall ones. Press the shelf against the wall and carefully lift it up so that the wall ones remain glued to the wall. Only I have the feeling that in the photo you are trying on the fastenings upside down.
))) Yes, on the last two photos... I’ll have to remember!
On the last three)))
Yes, and after gluing it with tape, of course, make marks through the holes and drill holes for dowels and screws)))
Thank you, your truth!
I once scratched my head trying to properly screw the overhead door to the main door of the dishwasher built into the furniture (the screws have to be tightened from the inside). I was tormented until the idea of double-sided tape came to me. I glued it down to the millimeter, maintaining even gaps with adjacent cabinet doors, opened it, and screwed it on.
I can’t even imagine how we lived before: without 2-sided tape, heat shrink...
Previously it was a carbon copy. Blue and black))) And when there were no magnetic screwdrivers, I used chewing gum to hold the screw.
And I just put a screwdriver on the magnet and the screw held on!
This is only if the screws are screwed into some kind of plastic or aluminum case. And if it’s black iron, then the screwdriver itself begins to become magnetized wherever it goes
It all depends on experience)
Screw the fasteners to the shelf. Place the wall ones in them (and to prevent them from falling out, lightly wedge them with a match or rolled up piece of paper). Attach double-sided tape to the wall ones. Press the shelf against the wall and carefully lift it up so that the wall ones remain glued to the wall. Only I have the feeling that in the photo you are trying on the fastenings upside down.
The wall is plastered and painted with water-based emulsion - will the tape stick? Well, in principle, you can do it the other way around - first attach the staples to the wall, insert the mating staple with tape and attach the cabinet, carefully remove the cabinet... and voila, the mating bracket is on the wall of the cabinet!
On the contrary, it is only possible if you don’t care where in the cabinet you screw the brackets)))))
The tape will stick to the emulsion. If it had been whitewashed with lime or chalk (returning to memories of earlier times), then the tape would not have stuck.
And what, besides the lack of adhesive tape, is stopping you from testing this in practice?
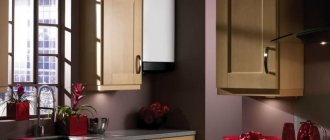
All modern kitchen sets include wall cabinets. They save space and have good capacity. Located at eye level, such cabinets are very convenient to use and are always filled with a large number of things, creating a serious load on the hanging mechanisms. Therefore, it is very important to make reliable and high-quality fastening of the cabinet to the wall.
Contents:
Selecting the height of the cabinet
Before you start attaching wall cabinets to the wall, you need to choose the right height for hanging them. It is determined based on the main criterion - the height of the kitchen owner. On average, the distance is approximately 50-60 cm from the countertop to the bottom of the wall cabinets. According to GOST, this value is 45 cm.
In the case when it is necessary to place wall cabinets above a refrigerator or above a high oven, then the height of these items determines the required level of hanging of the cabinets.
Existing cabinet hanging mechanisms
The use of modern fastening fittings greatly simplifies the work associated with hanging kitchen cabinets. It allows you to eliminate minor errors in marking and increases the strength of the entire structure. In this case, very little effort is required, and all the work can be done independently, without anyone’s help. To attach the cabinet to the wall, a specially prepared rail and a device called a hinge are mainly used.