Secure to the tabletop
For these purposes, it is important to adhere to the following action plan
- It is necessary to draw the contours of the future sink on the countertop. For this spruce, a regular pencil will do. Be sure to take care of the indentations from the front and rear edges of at least 5 cm. After this, you can take measurements where the bowl will be concentrated. Using these measurements, it is worth drawing the outline of the hole for the sink.
- the line along which the cut will take place should extend 1 cm outward from the sides of the bowl. Make a hole at one point of the contour. If the shape of the bowl is in the form of a rectangle, then the hole should be made in the corners of the designated contour.
- Attach masking tape to the outside of the outlines. Thanks to it, it is possible to protect the tabletop from damage that a jigsaw can cause to it. In the process of cutting the opening, it is necessary to screw self-tapping screws into the cut to a small depth. Thus, it is possible to protect the inside from falling. The element to be removed should also be secured from below with support.
- Treat the ends of the table top along the saw cut using silicone sealant. This way you will protect your products from moisture. Application of sealant is also possible along the drawn perimeter.
- Insert the sink and installed mixer and siphon into the prepared opening. Secure it to the tabletop using clamps. These fasteners are included in the plumbing fixture complex. All that remains for you is to connect the mixer to the water supply and drain the product through the sewer siphon.
Here's a video of attaching the sink to the countertop from below:
Installation
We lay out the tools and accessories in advance so that they are at hand. It is also advisable to decide on the mixer and siphon so that everything is installed at once, otherwise it will be difficult to install later. How to attach a stainless steel sink to a cabinet? This is not difficult if you have already completed the assembly of the frame itself.
- L-shaped fasteners are installed, either included in the kit or purchased separately.
For fastenings, it is better to purchase L-shaped plates with oblique slots at a fastening store. You will need 4-5 plates.
During the assembly process, make sure that all holes are at the same level.
We suggest you read: How to clean a toilet from limescale and rust?
Before installing the overhead sink itself on the base or cabinet and securing it, you need to assemble it completely - secure the siphon and mixer in their places, install gaskets.
This product provides additional fastening of the sink to the cabinet in the kitchen.
The fasteners are placed on self-tapping screws and moved along the slot. This presses the sink against the cabinet.
Take care of the accuracy of the work and reliability.
If water leaks out, the system is assembled incorrectly.
The sink is secured to the cabinet with fasteners and a sealant. This is the most reliable method, quite durable.
So the question of how to install a stainless steel sink on a cabinet has been resolved. If the work is done correctly, it can stand for a long time.
Many people attach the sink to the countertop. There are options when, when ordering kitchen furniture, the need for a hole in the countertop for installing plumbing is specified. Then there will be little work involved in installing the sink.
If there is no specially allocated space on the countertop, then you will have to do everything yourself.
- Mark the contours on the surface with a pencil. Take into account the margins from the edges (5 cm). Take measurements for the bowl.
Remember that the gap from the edge of the countertop to the side of the sink must exceed 50 mm. If this distance is less than 50 cm, then the sink needs to be deepened.
To make a hole in the tabletop you will need an electric jigsaw.
To avoid chipping on the front surface, choose the opposite direction of the tooth.
Stepping back a couple of millimeters from the edge of the hole, we apply the silicone in a thickness just above the side of the sink.
The sink needs to be inserted into the hole and the edges should be pressed firmly so that the silicone strands take the shape of the sink and left for a few minutes.
So, having looked at how to attach a stainless steel sink to a cabinet with fasteners and to a countertop, you will notice that doing this is not as difficult as it seems.
https://www.youtube.com/watch?v=Ndnm8yp-fLs
The most difficult thing is to make the hole correctly. If it turns out to be larger than expected, the paws will not be able to hold the sink.
Using mounting brackets
Installing an overhead sink requires a little less time and can be done using special metal corners. They usually come with it. In total, you will need at least 4 mounting plates, which will be fixed on the outside of the cabinet using self-tapping screws. Since the wall of the stand cabinet rarely exceeds a thickness of 18 mm, the screws in the set are 16 mm long.
The step-by-step process looks like this:
- We screw in the screws 5-6 mm.
- We hang a mounting bracket on them (with the inner corner part facing the cabinet).
- We tighten the screws, but not completely, leaving room for adjustment.
- We place the sink on the stand so that the powerful main fastening screw is fixed in the very depths of the metal corner.
- We tighten the screws all the way and make sure that they are securely fastened
Installation of tap and siphon
Installing a siphon without experience is not so easy. Therefore, those who have not had experience in such work should use the step-by-step instructions provided:
- A gasket must be attached to the bottom of the siphon. Then screw it on.
- The following parts must be attached to the pipe in strict sequence - a plastic nut and a cone-shaped gasket.
- Combine the pipe with the flask.
- After this, tighten the nut. Do this very carefully.
- Next, the pipe should be connected to the siphon using a coupling nut.
- The cone-shaped gasket must be fixed on the reverse side, and this part is connected to the sewer.
- A gasket is also placed in the drain hole. An additional metal mesh is fixed here.
- Then we fix the screw and attach the pipe.
- At this stage, you should make sure that there are no distortions, and also make sure that the pipe does not touch the bottom in the sump. Otherwise, draining will be difficult or impossible.
How to attach an overhead sink
You can attach an overhead sink without a cabinet directly to the wall. To do this, you need to use special brackets (sold in plumbing stores or departments with furniture fittings). First, make the first marking at the desired height from the floor (about 80 cm). Then, just below the first, make a second marking - it should correspond to the thickness of the wall of the sink at the back - this creates a line for attaching the brackets.
The simplest option is to install an overhead sink on a special cabinet (underframe). In this case, it should be wider than the underframe. Those. You can simply install an overhead sink between the sides of the cabinet, and its sides will cover the ribs of the cabinet. To do this, treat the end of the cabinet under the sink with silicone sealant, place the sink and press down. After the sealant dries, the sink will be firmly fixed.
We invite you to familiarize yourself with How to easily and quickly remove scratches from the plastic of a car interior? Review of car cosmetics for removing scratches from plastic in the interior
In normal situations, the overhead sink is secured with special fasteners (4 pieces), which can come with it or be sold separately. Initially, screw the screws into the walls of the cabinet from the inside. Then attach brackets to them (the corner should be facing the cabinet). Next you need to tighten the screws a little.
If fastening with standard brackets seems unreliable, fixing the sink with wooden blocks and furniture corners will save the situation. To do this, you need to put wooden slats in the box of the overhead sink. Then screw four metal corners to the slats around the perimeter of the sink and install it on the cabinet. And only then should you fasten the second part of the corner from the inside to the walls of the underframe.
How to install an overhead sink in the kitchen: installation instructions
Features of overhead sinks
- low cost;
- ease of installation of the sink.
The disadvantages include:
- relatively small thickness;
- gap between the cabinet.
Overhead models are placed on the cabinet and secured. This is extremely easy to do, especially if the height of the structures is standard.
Important : Such sinks are best suited to sets of separate modules, where the sink is not part of a single work area covered by a common countertop. Installing an overhead sink is preferable in corner kitchens, where the furniture is located in an L-shape and the height of the modules is standard.
Required Tools
- electric drill;
- Screwdriver Set;
- pliers;
- silicone sealant;
- ruler;
- wood drills;
- self-tapping screws;
- masking tape;
- L-shaped fastener.
Methods for installing a sink on a cabinet
A standard cabinet sink can be installed in the kitchen in two ways:
- secure with sealant;
- hang with self-tapping screws.
Important : You can attach a sink to sealant without additional equipment if it is light. If the overhead sink is heavy, then installing it on the sealant will lead to the collapse of the structure. In this case, it must be fastened with self-tapping screws.
Securing the overhead sink with sealant
Before installing the sink in the kitchen, you need to assemble all the structural elements. Then coat all ends of the cabinet well with silicone sealant. Place the sink on the coated ends of the cabinet and press on it. This method of fastening is easier to implement if the height of the sink and cabinet is standard.
Installing a sink with self-tapping screws
- Assemble a table or cabinet. Their height should be comfortable for the housewife to work with.
- Fastenings must be installed on the cabinet. It is better to purchase L-shaped plates with oblique slots from a hardware store. You will need 4-5 plates.
- Place the fasteners on the inside of the cabinet in the center of each wall of the underframe at the top. Mark the location of the slot with a pencil. Drill a blind hole for a self-tapping screw 5 mm above the mark. Screw in the screw and install the fastener on it. Repeat the operation with all fasteners on all sides of the base under the sink. The height of the holes for the screws should be the same everywhere.
- Assemble the sink. Before installing the overhead sink itself on the base or cabinet and securing it, you need to assemble it completely - secure the siphon and mixer in their places, install gaskets. This is done in advance, since the standard height of the cabinet after the final installation of the sink makes it difficult to properly install the siphon and other drainage devices.
- Coat the ends of the walls of the cabinet (underframe) with silicone sealant. This will save the cabinet material from deformation due to moisture.
- Installing a sink: the sink with the siphon and mixer attached to it is turned over and inserted into the cabinet. The fasteners are placed on self-tapping screws and moved along the slot. This presses the sink against the cabinet.
- The installation of an overhead sink is completed by connecting the siphon to the drain pipe in the kitchen. Assemble the siphon and connect it to the sewer pipe carefully so as not to break the thread.
- Before installing the doors on the cabinet, you need to check the sink for leaks. To do this, you need to fill the sink with water. If water does not begin to ooze out at the connection points with the siphon and mixer, then everything has been done efficiently.
- Install the door to the cabinet.
Installing an overhead sink (video)
Installing an overhead sink in the kitchen does not cause any difficulties. If the height of the kitchen modules is standard, then it corresponds to the concepts of ergonomics and will not interfere with the work on fixing the sink. All work can be completed independently if you have the tools in a short time.
Mounting on a kitchen cabinet
In this case, the DIY installation process is carried out as follows:
- Prepare the place where the bowl will be installed. It is worth turning it upside down and tracing the outline with a pencil. You can cut the hole using a jigsaw.
- To prevent the embedded part from falling prematurely, it must be secured with 2-3 self-tapping screws.
- After this, try on the sink to the resulting hole. If it is placed normally, you can attach it to a set, equip it with a siphon or mixer.
- Attach the faucet to the bottom using nuts and washers. Screw flexible hoses into it.
- The siphon is assembled using union nuts. When the sink is equipped with an overflow, it is also worth connecting it to the siphon. Although it is not uncommon to find ready-made siphons for sinks with overflow. The finished sink is installed in a prepared place, and then connected to the water supply and sewerage system. Seal all existing spaces with sealant.
The video shows how to attach a countertop sink to a cabinet:
Preparing the sink
Once you have a cabinet on which the overhead sink will be installed, you should first prepare it for the installation process.
Before installation, the sink must be prepared.
To do this, you need to perform the following manipulations:
- Unpack the metal product. The packaging film must be removed very carefully so as not to scratch the surface. Especially if it is glossy.
- Carefully try it on the cabinet and make sure it fits snugly enough. It is important at this moment to analyze whether the sink fits too tightly on the sides and, conversely, whether it is wobbly. If it doesn’t fit, you will have to sharpen the sides a little in the place where it is necessary. If, on the contrary, it dangles too much, then you will have to glue thin wood chips onto the sides.
- After this, to ensure long-term operation, care should be taken to ensure that the ends of the lumber are protected from moisture. To do this, they are treated with special materials that repel liquids or covered with a special edge film.
Installation of an overhead sink
The affordable overhead (built-in) sink is made of stainless steel. It is mounted on a separate module and covers its entire upper part. The installation is very simple here - special L-shaped elements with an oblique slot are used for fastening. About 4-5 such fasteners are provided for one sink.
Advice! The connection of the mixer is carried out before the stage of installing the sink (the sink is installed with the equipment already installed) - otherwise it will be inconvenient to do all this at subsequent stages.
How to attach an overhead sink with your own hands:
- You need to attach the L-shaped fasteners to the cabinet from the inside and make notes;
- Screw the screws in the marked places. It is important to choose short 15 mm screws and screw them in so that at least 5 mm remains above the mark;
- Cover the end of the drawer with sealant - it will protect the furniture and additionally glue the sink;
- After this, the sink is installed on the screws screwed into the cabinet and moved until it fits completely;
- Then the fasteners are fixed, the excess sealant is wiped off, and you can begin connecting the sink to the water supply and sewerage system.
Conclusions and useful video on the topic
Video instructions for installation on a kitchen sink:
An overhead sink is not the best solution for improving the kitchen. But when a suitable cabinet is idle at the dacha and you need to quickly create comfortable living conditions, it is considered one of the most successful options. What is also attractive is that installation work does not require special skills, time and effort - everything can be done with your own hands.
Would you like to supplement the step-by-step instructions outlined above with useful tips or point out nuances that we did not mention? Please write your comments and recommendations under this article.
Or maybe you want to share your personal experience of installing a sink in your dacha? Tell us how difficult this work was for you and how much time it took you to assemble the structure.
Universal plumbing → Articles → Sinks →Proper installation of a sink in a countertop: nuances of the process
Installation of a free-standing sink
If the sink and its cabinet are not part of the set, but are installed separately, then connecting the structure is usually even easier. All necessary brackets are most often included in the kit, and the absence of interference from other items makes the headset easier to access.
We suggest you read What to do if your kitchen sink is clogged: remedies and methods for clearing blockages
If the sink is built-in or embedded in a cabinet, the operating procedure is exactly the same as described in the previous sections of the article. If the sink does not have a cabinet, it is placed on brackets screwed to the wall. The supplied communications can be hidden in the decorative “leg” of the sink or hidden in a decorative box.
How to properly install a kitchen sink
The crucial moment comes - installing our entire structure in its proper place. We will need:
- Drill with drill 10-12 mm in diameter;
- Jigsaw, or hand jigsaw;
- Silicone sealant.
The sink must be installed on a waterproof floor covering. It's better to foresee this in advance. The places on the floor where the stands will be supported must be level.
The parts of the wall to which our structure will adjoin must also be leveled in advance and cleaned of dust and dirt.
If you have a sewer pipe coming out of the wall, then you need to make an installation hole in the wall of the cabinet so that we can slide the cabinet against the wall without interference.
We outline the outline of the hole for the pipe, use a drill to make a hole for the jigsaw file to pass through, and cut along the outline. We coat the edges of the cut with silicone sealant, let it dry and put the cabinet in place. We hang the door last.
We also need to seal the connection between the sink and the wall. We coat the adjacent edges of the sink with sealant, push the cabinet with the sink all the way and remove the excess sealant. That's it, now we wait until it dries and connect the drain fittings.
Distinctive features of overhead models
If we do not take into account sinks that are a thing of the past, which are attached directly to the wall on special brackets and do not require a cabinet or countertop as a support, all products for washing kitchen utensils can be divided into 2 categories: overhead and mortise.
The main difference between the two types is the installation method. The first ones, chosen exactly to size, are “put on” the top of the cabinet, and to install the second ones, you need to cut a hole in the tabletop.
From here follow the distinctive features expressed in design, material, and shape.
Unlike mortise sinks, which can be round, oval, or complex in configuration, overhead models have only a rectangular shape. Modern overhead sinks are made from stamped sheet steel, while mortise analogues are made from metal, artificial and natural stone, ceramics and even glass Overhead models are designed for installation on free-standing kitchen cabinets, therefore they have edges bent down on all sides, except one - the wall one.
On the contrary, it is bent upward. Overhead models have standard sizes: 600*600 mm, 600*800 mm, 500*600 mm, etc., and do not differ in variety. Mortise ones have many options, depending only on the imagination of the manufacturer. Overhead two-cup rectangular model. The sink is made of sheet steel. A standard square-shaped sink.
Products that do not require additional processing of the base are preferable for self-installation, and they are on average cheaper.
However, design features rarely allow the use of “overlays” in modern kitchen sets with a single countertop and built-in appliances. Overhead models are also quite often chosen for installation in the bathroom, but these plumbing fixtures have a more attractive design, material and size than kitchen fixtures.
For installation, you need a separate cabinet without a table top, which you can make yourself by cutting parts from a sheet of laminated chipboard or MDF and connecting the parts with self-tapping screws
But there are similarities between the two types of sinks. For example, installation of a tap and siphon, as well as connection to water supply and sewerage, is carried out using the same technology.
Detailed installation instructions
Let’s look at how you can independently install an overhead sink from “A” to “Z” without resorting to the services of hired installers and furniture manufacturing companies.
The instructions will be useful to anyone who is used to doing all the simple housework with their own hands, and the sink itself will find a place in a country house or in an apartment kitchen as a temporary replacement.
Step #1 - selection of materials and tools
To assemble more quickly, the cabinet can be purchased ready-made, but only if it is sized to fit the sink.
The second solution is to order from a furniture company, but this option is only advisable if the cost of the order is low.
To put together a cabinet and attach a sink to it, you will need the following materials:
- thin boards, sheets of chipboard or MDF plywood;
- steel sink;
- kitchen faucet with hoses;
- fastenings for washing (screws, corners);
- sealant or polyurethane foam;
- hinges and handle for the door;
- siphon with sewer fittings;
- antiseptic impregnation;
- legs or rollers.
To attach the sink to the cabinet, you only need a screwdriver or a screwdriver to tighten the screws, but to cut out the walls, base and door you will need a hacksaw, circular saw or jigsaw.
To clean the ends, you will need sandpaper, and to drill holes for self-tapping screws, a drill with a thin drill bit. We do not recommend using nails: they are more difficult to hammer into particle board panels, and besides, the structure fastened with nails becomes inseparable.
It is better to purchase all materials in advance so as not to waste time searching for the necessary parts during the assembly process. The listed tools are usually found in the home workshops of amateur craftsmen, especially if they are in charge of a dacha farm.
Step #2 - making a kitchen cabinet
The sink cabinet has a design that differs from conventional kitchen cabinets. It does not have two elements: a back wall - for free connection to communications, as well as a countertop, since it is completely replaced by an overlay sink.
Sheets of chipboard, thick plywood or moisture-resistant plasterboard - sometimes it’s easier to take some materials left over after repairs - we take in such a volume that there is enough material for two full walls, a bottom and parts for the connecting “belt”.
- first we cut out the large elements - two identical side walls and the base, then - the horizontal connecting parts;
- We carefully cut and, if necessary, clean and process the edges;
- if we use planed boards or plywood, before assembly we cover all elements with antiseptic impregnation, varnish or paint;
- we connect the elements according to the drawing using self-tapping screws and metal corners;
- Attach legs or rollers to the bottom side of the base.
If possible, we adjust the legs. If desired, the space under the cabinet can be covered with a plank. Lastly, we hang the door. This is best done after installing the sink.
It is recommended to place drawers (transverse stiffeners) directly under the sink and at the very bottom. You can also make additional crossbars in the middle if the structure is voluminous.
Having assembled the structure, we check its strength. We install it at the chosen location - it is desirable that it is as close as possible to communications.
Step #3 - choosing a suitable sink
Metal overhead sinks are sold in plumbing stores and can also be found in garden departments. They are similar to each other, but may differ in design and size.
In addition to single sinks, which are a traditional rectangular or square product with rounded corners of the bowls, there are models with drying shelves on which it is convenient to stack washed dishes, vegetables or fruits.
When choosing the size, you need to take into account the dimensions of the cabinet, if it is already ready. Otherwise, the sink is chosen according to needs: single or double, with or without a drainer.
The metal from which the sink is made can be shiny (traditionally “steel”) or matte. In terms of technical characteristics, both options are the same.
Next, we’ll look at how best to attach an overhead sink to a kitchen cabinet.
Step #4 - installation of faucet and siphon
Once the cabinet is assembled and adjusted, the hardest part of the job is over. All that remains is to fix the sink, having previously fixed the mixer and siphon to it.
First, you can install the mixer using the fasteners and gaskets included in the kit.
If only cold water supply is available at the dacha, then instead of a mixer, install a simpler device - a single tap for cold water.
Next you need to install a siphon. It is necessary to prevent odors from the sewer pipe from spreading throughout the living quarters.
It is also advisable to attach it to the bottom of the sink before installation, but it is also possible after - there is enough space under the sink to manipulate the plastic fittings.
Thanks to the prefabricated design, plastic siphons are installed quickly - according to the scheme proposed by the manufacturer.
Step #5 - installing the sink on the cabinet
Often, to install metal sinks, plastic “corners” are used - L-shaped pads, which are fixed to the upper ends of the side walls.
Share on social media networks:
A kitchen sink is as necessary an attribute as a stove or refrigerator. There are a huge number of types of sinks, however, the most popular design is the overhead kitchen sink, the availability and ease of installation of which create high demand among consumers. Operation of overhead plumbing fixtures is impossible without the kitchen cabinet on which it is installed.
In other words, the sink and base cabinet represent a single structure in the kitchen interior. Therefore, it is very important to attach the stainless steel sink to the cabinet correctly so that washing dishes and food is comfortable and convenient. In our article we will provide an overview of the most common methods of fixing sinks to different bases and describe an algorithm for doing the work yourself.
Preparatory work
Before installing an overhead stainless steel sink, you must carefully install all outlets for each siphon and mixer. When the structure is securely fixed on the cabinet, this will be much more difficult to do. If the master uses chipboards, then they need to be provided with additional protection. The upper ends are treated with silicone, which will subsequently repel moisture.
You can correctly install an overhead sink in the kitchen if you adhere to the following scheme:
- From dense material you need to build a template according to the shape of the purchased product. The allowance is 2 centimeters.
- You should decide on the exact configuration of additional elements on the countertop. You need to carefully think through this or that position.
- Tabletop protection. The entire space around the product being installed must be treated with masking tape (this will help avoid scratches).
- Using a regular drill, you need to make starting points and carefully connect them with a chisel to turn them into a small gap.
- A thin layer of red sealant is applied to the cut, after which you can install the overhead sink yourself. Excess product is removed, after which the structure must be given time to fix. All that remains is to connect the sewerage and water supply.
Advantages and disadvantages of overhead sink design
The advantages of an overhead sink made of stainless steel can be described by a combination of four main functions: it works durable, is easy to install, looks normal and is inexpensive.
- Affordability. These are the most inexpensive sinks on the market.
- Easy to install. Assembling the sink involves placing it on top of the cabinet and securing the assembled structure with self-tapping screws.
- Sufficient operational durability. Stainless steel countertop sinks are resistant to water corrosion, so the sink will last for many years without the need for painting or rust removal.
- Aesthetic appearance. The shiny surface of the metal is easily cleaned of grease, and does not require special expensive cleaning agents (such as marble).
The disadvantages of overhead structures appear when you save money and purchase a sink with thin walls (up to 1 mm). Such sinks:
- prone to dent formation;
- the mixer does not hold well;
- make a lot of noise when a stream of water falls.
In general, increased noise production is typical for all metal sinks, regardless of the type of structure (surface or mortise). You can significantly reduce it by purchasing a sink with a normal metal thickness (1 mm).
Sometimes claims are made against overhead structures for the lack of diversity and design of the sink. Indeed, overhead sinks are standard and are available in several of the most popular sizes. However, such a charge is not relevant and is not a defect. The fact is that this type of kitchen equipment (due to affordability) does not pretend to be an expensive designer kitchen arrangement.
Making a kitchen sink cabinet
There are 2 options for this method of installing a stainless steel sink:
- When buying a cabinet or a complete set of kitchen furniture. In this case, the section that will be fixed in the place of the room where the sink needs to be installed must be open at the top. That is, it is a cabinet with a frame, side walls, front doors and a bottom.
- The second option is to make your own cabinet.
Naturally, for the second option to resolve the issue you will need to acquire:
- Lumber - this will be timber, the cross-section of which should be about 10x20 mm.
- MDF, chipboard, fiberboard for creating sides, bottom and doors.
- Metal corners.
- Screws for connecting elements.
- Additionally, glue may be needed.
To make your own cabinet you will need chipboard and other materials and tools.
After this, a drawing is selected in accordance with the dimensions of the stainless steel sink that is planned for purchase.
At this point, it is important to consider the following parameters:
- The sink can be simple, that is, it can consist solely of the bowl itself. Most often, the dimensions in this case along the upper plane of the cabinet will be 600x500 mm. And the height is standard 850 mm. Although there are other options for the height of the working surface.
- The second option is a sink that has either a double compartment or a drainer that is located either to the right or left of the main sink. In this case, the dimensions on the upper plane are 600x800 mm.
- The depth of the sink most often occupies 150 mm.
The drawing must take into account certain parameters.
When making a cabinet yourself, first:
- Select a suitable drawing.
- Then the amount of materials needed is calculated. They buy them.
- The cut is made in accordance with the dimensions in the drawing.
- The frame is made of timber.
- Then, using screws, the sides and bottom, as well as the back wall, are attached to the frame.
- Using metal corners, individual elements are fixed relative to each other. This eliminates distortion of parts during operation and exposure of furniture to loads.
- After this, the doors are sawed and trimmed at the end with a special edge in order to fix the open edge.
- Then they are hung on hinges that are attached to the sides.
- It is important to take into account that along the upper plane, in the place where the stainless steel sink will be installed, there should be strips around the entire perimeter. It is on them that the shell is hung, as it were. They serve as a support for her.
Dimensions of overhead sinks
The dimensions of overlapping sinks are standardized to the perimeter dimensions of manufactured kitchen cabinets. The most common size of an overhead sink is 50x60 cm. The most commonly used overhead sinks (and, accordingly, cabinets) are sizes 50, 60 and 80 cm in various variations.
- 50×50 cm;
- 50×60 cm;
- 60×60 cm;
- 50×80 cm;
- 60x80 cm.
The width of the sink can be 50 or 60 cm (sometimes 55 cm), a size of 80 cm will be too wide and inconvenient to use (you will have to reach for the tap). The length of the sink varies in wider dimensions and depends on the presence of a monolithic countertop. If there is a table for dishes, then the length of the sink reaches 80 cm; if there is only a bowl, the length of the sink will be 50 or 60 cm.
The depth of the bowl can be 16, 18 and 19 cm, while the size of 19 cm will be more convenient for washing, since the walls of the sink will better limit water from splashing on the walls and clothes.
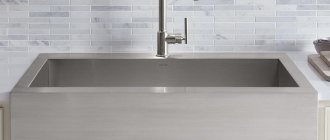
Double-bowl countertop sink