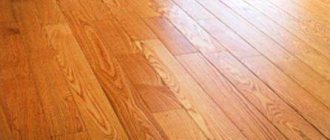
To lay the final flooring, a floor screed is carried out, which can be wet or dry.
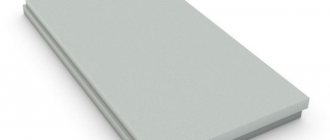
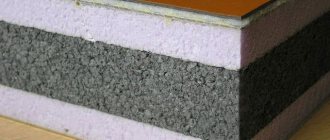
Dry screed consists of gypsum fiber boards (GVL) with a waterproofing layer, waterproof plywood or chipboard, which are laid on a dry backfill (expanded clay) or insulation (polystyrene). Using a dry screed, any unevenness in the subfloor is leveled and a perfectly flat surface is prepared for laying the flooring.
Floors constructed using this technology provide maximum comfort and convenience. Thanks to their characteristics, they provide a feeling of coolness in summer and warmth in winter.
Dry floor screed is used for:
- short deadlines for repairs;
- reconstruction of old buildings or structures with wooden floors;
- low temperatures;
- arrangement of floors in multi-storey and office buildings, cottage-type houses;
- installation of electric heated floors in buildings with wooden floors.
Advantages and disadvantages of dry floor screed
Dry screed has undoubted advantages that have ensured its widespread use:
- excellent heat and sound insulation;
- low fire hazard;
- hypoallergenic;
- very short installation time;
- absence of “wet” stages of work;
- ability to withstand high operating loads (distributed - up to 1000 kg/m2, point - up to 500 kg/m2);
- the ability to install any plasterboard partitions;
- ease of installation;
- a light weight;
- convenience of laying any communications.
For all its advantages, dry screed has the following disadvantages:
- the most important is hydrophobia , when moisture gets in, the backfill gets wet and an unpleasant smell of mold appears, gypsum fiber board, chipboard or plywood begin to deteriorate, which leads to deformation of the floors; to eliminate the consequences of moisture ingress, the floors have to be opened to dry or completely replace the dry screed;
- relatively high cost compared to other types of screed;
- dusty, when laying the backfill you have to work with gas masks.
Materials and tools for work
The process of arranging a dry screed is not very difficult and can be performed by anyone with minimal construction training. To perform a dry floor screed, the following materials and tools are required:
- dry backfill (expanded clay, fine-grained blast furnace slag, expanded vermiculite or expanded perlite sand) or slabs of extruded polystyrene foam (for a perfectly flat surface of the floor base);
- tile covering (gypsum fiber board, chipboard or plywood);
- vapor barrier film;
- edge tape;
- self-tapping screws;
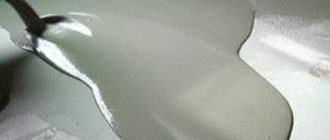
- PVA glue;
- metal U-profiles;
- jigsaw;
- screwdriver;
- laser or water level;
- roulette;
- ruler;
- pencil.
Leveling the floor with a dry screed: subtleties and special knots
The backfill for dry screed should be uniform, with a slight variation in the size of the granules. Knaufovsky expanded clay sand has dimensions of 3-5 mm, so the technology is sometimes called expanded clay dry floor screed.
It is not recommended to use elements with large variations in size. The material is simply poured and leveled, after which slabs are laid on it, which will be the basis for laying the flooring. Under periodic loads, fragments of different sizes begin to move. This is how voids are formed, as a result of which deflections appear. Also, when using large granules - about 1 cm, you may hear a squeaking sound when walking. If the backfill is shallow, this is not the case.
Expanded clay for dry screed should not be larger than 0.5 cm
There are products on the market called “dry backfill for floors.” The faction is indicated on the bag. Most often - 1-0.5 cm. A little more than recommended, but still acceptable. The price of these granules is slightly lower than those mentioned above. If the granules are no larger than stated and are only slightly large, such material can also be used.
Dry screed with your own hands: one room will take a day. Maybe two
You can also use calcined river sand as backfill when using dry screed technology. It is calcined to kill flora and burn out mineral components. Why river and not quarry? Because the river has sharp edges, and it also contains less organic matter. When using sand, it can be compacted, which will reduce the likelihood of sagging. In general, a dry floor screed with river sand will be no worse (at least) than with expanded clay.
What a dry floor screed is should be clear. The technology is indeed simple, but there are some points that are not clear “just like that.”
These are Knauf profiles for dry screed and the rules for them
Setting up beacons for dry floor screed is a whole story. Branded ones - those that are used by representatives of the company, are difficult to buy. They simply don't exist. They are usually replaced with drywall profiles. They work with them like this:
- The profiles are laid out on heaps of expanded clay backfill, pressed down, and adjusted to the desired height. The distance between the beacon profiles is slightly less than the length of the rule.
- Expanded clay backfill is poured between the beacons.
The most difficult thing when doing a dry floor screed is to level the expanded clay and prevent dips and voids - Take a long rule or just a flat bar. It is supported on the beacons, stretching and leveling the backfill layer. If holes form somewhere, they are filled and stretched again using the rule.
- After the backfill is leveled, the profile is removed, the hole is filled in and leveled. In this case, you need to move along the gypsum fiber board sheets, which are laid on a leveled layer. You cannot step on expanded clay.
You have to get sophisticated somehow
. In general, it seems clear and easy until you start doing it. The beacons are not secured by anything - I pressed a little harder, and he left. You have to control the effort, constantly check whether the bar has moved or whether the level has dropped. If you have a laser level, it’s still easier. Otherwise it's really difficult.
Laying beacons on flat cakes will cause problems with the deflection of the GVL. Above these “piles” the layer of expanded clay will be smaller, which will cause deflections. There is an option - screw in self-tapping pins and adjust them in height. Attach platforms to them on which to rest the profiles. After leveling, it will be necessary not only to remove the profiles, but also the platforms. It would also be very good to unscrew the screws. This will be ideal.
There is another way, but it is acceptable for not very wide rooms. The guides are screwed to the walls; special rules will need to be made for them. In order:
- We screw the profiles to the walls at a certain height. It is clear that they must be aligned in a horizontal plane.
Here is the guide on the wall. Also, at the same level we attach it to the second - We take a long, flat board, a piece of thick polymer. It is important that the bar is level, without bending. If there is any defect, it must be eliminated. We make cutouts on the sides so that the plank can slide along the beacon guides. The cut should be such that the lower edge of the strip installed on the beacons is at the level to which the backfill must be leveled.
This is a non-standard option: beacons for dry screed are screwed onto the walls - We pour the backfill, starting from the far wall at a distance equal to two or three times the width of the gypsum fiber sheet or superfloor. We leveled the backfill level to some distance.
- We laid GVL sheets, covering the joints with glue.
- Installed self-tapping screws (can be rescheduled for later).
And this is how to make a rule for beacons on walls
It's much easier to work this way. Firstly, your rule is guaranteed to be in place. There is no need to constantly check the position of the beacons. Secondly, it is easier to stack the sheets from the floor rather than balancing on the sheets. Thirdly, you can tighten the screws after the entire floor has been laid. Fourthly, the beacons are removed after installing the sheet material and do not interfere with the process in any way.
Such a moment as risers that we roll into a dry floor screed. If you just sprinkle them, cut holes in the sheet, “all of a sudden” - replacement will be problematic. We will have to dismantle, if not the entire floor, then a significant part of it. To make replacement possible without dismantling the floor, a casing must be installed around the pipes.
Make a box that will enclose the pipes. The height should be at the level of the backfill
Another point is the threshold. If dry screed is done only in one room and the floor level in it is higher, how to make sure that the expanded clay does not spill out. The standard option is to install a block. It is logical and understandable. But the block is a zone of increased rigidity and the GVL lying on top will outline it over time. We must be prepared for this.
We install self-tapping screws as recommended
Another connection to the door jambs. If the doors are already installed, gypsum fiber sheets can be cut out. But if you ever decide to change the doors? It will be necessary to disassemble part of the floor again, and it will begin to fall out. In general, we also need to think about this point. Options:
- Trim existing box to floor height. Install the next one flush.
- Install a barrier made of gypsum fiber board/plywood.
There may be other options. There are no standard solutions. People usually don’t think about such little things, but only until dry floor screeding with your own hands becomes your reality.
Do-it-yourself dry screed installation technology
The quality of future floors and their service life largely depend on how the dry screed was carried out. It must be remembered that before starting work on arranging a dry screed, the installation of all communications must be completed.
The process of installing a dry screed with your own hands includes the mandatory sequential implementation of the following work:
- preparation of the floor base;
- floor waterproofing;
- laying edge tape;
- installation of beacons;
- arrangement of the substrate;
- laying sheet material.
Preparing the subfloor. It consists of removing the old floor covering (during reconstruction or restoration) and sealing with cement mortar all existing cracks, cracks and potholes, especially in areas adjacent to load-bearing walls and joints between floor slabs. All debris must be carefully removed from the floors
In order to avoid the appearance of floor squeaks in the future in houses with wooden flooring made of solid boards or parquet, the latter are strengthened with the help of self-tapping screws or nails.
Waterproofing. It is carried out to prevent the penetration of moisture from the lower floors or basement. To do this, a polyethylene film with a thickness of at least 200 microns is spread on the concrete base. Instead of film, you can use bitumen-impregnated paper or any other moisture-proofing materials.
The film is laid in strips overlapping each other by 15 -20 cm and overlapping the walls by 7 - 10 cm or slightly higher, so that the edges of the film are slightly above the level of the dry backfill. To increase the effectiveness of the waterproofing layer, the joints between the film strips are taped together in the same way as the edges of the film are taped to the wall. Instead of adhesive tape, bitumen mastic can be used.
In old houses, wooden floors or wooden floors are covered with bitumen-impregnated paper to prevent spillage of fine-grained backfill materials.
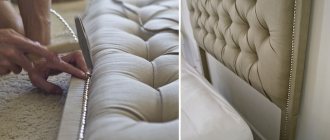
Laying edge tape. This is done to improve sound insulation characteristics and protect the finished floor from deformation due to thermal expansion. To do this, a 10 mm gap is left between the walls and the screed around the perimeter of the room, which is sealed with an edge tape made of foamed PVC. You can also use strips of polypropylene foam, mineral wool or other elastic materials.
Installation of beacons and dry backfill
- Beacons are needed to obtain a smooth surface of the dry screed.
- Most often, metal U-profiles or plasterboard profiles measuring 27x60 mm are used as beacons for dry screed, which are laid on self-tapping screws screwed into the base of the floor with sharp edges upward.
- The profile is attached to the base using concrete mortar.
Arrangement of the substrate. Bulk materials with a fraction size of 1 to 5 mm are used as a substrate for dry screed They must have a density of no more than 500 kg/m2 and a humidity of no more than 1%, have high porosity and minimal hygroscopicity.
Before backfilling, a laser level is used to mark the level of the future finished floor. Level marks are applied to the walls and then connected in one line along the entire perimeter of the room.
When backfilling bulk materials, it is necessary to take into account the fact that corrugations or pipes with communications must be covered with it to a thickness of at least 2 cm, and the thickness of the backfill itself must be in the range of 3 - 12 cm (on average 5 - 8 cm). It is also necessary to take into account the height of the lower edge of the doorway so that the total thickness of the backfill, sheet covering and finished floor does not exceed it.
Dry materials are poured into the space between the guides and leveled using the rule according to beacons set taking into account the level of the future finished floor. The backfill starts from the wall opposite the doorway. After leveling the backfill, the beacons must be removed, since the shrinkage of the backfill can be up to 5%. This will cause the sheets of the finishing coating to rest on the rigid edges of the guides, rather than on the flat surface of the substrate, which will lead to deformation of the coating. If the thickness of the backfill is large, then it must be compacted using a hand tamper.
Dry screed technology
1. Determine the “horizon” with a laser level.
2. Cover the floor with plastic film, placing it on the lower part of the wall and gluing it.
3. We lay an edge strip along the perimeter of the floor.
4. Fill the filler with a layer of at least 20 mm thick and level it, starting from the wall opposite the doorway.
5. Lay the gypsum fiber panels from right to left, starting from the wall with the doorway.
6. The panels are fastened together with strips of adhesive mastic and fastening screws for gypsum fiber board.
7. You can lay an insulating underlay (under laminate) or plywood (under parquet) on top of the panels.
On a note:
Laying sheets of dry screed begins from the door, so that during the work, builders do not walk back and forth on the leveled surface. Thermal insulation boards are laid from the opposite wall.
Author: S.Volina. Photo “KNAUF” (manufacturer of materials for dry screeding)
TOOLS FOR CRAFTSMAN AND CRAFTSMAN, AND HOUSEHOLD GOODS VERY CHEAP. FREE SHIPPING. THERE ARE REVIEWS.
Below are other entries on the topic “How to do it yourself - for a homeowner!”
- Do-it-yourself plastic clamp from a plastic bottle Do-it-yourself detachable fastener Many in…
- Installing a heated floor with your own hands in one of the rooms of the house (+ photo) How to install a heated floor...
- Do-it-yourself mini veranda (drawing + photo) How to attach a mini veranda to your house New…
- Shower room in a wooden house with your own hands How to make a shower with your own hands...
- DIY garden varnish - 3 recipes. A reminder to the gardener HOW TO PREPARE A GARDEN WITH YOUR OWN HANDS...
- Stable folding trestles for the workshop with your own hands - photo and drawing Folding trestles for the workshop with your own...
- Cement (concrete) floor screed with your own hands How to make a concrete screed yourself Preparation...
Subscribe to updates in our groups and share.
Let's be friends!
With your own hands › Repair and design › Interior decoration › Floors › Do -it-yourself dry screed - photo and how to make