Chipboard (chipboard) is a material often used for flooring due to its low cost and high strength. The slab is used in standard and tongue-and-groove versions for laying on a concrete base and joists. However, the quality of installation and durability of the finished floor largely depend on the correct selection and installation of the material.
Chipboard: general characteristics and properties
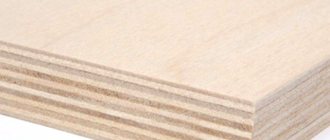
Chipboard is a chipboard that is produced by hot pressing wood waste with the addition of a gluing component. The slab can have one, two or several layers and is divided into grades A and B, which differ in moisture resistance, flexibility, resistance to deformation and a number of other technical characteristics. Chipboard is also divided into grades I and II. The first grade is a high quality slab with minimal defects. The second grade has chips, cracks, depressions, protrusions, stains, etc.
In the construction industry, chipboard with a coarse-grained, unpolished surface is most often used, since the decorative qualities of the material are not important.
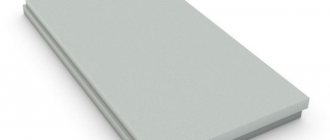
Moisture-resistant tongue-and-groove chipboards for flooring
QuickDeck Professional boards are moisture-resistant chipboards, tongue and groove along the perimeter. They contain alternating layers of large and small hardwood shavings, as well as thermoactive resins and paraffin that are safe for human health. QuickDeck Professional slabs have a number of advantages over other well-known materials (chipboard, plywood, gypsum plasterboard, gypsum fiber board, OSB): - moisture resistance - class P5, allowing the use of such slabs in rooms even with very high air humidity - tongue-and-groove joint , providing convenience and high installation speed, smooth floor without squeaking. - increased sound and heat insulation (due to the peculiarities of the joint) - environmental friendliness - class E1, comparable to the performance of natural wood - strength - wear resistance - under conditions of maximum increased use (for example, at sports facilities) they fully retain their qualities for at least six years. - light weight - this is often important during transportation and installation. - convenient dimensions for work - for laying the base of the floor it is better to use sheets of large sizes. — installation without “wet work” , does not require special knowledge, skills or tools. - affordable price .
Quick Dec slabs are often used to level floor coverings both in private construction and in various sports and retail facilities. QuickDeck Plus slabs are designed for finishing indoor floors, including terraces, verandas, balconies, gazebos, attics and loggias. The back side of QuickDeck Professional Plus slabs has a protective kraft coating, the front side is covered with a decorative wear-resistant laminated layer with a pattern of colored parquet, stone or wooden masonry. This is a completely ready-made solution for floor repair . You do not need to choose and pay for materials twice - you purchase both the rough installation and the finishing of the floor at the same time . Moisture-resistant chipboards, tongue-and-groove along the perimeter, provide a smooth, squeak-free floor surface with increased heat and sound insulation, a special protective coating protects the slabs from moisture from below, and the front decorative coating replaces linoleum or floor tiles. Such floors do not fade in the sun and can be washed using standard household chemicals.
The production of QuickDeck slabs is located in Russia, which has a positive effect on the price-quality ratio - the quality remains consistently high and the price is affordable.
Advantages of using chipboard in floor installation
- Low cost. It is thanks to the low price of particle boards that they are widely used in the furniture and construction industries.
- Ease of processing. Chipboard is easy to cut with conventional saws and does not require special skills for processing and installation.
- Environmentally friendly. The high-quality slabs sold in our online store comply with state environmental safety requirements and technological construction standards.
- Good performance. Chipboard has a long service life, so laying it under the main floor for leveling and strengthening is reliable and durable.
- Multifunctionality. Wood-based installation is suitable for floors made of any type of coating - both synthetic material and fine parquet.
- Insulating properties. Particleboards absorb sound well and reduce heat loss.
The disadvantage of this material is its vulnerability to moisture and steam, due to which it swells and deteriorates. Moisture-resistant chipboard can withstand a maximum of 4 wet cycles. This feature should be taken into account when designing.
How to choose the right chipboard for the floor?
If you want to make a floor from chipboard, then you need to carefully study the characteristics of this material, as well as its markings:
- For convenience, all chipboards are divided into strength classes. For the floor you should use P-A grade chipboard (they are more durable). The sheets may be unprotected or covered with plastic film.
- To create a rough covering or insulate a floor, low-quality sheets are suitable - loose, not sanded with a density of up to 550 kg/m3.
- The base for the finishing coating can be sheets with a density of 550-750 kg/m3.
- In living rooms, it is allowed to use chipboard with safety class E-1 or E-2, which corresponds to formaldehyde emissions of no more than 30 mg. Here it is not advisable to lay sheets with a large amount of formaldehyde for finishing flooring, only as a rough coating.
- Chipboard strongly absorbs moisture, so it is worth buying sheets with a density of 750 kg/m3, which are characterized by low humidity, moisture absorption and swelling.
Important! Manufacturers claim that average quality chipboard can withstand 3-5 layers of wet cycles without much destruction of the layers of material.
- When buying chipboard for the floor, always check the moisture protection class of the material. It is advisable to lay P6 class slabs in rooms with low humidity levels. Class P5 slabs can withstand moisture for a long time and are used in damp rooms.
Important! If you wet chipboard and leave it for a day, then such material will swell by less than 10%.
- The thickness of the material should be chosen depending on the base on which it will be laid - 16-24 mm. With a material thickness of 1.6 cm, the beams should be spaced between each other at a distance of approximately 40-60 cm.
- Sheets up to 1.6 cm thick can only be laid on a solid, level base (old floor or concrete screed). They will not withstand height differences of 5 mm or more.
- For the floor, the most convenient sizes will be 3500x1750 and 2500x1850 mm (Euro format).
Important! Sometimes there are fakes on the market, so in order to confirm the declared characteristics, it is worth asking the seller for a quality certificate.
Recommendations for choosing chipboard sheets for floor installation
When selecting chipboard for laying on the floor, you should adhere to the following recommendations and criteria:
- Plates with a density of up to 550 kg/m3 are used to organize a subfloor for laying under the main covering. This material increases the thermal insulation properties of the structure.
- Plates with a density of 500 to 750 kg/m3 are better suited for laying under parquet or laminate. This is a more durable material that levels the floor well and does not deform when installed on joists.
- Chipboard with a density of 750 kg/m3 is characterized by increased moisture resistance and can withstand several wet cycles. It is advisable to use it in rooms with high humidity. The slab marked with the designation P5 has the best moisture resistance - it increases in volume by no more than 10% per day when completely wet.
- When choosing chipboard for laying on joists, you need to correlate the thickness of the slab with the width of the step. It is better not to use slabs thinner than 24 mm for this installation at all.
- For floor construction, the best option is grade 2 chipboard. This material is strong, durable and inexpensive.
- Wood-based materials of class E-2 (chemical safety) contain ~30 g of formaldehyde per 100 grams of weight. They are recommended for use on subfloors.
In the production of green boards, urea-melamine resin is used instead of formaldehyde. This material is harmless to humans and has increased moisture resistance.
Characteristics of tongue-and-groove chipboard sheet
Compared to a concrete base, gypsum fiber sheets, regular or bakelite plywood and traditional screeds, this material wins for three reasons: firstly, it creates a perfectly flat surface, secondly, it wins in price and. thirdly, it can be used on joists.
Tongue-and-groove chipboard has a number of undeniable advantages:
- first , it is very durable and reliable,
- the second is produced using new technologies and polymer components,
- third , this material itself is of very high quality.
Which furniture is better made from chipboard or MDF can be found in this article.
In the video - tongue-and-groove chipboard for the floor:
One more thing can be added to the listed advantages - the possibility of reusing it, after dismantling, using it in another place. The basis of tongue and groove chipboard is wood, which is fastened with resins; to impart moisture resistance, a paraffin emulsion is added to the mixture, as well as glue with a low-toxic synthetic polymer.
How edge tape is used for chipboard can be found in this article.
Most often, a subfloor is laid from tongue-and-groove chipboard. It can be laid on logs or floating. In the first case, first the logs are laid in increments equal to the width of the slab, insulation is laid in the spaces between the logs, and then the slabs themselves are laid. In the second case, chipboard slabs do not need to be fixed to the base, but are laid freely on a layer of expanded clay chips; to close the temperature gaps formed between the chipboard slabs and the walls, plinths are used, securing them to the walls; this design is more durable compared to the first option.
What is better than chipboard or chipboard or MDF can be found in this article.
In the video - moisture-resistant tongue-and-groove chipboard for the floor:
Fiberboard or chipboard, which is better described in the article.
When laying on joists, one slab covers two spans between the joists, the sheets themselves must be laid staggered in order to evenly distribute the load over the entire floor area, a 10 mm gap should remain from the wall to the slab, the slabs are connected to each other along the joists, and they are secured using self-tapping screws and using glue; when installing screws, the caps must be recessed.
When deciding what base to lay as a subfloor, you should give preference to tongue-and-groove chipboard, which will save both time and budget. Despite the fact that traditional options have long been tested and known, modern technologies are in no way inferior to them, and sometimes even outperform them.
Construction nuances that influence the choice of chipboard for floor installation
Chipboard is an inexpensive and durable material for flooring, but its scope of application is limited. Firstly, it is sensitive to humidity and temperature, so it is not recommended to install it in rooms with a relative air humidity above 60% and a temperature below +10˚C. Secondly, the material is not recommended for use on floors that will be subject to heavy loads.
However, chipboard is an excellent choice for a living space in which floor insulation is planned. In this case, the slabs are mounted on logs, between which thermal insulation material is laid. In addition, they can be used to successfully level plank floors before installing a new floor covering.
Advantages and disadvantages of chipboard flooring:
- The cost of chipboard flooring is significantly lower than the price of laying plank flooring.
- The slabs have a flat surface that does not require leveling during installation.
- The material has good rigidity and can withstand differences of up to 5 mm vertically.
- It is possible to lay the canvas on logs.
- The compressive strength of chipboard is not much less than the strength of wood, which ensures high reliability of the floor covering.
- The slabs are excellent sound and heat insulators.
- The material has good adhesion to glue.
- Installing chipboard on the floor is a simple job - even inexperienced users can install it themselves.
- The boards are resistant to fungus, rot and mold.
- The material is designed for long term use.
- The design of the slabs has a special compensation layer that prevents the destruction of the product at the joints under some unfavorable conditions.
- The material is a universal base on which any flooring can be laid - tiles, laminate, parquet.
But, despite all the obvious advantages of chipboard for flooring, there are also disadvantages:
- The boards contain a large percentage of formaldehyde, which is harmful to human health.
- Ordinary chipboard sheets are afraid of moisture, so they cannot be laid in rooms with high humidity. Once wet, the material breaks down too quickly. Even moisture-resistant variations of chipboard are not able to withstand moisture for a long time and are destroyed after 5 cycles of wetting.
- The edges of the product are quite fragile, they quickly chip and break.
- Chipboard is fire hazardous. Domestic manufacturers of this material do not add fire retardant to it to reduce flammability.
- Due to its low density, the material does not hold nails well.
- It has low abrasion resistance, which makes it impossible to use slabs without additional coating.
Correct material calculation
In accordance with today's government standards, chipboard sheets have a width of 1830 mm, a thickness of 8 to 38 mm and a length of 1830 to 5680 mm. Our online store sells slabs in sizes 2500×1830×16 mm, 3500×1500×16 mm and 2750×1830×8 mm.
As an example, let’s take a room 6 meters long and 4 meters wide, for which sheets of 2500 * 1830 mm are purchased. The total area of the room is 24 m2. The area of one sheet is 2.5 × 1.83 = 4.575 m2. Accordingly, 24/4.575 = 5.2 m3 of material is required for installation. You will have to buy 6 sheets. There is an alternative option - buy sheets 2.75 × 1.83 (5.03 m2). Taking into account the distances from the walls, 5 sheets will be enough.
Tongue-and-groove chipboard: differences and advantages
The tongue-and-groove chipboard differs from the standard version by the presence of a tongue-and-groove locking end connection. It allows you to create a stronger and more stable structure from several slabs. The tongue-and-groove slab has the following advantages:
- allows even an inexperienced installer to create a strong connection between slabs without any problems;
- simplifies the installation of slab flooring without differences;
- easily dismantled if necessary;
- has increased strength characteristics for pressure and fracture;
- laying under a tongue-and-groove chipboard floor has high rigidity due to the partial distribution of the load between the slabs.
Laying tongue-and-groove particle boards requires carefully checking the horizontal plane of the joists. After installation, the slabs form a common panel that will “play” on the depressions and protrusions. To strengthen and seal the connection between the sheets, the tenons are coated with PVA glue before inserting into the groove.
How to install chipboard correctly
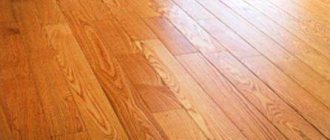
The main use of chipboard is the construction of a subfloor. It is often also called a dry screed, because it performs the same functions - leveling and insulating the surface, but no water is used during installation. The finishing floor covering is laid on top of the subfloor: laminate, parquet, linoleum, carpet, etc.
How to install a chipboard subfloor for leveling:
- Logs are installed on top of the concrete or wooden subfloor. When using chipboard with a thickness of up to 16 mm, the logs should be 30-40 cm apart from each other, and for thicker ones - 400-600 mm. When calculating the material and location of the logs, keep in mind that you need to retreat 20 mm from the walls.
- When installing the floor on the ground floor, it is necessary to install thermal insulation made of polystyrene foam, polystyrene foam, expanded clay or other suitable material. Please note that before backfilling you need to lay a vapor barrier film on the base.
- Before laying chipboard, use a long building level to check the horizontality of the joists.
- To prevent squeaks during floor operation, paper or construction plastic is placed on top of the joists, preventing direct contact of the particle board with the boards.
- Laying chipboard begins from the far wall of the room (relative to the entrance). For more precise positioning and to prevent sheets from moving, it is recommended to install wedges near the walls. The sheet is fixed in the joists with self-tapping screws located at a distance of 20-25 cm from each other. When tightening, it is recommended to recess the fastener heads by 1 mm.
- The next slab is tightly applied to the previous one, aligned with the walls using wedges and fixed. For reliable pressing against each other and a strong tongue-and-groove connection, the slabs are beaten with a mallet through a block attached to the end part. This prevents the fragile edge from being destroyed. When using tongue-and-groove material, the end connections are coated with construction mastic or PVA glue.
- An important requirement when connecting boards of slabs is the location of the seams strictly on the joists. Ignoring this rule significantly reduces the strength and rigidity of the structure. In narrow rooms, logs are always located perpendicular to long walls.
- At the end of installation, uneven surfaces are sanded and the floor is cleaned of dirt and dust (it is better to use a vacuum cleaner). Next, the finishing coating is installed from tiles, parquet boards, linoleum, laminate, etc.
When installing particle board flooring on joists, it is recommended to place the panels in a checkerboard pattern to increase strength.
Installation of subfloor
The rough screed is the basis for further fastening of the floor covering. Tongue-and-groove water-repellent chipboards are easy to install yourself, without involving expensive specialists. To do this, you just need to follow the sequence of actions described below.
First, timber logs are installed on the concrete screed, the distance between which is determined by the thickness of the slabs. With a sheet thickness of 16 mm, the beams need to be laid at a distance of 30-40 cm, and with a thickness of 22 mm - up to 60 cm. The floor level is indicated on the wall with a pencil. Recesses and depressions in the concrete will have to be filled with sand. Be sure to leave a small gap of 20 mm around the perimeter near the walls. If necessary, additionally insulate the floor. A layer of waterproofing is laid on the concrete under the beams, and foam plastic or glass wool is laid between the beams.
Previously, all electrical wires, protected by a corrugated sheath, are placed in specially prepared gutters. It is recommended to treat the space with substances that kill insects so that colonies of parasites do not breed under the floor.
Before fixing the plates, a place is designated for a hatch that provides access to electrical equipment.
The correct installation of the joists is determined by the building level, and if everything is in order, special paper is laid on top of the frame to prevent squeaking when walking. A hole for the hatch is marked and cut on the panels.
After this you can lay chipboard. The covering begins on the side of the room opposite to the exit. The laid panel is fixed with self-tapping screws, the first of which is screwed into the center, and the rest at the edges, to ensure uniform laying of the coating. The screw head should not protrude above the surface, so it is advisable to recess it by at least 1 mm. The area of one sheet must cover at least three logs in order not to lose rigidity and not bend.
To make the grooves and protrusions more tightly connected to each other, craftsmen recommend treating them with construction glue or mastic.
The second, third, and so on until the end is joined to the first sheet. It is recommended to place the slabs so that the joints between them pass over the beams. If you plan to cover the floor in a narrow corridor, then the stiffeners should be located across the track.
Any irregularities that arise during installation are sanded down, after which linoleum can be laid.
On the concrete floor
The concrete is primed to ensure maximum leveling of the surface. To ensure the evenness of the screed, pouring occurs using a level and special metal guides. The gypsum mixture is poured from the far corner so that there are no impurities or bubbles in the solution.
The dried plaster is covered with insulation on top and filled with expanded clay. Next, the slabs moistened with an antiseptic are laid out one after another at a distance of about 2 cm from the wall. Installation, like pouring, begins from the opposite edge of the room.
Floating floor
This design is optimal for uneven wavy bases. Waterproofing is laid on the concrete screed, as in the option above, and if the floor is wooden, glassine is spread. Expanded clay is poured on top, the top layer of which is leveled and compacted. When the embankment does not have waves or depressions, paper is laid and used to prevent the floor from creaking. As in the previous description, the installation of chipboard begins from the far corner, but before that, wedges are driven in near the walls so that there is a gap of 10 mm between them and the floor.
On the ceiling and walls
The sheets are attached to the wall with self-tapping screws at a distance of 30-40 cm from each other. When using nails, they are driven in at an angle of 45 degrees horizontally. Application of additional primer mesh is not required.
For the ceiling, panels with a thickness of 12 mm are chosen. As with plasterboard, the ceiling is equipped with a wooden frame onto which chipboard is attached with nails or screws. Next, all the necessary wiring is threaded through and the insulation is lined, and then the material can be fixed. It is also advisable to seal the seams here with sealant or mastic.
Tongue-and-groove moisture-resistant chipboards are distinguished by noticeable strength and long service life, which has earned the recognition of many craftsmen when working with floor coverings. Pre-leveled slabs can be covered with all types of flooring materials: linoleum, parquet, tiles, laminate and others. The reviews given here are mostly positive.
The versatility of the use of slabs and their sizes allows for the most even coverage of walls, ceilings and floors, as well as interior partitions and dampers. Resistance to environmental factors, moisture and temperature changes, combined with ease of installation, makes this product very popular among interior decorators. In addition, it is unpretentious in storage, lightweight and has a low cost compared to analogues made from other materials.
Laying chipboard on concrete
If the concrete base is initially perfectly level or a leveling screed has been made, the particle board can be laid directly on it without lags. The work is performed in the following order:
- The surface of the base is cleaned of debris, dirt and dust using a construction vacuum cleaner. If you had to resort to wet cleaning for preparation, leave the premises until completely dry and ventilated.
- Chipboard is treated with a moisture-resistant impregnating agent. For example, drying oil.
- The slabs are laid at a short distance from the walls in a checkerboard pattern. To avoid squeaks during operation, they are placed at a slight distance from each other. 1 cm away from the walls of the room.
- To fix the sheets on a concrete base, dowel nails are used. On average, 14-16 fasteners are required to secure one sheet. They are installed in corners, along the edges and in the center.
In our Remonstr online store we have a large selection of chipboards that are suitable for installing floors, both on joists and directly on concrete. Store managers are always ready to provide you with advice on the material, help you choose the best chipboard for a specific project, simplify payment and arrange delivery. Thanks to this, you will receive high-quality material at an affordable price, without spending extra time on selection. For greater shopping convenience, we suggest you use an online calculator to calculate the required amount of material.
Installation of chipboard on a concrete base
Chipboard is laid directly on concrete if logs cannot be installed in the room due to low ceilings or the room does not require insulation. The material can only be laid on a flat horizontal floor, without differences in the horizontal plane.
Fastening chipboard using the floating method
Tongue-and-groove chipboards are often laid on a concrete floating base.
It is distinguished by the presence of damper tapes that are laid between the floor and the wall, as well as the absence of rigid fastening of the sheets to the base. This design allows the covering to expand as the temperature in the room changes and maintains the integrity of the flooring. Before starting work, check the moisture content of the concrete screed, which should be within 3%.
Further work is performed in the following sequence:
- Place a vapor barrier film on the concrete base, which can be replaced with ordinary polyethylene. Carefully insulate the connections between the film and the wall and between individual parts of the material.
- Place a layer of expanded clay with small fragments on the floor, which will provide heat and sound insulation for the flooring. Instead of expanded clay, it is allowed to use basalt wool or polystyrene foam boards.
- Place a backing made of membrane, cork, construction paper or other materials over the insulation. The formed intermediate layer will increase the heat and sound insulation of the floor.
- Laying sheets on insulation is done in the same way as installing slabs on joists. The difference is that they are not attached to the base, but are only connected to each other with an adhesive solution applied to the tenons and grooves of the sheets. Before the glue dries, the boards must be pressed together with wedges, which are driven into the gap between the wall and the canvas.
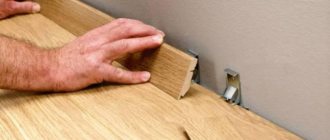
The floating floor is held stationary by its own weight and skirting boards along the perimeter of the flooring.
Fixing chipboard with fasteners
In addition to the floating method, there is another way to install chipboard sheets on a concrete base, which consists of using fasteners.
The sequence of work is as follows:
- If unevenness is found on the concrete screed, fill the surface with a thin screed and leave for 2-3 weeks to dry. Make sure that the new layer is completely dry - sheets can only be laid on a dry base. The presence of moisture in the screed of more than 3% will lead to rapid destruction of the material.
- After the concrete has completely hardened, clean the surface from dust and dirt.
- Draw a drawing of the floor to scale. Transfer the design to a sheet of chipboard and cut it so that the material covers the entire floor area, leaving 10-15 mm gaps between the boards and the wall.
- Cut out individual parts of the flooring from the sheet according to the markings.
- Cover the chipboard with drying oil or antiseptic and dry the material.
- Place the sheets on the screed according to the drawn diagram.
- Check the levelness of the flooring. Leveling the chipboard floor is only possible by modifying the screed.
- Drill holes in the sheets and concrete screed.
- Secure the sheets to the floor with anchors and dowels.
How to attach chipboard to the floor - watch the video:
Using chipboard sheets, high-quality flooring is assembled with minimal effort. The main requirements for obtaining a high-quality result are the correct choice of material and knowledge of installation technology.